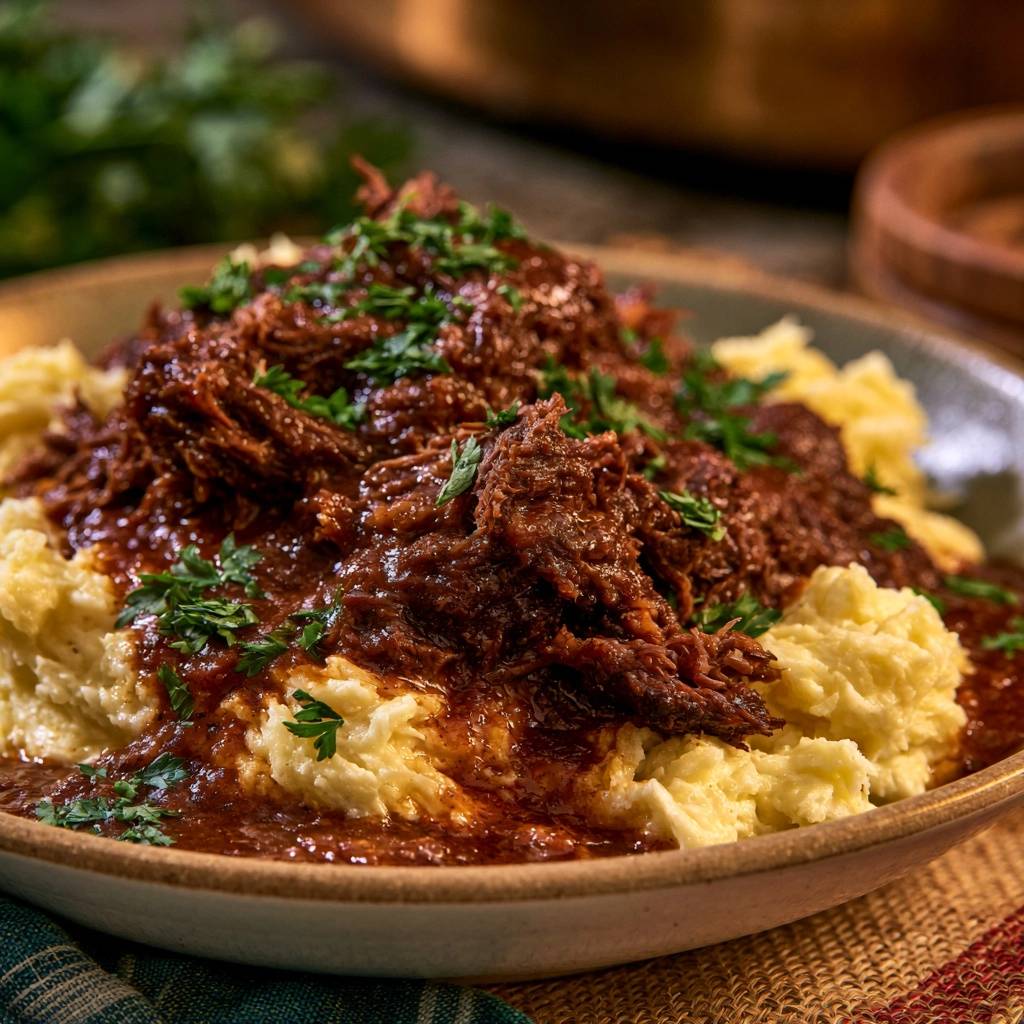
Stop settling for pot roast that feels like chewing on a wide rubber band. The secret to that melt-in-your-mouth, fork-tender texture isn’t just time; it’s the low-and-slow collagen breakdown method. By searing the meat first to develop a deep Maillard crust and then submerging it in a rich, acidic braising liquid, you ensure the connective tissue dissolves into silk.
This recipe guarantees a fall-apart, shredded result every single time you step into the kitchen. You’ll watch as tough fibers transform into succulent morsels coated in a dark mahogany glaze that clings to every bite. It’s the kind of meal that fills the house with a savory aroma, promising a dinner that feels both rustic and incredibly sophisticated.
The real trick to success lies in the temperature control of your oven. Most home cooks rush the process by cranking the heat, but that actually causes the muscle fibers to seize and turn stringy. I’ve found that keeping the oven at a steady 300°F creates the perfect environment for the meat to relax and absorb the flavors of the thyme and rosemary without drying out.
The Science of Collagen and Connective Tissue
Beef short ribs are naturally tough because they come from the lower portion of the rib cage, a muscle group that works hard. This means they’re packed with collagen, a structural protein that acts like a tight braid holding the meat together. If you grill a short rib like a steak, it stays incredibly chewy and difficult to eat.
However, when you subject that collagen to moist heat over several hours, a beautiful chemical reaction occurs. The heat slowly unravels those protein braids, turning them into gelatin. This gelatin is what gives the final sauce its body and provides that luxurious, lip-smacking mouthfeel that you just can’t get from leaner cuts of beef.
Patience is your primary ingredient during this phase. You might notice a “stall” where the meat seems to stay firm for a long time, but don’t panic. As long as you maintain that consistent 300°F environment, the breakdown is happening behind the scenes. Once the internal temperature reaches the sweet spot, the meat will suddenly give way and become effortlessly tender.
Essential Components for Braised Beef Short Ribs
Quality ingredients are the foundation of a great braise. You want to look for beef short ribs with heavy marbling, as those white flecks of fat will melt down and baste the meat from the inside out. While boneless ribs are available, they often lack the depth of flavor found in their bone-in counterparts.
The aromatic base, known as a mirepoix, consists of finely diced onions, carrots, and celery. These vegetables provide a subtle sweetness that balances the savory beef. Don’t rush the sautéing process; you want them softened and slightly browned to release their full aromatic potential before you add any liquid to the pot.
For the liquid, a high-quality beef stock is essential. If you’re using a store-bought version, look for “low sodium” so you can control the salt levels as the sauce reduces. The balsamic vinegar provides the necessary acidity to cut through the richness of the fat, creating a balanced profile that isn’t overly heavy on the palate.
Selecting the Right Cut: Bone-In vs. Boneless
I always recommend bone-in short ribs for this specific preparation. The bones contain marrow and connective tissues that release natural thickeners into the braising liquid as it cooks. This adds a level of silkiness and body to the final reduction that boneless cuts simply cannot replicate, even with extra stock.
The Role of Acidity in the Braising Liquid
Acidity is the unsung hero of a successful braise. The natural acids in the balsamic vinegar work to weaken the stubborn muscle fibers during the long cook time. Furthermore, this acidity provides a bright counterpoint to the heavy fats, ensuring the dish tastes complex rather than just salty.
The Importance of a Heavy-Bottomed Dutch Oven
A heavy-bottomed Dutch oven, preferably made of enameled cast iron, is the best tool for this job. These pots are designed for superior heat distribution and retention, which prevents hot spots that could scorch your vegetables. The thick walls keep the temperature stable even if your oven fluctuates slightly.
A tight-fitting lid is also non-negotiable. You need to trap the steam inside the vessel to create a moist cooking environment. If your lid is a bit loose, place a piece of aluminum foil over the pot before pressing the lid down. This creates a better seal, preventing the liquid from evaporating and leaving you with dry, burnt meat.
Step-by-Step: Achieving the Perfect Maillard Sear
The most common mistake people make is skipping the sear or doing it poorly. Gray meat is a failure of flavor. You want a deep, dark brown crust on all sides of the ribs. This is the Maillard reaction, a chemical process that creates hundreds of different flavor compounds that weren’t there before.
Heat your oil until it’s shimmering and just starting to smoke. Sear the ribs in batches to avoid crowding the pan. If you put too much meat in at once, the temperature of the oil drops, and the meat will steam in its own juices instead of browning. Give each rib enough space to develop that beautiful, caramelized exterior.
Building the Braise: Deglazing and Aromatics
After removing the meat, you’ll see dark bits stuck to the bottom of the pot. This is called the “fond,” and it’s pure flavor gold. Add your vegetables to the rendered fat and cook them until they’re soft. Then, stir in the tomato paste and cook it for about two minutes until it turns a dark brick red.
Toasting the tomato paste removes that raw, metallic tin taste and adds a savory depth. Pour in your broth and balsamic vinegar to deglaze the pan, using a wooden spoon to scrape up every bit of that fond. Let the liquid bubble and reduce by half; this concentrates the flavors.
The Low-Temperature Oven Transformation Phase
Once you return the ribs to the pot and add the stock and herbs, check the liquid level. The ribs should be submerged by about two-thirds. You don’t want them fully covered because the exposed tops will undergo a bit of extra caramelization in the oven’s dry heat, adding even more texture to the final dish.
Slide the pot into the oven and let it work its magic for 3 to 3.5 hours. Resist the urge to peek every thirty minutes. Every time you open the lid, you let out the heat and moisture that the meat needs to stay succulent. Trust the process and let the low temperature do the heavy lifting.
Refining the Sauce: Straining and Reducing
When the meat is tender enough to slip off the bone, remove the ribs and strain the liquid. Discard the mushy vegetables and herb sprigs; they’ve given everything they have to the sauce. Pour the liquid into a saucepan and simmer it over medium-high heat to concentrate the sugars and proteins.
You’re looking for the liquid to transform into a glossy, dark mahogany glaze. It should be thick enough to coat the back of a spoon. If you dip a spoon in and run your finger through the sauce, the line should stay clean. Toss your shredded beef back into this reduction to ensure every fiber is coated in flavor.
Troubleshooting Tough or Dry Braised Beef
If your meat is still tough after three hours, it simply hasn’t cooked long enough. Put the lid back on and give it another 30 minutes. However, if the meat is dry and crumbly, your oven was likely too hot, causing the moisture to squeeze out of the fibers before the collagen could melt.
If your sauce tastes too salty after reducing, don’t add water, which will thin it out. Instead, add a small splash of water and a tiny pinch of sugar or a teaspoon of butter to mellow the saltiness. Never use flour or cornstarch to thicken this sauce; the natural reduction method provides a much cleaner, more intense flavor.
Starch Pairings: Why Yukon Gold Potatoes Excel
While you could serve this with bread, creamy mashed potatoes are the classic choice for a reason. I prefer Yukon Gold potatoes because they have a naturally buttery, waxy texture that holds up well against the heavy sauce. They provide a smooth, mild base that lets the intense richness of the beef shine.
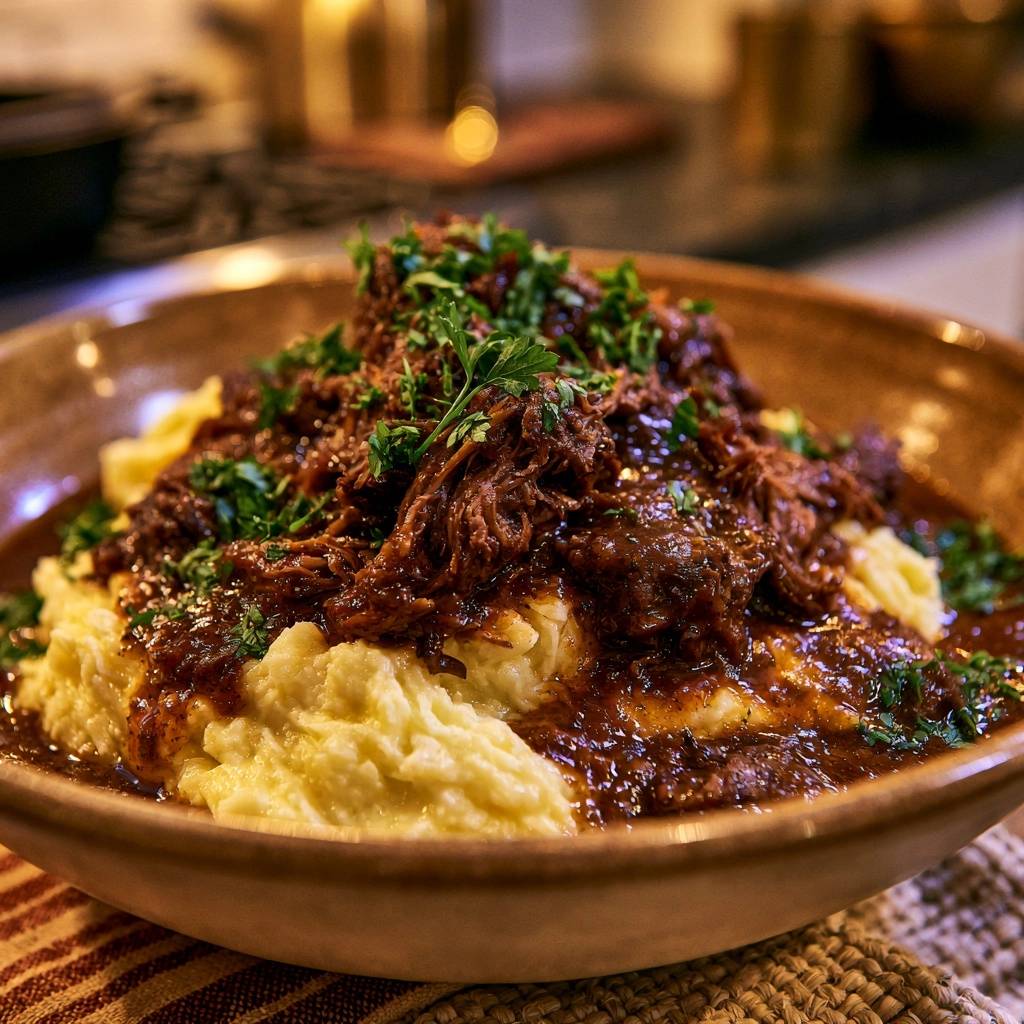
Russet potatoes can sometimes be too fluffy or mealy, absorbing the sauce so quickly that the dish feels dry. The waxy nature of the Yukon Gold creates a velvety barrier. When you spoon that dark balsamic reduction over the yellow potatoes, the visual contrast is just as appetizing as the flavor combination.
Make-Ahead Strategy and Storage Instructions
Braised dishes are famous for tasting better the next day. As the meat sits in the liquid, the flavors continue to marry and deepen. If you make this ahead of time, let the pot cool to room temperature before placing it in the fridge. This prevents steam from condensing and watering down your sauce.
Once chilled, a layer of solid white fat (tallow) will form on the top. You can easily scrape this off and discard it, leaving you with a much cleaner, leaner sauce when you reheat it. To serve, simply warm the meat and sauce together over low heat on the stove until bubbling and hot throughout.
Expert Tips for Professional Plating
To get that restaurant-style look, use the “high pile” technique. Place a large mound of potatoes in the center of a shallow bowl and stack the shredded beef as high as possible on top. This creates a sense of abundance and makes the dish look much more impressive than a flat layer of food.
Don’t forget the parsley. A heavy garnish of fresh, finely chopped parsley isn’t just for color. It provides a necessary hit of freshness and a slight bitter note that cuts through the dark, heavy proteins. It wakes up the palate and makes each bite feel a little lighter and more balanced.
Common Braising Questions
Can I use a slow cooker for this recipe?
Yes, you can use a slow cooker, but you must still sear the meat and sauté the vegetables in a pan first. Cook on low for 7-8 hours. Keep in mind that slow cookers don’t allow for evaporation, so your sauce will be much thinner. You’ll need to pour the liquid into a saucepan at the end and reduce it on the stove to get that thick glaze.
Can I use pomegranate juice in the braise?
Yes, a mixture of unsweetened pomegranate juice and a tablespoon of red wine vinegar works beautifully in place of the balsamic broth. The pomegranate provides the deep color and tannins, while the vinegar adds the necessary acidity to break down the meat fibers.
Why did my meat shrink so much during cooking?
It’s completely normal for beef to shrink by about 25-30% during the braising process. As the proteins cook, they contract and release moisture. Additionally, the fat and collagen melt away, which reduces the overall volume. This is why we start with three pounds of meat to serve four people comfortably.
Can I use a different cut of meat like chuck roast?
You can substitute a chuck roast if short ribs aren’t available. Cut the roast into large 3-inch chunks to mimic the size of the ribs. While the flavor will be similar, the texture won’t be quite as silky because chuck roast has less collagen and bone-in richness than short ribs. It’s a great budget-friendly alternative for a weeknight meal.
How long can I store leftovers in the fridge?
You can store these short ribs in an airtight container in the refrigerator for up to 4 days. They also freeze exceptionally well. Place the meat and sauce in a freezer-safe bag or container for up to 3 months. Thaw overnight in the fridge before reheating slowly on the stovetop to maintain the tender texture.
Slow-Braised Balsamic Beef Short Ribs
Course: Main CourseCuisine: AmericanDifficulty: easy4
servings20
minutes3
hours240
Minutes720
kcalAmerican
Ingredients
3 pounds beef short ribs, bone-in
2 tablespoons vegetable oil
1 large yellow onion, finely diced
2 carrots, finely chopped
2 stalks celery, finely chopped
4 cloves garlic, minced
3 tablespoons tomato paste
2 cups beef broth plus 2 tablespoons balsamic vinegar
2 cups beef stock
2 sprigs fresh rosemary
4 sprigs fresh thyme
2 bay leaves
Salt and black pepper to taste
4 cups buttery mashed potatoes (use Yukon Gold for the yellow hue shown)
1/2 cup fresh parsley, finely chopped for garnish
Directions
- Preheat your oven to 300°F (150°C). A lower temperature over a longer period is the key to preventing meat fibers from seizing and becoming stringy.
- Generously season the beef short ribs with salt and pepper on all sides.
- Heat oil in a large heavy-bottomed Dutch oven over medium-high heat. Sear the ribs in batches until a deep, dark brown crust forms on all sides (about 3 minutes per side). Remove the meat and set aside.
- Lower the heat to medium. Add the onion, carrots, and celery to the rendered fat. Cook for 6-8 minutes until the vegetables are browned and softened. Stir in the garlic and tomato paste, cooking for 2 minutes until the paste turns a deep brick red.
- Pour in the beef broth and balsamic vinegar to deglaze the pan, scraping the bottom vigorously with a wooden spoon to release the “fond” (brown bits). Let the liquid reduce by half.
- Add the beef stock, rosemary, thyme, and bay leaves. Return the short ribs and any accumulated juices to the pot. The liquid should cover at least two-thirds of the meat.
- Cover with a tight-fitting lid (or a layer of foil under the lid) and transfer to the oven. Braise for 3 to 3.5 hours, or until the meat is completely tender and slipping off the bone.
- Carefully remove the ribs from the liquid. Discard the bones and the herb sprigs. Use two forks to coarsely shred the beef into large, succulent chunks.
- Strain the braising liquid through a fine-mesh sieve into a saucepan, discarding the solids. Simmer the liquid over medium-high heat for 10-15 minutes until it reduces into a thick, glossy, dark mahogany glaze. Toss the shredded beef back into this reduction to coat thoroughly.
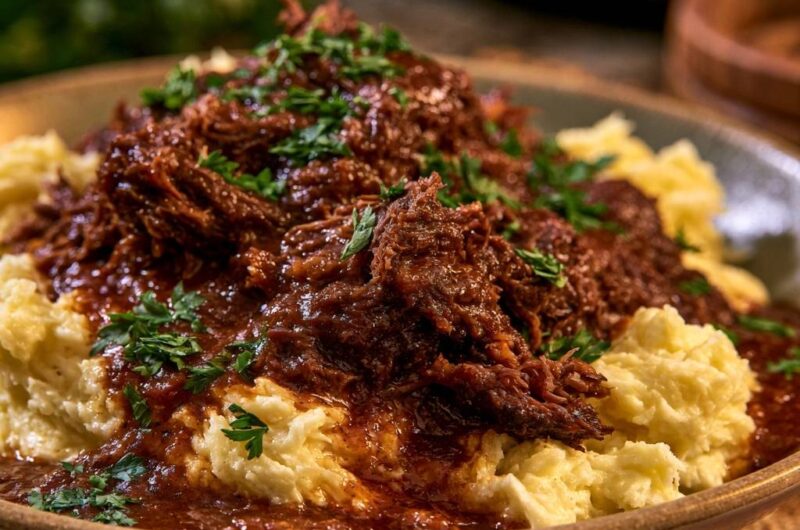
- To plate as pictured: Place a generous mound of creamy mashed potatoes in a shallow bowl. Top with a high pile of the glazed, shredded beef. Spoon extra sauce around the base and garnish heavily with fresh chopped parsley.
Notes
- Using a lower temperature over a longer period prevents meat fibers from becoming stringy. Yukon Gold potatoes are recommended for the best color and texture.