Few things in the kitchen are as disappointing as a bowl of curry featuring beef that feels like chewing on a rubber band. You spend hours prepping, only to have the meat seize up into tough, dry knots that ruin the entire experience. This frustration usually stems from boiling the beef too aggressively, which causes the muscle fibers to tighten and squeeze out every drop of moisture. If you’ve ever struggled with “chewy” curry, you aren’t alone, but there is a better way to cook.
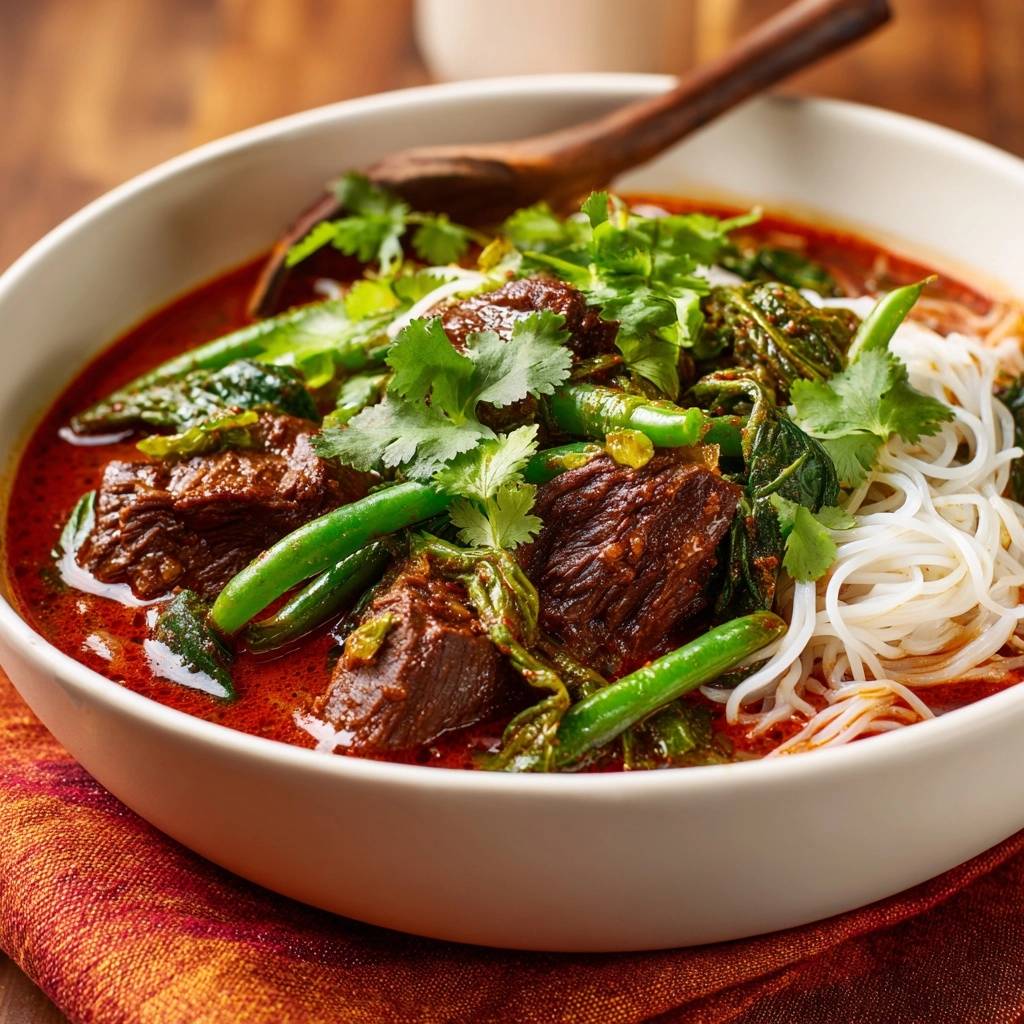
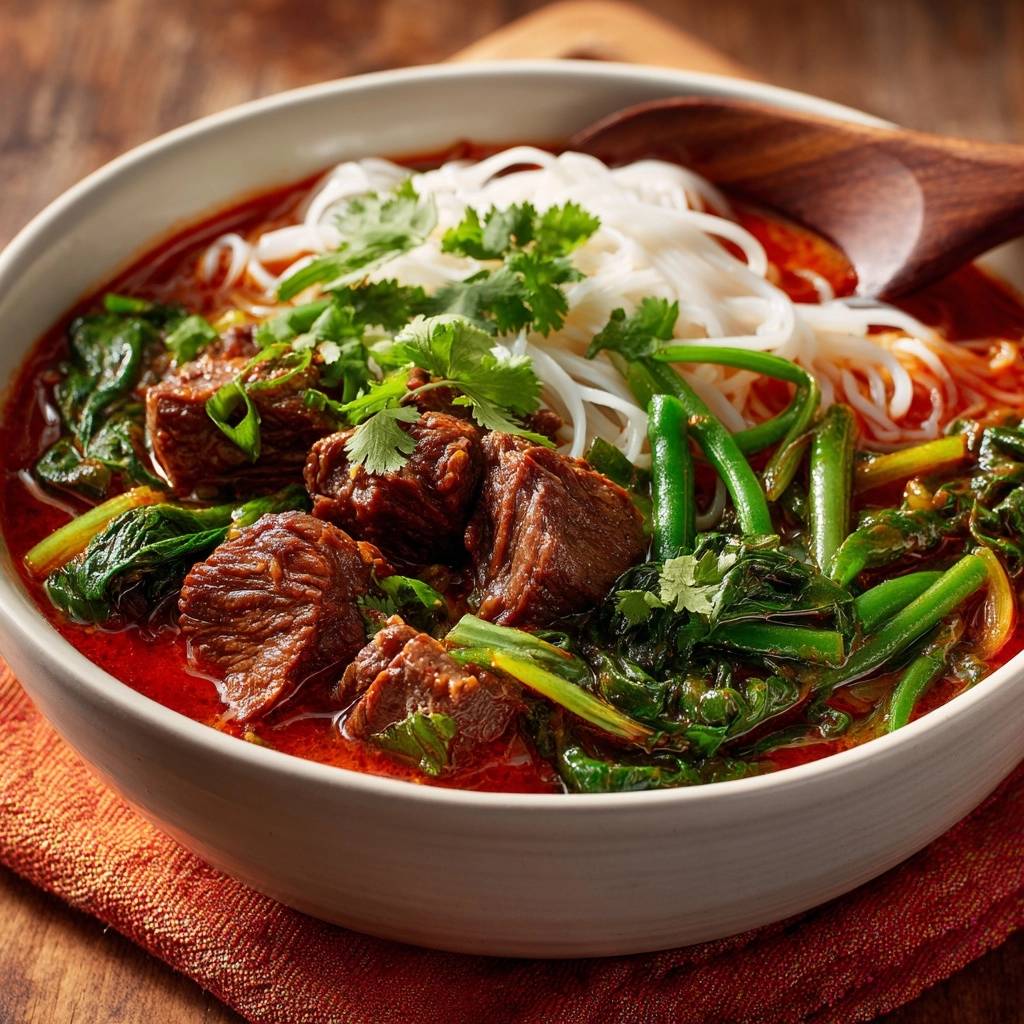
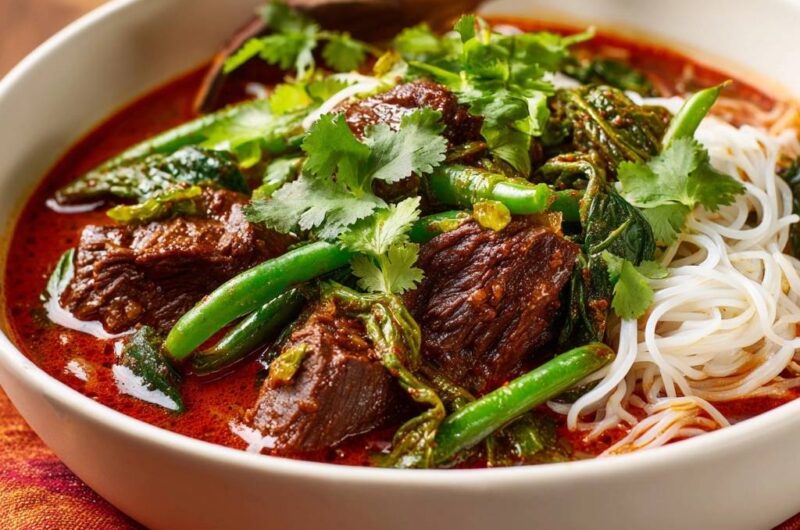
These Slow Cooked Red Curry Beef Noodles are designed to solve that problem forever. By using a specific low-temperature braising technique, we transform humble beef chuck into buttery, melt-in-your-mouth morsels. The sauce itself is a vibrant, deep crimson thanks to the addition of Thai chili oil, creating a rich mouthfeel that coats every strand of rice noodle. It’s a dish that looks like it came from a high-end bistro but relies on simple, patient chemistry to achieve its greatness.
If you enjoy the slow-cooked curry flavor, you might also like this curry tortellini meatball soup.
The secret to this recipe’s success lies in the “lazy bubble.” Instead of a rolling boil, we look for a gentle, occasional simmer that barely breaks the surface. This controlled heat allows the connective tissues to dissolve into gelatin without toughening the protein. When you pair that tender beef with the snap of fresh green beans and the silky texture of rice noodles, you get a balanced, restaurant-quality meal that feels like a warm hug in a bowl.
For another rich beef and red curry experience, consider this slow-simmered beef and pumpkin red curry.
The Science of Tenderizing Beef Chuck Roast
To understand why this recipe works, we have to look at the biology of the beef chuck roast. This cut comes from the shoulder of the cow, an area that does a lot of heavy lifting. Consequently, it’s packed with collagen and tough connective tissue. If you were to grill a piece of chuck like a steak, it would be nearly impossible to eat. However, when treated with moisture and low heat, that collagen undergoes a beautiful chemical transformation.
Between 160°F and 180°F, collagen begins to break down and turn into gelatin. This process doesn’t happen instantly; it requires time. As the gelatin melts, it coats the individual muscle fibers, providing that “succulent” mouthfeel we crave. If the temperature climbs too high, the muscle fibers contract violently, pushing out all the internal juices before the collagen has a chance to melt. This is why “boiling” beef makes it tough, while “braising” it makes it tender.
By keeping the pot at the lowest possible setting for over three hours, we ensure the meat stays relaxed. You’re essentially bathing the beef in a warm, aromatic coconut bath. By the time the timer goes off, the internal structure of the meat has essentially collapsed in the best way possible. You won’t even need a knife to eat this; a dull spoon should be enough to break the beef apart into tender flakes.
Essential Components for Red Curry Beef Noodles
The foundation of a great curry starts with the fat. I always recommend using full-fat coconut milk rather than the “light” versions. Full-fat milk contains the necessary solids to emulsify with the curry paste, creating a thick, velvety sauce that clings to the noodles. Light coconut milk is mostly water and will often break or look thin and greyish, which lacks the luxury we want in a slow-cooked dish.
Next, let’s talk about fish sauce. While the smell in the bottle can be pungent, it’s your primary source of umami. It provides a deep, salty backbone that salt alone cannot achieve. Think of it as a flavor intensifier rather than a “fishy” ingredient. When combined with brown sugar, it creates that classic Thai balance of salty, sweet, and savory. If you skip the fish sauce, the curry will taste flat and one-dimensional.
Finally, the “bloom” of the sauce depends on Thai chili oil. While the red curry paste provides the spice and aromatics, the chili oil adds that signature translucent red shimmer on top of the bowl. It carries the fat-soluble flavors of the chilies and garlic directly to your taste buds. If you use a high-quality paste with fresh lemongrass and galangal, the aroma in your kitchen will be absolutely incredible by the second hour of cooking.
Selecting the Right Rice Noodles
Noodle choice is more than just aesthetics; it’s about “sauce-to-noodle” ratio. For this specific beef curry, I prefer thin rice vermicelli or standard “Pad Thai” style width. These noodles have a high surface area, meaning they can soak up the rich, coconut-based broth without becoming heavy or overwhelming the tender beef.
Wide, flat noodles are great for stir-fries, but in a braised dish, they can sometimes become too slippery or break apart. Thin noodles provide a delicate, tangled nest that holds the sauce in every crevice. Just remember to cook them separately. If you drop dry noodles directly into the curry pot, they will suck up all your precious sauce and release starch that turns the broth into a thick, gummy paste.
Phase One: Searing for Maximum Maillard Reaction
Before the liquid ever touches the pot, we need to sear the beef. This isn’t about cooking the meat through; it’s about the Maillard reaction. This chemical reaction between amino acids and reducing sugars creates those complex, savory flavors that define a good stew. You want a deep, mahogany-brown crust on at least two sides of every beef cube.
The biggest mistake people make here is crowding the pan. If you put too much meat in at once, the temperature of the oil drops, and the beef starts to release its juices. Instead of searing, the meat ends up “steaming” in its own grey liquid. Work in batches. Give each piece of beef its own space. When you remove the meat, you’ll see brown bits stuck to the bottom of the pot. That’s “fond,” and it’s pure flavor gold that will dissolve into your sauce later.
Phase Two: Blooming the Red Curry Aromatics
Once the beef is out, it’s time to “bloom” the curry paste. Most people just stir the paste into the coconut milk, but that’s a missed opportunity. By frying the paste in the leftover beef fat and chili oil for a minute or two, you wake up the dried spices. You’ll know it’s ready when the oil starts to separate from the paste and turns a brilliant, translucent red.
As you fry the paste, the heat releases the essential oils from the lemongrass, shrimp paste, and chilies. The smell will become very intense and fragrant. This is also the perfect time to use your wooden spoon to scrape up those browned beef bits from the bottom. As soon as you pour in the coconut milk and broth, those bits will lift off and integrate into the liquid, adding a massive boost of savory depth to the final curry.
Phase Three: The Low and Slow Braise
This is the most critical phase of the entire process. Once you’ve returned the beef to the pot, turn your burner down to the lowest setting. You are looking for a “lazy bubble”—maybe one or two bubbles breaking the surface every few seconds. If the liquid is rolling or splashing, it’s too hot. Cover the pot with a tight-fitting lid to trap the moisture and maintain a consistent internal temperature.
The 3 to 3.5-hour window is the “sweet spot” for 1.5-inch cubes of chuck roast. Around the two-hour mark, the meat might actually feel tougher than when you started; don’t panic! This is the stage where the fibers have tightened but the collagen hasn’t fully melted yet. By hour three, the transformation will be complete. You can test this by taking a piece out and pressing it with a fork. It should give way easily without you having to apply much pressure.
During this time, resist the urge to keep peeking. Every time you lift the lid, you lose heat and moisture. Trust the process and the low flame. The long, slow cook allows the beef to actually absorb the flavors of the curry, rather than just being coated by them. By the time you’re done, the beef will be saturated with coconut and spice, making every bite an explosion of flavor.
Phase Four: Integrating Fresh Greens and Noodles
Timing is everything when it comes to the vegetables. You’ve spent hours making the beef tender, so don’t ruin the dish by overcooking your greens into a mushy mess. I add the green beans about five to seven minutes before serving. This is just enough time to take the raw edge off while keeping that bright green color and a satisfying “snap” that contrasts with the soft beef.
The spinach or bok choy should be the very last thing to go in. These greens are delicate and will wilt in about thirty seconds just from the residual heat of the sauce. Stir them in, watch them collapse into the red broth, and then turn off the heat immediately. This keeps the flavors fresh and prevents the greens from turning bitter or slimy.
For the noodles, follow the package instructions to boil them in a separate pot of water. Once they are tender, drain them well and rinse with a little warm water to remove excess starch. By keeping the noodles separate until the very end, you ensure the curry remains a clean, pourable sauce rather than a thick porridge. It also allows your guests to choose exactly how many noodles they want in their bowl.
Troubleshooting Common Red Curry Obstacles
If your sauce feels too thin after three hours, don’t worry. Simply remove the lid for the last 20 minutes of cooking. This allows some of the water to evaporate, concentrating the flavors and thickening the coconut milk. Just keep an eye on it so it doesn’t reduce too much and become overly salty. If it does get too thick, a splash of beef broth or water will bring it back to the right consistency.
Sometimes a curry can end up too spicy, especially if your curry paste was particularly potent. The best way to fix this is with more fat or sweetness. Add an extra tablespoon of coconut cream or a teaspoon of brown sugar. The fat in the coconut milk helps coat the tongue and neutralize the capsaicin from the chilies. Conversely, if the dish feels “heavy” or too rich, a squeeze of fresh lime juice right at the end provides the acidity needed to cut through the fat.
If the beef is still tough after three hours, it almost always means it needs more time. Every cow is different, and some cuts have more stubborn connective tissue than others. If the meat isn’t “fork-tender,” put the lid back on and give it another 30 minutes. As long as the heat is low, you won’t overcook it. Patience is the primary ingredient in any successful braise.
Optimal Pairings for Rich Beef Curries
Because this curry is so rich and savory, you want accompaniments that provide contrast. Freshness is key. A big pile of cilantro or Thai basil on top adds a herbal note that brightens the heavy coconut base. I also love serving this with a side of quick-pickled cucumber relish. The vinegar and crunch of the cucumbers act as a palate cleanser between bites of the fatty beef.
Complementary Recipes to Try
Round out your meal with these flavorful dishes that pair well with slow-cooked beef.
- For a refreshing contrast to the rich noodles, consider the Moroccan Spiced Carrot and Chickpea Salad, featuring bright spices and hearty chickpeas.
- If you’re in the mood for more warming flavors, the Creamy Coconut Lime Chicken Curry offers a delightful blend of tropical notes and savory spices.
For drinks, look for something crisp and cold. A sparkling apple juice or a cold ginger beer works beautifully. The carbonation helps scrub the richness of the coconut oil off your palate, while the ginger complements the aromatics in the curry paste. Avoid anything too creamy or heavy, as the dish already provides plenty of those textures.
Don’t forget the lime wedges! A squeeze of fresh lime juice over the bowl right before you eat is non-negotiable. The citric acid reacts with the salt in the fish sauce to make all the other flavors “pop.” It transforms the dish from a heavy stew into a vibrant, balanced Thai-inspired masterpiece.
Storage and Reheating for Better Leftovers
Like most stews and curries, this dish actually tastes better the next day. As the curry sits in the fridge, the spices continue to meld and the beef absorbs even more of the sauce’s character. However, you must store the noodles and the curry in separate airtight containers. If you store them together, the noodles will continue to absorb liquid overnight, turning into a soggy mass and leaving you with no sauce the next day.
When reheating, do it gently on the stove over medium-low heat. If the sauce has thickened too much in the fridge (which coconut milk tends to do), add a tablespoon of water or broth to loosen it up. For the noodles, you can quickly dip them in boiling water for 30 seconds or microwave them with a damp paper towel over the top to keep them from drying out.
If you want to freeze this meal, only freeze the curry base and the beef. Rice noodles do not freeze well and will become grainy and brittle when thawed. The beef curry itself will stay fresh in the freezer for up to three months. When you’re ready to eat, thaw it in the fridge overnight and prepare a fresh batch of noodles to go with it.
Expert Tips for Professional Presentation
To get that restaurant look, focus on “bowl construction.” Instead of just dumping everything together, place a neat mound of noodles on one side of a wide, shallow bowl. Ladle the beef and the curry sauce into the other side. This allows the red oil “pearls” to sit beautifully on the surface of the sauce rather than getting lost in the noodles.
Garnish with intention. Instead of just throwing whole cilantro leaves on top, try a fine chiffonade or use the delicate top sprigs. If you have extra chili oil, drizzle a tiny bit more over the coconut milk areas to create a striking visual contrast of white and red. A few thinly sliced red chilies can also add a pop of color and a hint of what’s inside.
Finally, make sure your bowls are warm. A cold bowl will suck the heat out of your curry and cause the coconut fat to tighten up faster. A quick rinse under hot water before plating makes a huge difference in how long the meal stays at the perfect eating temperature. It’s these small details that elevate a home-cooked meal into a professional dining experience.
Frequently Asked Questions
How do I store leftovers and can I freeze this?
Store the beef curry and the rice noodles in separate airtight containers in the refrigerator for up to 3 days. Keeping them separate prevents the noodles from absorbing all the sauce and becoming mushy. You can freeze the beef curry (without the noodles or greens) for up to 3 months. Thaw it in the refrigerator overnight before reheating gently on the stove. Always prepare fresh noodles when serving from frozen for the best texture.
Why is my beef still tough after cooking for the recommended time?
If the beef is tough, it usually means the collagen hasn’t finished breaking down into gelatin. This can happen if the heat was too low (below 160°F) or if the specific cut of meat was particularly lean. Simply put the lid back on and continue simmering for another 30-45 minutes. As long as you maintain a “lazy bubble” and don’t let it boil hard, the meat will eventually tenderize. Patience is key with chuck roast!
Can I use a different cut of meat if I can’t find chuck roast?
Yes, you can substitute chuck roast with other cuts that are high in connective tissue, such as beef shank or short ribs. Avoid lean cuts like sirloin or round steak; these lack the fat and collagen necessary for a long braise and will become extremely dry and “stringy” if cooked for three hours. If using short ribs, you may need to skim off excess fat from the surface of the curry before serving.
What can I use if I don’t have fish sauce?
While fish sauce provides a unique depth of flavor, you can substitute it with an equal amount of soy sauce or liquid aminos mixed with a pinch of salt. To mimic the fermented complexity of fish sauce, some cooks also add a finely minced anchovy fillet to the curry paste while frying it, which dissolves completely into the sauce and adds that essential umami punch without a “fishy” aftertaste.
My curry sauce is too thin, how can I thicken it?
The best way to thicken the sauce is through reduction. Remove the lid during the last 20-30 minutes of cooking to allow excess moisture to evaporate. This concentrates the coconut milk and fats. Avoid using a cornstarch slurry if possible, as it can change the silky mouthfeel of the Thai curry. If you need an immediate fix, stirring in a tablespoon of coconut cream (the thick part at the top of a can) can also add body.
Is there a way to make this less spicy?
To reduce the heat, start with only 2 tablespoons of red curry paste and omit the chili oil flakes. You can always add more spice at the end, but you can’t take it out. If the finished dish is still too spicy, add more coconut milk or a teaspoon of brown sugar. The sugar and fat help to neutralize the burn of the chilies on your palate.
Red Curry Beef Noodles
Course: Main CourseCuisine: Thai InspiredDifficulty: medium4
servings20
minutes4
hours620
kcal240
MinutesA rich and vibrant red curry featuring beef chuck roast slow-simmered for four hours until melt-in-your-mouth tender. Served with thin rice noodles, fresh green beans, and spinach, this dish achieves a deep red color and rich mouthfeel through the use of Thai chili oil and full-fat coconut milk.
Ingredients
2 lbs beef chuck roast, cut into 1.5 inch cubes
4 tablespoons red curry paste (for deep color and spice)
1 can (14 oz) full-fat coconut milk
1 cup beef broth
2 tablespoons fish sauce
1 tablespoon brown sugar
2 tablespoons Thai chili oil (with flakes)
1 cup fresh green beans, trimmed
2 cups fresh spinach or bok choy
8 oz thin rice noodles (vermicelli style)
Fresh cilantro for garnish
2 tablespoons vegetable oil
Directions
- Heat vegetable oil in a heavy-bottomed pot or Dutch oven over medium-high heat. Sear the beef cubes in batches, ensuring they are not crowded, until a deep brown crust forms on all sides. Remove beef and set aside.
- Lower heat to medium. Add the red curry paste and chili oil to the remaining fat in the pot. Fry for 1-2 minutes until the oil turns bright red and the paste is highly fragrant.
- Pour in the coconut milk, beef broth, fish sauce, and brown sugar. Use a wooden spoon to scrape up all the browned bits (fond) from the bottom of the pot.
- Return the beef and any accumulated juices to the pot. To solve the tough meat problem, reduce the heat to the lowest possible setting. Cover with a tight-fitting lid and simmer very gently for 3 to 3.5 hours. The liquid should only show a “lazy bubble.” This slow breakdown of collagen is the only way to guarantee fork-tender beef.
- Once the beef is tender, stir in the green beans. Simmer for 5-7 minutes until they are bright green but still have a slight snap.
- Stir in the spinach or bok choy. These will wilt almost instantly (about 30 seconds).
- While the vegetables finish, soak or boil the rice noodles according to package instructions until tender. Drain well.
- To serve, place a mound of noodles on one side of a deep bowl. Ladle the rich, red curry and beef alongside the noodles. Garnish generously with fresh cilantro.
Notes
- To ensure the beef is buttery soft, maintain the lowest heat setting possible. The liquid should only show a lazy bubble to properly break down the collagen without seizing the muscle fibers.