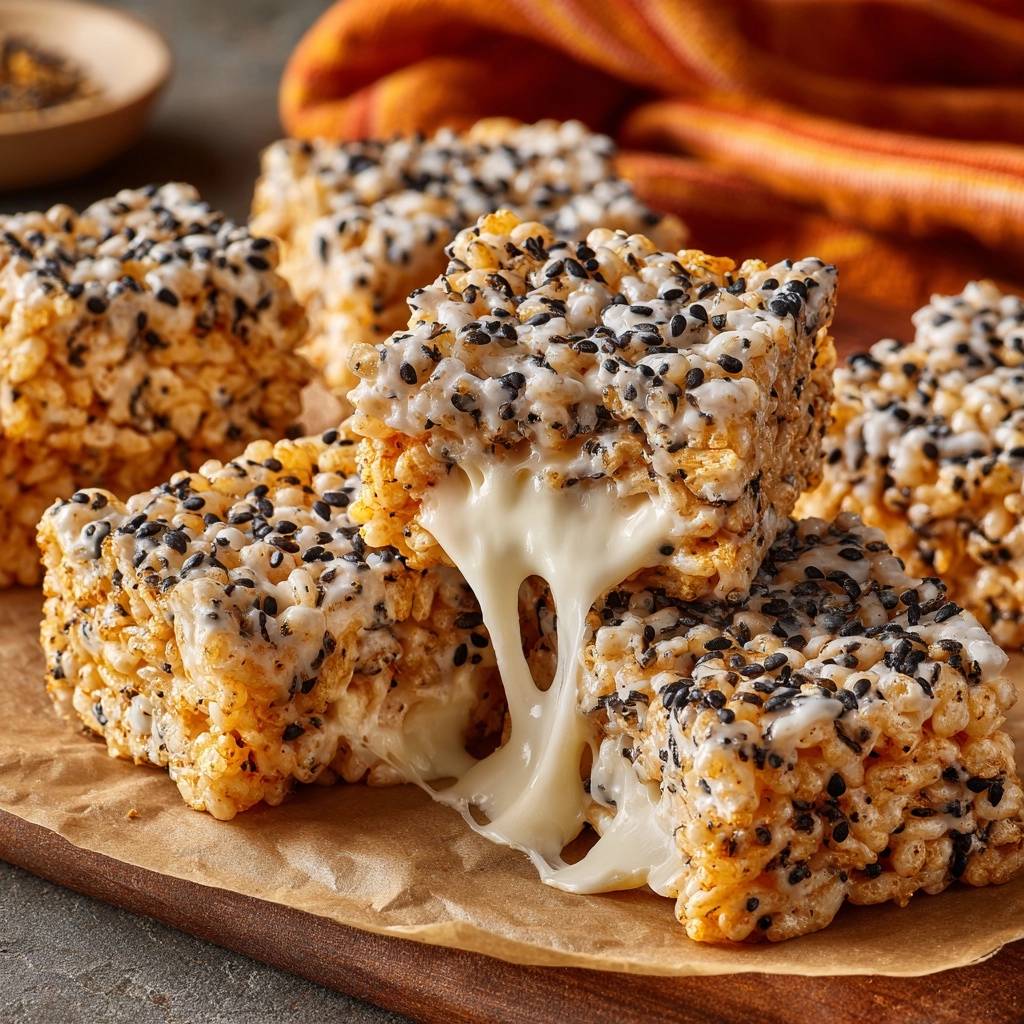
Imagine biting into a cloud that tastes like toasted nuts and honeyed cream. These Black Sesame Marshmallow Cereal Treats offer a sophisticated, earthy twist on the childhood classic, replacing one-note sweetness with the deep, roasted complexity of black sesame. The contrast between the jet-black seeds and the snowy, stretchy marshmallow creates a striking look that belongs in a high-end bakery.
However, many home cooks struggle with cereal bars that turn into literal bricks once they cool. We have all been there, trying to saw through a treat that should be soft and pliable. This recipe solves that frustration by focusing on moisture retention and sugar stability, ensuring your bars stay gooey for days rather than hours.
The secret to that professional, long-lasting pull is a high marshmallow-to-cereal ratio combined with strict temperature control. By using a two-stage marshmallow addition, you create “pockets of goo” that act as internal moisture reservoirs. This prevents the sugar from crystallizing into a hard, brittle shell that ruins the eating experience.
The Science of the Gooey Pull
Marshmallows are essentially a stable foam made of sugar, corn syrup, and gelatin. When you apply heat, you are breaking down that structure. If you use high heat, the water evaporates too quickly, and the sugar reaches the “hard ball” stage. This results in a bar that feels like a rock once it returns to room temperature.
Therefore, the “Low and Slow” philosophy is your best friend in the kitchen. Keeping the temperature at the lowest possible setting preserves the moisture content of the corn syrup. This allows the gelatin to stay flexible, which is exactly what gives you that iconic, stretchy “cheese pull” effect when you break a bar in half.
Why Temperature Control Prevents Hard Bars
Sugar is temperamental and changes its molecular structure based on tiny degree increments. Once marshmallows reach a full boil, they transition into a candy stage that is far too firm for a cereal treat. You want to melt them just until they lose their shape, not until they become a bubbling liquid soup.
In addition, removing the pot from the heat when the marshmallows are only 90 percent melted is a pro move. The residual heat in the butter and the pot will finish the job gently. This prevents overcooking and ensures the sugars remain in a soft, syrupy state that coats the cereal without hardening.
The Role of Extra Fat and Emulsifiers
Butter does more than just add a rich, salty flavor to these treats. The 6 tablespoons of unsalted butter act as a lubricant between the sugar molecules, preventing them from bonding too tightly. This fat barrier is what keeps the bars tender and easy to bite into.
Furthermore, the fats found in black sesame paste contribute to a more supple, flexible crumb. Because sesame paste is an emulsifier, it helps the butter and marshmallow syrup stay bonded together. This results in a more cohesive texture that doesn’t snap or crumble when you try to slice it.
Essential Components for Black Sesame Marshmallow Cereal Treats
Quality ingredients make a massive difference when the recipe is this simple. Freshness is the most important factor for your marshmallows. Stale marshmallows have already lost their internal moisture, which means they won’t melt smoothly and will almost certainly result in a dry, tough treat.
Using mini marshmallows is also a strategic choice rather than just a preference. Because they have more surface area relative to their size, they melt much faster and more evenly than the jumbo version. This speed allows you to get the pot off the stove sooner, further protecting the texture of the sugar.
Selecting the Right Black Sesame
Toasted black sesame seeds provide a much deeper, smokier flavor than raw ones. If you can only find raw seeds, toss them in a dry skillet over medium heat for 2 or 3 minutes until they smell fragrant. This extra step unlocks the oils that give the treats their signature nutty aroma.
For the best results, look for Japanese black sesame paste, often labeled as Kuro Neri Goma. Unlike Middle Eastern Tahini, which is often made from hulled white seeds and can be bitter, black sesame paste is intensely roasty and slightly sweet. It provides the deep charcoal color and savory undertone that makes these treats so addictive.
The Cereal Base: Puffed Rice Varieties
While standard puffed rice cereal is the classic choice, different brands have varying densities. Some are very airy, while others are more toasted and firm. A lighter, airier cereal will require a bit more marshmallow coating to hold its shape without falling apart.
The goal is a perfect “cling” where every single grain of rice is enveloped in a thin, sticky film. If you use a very dense or large-grain cereal, you might find you need to slightly increase the marshmallow count to maintain that gooey ratio. Always look for a cereal that feels crisp and fresh right out of the box.
For a similar sticky texture, check out these creamy lemon crumble bars.
Step-by-Step: Achieving the Perfect Texture
Success with this recipe depends on your ability to read visual cues rather than just following a timer. The mixture will transform quickly, so it is helpful to have all your ingredients measured and ready before you even turn on the stove. This prevents the butter from browning or the marshmallows from overcooking while you search for the salt.
Phase 1: The Low-Heat Butter and Sesame Infusion
Start by melting your butter in a heavy-bottomed pot. A thick base is non-negotiable because it distributes heat evenly and prevents “hot spots” that could scorch the sugar. Once the butter is liquid, whisk in the black sesame paste until the mixture is a smooth, dark ebony color.
You want to ensure there are no grey streaks remaining in the fat. This infusion step ensures that the sesame flavor is carried through every single bite of the treat. The aroma at this stage should be incredibly nutty and rich, almost like a dark roasted coffee.
Phase 2: The Two-Stage Marshmallow Addition
This is the “Skyscraper” secret that separates amateur treats from professional ones. You melt 12 ounces of marshmallows into the butter first to create the structural glue. However, you save the final 4 ounces to fold in at the very end along with the cereal.
For even more chewy goodness, explore layered marshmallow cereal treats.
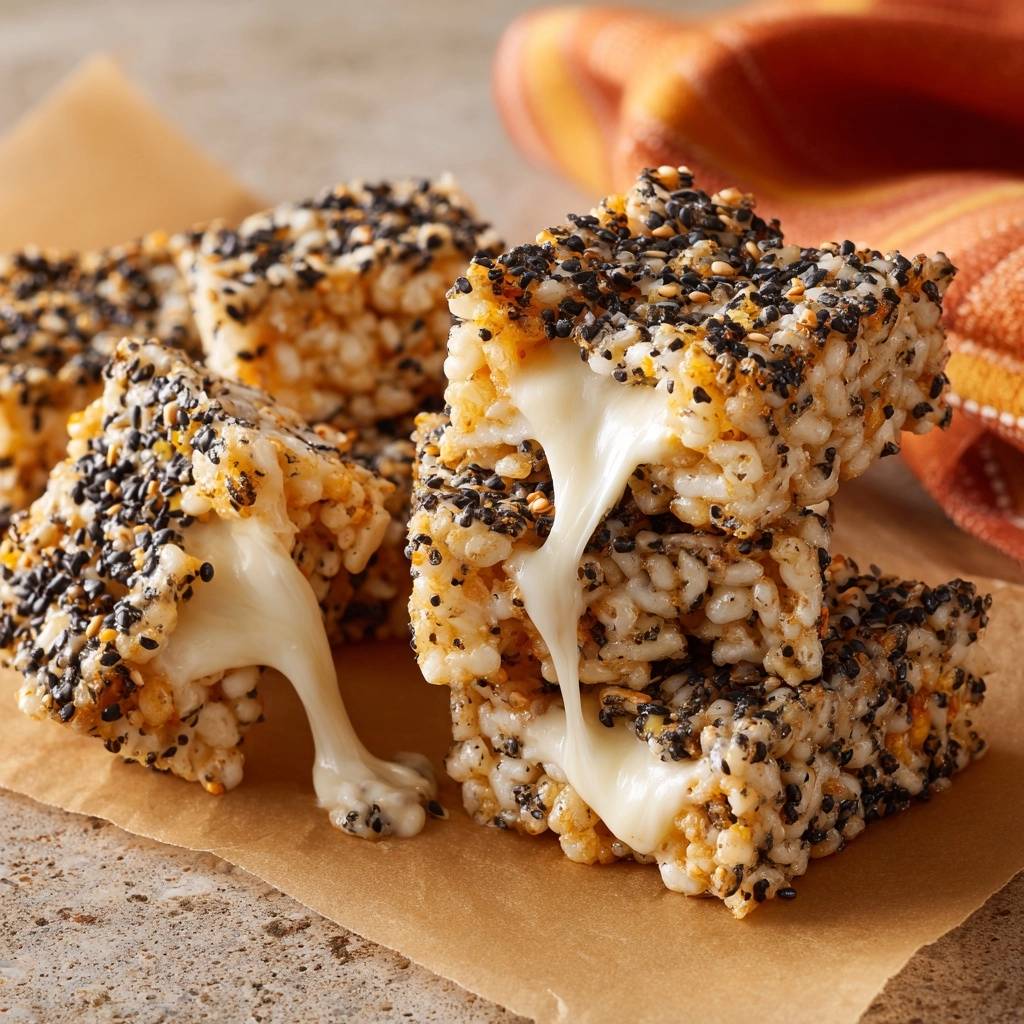
These late-addition marshmallows won’t melt completely. Instead, they soften into “pockets of goo” that stay stretchy even after the bars have cooled. When you pull a bar apart, these pockets create those long, dramatic strands of marshmallow that everyone loves.
Phase 3: The “No-Pressure” Transfer Technique
This is where most home cooks fail by being too aggressive. When you move the mixture into the pan, do not pack it down. If you press firmly, you crush the air pockets in the cereal and squeeze the marshmallow into a dense, hard mass.
Instead, think of it like “tucking in a blanket.” Use buttered fingers or a greased spatula to lightly pat the mixture into the corners of the pan. You want the treats to stay light and airy. If the top looks a little craggy and uneven, that is actually a sign that you have done it perfectly.
Avoiding Common Mistakes with Marshmallow Treats
One of the biggest mistakes people make is trying to speed up the cooling process by putting the pan in the refrigerator. Cold temperatures cause the marshmallow structure to tighten and become brittle. Always let them set at room temperature to maintain their softness.
If your mixture becomes too stiff to stir before you have even gotten it into the pan, your heat was likely too high. You can try to save it by adding a tiny splash of milk or a teaspoon more of butter, but the best fix is to work quickly while the residual heat is still active.
The Humidity Factor in Sugar Work
Sugar is hygroscopic, meaning it pulls moisture out of the air. On a very rainy or humid day, your marshmallow treats might stay a bit too soft or feel extra sticky. This is one of the few times where you might want to add an extra half-cup of cereal to provide more structure.
In addition, reducing the vanilla extract by half on humid days can help. Since vanilla is alcohol-based, it adds liquid to the mix. On a dry day, however, feel free to use the full amount to enhance the floral notes of the marshmallow.
Why Greasing Your Tools is Mandatory
Working with melted marshmallows is like working with industrial-strength glue. To keep your sanity, you must grease everything that touches the mixture. This includes your large mixing bowl, your silicone spatula, and even the knife you use for slicing.
A light coating of butter or a neutral oil spray works wonders. Pro tip: keep a small bowl of softened butter on the counter. If the mixture starts sticking to your hands while you are patting it into the pan, just rub a little butter on your palms and you will be back in business.
Flavor Variations and Nut-Free Swaps
While the black sesame is the star here, you can easily customize these bars. A pinch of ground cardamom or cinnamon added to the melted butter can add a warm, spicy layer. You could also drizzle the finished bars with melted dark chocolate, which pairs beautifully with the earthy sesame.
More Sweet Treats to Try
If you enjoyed these soft black sesame marshmallow cereal treats, you might like these other sweet breakfast and dessert options.
- For a classic breakfast that pairs well with the sweet cereal treat, consider making fluffy diner-style pancakes for a light and airy start.
- If you’re after another light and airy breakfast treat, try these fluffy golden pancakes for a delightful meal.
If you want to add more crunch, try folding in a handful of toasted sunflower seeds or chopped pumpkin seeds. These additions won’t ruin the structural integrity of the bars as long as you don’t overdo it. Keep the total volume of “add-ins” to about half a cup so the marshmallow can still hold everything together.
Incorporating Miso for a Savory Twist
If you love a “salty-sweet” profile, try adding a teaspoon of white miso paste to the melted butter. Miso is a fermented soybean paste that provides a massive hit of umami. It deepens the roasted flavor of the black sesame and cuts through the intense sugar of the marshmallows.
When using miso, make sure to whisk it thoroughly into the warm butter until no lumps remain. Since miso is salty, you should omit the sea salt called for in the original recipe. This variation creates a sophisticated “adult” version of the treat that is perfect for dinner parties.
Equipment: Why the Right Pot Matters
The material of your pot actually changes how the sugar behaves. Stainless steel is excellent for heat distribution, but it can be prone to sticking if not greased. Non-stick pots are the easiest for cleanup, but they don’t always provide the most even heat for melting butter.
Avoid thin aluminum pots, as they create hot spots that can burn the marshmallow before the rest of the bag has even started to soften. A silicone spatula is vastly superior to a wooden spoon here. Its flexibility allows you to scrape every bit of gooey goodness from the bottom of the pot, making cleanup much easier.
Storage and Longevity Guide
To keep your Black Sesame Marshmallow Cereal Treats soft, store them in an airtight container at room temperature. They will stay fresh and chewy for up to 3 to 4 days. If you need to stack them, place a piece of parchment paper between the layers to prevent them from fusing into one giant block.
Never store these in the fridge, as the cold will turn them into bricks. If you find that your treats have firmed up more than you like after a few days, you can use the “microwave refresh” trick. Pop a single bar in the microwave for exactly 5 to 7 seconds. This briefly softens the gelatin and sugar, returning it to its original gooey state.
Expert Tips for Professional Presentation
Getting clean, sharp edges on a sticky cereal bar can be tricky. The key is to wait at least 45 minutes for the bars to fully set at room temperature. If you cut them while they are still warm, the marshmallow will stretch and tear, leaving you with ragged edges.
Use a long, sharp chef’s knife or a bench scraper. Grease the blade with a little butter before every cut. Instead of sawing back and forth, use a firm, downward pressing motion. This creates those perfectly square, bakery-style bars that look as good as they taste.
The Visual Appeal of Toasted Sesame Toppings
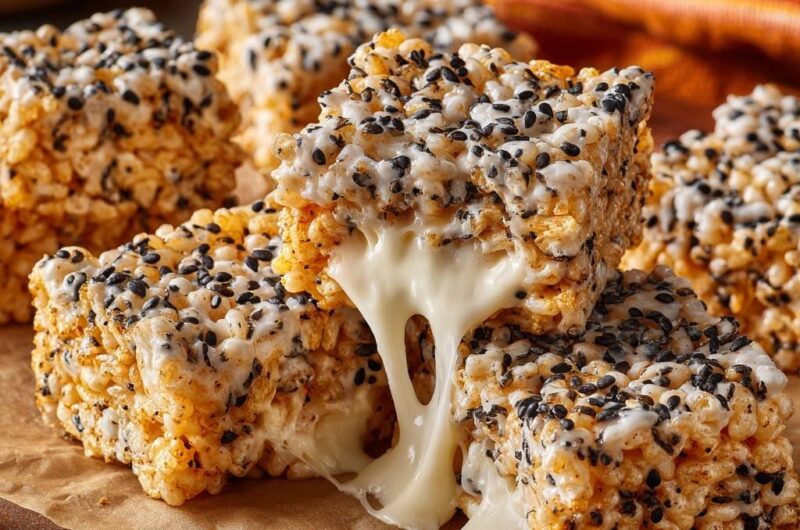
The final sprinkle of black sesame seeds isn’t just for flavor; it provides a beautiful textural contrast. When you sprinkle the seeds over the top, give them a very light press with your palm. This ensures they adhere to the sticky surface so they don’t fall off when you take a bite.
The black-on-white contrast of the seeds against the marshmallow creates a modern, minimalist aesthetic. For an even more dramatic look, you can save a few of the mini marshmallows and press them into the top of the bars before they set, creating a bumpy, snowy landscape of sweetness.
Troubleshooting: Frequently Asked Questions
Why are my treats falling apart?
If your bars are crumbling, you likely had too much cereal or didn’t melt the marshmallows enough to create a strong bond. It can also happen if you used too much butter, which can act as too much of a lubricant and prevent the sugar from “grabbing” the cereal. Ensure you measure your cereal accurately using the “scoop and level” method.
Can I use large marshmallows instead of mini ones?
Yes, you can substitute large marshmallows by weight. A 16-ounce bag of large marshmallows is equivalent to a 16-ounce bag of minis. However, you should cut the large marshmallows into quarters using greased kitchen shears before melting. This ensures they melt quickly and don’t overcook while you wait for the centers to soften.
My treats are grey instead of black—why?
The deep black color comes primarily from the black sesame paste (Kuro Neri Goma). If you only use the seeds, the treats will look mostly white with black speckles. To get that intense, dark hue, you must use the paste. If your paste is a lighter grey, it may be a blend or made from unroasted seeds; look for “pure” black sesame paste for the best color.
Can I make these vegan?
You can use vegan marshmallows, but be aware that they behave differently than gelatin-based ones. Vegan marshmallows often require a bit more heat to melt and can set much firmer. You may need to increase the amount of butter (or vegan butter) slightly and work even faster, as vegan marshmallow fluff tends to “set” almost instantly once removed from heat.
How do I scale this for a crowd?
To double the recipe for a standard 9×13 inch pan, simply multiply all ingredients by two. When working with a larger volume of marshmallows, it is even more important to use a very large, heavy-bottomed pot. The melting process will take a few minutes longer, so keep the heat extra low to ensure the bottom doesn’t scorch while the top is still solid.
Black Sesame Cereal Treats
Course: DessertCuisine: AmericanDifficulty: easy12
bars10
minutes5
minutes210
kcal15
MinutesA professional take on classic cereal treats featuring toasted black sesame seeds and a specific melting technique to ensure a soft, stretchy, and gooey pull every time.
Ingredients
5 cups puffed rice cereal
16 ounces (1.5 bags) fresh mini marshmallows, divided
6 tablespoons unsalted butter
1/3 cup black sesame seeds, toasted
1 tablespoon black sesame paste (optional, for deeper flavor)
1/2 teaspoon vanilla extract
1/4 teaspoon sea salt
Directions
- Grease a 9×9 inch baking pan lightly with butter or line with parchment paper.
- In a large heavy-bottomed pot, melt the butter over the lowest heat setting possible. This is the critical step to prevent the bars from hardening later.
- Add 12 ounces of the marshmallows to the melted butter. Stir constantly using a silicone spatula. As soon as the marshmallows are 90 percent melted and look like thick cream, remove the pot from the heat immediately.
- Stir in the vanilla extract, sea salt, and black sesame paste (if using).
- Fold in the puffed rice cereal and 1/4 cup of the black sesame seeds.
- Add the remaining 4 ounces of mini marshmallows to the warm mixture. Stir gently just until they begin to soften but still hold some shape; this creates the “pockets” of gooey pull seen in the image.
- Transfer the mixture to your prepared pan. Do not pack them down. Use buttered fingers or the back of a buttered spoon to lightly pat the mixture into the corners. Pressing too hard creates a dense, hard bar.
- Sprinkle the remaining black sesame seeds heavily over the top, pressing them very lightly so they adhere to the surface.
- Let the treats sit at room temperature for at least 45 minutes before slicing. Never refrigerate them, as cold temperatures cause the marshmallow structure to tighten and become brittle. Use a greased knife to slice for clean edges.
Notes
- Never refrigerate these treats as cold temperatures cause the marshmallow structure to become brittle. Use the low and slow melt method to prevent the bars from hardening.