Nothing ruins a weekend brunch faster than a waffle that turns into a soggy sponge the second the syrup hits it. Most home cooks struggle with waffles that go limp under the weight of the chicken or lose their crunch instantly. It’s a heartbreaking waste of good ingredients when that beautiful golden exterior turns into a mushy mess before you’ve even finished your first bite.
The “Skyscraper” version of this dish requires a deliberate contrast between a light, airy interior and a structural, shatter-crisp exterior. We aren’t just making breakfast; we’re engineering a meal that stands up to the heavy, savory weight of fried chicken. By focusing on moisture control and structural integrity, you can create a plate that stays crunchy until the very last forkful.
The secret to this permanent crunch is the “double-toast” method combined with a specific cornstarch-to-flour ratio. While most recipes rely on flour alone, adding cornstarch prevents excessive gluten development, which is the primary culprit behind chewy, tough waffles. I’ve found that placing the finished waffles on a wire rack in a low oven is the only way to truly lock in that texture while you finish the chicken.
The Structural Integrity of Southern Fried Chicken and Waffles
When you place a hot piece of fried chicken on top of a fresh waffle, you’re creating a localized weather system. The heat from the chicken releases steam, which gets trapped between the meat and the waffle surface. This “moisture migration” is the enemy of crispiness, as the waffle absorbs that steam and softens almost immediately.
Physics tells us that a standard waffle is too porous to handle this much weight and moisture without help. Therefore, we have to reinforce the starch structure of the batter. By using a high-heat sear in the iron and a secondary drying phase in the oven, we evacuate the internal steam that usually causes the waffle to collapse from the inside out.
Essential Components for the Reinforced Waffle Batter
The foundation of a sturdy waffle starts with the dry mix. While all-purpose flour provides the necessary structure, the addition of a half-cup of cornstarch is non-negotiable. Cornstarch acts as a gluten-inhibitor, ensuring the batter stays tender on the inside while the outside fries to a brittle, glass-like finish in the iron.
In addition to the starch, baking powder plays a vital role in creating micro-pockets of air. These tiny bubbles act as “syrup traps,” holding the liquid on the surface rather than letting it soak into the core of the waffle. This chemical leavening, combined with the sugar for caramelization, creates a deep golden crust that acts as a waterproof barrier.
The Role of Aeration: Why We Separate the Eggs
If you want a waffle that feels light despite being topped with fried meat, you must separate your eggs. Whisking the yolks into the milk and butter provides richness, but beating the whites to stiff peaks provides the lift. This mechanical leavening creates a honeycomb-like internal structure that is surprisingly strong.
When you gently fold those whites into the batter, you’re folding in air. This creates a “loft” that prevents the waffle from becoming a dense, heavy brick. Unlike the “dump and stir” method, which results in a flat and floppy disc, this technique ensures your waffle has the vertical strength to support the chicken.
Selecting and Seasoning the Chicken Tenders
While bone-in fried chicken is a classic, chicken tenders are the superior choice for this specific pairing. They offer a higher surface-area-to-meat ratio, which means more of that craggy, seasoned breading in every bite. Plus, they are much easier to navigate with a knife and fork when you’re trying to get the perfect “everything” bite.
The buttermilk soak is your best friend here. The lactic acid in the buttermilk gently breaks down the protein fibers, ensuring the chicken stays juicy even after a trip to the deep fryer. It also creates a thick, tangy “glue” that helps the seasoned flour cling to the meat, forming those iconic ridges and flakes.
The Spice Profile: Beyond Salt and Pepper
A great chicken and waffle dish needs a savory punch to cut through the sweetness of the maple syrup. I love using a blend of smoked paprika, garlic powder, and onion powder to create a complex flavor profile. The smokiness of the paprika adds a “pit-master” depth that bridges the gap between the salty chicken and the sugary syrup.
Always check the freshness of your spices before starting. If your garlic powder is clumped or your paprika has lost its vibrant red color, your chicken will taste flat. High-quality, potent spices ensure that the savory notes don’t get lost when the syrup starts flowing.
Step-by-Step: Engineering the Perfect Waffle Base
Start by heating your waffle iron to its highest setting. You want a fierce initial heat to sear the batter and create an immediate crust. Pour the batter in and cook until it’s a deep, dark golden brown—much darker than you might think is necessary. That color represents the Maillard reaction, which provides both flavor and structural strength.
Watch the steam coming out of the sides of the iron. When the steam stops, the waffle is usually done. However, don’t just stack them on a plate! Stacking creates immediate condensation, which will turn your hard work into a pile of mush in seconds. Handle them carefully with tongs to keep the edges intact.
The Double-Toast: The Secret to a Permanent Crunch
This is the most critical step in the entire process. Once the waffles come out of the iron, place them directly onto a wire cooling rack set inside a 250°F oven. This allows hot air to circulate 360 degrees around the waffle, effectively “curing” the crust. It prevents the “sweat” that occurs when a hot waffle sits on a flat, cold ceramic plate.
Letting them sit in the oven for about 10 minutes while you fry the chicken does two things. First, it keeps them piping hot. Second, it draws out any remaining moisture from the outer shell, making it incredibly crisp. This reinforced crust is what allows the waffle to maintain its integrity even after it’s been doused in syrup.
The Dredging Station: Creating the Craggy Chicken Crust
To get those beautiful, craggy bits on your chicken, use the “wet hand/dry hand” technique. Use one hand to move the chicken from the buttermilk and the other to toss it in the flour. This keeps your fingers from becoming breaded clubs and ensures a clean, even coating on the meat.
For even more amazing crispiness on your chicken, check out Famous Spicy Fried Chicken Cutlets.
When you move the chicken into the flour and cornstarch mix, don’t just toss it. Press the flour firmly into the meat with your palms. Then, give it a gentle shake. This “press and shake” method creates the high-surface-area crags that catch the syrup and provide that satisfying shatter when you bite into it.
Precision Frying: Temperature Control and Oil Selection
For frying, I recommend peanut oil because of its high smoke point and neutral flavor. If you have an allergy, canola oil is a great second choice. You need to maintain a steady temperature of 350°F. If the oil is too cold, the breading will soak up the grease and become heavy; if it’s too hot, the outside will burn before the chicken is cooked through.
Avoid the temptation to overcrowd the pan. Adding too many pieces of cold chicken at once will cause the oil temperature to plummet. Fry in small batches, allowing the oil to return to 350°F between each round. This ensures every piece of chicken comes out golden, light, and perfectly cooked.
The Drainage Protocol: Wire Racks vs. Paper Towels
Never drain your fried chicken on paper towels. While it seems intuitive to soak up the grease, the chicken actually ends up sitting in a pool of its own oil and steam. This steams the bottom of the breading, ruining the crunch you just worked so hard to create.
Instead, use a clean wire rack set over a baking sheet. This allows the excess oil to drip away completely and lets air circulate under the chicken. This simple switch is the difference between a professional-grade crust and a greasy, soggy mess.
Troubleshooting Common Texture Failures
If your waffles come out tough or “bready,” you likely overmixed the batter. Once you add the wet ingredients to the dry, stir only until the flour streaks disappear. A few lumps are perfectly fine! Overmixing develops the gluten, which is great for bread but terrible for light, crispy waffles.
If the breading is falling off your chicken, you might be frying it too soon or not pressing the flour in hard enough. Let the breaded chicken sit for about 5 minutes before frying; this helps the “glue” set. If the center of the chicken is raw but the outside is dark, your oil is too hot. Lower the flame and use a thermometer to stay at that 350°F sweet spot.
Optimal Serving and Assembly Strategy
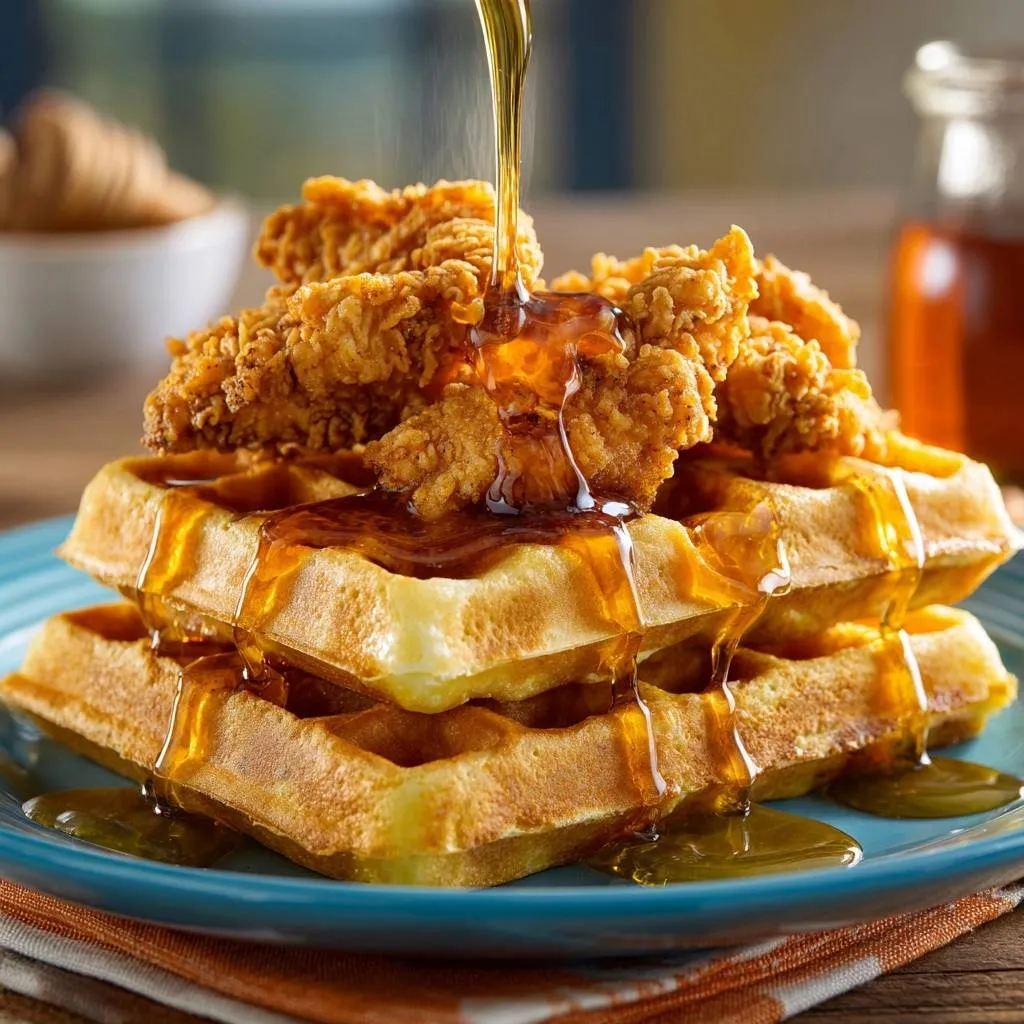
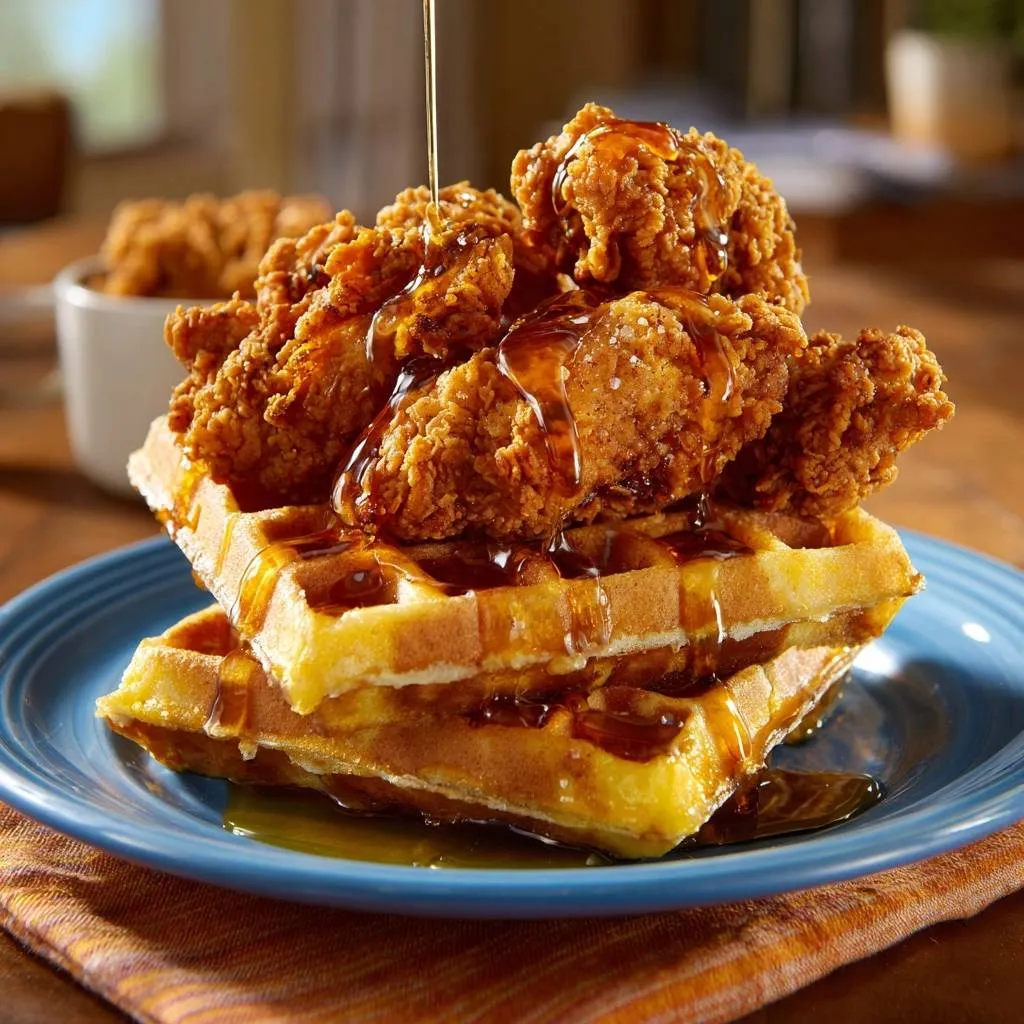
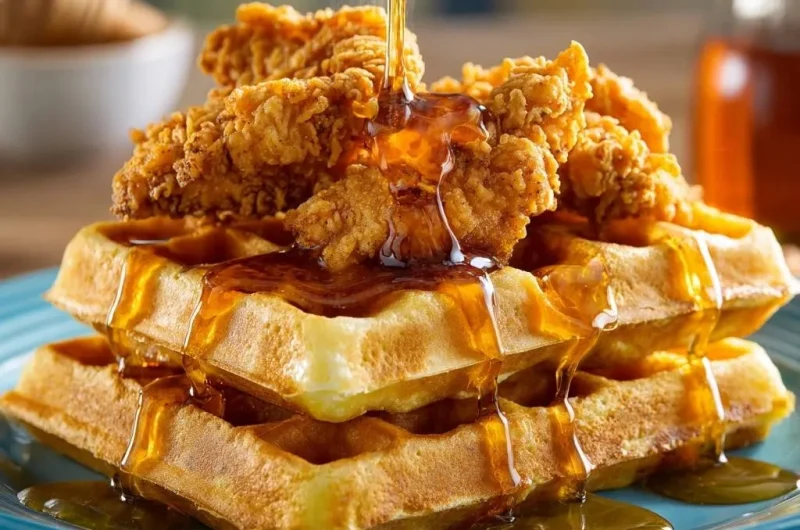
Timing is everything with this dish. You want to use a “just-in-time” assembly strategy. Only take the waffles out of the oven and the chicken off the rack when you are ready to eat. Stack the waffles, shingle the chicken tenders on top so they don’t completely cover the waffle surface, and then—and only then—pour the syrup.
By shingling the chicken, you keep the dish visually appealing while ensuring the waffle stays accessible. This also prevents the chicken from “steaming” the waffle too much. The syrup should be the very last addition, acting as the finishing touch to this architectural masterpiece of a brunch.
Expert Tips for High-Volume Brunch Hosting
If you’re cooking for a crowd, don’t panic. You can fry all the chicken and bake all the waffles in advance. Keep the chicken on one wire rack and the waffles on another in a 200°F oven. They will stay at peak texture for up to 30 minutes without drying out the meat.
To scale the recipe, simply double the dry and wet mixes but keep them separate until you are ready to cook. This prevents the baking powder from losing its punch. If you have two waffle irons, use them both! The faster you can get the waffles into the “double-toast” phase, the smoother your hosting duties will be.
Frequently Asked Questions
Can I use a Belgian waffle maker for this recipe?
Yes, you absolutely can. Belgian waffle makers have deeper pockets, which are actually fantastic for holding more syrup and supporting the chicken. However, because Belgian waffles are thicker, they might need an extra 2 to 3 minutes in the oven during the “double-toast” phase to ensure the center is fully set and the exterior is sufficiently dried out.
What is the best substitute for buttermilk?
If you don’t have buttermilk on hand, you can make a quick substitute by adding one tablespoon of lemon juice or white vinegar to one cup of whole milk. Let it sit for five minutes until it curdles slightly. While this works in a pinch for the chicken coating, real buttermilk is thicker and provides a better “cling” for the flour dredge, so use the real stuff if you can find it.
How do I store and reheat leftovers without losing the crunch?
Whatever you do, stay away from the microwave! It will turn your chicken and waffles into a rubbery disaster. To reheat, place the chicken and waffles on a wire rack in an air fryer or toaster oven at 350°F for about 5 to 7 minutes. This will re-crisp the starches and render out any moisture that settled during refrigeration. Store leftovers in an airtight container in the fridge for up to three days.
Can I make the batter in advance?
I don’t recommend making the fully mixed batter more than 30 minutes in advance. The baking powder begins reacting the moment it hits the liquid, and those whipped egg whites will eventually deflate. If you want to prep ahead, mix your dry ingredients in one bowl and your wet ingredients in another. Combine them and fold in the egg whites just before you’re ready to start the waffle iron.
Why is my chicken crust dark but the meat is still pink?
This usually happens if your oil is too hot or if there is too much sugar in your dredging station. If the oil is above 375°F, the outside will burn before the heat can penetrate the center of the chicken. Always use a clip-on frying thermometer to monitor the temperature. If the oil is at the correct temperature and it’s still browning too fast, ensure you haven’t accidentally added sugar to your chicken flour mix.
Fried Chicken
Course: Main CourseCuisine: AmericanDifficulty: medium4
servings20
minutes25
minutes950
kcal45
MinutesA brunch classic engineered for maximum crunch. This recipe uses a unique aeration technique for the waffles and a double-dredge for the chicken to ensure every bite stays shatteringly crisp even under maple syrup.
Ingredients
For the Waffles:
2 cups all-purpose flour
1/2 cup cornstarch
1 tablespoon baking powder
1 tablespoon sugar
1/2 teaspoon salt
2 large eggs, separated
1 3/4 cups whole milk
1/2 cup melted butter
1 teaspoon vanilla extract
For the Fried Chicken:
1 pound chicken breast tenders
1 cup buttermilk
1 tablespoon hot sauce (optional)
1 1/2 cups all-purpose flour
1/2 cup cornstarch (for extra-craggy crust)
2 teaspoons salt
1 teaspoon black pepper
1 teaspoon smoked paprika
1 teaspoon garlic powder
1/2 teaspoon onion powder
Vegetable oil for frying (peanut or canola)
Maple syrup for serving
Directions
- The Crisp Waffle Base: In a large bowl, whisk the flour, 1/2 cup cornstarch, baking powder, sugar, and salt. The cornstarch is the secret to a crispier exterior that resists moisture.
- The Aeration Step: In a separate bowl, whisk the egg yolks, milk, melted butter, and vanilla. In a clean bowl, beat the egg whites until stiff peaks form. Fold the wet ingredients into the dry until just combined, then gently fold in the beaten egg whites. This creates a light, airy interior that contrasts with the crunchy shell.
- The First Bake: Heat your waffle iron to its highest setting. Cook the waffles until deep golden brown.
- The Anti-Soggy Secret: Place the cooked waffles directly on a wire cooling rack inside a 250°F (120°C) oven for 10 minutes while you fry the chicken. This “double-toast” allows steam to escape from all sides, hardening the crust so it won’t collapse under syrup.
- The Craggy Chicken: In a shallow bowl, mix buttermilk and hot sauce. In another bowl, whisk the flour, cornstarch, and all spices. Dip chicken tenders into the buttermilk, then dredge thoroughly in the flour mixture. Press the flour firmly into the meat and shake gently to create the “crags” and “flakes” seen in the image.
- The Fry: Heat 2 inches of oil in a heavy skillet to 350°F. Fry the chicken in batches for 5 to 6 minutes, turning once, until the crust is deep golden brown and the internal temperature reaches 165°F. Drain on a clean wire rack (not paper towels) to maintain maximum crunch.
- Assembly: Stack two oven-dried waffles on a plate. Top with 2-3 pieces of the hot, craggy fried chicken. Pour maple syrup generously over the top. The reinforced waffle crust will maintain its structural integrity even as it soaks up the syrup.
Notes
- The secret to the ‘Anti-Soggy’ waffle is the double-toast method in the oven and the inclusion of cornstarch in both the waffle batter and the chicken breading. Always drain fried chicken on a wire rack rather than paper towels to maintain the crust’s integrity.