Southern style shrimp and grits is the undisputed crown jewel of Lowcountry cooking. Originating from the coastal regions of South Carolina and Georgia, this dish began as a humble fisherman’s breakfast. However, it has evolved into a sophisticated staple found in the finest Southern bistros. The beauty of the dish lies in the contrast between the savory, spiced shrimp and the buttery, cloud-like grits beneath them.
The biggest frustration home cooks face is the dreaded “sandy” texture. You’ve likely had a bowl where the grits felt like eating wet beach sand, or perhaps the shrimp were so rubbery they bounced. It’s a common pitfall that usually stems from rushing the process or using the wrong type of corn. This guide is a deep dive into the technical side of hydration and fat emulsification to ensure your results are velvety every single time.
I’ve spent years perfecting the ratio of liquid to grain to achieve that elusive, spoonable consistency. The secret isn’t just in the ingredients, but in the mechanical action of whisking and the patience of a slow simmer. By the time you finish this recipe, you’ll understand how to transform a few simple pantry staples into a professional-grade masterpiece that melts in your mouth.
For a different take on shrimp, consider trying this pineapple shrimp curry.
The Anatomy of Stone-Ground Grits vs. Instant Varieties
If you want a dish that rivals a high-end restaurant, you must start with stone-ground grits. Unlike instant or quick-cooking varieties, stone-ground grits are made by grinding the whole dried corn kernel between two millstones. This process preserves the pericarp (the outer skin) and the germ, which are essential for both flavor and texture.
Instant grits are pre-cooked and dehydrated, which strips away the natural starches. When you rehydrate them, they lack the structural integrity to create a creamy emulsion. They often turn into a watery mush rather than a thick porridge. Stone-ground varieties require a longer cook time because those larger pieces of corn need time to absorb liquid all the way to their core.
Nutritionally, stone-ground grits are superior because they aren’t highly processed. More importantly for the chef, they contain a high amount of natural corn starch. As they simmer, this starch is released into the cooking liquid, creating a natural “gravy” that binds the grains together. This is the foundation of a truly velvety Southern style shrimp and grits.
Essential Components for Southern Style Shrimp and Grits
Quality is everything when the ingredient list is this focused. For the cheese, I highly recommend a sharp white cheddar. While yellow cheddar tastes great, white cheddar provides a cleaner, more sophisticated aesthetic that allows the amber shrimp oil to pop visually. Always grate your cheese from a block; pre-shredded cheese is coated in potato starch to prevent clumping, which can make your grits feel gritty.
When shopping for shrimp, look for the 16/20 count, which means there are 16 to 20 shrimp per pound. These are large enough to get a beautiful, hard sear on the outside without overcooking the center. If you use tiny salad shrimp, they will turn into rubber balls before you can even develop a crust. Keep the tails on for a stunning presentation, though you can certainly remove them for easier eating.
Since we are avoiding pork, you can use a high-quality beef bacon or turkey bacon for this recipe. The key is choosing a thick-cut version. Thick-cut bacon renders more fat, which we need to sear the shrimp. This rendered fat carries the smoky flavor throughout the entire dish, acting as the bridge between the sea and the soil.
Selecting the Right Liquid Ratio for Hydration
The golden rule for stone-ground grits is a 4:1 ratio. For every cup of grits, you need four cups of liquid. However, using only water is a missed opportunity for flavor. I use a 50/50 split of chicken broth and whole milk. The broth provides a savory backbone, while the milk adds a rich, creamy mouthfeel that water simply cannot replicate.
The proteins in the milk interact with the corn starches during the long simmer. This creates a much smoother emulsion than water alone. If you find the grits are thickening too quickly before they are tender, don’t be afraid to whisk in an extra splash of warm broth. The goal is a consistency similar to heavy cream or a thick risotto.
The Role of Aromatics and Spices
The spice blend for the shrimp is designed to provide warmth without overwhelming the delicate sweetness of the corn. Smoked paprika is the heavy lifter here, providing a deep red color and a wood-fired aroma. A touch of cayenne pepper adds a back-of-the-throat heat that cuts through the richness of the butter and cream.
For a delightful alternative, consider trying creamy garlic shrimp over rice sometime.
Dried thyme is used during the searing process because it stands up well to high heat. These spices don’t just season the shrimp; they season the fat in the pan. When you deglaze the skillet later, these spices become the base of your pan sauce, ensuring every bite of grit is infused with savory goodness.
The Science of Achieving a Velvety Texture
Achieving the perfect texture is all about starch gelatinization. As the grits heat up in the liquid, the starch granules swell and eventually burst. This releases amylopectin, the same starch that makes risotto creamy. If you don’t cook them long enough, the granules stay hard in the center, leading to that “sandy” feeling.
A heavy-bottomed saucepan is non-negotiable for this process. Thin pots have “hot spots” that will cause the grits to stick and burn at the bottom while the top remains raw. A heavy pot distributes heat evenly, allowing for a gentle, consistent simmer that coaxes the starch out of the corn without scorching it.
Step-by-Step: Preparing the Creamy Grits Base
Start by bringing your broth and milk to a gentle boil. Do not just dump the grits in all at once! This is the most common mistake. Instead, use the “raining” technique. Slowly pour the grits into the pot in a thin stream while whisking vigorously with your other hand. This ensures every grain is hydrated individually and prevents clumps.
Once the grits are in, turn the heat down to the lowest setting. You want a very lazy bubble, not a rolling boil. Cover the pot to trap the steam, which helps soften the corn. Set a timer for 45 minutes. It seems like a long time, but this patience is what separates average home cooking from professional Southern cuisine.
The Importance of Periodic Whisking
Every 10 minutes, you need to uncover the pot and whisk the grits with some muscle. This mechanical agitation is vital. It rubs the grains against each other, breaking down the tough exterior walls and releasing more starch. It’s exactly like making a great risotto; the more you work it, the creamier it gets.
Watch for the visual cues. In the beginning, the grits will look like distinct grains floating in liquid. By the 30-minute mark, they should start to look like a cohesive porridge. At 45 minutes, they should be glossy and thick. Taste a small spoonful; if you feel any crunch at all, add a splash of liquid and keep going for another 5 minutes.
Finishing with Fat: Butter, Cream, and Cheese
We add the heavy cream, butter, and cheese at the very end for a reason. If you boil cheese or cream for 45 minutes, the fats will separate and become oily. By stirring them in at the end, you use the “carry-over” heat to melt them gently. This creates a stable, silky sauce that coats every grain of corn.
Whisk the butter in first until it’s fully incorporated, then fold in the cheese. If you are using cheddar, stir slowly until it’s just melted. Over-whisking at this stage can sometimes make the cheese turn stringy. Once it’s glossy and smooth, put the lid back on and set it aside while you handle the shrimp.
Step-by-Step: Searing Succulent Shrimp and Bacon
Now we move to the protein. The goal here is to create “fond”—those little browned bits of caramelized protein stuck to the bottom of the skillet. That fond is pure flavor gold. It contains the concentrated essence of the bacon and the shrimp spices, and it will eventually become the base of your sauce.
Rendering Bacon Fat for Maximum Flavor
Start your chopped beef or turkey bacon in a cold skillet. Starting cold allows the fat to render out slowly as the pan heats up, resulting in crispier bacon and more liquid fat for cooking. Once the bacon is crispy, remove it with a slotted spoon but leave all that liquid gold in the pan.
This rendered fat has a much higher smoke point than butter, which allows us to get a better sear on the shrimp. It also infuses the shrimp with a smoky, salty depth that you can’t get from vegetable oil. If the pan looks a little dry, you can add a teaspoon of olive oil, but usually, the bacon provides plenty.
The Two-Minute Sear: Avoiding Rubbery Texture
Pat your shrimp completely dry with paper towels before seasoning. Moisture is the enemy of a good sear; if the shrimp are wet, they will steam instead of browning. Once the pan is shimmering hot, add the shrimp in a single layer. Do not crowd the pan, or the temperature will drop too quickly.
Cook the shrimp for exactly two minutes per side. Watch the shape! A perfectly cooked shrimp looks like the letter “C.” If it curls tightly into an “O,” it is overcooked and will be rubbery. Add the minced garlic in the last 30 seconds. Garlic burns quickly, and burnt garlic is bitter, so it only needs a moment to become fragrant.
Deglazing the Pan for a Rich Amber Sauce
Once the shrimp are cooked, remove them from the pan. You’ll see a dark, flavorful crust on the bottom of the skillet. Pour in a small splash of chicken broth or water. Use a wooden spoon to scrape up all those browned bits. This is called deglazing, and it’s a fundamental culinary technique.
As the liquid bubbles, it will pick up the paprika and bacon drippings, turning into a beautiful amber-colored sauce. Let it reduce for about 60 seconds until it thickens slightly. This sauce is the “glue” that ties the spicy shrimp to the creamy grits. It’s packed with the Maillard reaction products that make seared food taste so savory.
Troubleshooting Common Southern Style Shrimp and Grits Issues
If your grits have become too thick while you were cooking the shrimp, don’t panic. Simply whisk in a tablespoon or two of warm milk or broth. Never add cold liquid to hot grits, as it can cause the starch to seize up and create lumps. Always aim for a consistency that is slightly looser than you think you need, as they will thicken more as they cool.
If your cheese sauce looks broken or oily, it usually means the heat was too high. You can sometimes fix this by adding a tiny splash of heavy cream and whisking vigorously off the heat. For over-seasoned shrimp, a quick squeeze of fresh lemon juice can help neutralize excess salt or heat, providing a bright acidic balance.
Plating for Professional Presentation
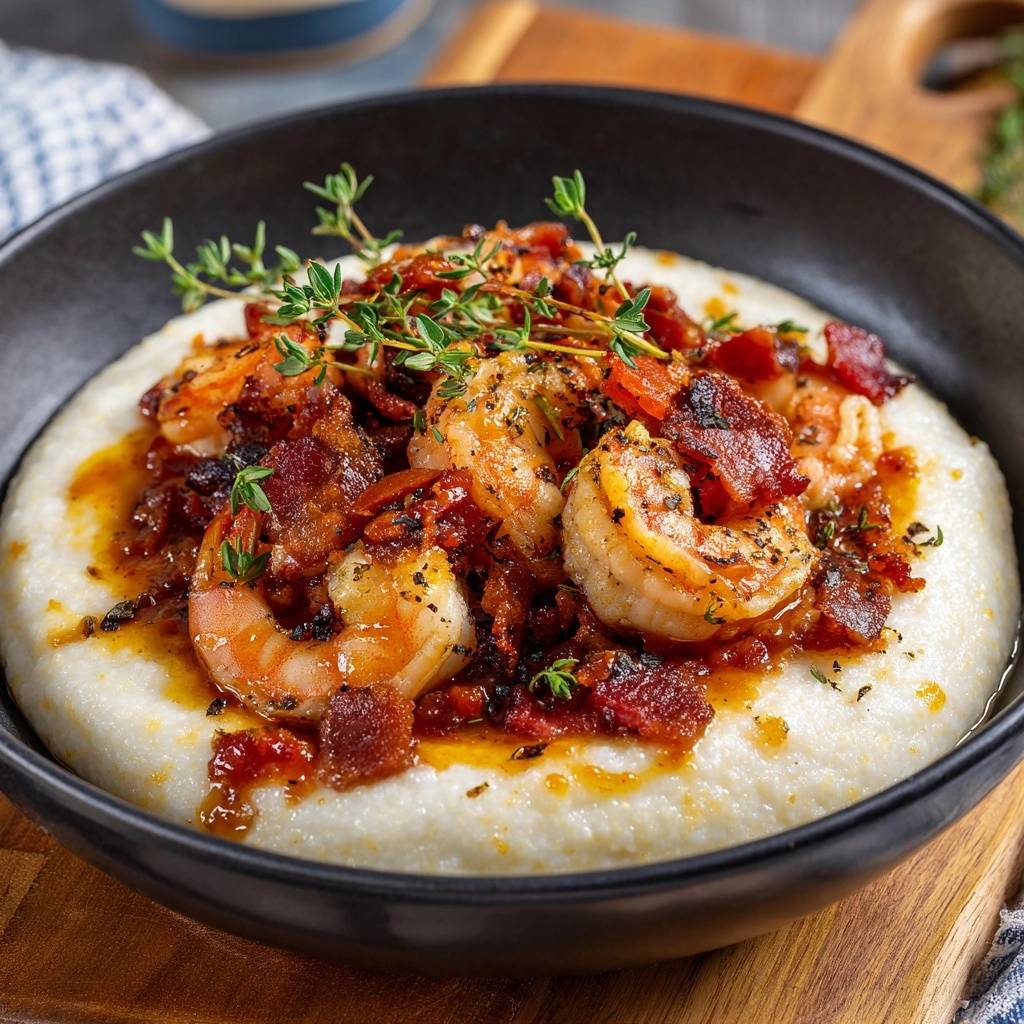
Presentation is the final step in the Southern style shrimp and grits experience. Use a shallow bowl rather than a deep one. This allows the grits to spread out, creating a larger surface area for the shrimp and sauce. Spoon a generous portion of grits into the center and use the back of the spoon to create a slight well.
Arrange the shrimp neatly in the center of the well. Sprinkle the crispy bacon bits over the top for texture. Finally, drizzle that amber pan sauce over the shrimp and let it bleed into the white grits. The color contrast is stunning. Garnish with a few fresh thyme sprigs to add a pop of green and a fresh herbal aroma that hits the diner before the first bite.
Optimal Side Dishes for a Lowcountry Feast
Because this dish is incredibly rich and creamy, you want side dishes that offer acidity or bitterness to cleanse the palate. Braised collard greens with a splash of apple cider vinegar are the traditional choice. The vinegar cuts right through the heavy cream and butter, making the next bite of grits taste just as good as the first.
Round Out Your Meal
To complement your shrimp and grits experience, consider these other chicken dishes.
- For a refreshing option, try the Garlic Herb Grilled Chicken Salad, which offers bright, savory flavors.
- If you prefer something richer, the Creamy Zesty Chicken and Corn Salad provides a delightful mix of textures and tastes.
A bright green bean salad with a lemon vinaigrette is another excellent option. If you want something to soak up every last drop of that pan sauce, serve some crusty French bread or toasted sourdough on the side. Avoid heavy, starchy sides like potatoes, as the grits already provide plenty of hearty carbohydrates.
For a deeply satisfying side, try these Southern-Style Collard Greens.
Storage and Reheating: Maintaining the Emulsion
Grits are notorious for turning into a solid brick once they hit the refrigerator. This happens because the starches retrogradate and lock together. To store leftovers, place them in an airtight container for up to three days. I do not recommend freezing this dish, as the dairy will likely separate and the shrimp will become very tough upon thawing.
To reheat, avoid the microwave if possible. Instead, place the grits in a small saucepan over medium-low heat. Add a splash of milk or broth and whisk constantly as they warm up. This will break up the “brick” and restore the creamy texture. Add the shrimp at the very end just to warm them through so they don’t overcook.
Expert Tips for Customizing Your Flavor Profile
Once you’ve mastered the base recipe, you can start experimenting with different flavor profiles. If you want more heat, try folding in some roasted and diced poblano peppers or a spoonful of canned chipotles in adobo. For a different cheesy twist, swap the sharp cheddar for smoked gouda or even a creamy goat cheese for a tangy finish.
If you find the dish a bit too heavy, a squeeze of fresh lemon juice over the shrimp right before serving can brighten the whole plate. You can also experiment with the protein; while shrimp is classic, this grits base works beautifully with seared scallops or even a piece of blackened white fish. Just remember to keep the grits slow and the sear fast!
Frequently Asked Questions
Can I use yellow grits instead of white?
Yes, you absolutely can. The main difference between white and yellow grits is the variety of corn used. White grits are made from white corn and tend to be slightly milder and sweeter. Yellow grits have a more pronounced, “corny” flavor and a bolder color. They both have the same starch content, so the cooking method remains identical.
Why are my grits still crunchy after 40 minutes?
This usually happens for two reasons: either the heat was too low to penetrate the grain, or you didn’t use enough liquid. Stone-ground grits vary by brand; some are coarser than others. If they are still crunchy, add another half-cup of warm liquid and continue simmering for 10 more minutes. Also, ensure your pot lid fits tightly so the steam doesn’t escape.
Can I peel the shrimp entirely, including the tails?
You certainly can. While leaving the tails on is traditional for “fancy” presentation and gives you a little handle to pick them up, many people prefer them completely peeled for ease of eating. If you are serving this at a casual family dinner, peeling them entirely is often the more practical choice. It won’t affect the flavor or the sear at all.
Is there a dairy-free substitute that maintains the creaminess?
To keep that velvety texture without dairy, you can substitute the milk with a full-fat oat milk or cashew milk, as these have a higher fat content than almond milk. Replace the butter with a high-quality vegan butter stick and use a dairy-free cheddar shred. The key is still the long simmer and the whisking, which releases the natural corn starches to provide creaminess.
How do I prevent the cheese from clumping?
Cheese clumps when it is added to a liquid that is boiling too hard or if the cheese was pre-shredded with anti-caking agents. To ensure a smooth melt, turn the heat off completely before adding your hand-grated cheese. Let the residual heat of the grits do the work. Stir slowly and steadily until the cheese disappears into the mixture.
Shrimp and Grits
Course: Main CourseCuisine: AmericanDifficulty: medium4
servings10
minutes45
minutes510
kcal55
MinutesA comforting Southern classic featuring stone-ground grits simmered in milk and broth until creamy, topped with pan-seared shrimp, crispy bacon, and a savory garlic pan sauce.
Ingredients
1 cup stone-ground white grits (not instant or quick-cooking)
2 cups chicken broth
2 cups whole milk
1/2 cup heavy cream
4 tablespoons unsalted butter
1 cup sharp white cheddar cheese, shredded (optional, for visual richness)
1 pound large shrimp, peeled and deveined (tails on for presentation)
6 slices thick-cut bacon, chopped
2 cloves garlic, minced
1 teaspoon smoked paprika
1/2 teaspoon dried thyme
1/4 teaspoon cayenne pepper
Fresh thyme sprigs for garnish
Salt and black pepper to taste
Directions
- To solve the gritty texture issue, combine the chicken broth and milk in a heavy-bottomed saucepan and bring to a gentle boil. Slowly rain the stone-ground grits into the liquid while whisking constantly. This prevents the starch from clumping into hard beads.
- Reduce the heat to the lowest possible setting and cover. Simmer for 40 to 45 minutes. Stone-ground grits require this time to fully hydrate. Whisk vigorously every 10 minutes; this mechanical action breaks down the grain walls and releases natural starches for a creamy finish.
- While the grits cook, fry the chopped bacon in a large skillet over medium heat until crisp. Remove the bacon with a slotted spoon to a paper towel, leaving the rendered fat in the pan.
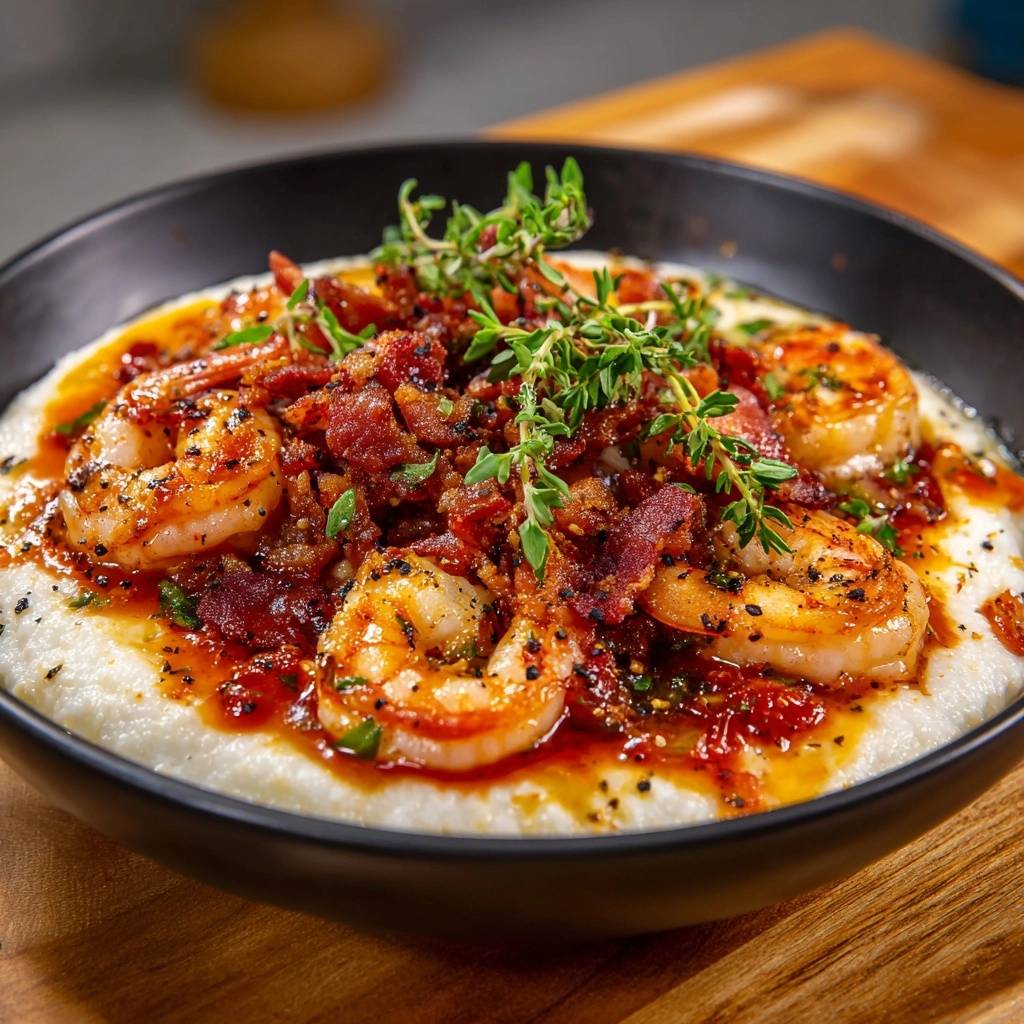
- Season the shrimp with paprika, dried thyme, cayenne, salt, and pepper. Increase the skillet heat to medium-high. Sear the shrimp in the bacon fat for 2 minutes per side until golden-brown and opaque. Add the minced garlic in the last 30 seconds of cooking. Deglaze the pan with a splash of broth or water to scrape up the browned bits (fond) to create the orange-tinted pan sauce seen in the image.
- Once the grits are tender and no longer “sandy,” stir in the heavy cream, butter, and shredded cheese. Whisk one final time until the mixture is glossy and thick. Adjust seasoning with salt and pepper.
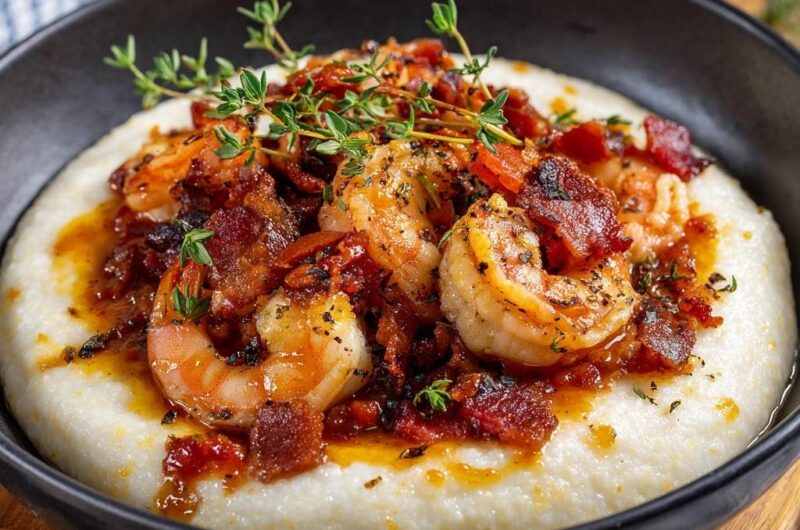
- Spoon the creamy grits into shallow bowls. Arrange the garlic shrimp in the center. Top with the crispy bacon bits and generously drizzle the amber pan juices over the shrimp and the surrounding grits. Garnish with several fresh thyme sprigs and serve immediately.
Notes
- To ensure a smooth texture, avoid instant or quick-cooking grits. Whisking every 10 minutes is essential to release the natural starches for a creamy finish.