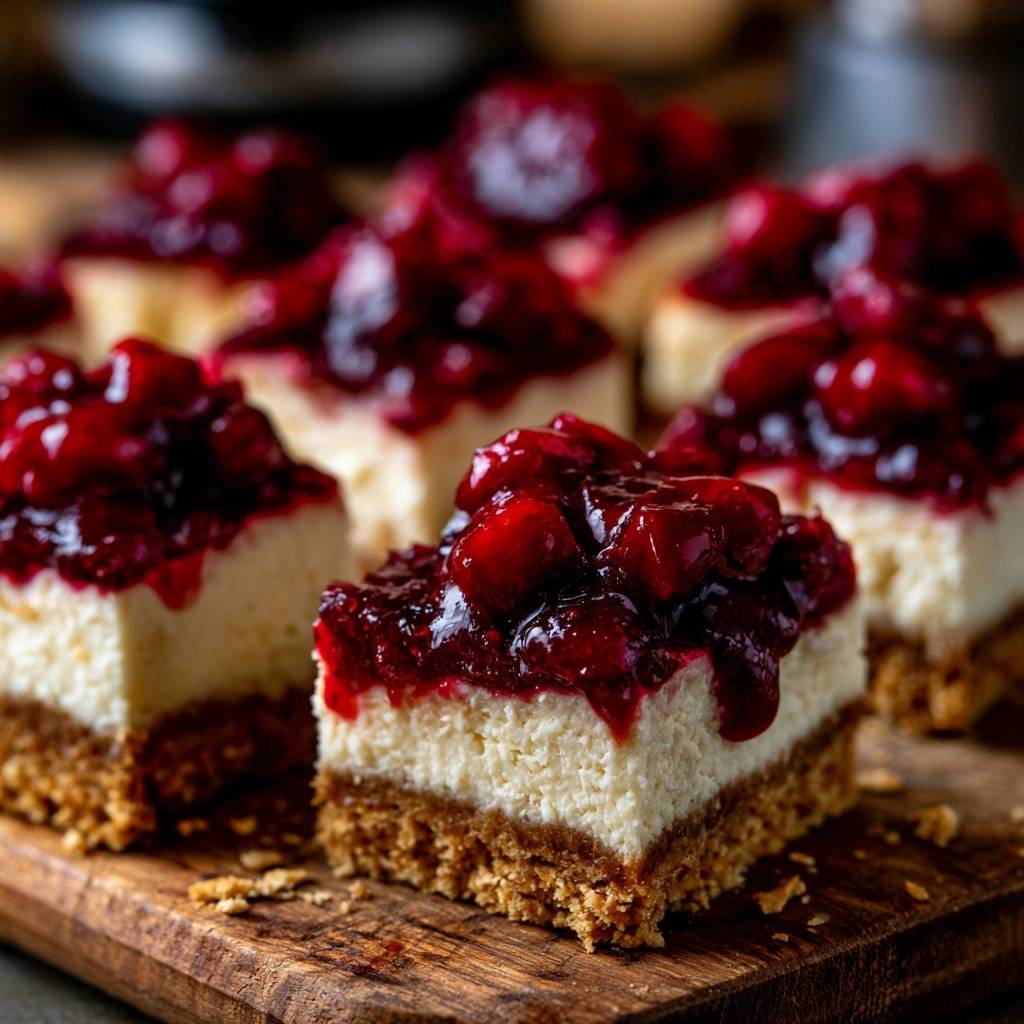
There is nothing quite as disappointing as a cheesecake bar that looks stunning on top but hides a soggy, mushy secret underneath. You want that satisfying, buttery crunch of a graham cracker base to contrast against the velvety smooth filling. Most recipes fail because the moisture from the cheesecake batter seeps into the crust during the long bake, turning your dessert into a wet mess. These Cherry Cheesecake Bars solve that problem with a clever technical fix that ensures every bite is structurally sound and texturally perfect.
The secret lies in a professional pastry technique called par-baking combined with a protein seal. By baking the crust first and then applying a thin layer of egg white, you create a hydrophobic barrier. This invisible shield prevents the cheesecake moisture from migrating into the crumbs. It’s the difference between a dessert that falls apart in your hands and one that holds its shape beautifully on a dessert platter. You’ll get that distinct “snap” from the base that makes these bars truly elite.
I’ve found that the temperature of your ingredients is just as vital as the baking method. If you try to beat cold cream cheese, you’ll end up with tiny white lumps that never fully incorporate. You might be tempted to turn up the mixer speed to get rid of them, but that’s a mistake. High speeds whip air into the batter, causing the cheesecake to puff up like a souffle and then collapse into a cracked, cratered mess. For a dense, New York-style consistency, keep the mixer on low and let your ingredients come to room temperature naturally on the counter.
The Anatomy of a Crisp Graham Cracker Base
A great crust requires the perfect ratio of dry crumbs to fat. We use 1.5 cups of graham cracker crumbs paired with 6 tablespoons of melted unsalted butter. This specific amount of butter ensures every crumb is hydrated without making the base greasy. Using unsalted butter is a deliberate choice; it allows the natural honey notes of the graham crackers to shine through without being overshadowed by excess sodium.
Granulated sugar plays a bigger role here than just adding sweetness. As the crust bakes, the sugar melts and then recrystallizes as it cools. This process acts like a glue, binding the crumbs together into a sturdy, crisp sheet. When you press the mixture into your 8×8 inch pan, use the bottom of a flat measuring cup to pack it down firmly. A tightly packed crust is much less likely to crumble when you finally slice into it.
Why Room Temperature Ingredients Prevent Cracking
Cheesecake is essentially a baked custard, and custards rely on a perfect emulsion. When your 16 ounces of cream cheese and 1/4 cup of sour cream are at room temperature, they blend into a liquid-gold consistency with almost no effort. This synergy creates a tight protein bond that holds up during the baking process. Cold ingredients resist blending, which leads to over-mixing and the introduction of unwanted air bubbles.
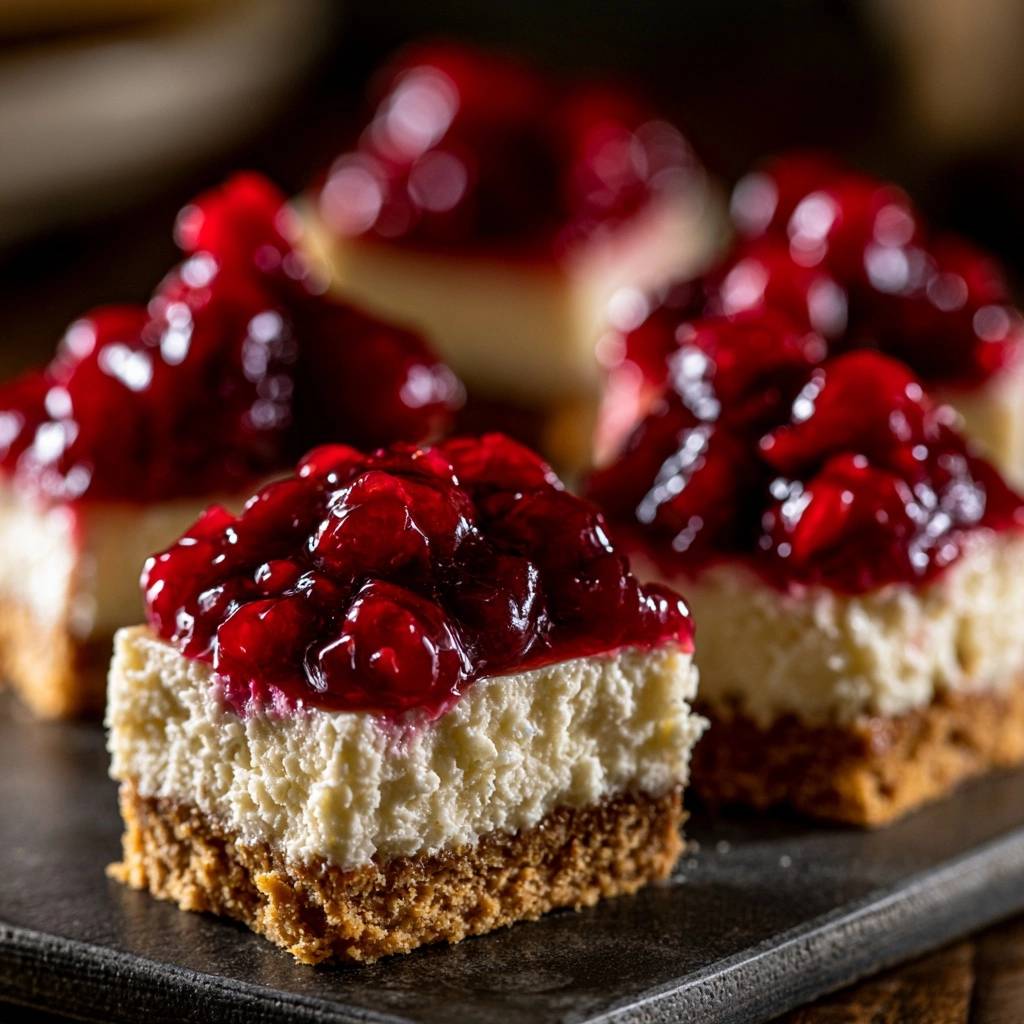
The sour cream is your secret weapon for texture. It adds a subtle tang that cuts through the richness of the cream cheese, but more importantly, it softens the protein structure. This results in a creamier mouthfeel that melts on the tongue. If you skip the room temperature rest, you’ll likely see the bars “weep” or release moisture after they’ve cooled, which ruins that silky finish we’re aiming for.
Essential Components for Cherry Cheesecake Bars
Quality matters when you only have a few ingredients. For the topping, look for a high-viscosity cherry pie filling that features whole, plump fruit. Cheaper brands often use too much cornstarch slurry and not enough actual cherries, which can make the bars look messy. You want those bright red cherries to sit proudly on top of the white cheesecake layer rather than bleeding into it.
The reserved egg white is perhaps the most important “hidden” ingredient in this recipe. While the two whole eggs provide the structure for the filling, that single egg white acts as your moisture barrier. It’s a small step that yields a massive payoff in texture. Additionally, using large eggs ensures you have the right amount of lecithin to keep the fats and liquids in the batter from separating while in the oven.
The Engineering of a Moisture-Proof Crust
The “Two-Step Par-Bake” is the technical heart of this recipe. First, you’ll slide your pressed crust into a 350°F oven for 10 minutes. This initial blast of heat toasts the crumbs and begins the sugar crystallization process. You’ll notice the kitchen starts to smell like toasted honey and butter, which is your cue that the structure is setting.
As soon as the pan comes out of the oven, you must act quickly. Brush the whisked egg white over the steaming hot crust. You’ll actually see the egg white turn opaque and dry almost instantly. This creates a thin, waterproof film that is completely tasteless but incredibly effective. Let the pan sit for 5 minutes to finish setting before you even think about pouring in your cheesecake batter.
Step-by-Step: Mixing the Silky Cheesecake Layer
When you’re ready to mix the filling, keep your hand mixer on the lowest setting possible. Start by creaming the softened cream cheese and sugar until no lumps remain. Add your eggs one at a time, waiting until the first is fully incorporated before adding the second. This gradual addition prevents the batter from breaking and ensures a uniform density throughout the pan.
Pour the batter over your sealed crust and smooth it out with a spatula. You’re looking for a bake time of 30 to 35 minutes. The biggest mistake people make is waiting for the center to look solid. If the center is firm when it’s in the oven, it’s already overbaked. You want the edges to be slightly puffed, but the center should still have a “slight jiggle” like Jell-O when you gently shake the pan. Residual heat will finish the cooking process as it cools.
The Critical Cooling and Setting Phase
Patience is the hardest part of this recipe, but it’s non-negotiable. Cheesecake is full of fats that need to solidify to reach the proper consistency. Start with a 1-hour rest on the counter. This slow descent in temperature prevents the cheesecake from shocking and pulling away from the edges of the pan too quickly, which is a common cause of cracks.
After the room temperature rest, spread your cherry filling on top and move the pan to the refrigerator for at least 4 hours, though overnight is even better. This chilling period allows the butter in the crust to firm up again, ensuring those bars can be lifted cleanly using your parchment paper “sling.” If you try to cut them while they’re even slightly warm, the crust will shatter and the filling will smear.
Troubleshooting Common Cheesecake Bar Failures
If your bars have a spongy, airy texture, you likely incorporated too much air during the mixing phase. Remember, we aren’t making a cake; we’re making a dense custard. Always use the lowest speed on your mixer and stop the moment the ingredients are combined. If you see large bubbles on the surface before baking, tap the pan firmly on the counter a few times to pop them.
The “slump” or a sunken center usually happens because of drastic temperature changes. Don’t move the bars directly from a hot oven to a cold fridge. That middle hour on the counter is vital for a level surface. If you notice “weeping” or beads of moisture on the cherries, it’s often due to condensation. Make sure the cheesecake is fully cooled before you cover it with plastic wrap to prevent steam from being trapped inside.
Achieving Clean Slices and Professional Presentation
To get those sharp, professional-looking edges, use the “Warm Knife Technique.” Run a long, sharp chef’s knife under hot water, then wipe it completely dry with a clean towel. The heat from the blade will glide through the cold fats of the cheesecake like butter. It’s tedious, but you must wipe the blade clean and re-warm it between every single cut.
For perfect symmetry, use a ruler to mark out 12 even bars. I usually cut the square in half, then cut those halves into thirds, and finally cut across the middle. This ensures everyone gets an equal share of that glorious cherry topping. Lifting the entire block out of the pan using the parchment overhang before you start cutting gives you much better leverage and prevents you from scratching your baking pan.
Flavor Variations and Ingredient Swaps
While graham crackers are the classic choice, you can easily swap them for speculoos (Biscoff) cookies or ginger snaps for a spicy, autumnal twist. If you go this route, you may need to slightly reduce the added sugar in the crust, as these cookies are often sweeter than standard graham crackers. A little bit of lemon or orange zest folded into the cheesecake batter can also brighten the flavor profile significantly.
If cherries aren’t your favorite, this base recipe works perfectly with a tart raspberry compote or even a thick blueberry preserves. The key is to ensure whatever fruit topping you use has a high viscosity. If the topping is too watery, it will eventually soak through the cheesecake layer and compromise that crisp crust we worked so hard to protect. Always stick to thick, jam-like consistencies for the best results.
Make-Ahead Strategies and Storage Logistics
These bars are the ultimate make-ahead dessert because they actually improve after a night in the fridge. You can store the fully assembled bars in an airtight container in the refrigerator for up to 5 days. The crust will stay remarkably crisp thanks to our egg-white seal. If you’re planning a party, I recommend making them 24 hours in advance to let the flavors fully melve.
If you want to freeze them, it’s best to freeze the cheesecake base on the crust without the cherry topping. Wrap the chilled cheesecake block tightly in plastic wrap and then foil; it will stay fresh for up to 3 months. When you’re ready to serve, thaw it in the fridge overnight, then add the fresh cherry filling and slice. Freezing the cherries can sometimes change their texture and make the filling “bleed” more than usual once thawed.
Expert Tips for Cherry Cheesecake Bars
Can I use fresh cherries instead of canned filling?
Yes, but you cannot just put raw cherries on top. You’ll need to cook them down first. Simmer fresh, pitted cherries with a bit of sugar, lemon juice, and a cornstarch slurry until the mixture thickens and becomes translucent. Let this homemade compote cool completely before spreading it over your cheesecake layer to avoid melting the filling.
Why did my crust crumble when I tried to slice the bars?
This usually happens for one of two reasons: either the crust wasn’t pressed down firmly enough during prep, or the bars weren’t chilled long enough. The butter acts as the primary binder, and it must be completely cold and solid to hold the crumbs together. Use a flat-bottomed glass to really compress the crumbs into the pan next time.
Can I substitute Greek yogurt for sour cream?
You can use full-fat Greek yogurt as a 1:1 replacement for sour cream. It provides a similar acidity and moisture level. However, avoid using non-fat or low-fat yogurt, as the lack of fat will make the cheesecake bars rubbery and less stable. The fat content is crucial for that creamy, decadent mouthfeel.
How do I prevent the parchment paper from slipping?
A quick pro tip is to lightly grease the baking pan with a tiny bit of butter or cooking spray before laying down the parchment paper. This acts like a temporary glue, holding the paper in place while you press in the graham cracker mixture. Make sure you have enough overhang on the sides to use as “handles” later on.
Optimizing Your Baking Equipment
The material of your pan changes how heat is distributed. A light-colored metal 8×8 pan is the gold standard for this recipe. Metal conducts heat quickly and evenly, which helps the crust set without over-browning the edges. Glass or ceramic pans hold onto heat much longer, which can lead to overbaked, dry edges by the time the center is finished. If you must use glass, reduce the oven temperature by 25 degrees and keep a close eye on the jiggle.
Why is my cheesecake filling yellow instead of white?
This is usually a sign of overbaking or using eggs with very dark, orange yolks. While the color doesn’t hurt the flavor, a bright white filling provides a better visual contrast for the cherries. To keep it white, ensure you are using the “jiggle test” and removing the bars from the oven the moment the edges are set. Overbaking browns the proteins and sugars in the dairy, leading to a yellow tint.
How do I get the cream cheese to soften quickly?
If you forgot to take the cream cheese out of the fridge, don’t microwave it on high, as this can cause it to melt or become oily. Instead, cut the blocks into small 1-inch cubes and spread them out on a plate. Increasing the surface area allows the cheese to reach room temperature in about 20 minutes. You can also place the sealed foil packages in a bowl of warm (not hot) water for 10 to 15 minutes.
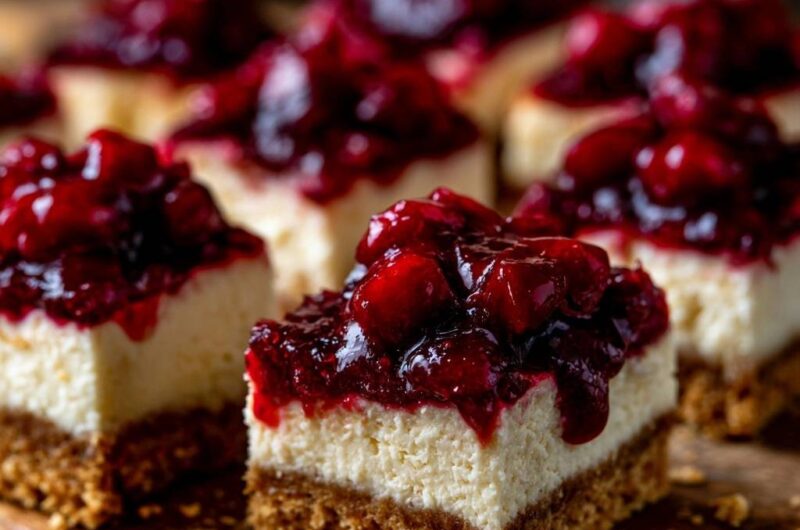
Cherry Cheesecake Bars
Course: DessertCuisine: AmericanDifficulty: easy12
bars20
minutes45
minutes65
Minutes310
kcalAmerican
Ingredients
1.5 cups graham cracker crumbs
6 tablespoons unsalted butter, melted
1/4 cup granulated sugar
16 ounces cream cheese, softened to room temperature
1/2 cup granulated sugar (for filling)
2 large eggs (plus 1 egg white, reserved for sealing the crust)
1 teaspoon vanilla extract
1/4 cup sour cream
21 ounces cherry pie filling (high-quality, with whole cherries)
Directions
- Preheat your oven to 350 degrees F and line an 8×8 inch baking pan with parchment paper, leaving an overhang on the sides.
- Combine graham cracker crumbs, melted butter, and 1/4 cup sugar in a bowl. Press the mixture firmly and evenly into the bottom of the prepared pan.
- To solve the soggy bottom issue, bake the crust alone for 10 minutes. This sets the structure. Once removed, immediately brush a thin layer of whisked egg white over the hot crust. The heat will cook the egg white instantly, creating a waterproof seal. Let it cool for 5 minutes.
- In a large bowl, beat the softened cream cheese and 1/2 cup sugar until completely smooth and creamy. Add the 2 eggs one at a time, followed by the vanilla and sour cream. Mix on low speed just until combined to avoid incorporating excess air, which causes cracking and a spongy texture.
- Pour the cheesecake batter over the sealed, par-baked crust.
- Bake for 30 to 35 minutes or until the edges are slightly puffed and set, but the center still has a slight jiggle when the pan is gently shaken.
- Remove from the oven and let cool at room temperature for 1 hour.
- Spread the cherry pie filling evenly over the top of the cooled cheesecake layer.
- Chill in the refrigerator for at least 4 hours, preferably overnight. This cooling period is essential for the fats in the crust to solidify (ensuring crispness) and for the cheesecake to set to a dense, sliceable consistency.
- Use the parchment overhang to lift the bars out of the pan. Use a sharp, warm knife to slice into clean squares, wiping the blade between each cut.
Notes
- The secret to the perfect bar is brushing the hot par-baked crust with egg white to create a waterproof seal. Ensure all filling ingredients are at room temperature to prevent cracking.