Most poke cakes suffer from a fatal flaw: the dreaded mushy bottom. You’ve likely seen it before, where the liquid filling rushes to the base of the pan, leaving the top of the cake dry and the bottom a soggy, unappealing mess. This Caramel Toffee Poke Cake solves that structural nightmare by using a specific temperature-timed infusion method that keeps the rich caramel suspended right in the center of the crumb.
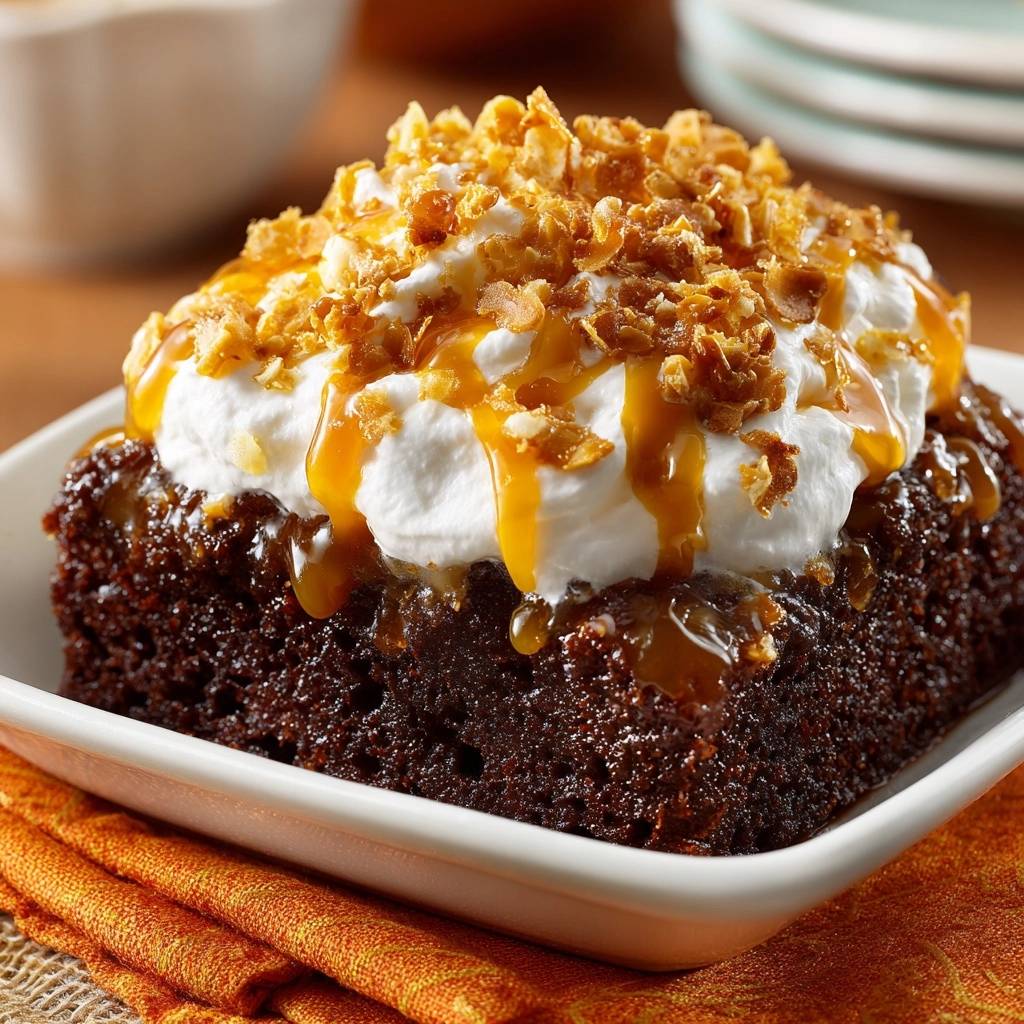
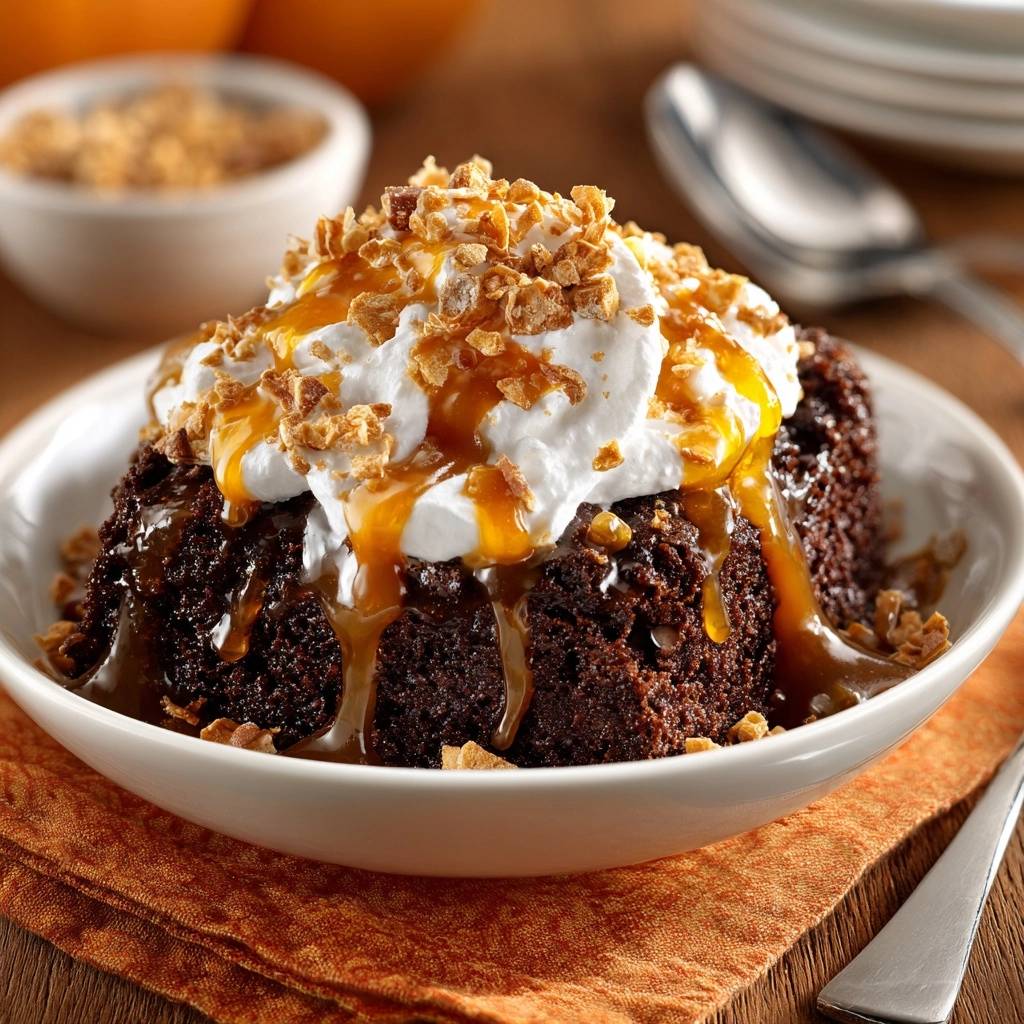
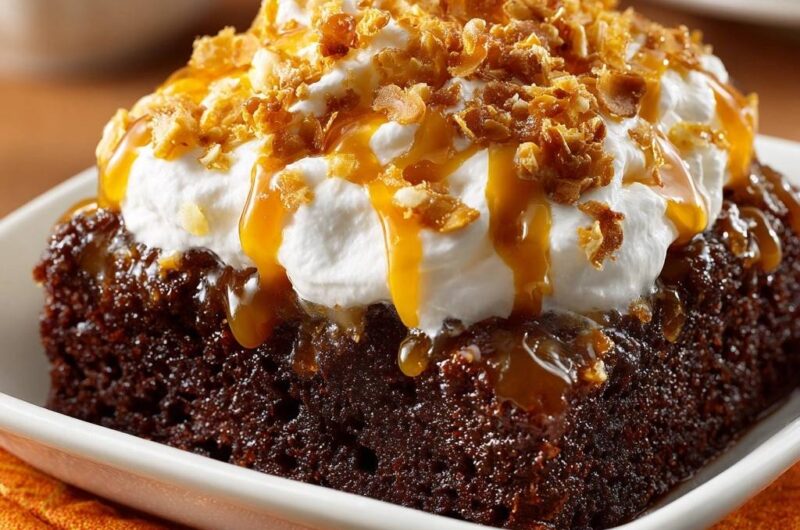
Imagine biting into a dense, velvety chocolate cake where every forkful is punctuated by pockets of buttery caramel and the sharp, salty crunch of toffee. The contrast between the airy whipped topping and the deep, dark cocoa notes creates a dessert that feels both indulgent and perfectly balanced. It’s a “skyscraper” of a cake, standing tall with distinct layers rather than collapsing into a puddle of sugar.
The secret to this success isn’t just the ingredients; it’s the physics of the pour. By waiting exactly ten minutes after the cake leaves the oven, you hit a thermal sweet spot. This timing ensures the cake fibers are open enough to drink in the sauce but firm enough to hold it in place, preventing the caramel from leaking through to the pan surface.
The Physics of the Anti-Soggy Poke Cake
Standard poke cakes fail because of gravity and low viscosity. When you pour a thin liquid over a piping hot cake, the heat turns that liquid into a watery consistency that races straight to the bottom. To achieve the “suspended caramel” effect, we manipulate the internal temperature of the chocolate crumb to act as a trap.
As the cake cools slightly, the starch molecules begin to set, creating a more stable network. When the thickened caramel hits these warm—but not hot—walls of the cake holes, it clings to the crumb. This creates a beautiful marbled effect inside the cake. Instead of a wet base, you get a moist, fudge-like interior that maintains its structural integrity even after slicing.
Essential Components for the Toffee Infusion
Quality ingredients are the backbone of this recipe. While a standard box of chocolate cake mix works best here, it’s because these mixes are engineered with a resilient crumb structure that can handle being “poked” without crumbling. A delicate homemade sponge might fall apart, but the box mix provides the sturdy foundation needed for heavy caramel saturation.
The choice of caramel is equally vital. Avoid thin, squeeze-bottle ice cream toppings which are too watery. Look for a high-quality, thick jarred caramel or a Dulce de Leche style sauce. These have a higher fat content and a lower water activity, which means they won’t soak into the cake and make it soggy. Adding a half-teaspoon of sea salt to the sauce is a professional move that cuts through the sugar and highlights the cocoa.
Selecting the Right Toffee and Crunch
For the topping, you can use standard pre-packaged toffee bits, but crushed honeycomb candy offers a more sophisticated, airy crunch. Keep in mind that the moisture in the whipped topping will eventually soften the toffee. If you’re serving this at a party, always wait until the very last minute to add the crunch so it provides a sharp textural contrast to the soft cream.
Precision Timing: The 10-Minute Cooling Window
The ten-minute cooling period is the most critical step in this entire process. If you poke the holes the moment the cake comes out of the oven, the steam escaping will cause the crumb to tear and turn gummy. However, if you wait thirty minutes, the cake “seals” itself as it cools, and the caramel will simply sit on top like a glaze.
At the ten-minute mark, the cake is in the “Goldilocks” zone. You’ll notice the edges just starting to pull away from the sides of the pan. This indicates the structure is set, but the interior is still warm enough to encourage the caramel to flow into the holes. It’s the perfect window for maximum absorption without compromising the base.
Step-by-Step: Engineering the Perfect Caramel Pockets
When you’re ready to poke, grab a wooden spoon with a rounded handle. You want holes that are about a half-inch wide to allow the thick caramel to actually enter the cake. Space them about an inch apart in a neat grid. This ensures that every single slice gets an equal distribution of flavor.
The most important technical tip is the “three-quarters depth” rule. As you push the spoon handle into the cake, stop before you hit the bottom of the pan. If you feel the metal or glass of the pan, you’ve gone too far. By leaving a quarter-inch of un-poked cake at the bottom, you create a natural “floor” that prevents the caramel from pooling at the base.
The Warm-Pour Method for Caramel Saturation
Microwave your caramel sauce for about 20 to 30 seconds. You’re looking for a “honey-like” consistency—it should be pourable but still have some weight to it. If it’s too thin, let it sit for a minute to thicken back up. Stir in your sea salt thoroughly before you start the pour.
Slowly drizzle the caramel over the holes, then use a flat spatula to gently “massage” the sauce into the cavities. Don’t just let it sit there; the spatula helps force the thick sauce down into those three-quarter-depth pockets. Reserve that last bit of caramel for the final garnish to give it that professional, drizzled look.
The Cold-Set Phase: Why Patience Prevails
You might be tempted to frost the cake immediately, but the two-hour refrigeration step is non-negotiable. During this time, the fats in the caramel sauce begin to solidify. This “cold-set” phase is what locks the caramel in place, creating those distinct pockets of flavor.
For a similarly smooth topping experience, consider the rich caramel drizzled cheesecake.
Furthermore, spreading whipped topping on a warm cake is a recipe for disaster. The topping will melt into a greasy film. Chilling the cake ensures the whipped layer stays thick, fluffy, and stable. This patience results in a clean, layered look when you finally cut into the dessert.
Troubleshooting Common Poke Cake Structural Failures
If your cake cracks significantly while you are poking the holes, don’t panic. This usually happens if the cake is a bit overbaked and dry. The caramel sauce actually acts as a “glue” in this scenario. Simply proceed with the pour, and the whipped topping will hide any surface imperfections.
If your caramel sauce is too thick to pour even after heating, stir in a teaspoon of milk or cream to loosen it up. Conversely, if your whipped topping seems watery, it might have been thawed too quickly in the microwave. Always thaw whipped topping in the fridge overnight for the best stability and “peak” height.
Texture Enhancements and Flavor Variations
To take this cake to a more “adult” flavor profile, try adding a tablespoon of espresso powder to the dry cake mix. The coffee doesn’t make the cake taste like mocha; instead, it intensifies the chocolate notes and provides a bitter backbone to the sweet caramel. It’s a simple trick that makes a box mix taste like it came from a high-end bakery.
You can also experiment with the crunch factor. While toffee is the classic choice, toasted pecans or a sprinkle of smoked sea salt on top can add a savory element that balances the richness. If you want a deeper flavor, use a dark chocolate cake mix instead of the standard milk chocolate version.
Make-Ahead Strategies and Storage Logistics
This is one of those rare desserts that actually tastes better the next day. As the cake sits in the fridge, the caramel and chocolate flavors have more time to meld, and the moisture redistributes for an even better mouthfeel. It will stay fresh and “anti-soggy” for up to three or four days if stored correctly.
To store the cake without ruining the beautiful whipped topping, stick four or five toothpicks into the cake to act as “tent poles.” Then, loosely drape plastic wrap or foil over the top. This prevents the covering from sticking to the cream and pulling it off when you’re ready to serve.
Expert Tips for Clean Slicing and Presentation
To get those perfect, magazine-quality squares where the caramel pockets are clearly visible, use the “hot knife” technique. Run a sharp chef’s knife under hot water, wipe it dry, and make one clean slice. Wipe the blade clean and reheat it between every single cut. This prevents the whipped topping from dragging into the chocolate layers.
Presentation is all about the final garnish. Wait until the cake is sliced and on the dessert plates before adding the final drizzle of caramel and the toffee bits. This ensures the toffee is at its maximum crunch level when it hits the tongue, providing that essential contrast to the soft, chilled cake.
Recommended Serving Temperatures
This cake is best served chilled, straight from the refrigerator. However, letting a slice sit on the counter for about five minutes before eating allows the caramel to soften just slightly. You don’t want it at room temperature, as the whipped topping will lose its structure, but a tiny bit of “tempering” makes the flavors pop.
Frequently Asked Questions
Can I use homemade whipped cream instead of whipped topping?
You can, but be aware that homemade whipped cream is much less stable than store-bought whipped topping. If you use homemade cream, you must stabilize it with a bit of cream cheese or gelatin, or the weight of the toffee bits will cause the cream to deflate and weep within a few hours.
Can I use a white or yellow cake mix instead?
Yes, you can use other flavors, but the chocolate provides a necessary bitterness that balances the intense sweetness of the caramel and toffee. If you use a yellow cake mix, I recommend adding extra sea salt to the caramel to ensure the dessert isn’t cloyingly sweet.
What if I accidentally poked all the way to the bottom of the pan?
If you’ve poked through to the bottom, you can “plug” the holes by taking a few crumbs from the top of the cake and dropping them into the holes before pouring the caramel. This creates a small buffer that will help soak up the sauce before it hits the pan surface.
Can this cake be frozen for later?
I don’t recommend freezing this specific cake once it’s fully assembled. The caramel doesn’t freeze and thaw well; it tends to expand and then contract, which can cause the cake crumb to become grainy. Additionally, the whipped topping can break down and become watery upon thawing. It’s best enjoyed fresh within four days.
Why did my caramel all stay on top of the cake?
This usually happens if the caramel was too cold or thick when poured, or if the holes were too small. Make sure you use the handle of a wooden spoon (not a fork) and warm the caramel until it reaches a pourable, honey-like consistency. If it’s too thick, it can’t navigate the tight crumb of the cake.
Poke Cake
Course: DessertCuisine: AmericanDifficulty: easy12
servings15
minutes30
minutes385
kcal45
MinutesThis recipe solves the common issue of mushy poke cakes by using a specific cooling time and partial-depth hole technique. The result is a perfectly moist chocolate cake where the caramel stays suspended in the crumb rather than pooling at the base.
Ingredients
1 box chocolate cake mix (plus required water, oil, and eggs)
1 jar (12 ounces) high-quality caramel sauce (thick, dulce de leche style preferred)
1 container (8 ounces) whipped topping, thawed
1 cup toffee bits or crushed honeycomb candy
1/2 teaspoon sea salt
Directions
- Preheat your oven and bake the chocolate cake in a 9×13 inch pan according to the package instructions.
- The Anti-Soggy Secret: Let the cake cool on a wire rack for exactly 10 minutes. If the cake is too hot, the caramel will turn into a thin liquid and run straight to the bottom. If it is too cold, the caramel won’t absorb into the crumb.
- Use the handle of a wooden spoon to poke holes every inch across the cake. To prevent a soggy base, poke the holes only three-quarters of the way down; do not let the spoon handle touch the bottom of the pan.
- Warm the caramel sauce in the microwave for 20-30 seconds until it is pourable but still maintains a thick, honey-like consistency. Stir in the sea salt.
- Slowly pour 3/4 of the caramel over the holes, using a spatula to spread it so it fills the cavities. Reserve the remaining caramel for the final drizzle.
- Refrigerate the cake for at least 2 hours. This “cold-set” step is vital to solidify the caramel inside the crumb so it stays suspended rather than pooling at the base.
- Once chilled, spread the whipped topping in a thick layer over the cake.
- Just before serving, drizzle the remaining caramel over the top and generously pile on the toffee bits or crushed honeycomb to ensure maximum visual height and crunch.
Notes
- The secret to success is letting the cake cool for exactly 10 minutes before poking holes. Ensure you only poke three-quarters of the way down to prevent the caramel from reaching the bottom of the pan.