
Imagine flipping a cake pan and revealing a shimmering, amber-hued mosaic of softened fruit bathed in a buttery glaze. The sight of a perfect Caramelized Apple Upside-Down Cake is enough to make any baker’s heart skip a beat, but the fear of the fruit sticking often keeps people from trying. You want that glossy, jewel-toned finish where every apple slice stays exactly where you placed it, rather than a jagged mess left behind in the pan.
The secret to this visual triumph isn’t luck; it’s a specific parchment-locking technique that creates a fail-safe barrier between the sugar and the metal. By combining a precise butter-to-sugar ratio with a strategic cooling window, you ensure the caramel remains fluid enough to release but thick enough to coat the fruit. This method transforms a stressful kitchen moment into a confident, professional reveal every single time.
For a different kind of spiced cake, try this old-fashioned gingerbread cake for a truly comforting bake.
Expertise in upside-down cakes comes down to managing the moisture of the fruit. I’ve found that packing the apple wedges in a tight, overlapping spiral prevents the cake batter from seeping underneath the fruit. When the batter stays on top, it pushes the apples into the caramel, creating a concentrated layer of flavor that won’t budge when you flip the pan.
The Physics of a Perfect Pan Release
Success with this cake relies on understanding how sugar behaves when it meets heat and metal. As the butter and brown sugar melt together, they form a concentrated syrup that undergoes a mild stage of caramelization. Without a barrier, this sticky syrup can find microscopic imperfections in your cake pan, creating a vacuum-like suction that refuses to let go once the cake is baked.
The parchment paper acts as a physical disruptor to this suction. By greasing both the pan and the paper, you create a slick surface that allows the caramel to glide. However, the most critical factor is the 10-minute cooling window. If you flip the cake immediately after it leaves the oven, the caramel is too thin and watery, which might cause the fruit to slide off the sides of the cake.
For a consistently smooth release, consider the easy pan trick in this moist chocolate bundt cake.
Conversely, if you wait too long, the sugar begins to crystallize and set like glue. At the 10-minute mark, the cake has regained enough structural integrity to be moved, but the caramel is still in a warm, fluid state. This timing ensures that when you lift the pan, the parchment peels away cleanly, leaving the glossy glaze perfectly intact on the fruit’s surface.
Essential Components for Caramelized Apple Upside-Down Cake
Quality ingredients are the backbone of this recipe, and their temperature is just as important as their grade. You must use room temperature eggs and milk to ensure a proper emulsion. When cold liquids hit creamed butter, they cause the fats to seize, resulting in a curdled batter and a dense, uneven crumb. Room temperature ingredients blend smoothly, trapping air that expands in the oven for a light, airy texture.
Unsalted butter is the preferred choice here because it allows you to control the salt levels precisely. Since we add sea salt to the caramel topping, using salted butter could make the glaze unpleasantly sharp. Light brown sugar is the hero of the topping; it contains just enough molasses to provide a deep, butterscotch flavor without the heavy, dark color that dark brown sugar would produce.
For the flour, standard all-purpose provides the necessary protein structure. This cake needs to be sturdy enough to support a heavy layer of caramelized fruit without collapsing. While cake flour might seem tempting for a soft bite, it often lacks the strength to hold the weight of the apples, leading to a soggy middle. Stick with all-purpose for the best structural results.
Selecting the Best Apple Varieties
Not all apples are created equal when it comes to the high heat of the oven. You need a “firm-flesh” variety that maintains its shape rather than dissolving into applesauce. Granny Smith apples are a classic choice because their high acidity cuts through the sweetness of the caramel, providing a bright contrast. They stay remarkably crisp even after 45 minutes of baking.
Honeycrisp is another fantastic option if you prefer a slightly sweeter profile. These apples have a unique cellular structure that makes them exceptionally crunchy, and they hold up beautifully under the weight of the batter. Avoid soft varieties like McIntosh or Red Delicious; these apples have too much moisture and a delicate cell structure, which will turn to mush and ruin the aesthetic of your fruit spiral.
The Role of Leavening Agents and Flour
The interaction between baking powder and the acidity in the batter is what gives this cake its lift. As the cake bakes, the baking powder releases carbon dioxide gas, which gets trapped by the gluten network in the all-purpose flour. This creates a sturdy yet tender crumb that can handle the moisture migrating from the apples during the baking process.
Because we are using the creaming method, the flour also works to stabilize the air bubbles we’ve beaten into the butter. This structural support is vital because an upside-down cake is essentially baked under pressure. The batter has to push upward against the weight of the fruit and caramel, so a strong leavening reaction is non-negotiable for a fluffy result.
Step-by-Step: Preparing the Caramelized Apple Base
Start by melting your butter in a small saucepan over medium heat. Once it’s liquid, whisk in the brown sugar, cinnamon, and sea salt. You are looking for a specific visual cue: the mixture should be bubbling and slightly thickened, resembling a smooth syrup. If the butter and sugar look separated, keep whisking for another minute until they emulsify into a cohesive caramel.
Pour this mixture immediately into your prepared pan. You want to work quickly before the caramel begins to firm up. When arranging your apple wedges, start from the outside edge and work your way in. Overlap the slices tightly, like shingles on a roof. This tight pattern is functional; it creates a solid floor of fruit that prevents the cake batter from leaking through to the bottom of the pan.
If the batter seeps under the apples, it will bake onto the bottom, and you’ll lose that clean, fruit-forward look. Take an extra minute to ensure there are no large gaps. The cinnamon in the caramel will scent the apples as they bake, infusing them with warmth while the sea salt balances the sugar’s intensity.
Mixing the Aerated Cake Batter
The secret to a bakery-quality crumb lies in the creaming process. You should beat the softened butter and granulated sugar for at least three full minutes. You’ll notice the mixture transform from a gritty, yellow paste into a pale, almost white, fluffy cloud. This step incorporates millions of tiny air pockets that are essential for a light cake.
When adding your eggs, do so one at a time. This allows the fats and liquids to bond properly. If you dump them in all at once, the batter may break. Once you move to the dry ingredients, use the “alternating” technique. Add a third of the flour, then half the milk, and repeat, ending with the flour. This prevents the batter from becoming too thin or too thick at any one point.
Be extremely careful not to overmix once the flour is added. You only want to mix until the white streaks disappear. Overworking the batter develops too much gluten, which will turn your light, tender cake into something tough and bread-like. Use a gentle hand or a low mixer speed for this final stage.
Baking and the Critical 10-Minute Window
As the cake bakes at 350°F, the caramel underneath the apples will bubble up the sides of the pan. This is perfectly normal and actually helps season the edges of the cake. You’ll know it’s done when the top is a deep golden brown and a toothpick comes out clean. The aroma of toasted sugar and warm apples will likely fill your entire kitchen.
Once you pull it out, set a timer for exactly 10 minutes. This is the most important step in the entire process. While you wait, find a large plate with a slight rim. A rimmed plate is essential because it will catch any stray caramel juices that might run off during the flip, preventing a sticky mess on your counter.
When the timer goes off, place the plate over the pan, take a deep breath, and flip it in one confident motion. Don’t rush to lift the pan! Let it sit inverted for about 30 seconds. This allows gravity to pull every last drop of that delicious caramel down onto the cake. Then, slowly lift the pan and peel back the parchment paper to reveal your masterpiece.
Troubleshooting Common Baking Obstacles
If you find that your caramel has leaked out of the pan during baking, don’t panic. This usually happens if the apple slices weren’t packed tightly enough or if the pan was slightly too small. Simply place a baking sheet on the rack below the cake pan next time to catch any drips. The cake itself will still taste wonderful.
If the center of your cake feels soft while the edges are getting too dark, tent the pan loosely with aluminum foil for the last 10 minutes of baking. This reflects heat away from the surface while allowing the middle to finish cooking. It’s a common fix for cakes that have a high moisture content from fruit.
In the rare event that an apple wedge sticks to the parchment paper when you peel it off, just use a small knife to gently slide it back into its spot on the cake. Because the caramel is still warm and tacky, the apple will adhere perfectly, and no one will ever know it moved. The glaze is very forgiving in this regard.
Flavor Variations and Ingredient Swaps
While cinnamon is the traditional pairing for apples, you can easily elevate the flavor profile with different spices. Adding a half-teaspoon of ground cardamom or ginger to the dry ingredients provides a sophisticated, floral warmth. You could even add a pinch of ground cloves for a deeper, more autumnal vibe that pairs excellently with the caramel.
What Else to Try
Continue your dessert exploration with these complementary baked goods.
- For a lighter, airy apple treat, consider making an Apple Dutch Baby, known for its impressive puff.
- If you’re in the mood for something breakfast-inspired, these Fluffy Diner-Style Pancakes offer a comforting, pillowy texture.
For a tangier, richer crumb, try substituting the half-cup of milk with an equal amount of sour cream or full-fat Greek yogurt. This adds a slight acidity that complements the sweet apples and creates an incredibly moist texture. If you want to experiment with different fruits, pears or even quince work beautifully in this format, provided they are firm and ripe.
If you want to add a bit of crunch, sprinkle a handful of toasted, chopped pecans or walnuts over the caramel before you lay down the apple slices. The nuts will become embedded in the glaze, adding a savory element and a wonderful textural contrast to the soft fruit and tender cake.
Optimal Serving and Storage Practices
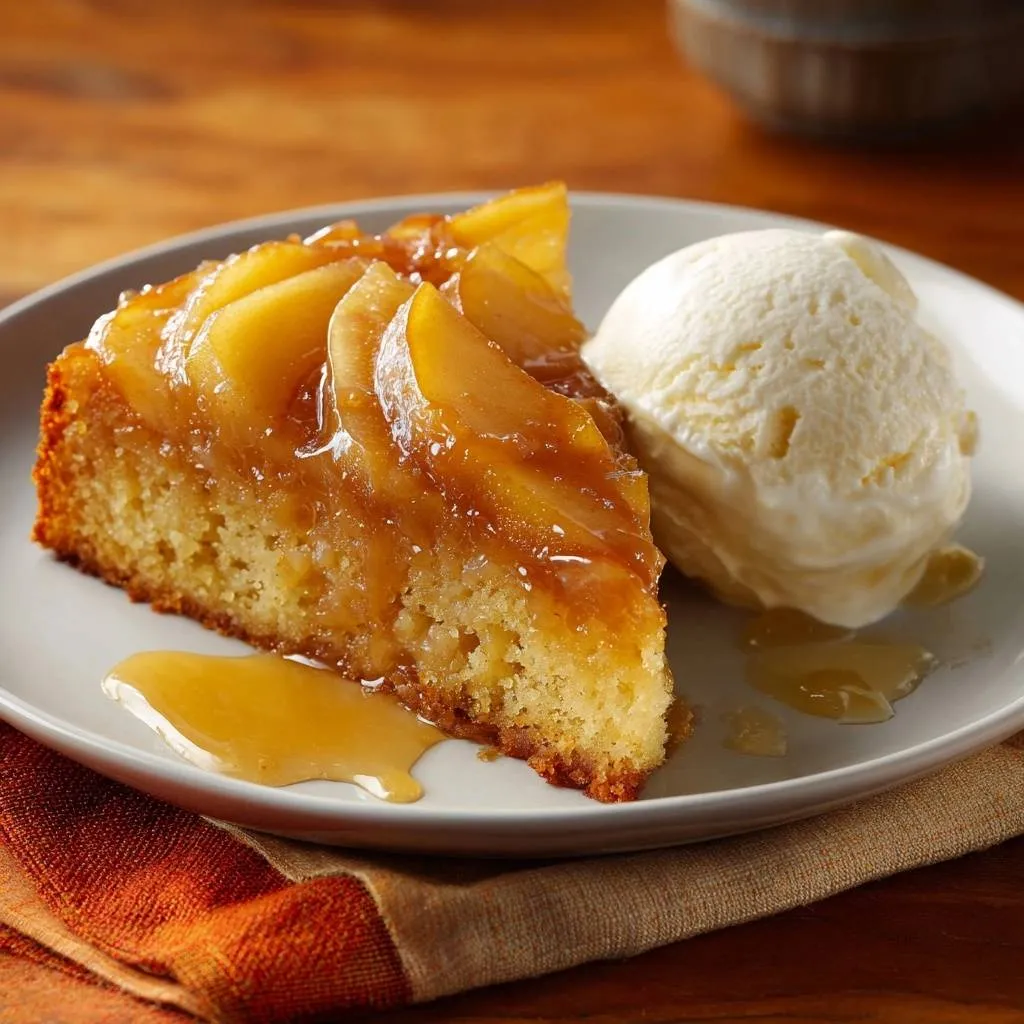
This cake is at its absolute best when served warm. The contrast between the hot, buttery caramel and a cold scoop of vanilla ice cream is a classic for a reason. The ice cream melts slightly, creating a creamy sauce that mingles with the fruit juices. If you prefer, a dollop of lightly sweetened whipped cream also works beautifully.
If you have leftovers, store them in an airtight container at room temperature for up to 24 hours. I don’t recommend refrigerating the cake immediately, as the cold air can cause the caramel to become grainy and the cake to dry out. If you need to keep it longer than a day, then move it to the fridge, but be sure to reheat it before serving.
To reheat a slice, simply pop it in the microwave for 15-20 seconds. This short burst of heat is enough to loosen the caramel and restore that “just-baked” silkiness. It makes for a fantastic breakfast the next morning with a hot cup of coffee.
Expert Tips for Success
Can I use a cast iron skillet instead of a cake pan?
Yes, a 9-inch cast iron skillet works wonderfully for this recipe. Cast iron retains heat exceptionally well, which can lead to even deeper caramelization on the apples. Just make sure your skillet is well-seasoned, and you should still use the parchment paper circle at the bottom to guarantee a clean release.
Why did my caramel turn out grainy?
Grainy caramel usually happens if the sugar didn’t fully dissolve in the butter before baking, or if the mixture was stirred too vigorously at a high temperature. To prevent this, whisk the butter and sugar over medium-low heat until you no longer see individual grains of sugar. Adding a tiny pinch of cream of tartar can also help prevent crystallization.
Can I make this gluten-free?
You can substitute the all-purpose flour with a high-quality 1-to-1 gluten-free flour blend. Look for a blend that contains xanthan gum, as this provides the elasticity and structure that gluten-free bakes often lack. The texture may be slightly more delicate, so be extra careful during the 10-minute cooling and flipping process.
How do I prevent the apples from browning while I prep the batter?
If you are a slow prepper, toss your sliced apples in a bowl with a tablespoon of lemon juice. The acidity prevents oxidation, keeping the apples looking fresh. However, since these apples will be covered in cinnamon and brown sugar caramel, a little bit of browning won’t be visible in the final product anyway.
Can I use granulated sugar for the topping if I’m out of brown sugar?
You can use granulated sugar, but you will lose that deep, molasses-driven flavor. If you must use white sugar, add an extra half-teaspoon of vanilla or a tiny bit more cinnamon to compensate for the loss of depth. The color will also be much lighter, more of a golden yellow than a deep amber.
How should I store leftovers and does it freeze well?
Store leftovers in an airtight container at room temperature for up to 24 hours. For longer storage, refrigerate for up to 3 days. This cake does not freeze particularly well; the apples tend to release too much moisture upon thawing, which can make the cake base soggy and the caramel topping watery.

Caramelized Apple Upside-Down Cake
Course: DessertCuisine: AmericanDifficulty: medium8
servings20
minutes45
minutes410
kcal65
MinutesThis recipe solves the common problem of fruit sticking to the pan by using a specialized caramel base and parchment paper technique. The result is a moist cake topped with perfectly caramelized Honeycrisp or Granny Smith apples.
Ingredients
For the Topping:
6 tablespoons unsalted butter
3/4 cup light brown sugar, packed
2 large Honeycrisp or Granny Smith apples, peeled and sliced into 1/4-inch wedges
1/2 teaspoon ground cinnamon
1/4 teaspoon sea salt
For the Cake:
1 1/2 cups all-purpose flour
1 1/2 teaspoons baking powder
1/2 teaspoon salt
1/2 cup unsalted butter, softened
3/4 cup granulated sugar
2 large eggs, room temperature
1 teaspoon vanilla extract
1/2 cup whole milk, room temperature
Vanilla ice cream for serving
Directions
- Preheat your oven to 350°F (175°C). To solve the sticking problem, cut a circle of parchment paper to fit the exact bottom of a 9-inch round cake pan. Grease the pan sides with butter, place the parchment in the bottom, and grease the top of the parchment. This creates a fail-safe barrier.
- In a small saucepan over medium heat, melt the 6 tablespoons of butter. Stir in the brown sugar, cinnamon, and sea salt. Whisk for 1-2 minutes until the sugar is dissolved and the mixture is bubbling and slightly thickened. Pour this caramel immediately over the parchment paper in the cake pan, spreading it to the edges.
- Arrange the apple wedges in a tight, overlapping circular pattern on top of the caramel. Packing them tightly prevents the cake batter from seeping underneath the fruit, which is the main cause of sticking.
- In a medium bowl, whisk together flour, baking powder, and salt.
- In a large bowl, cream the softened butter and granulated sugar with an electric mixer until light and fluffy (about 3 minutes). Add eggs one at a time, beating well after each addition, then stir in the vanilla.
- Gradually add the dry ingredients to the butter mixture, alternating with the milk (start and end with dry). Mix until just combined; do not overmix or the cake will be tough.
- Carefully spoon the batter over the apples, spreading it gently with a spatula so you do not disturb the fruit pattern.
- Bake for 40 to 45 minutes, or until the top is golden brown and a toothpick inserted into the center comes out clean.
- Let the cake cool in the pan for exactly 10 minutes. This is the “sweet spot” where the caramel is still fluid but the cake has gained enough structure to hold together.
- Run a thin knife around the edge of the pan. Place a large rimmed plate over the pan and flip confidently. Let the pan sit for 30 seconds to allow the caramel to drip down, then lift the pan and gently peel away the parchment paper. Serve warm with a generous scoop of vanilla ice cream.
Notes
- Cool the cake for exactly 10 minutes before flipping to ensure the caramel is fluid enough to release but the cake is structured enough to hold its shape. Serve warm with vanilla ice cream.