Nothing ruins a Mexican-inspired dinner faster than a plate of mushy, disintegrated corn tortillas. You’ve likely experienced it before: you spend an hour prepping, only to have the enchiladas turn into a soggy paste the moment they hit the sauce. It’s a common frustration that keeps many home cooks from attempting a restaurant-style platter at home.
The secret to a truly professional Cheesy Beef Enchilada Platter isn’t just in the seasoning; it’s in the structural integrity of the tortilla itself. By mastering a specific “Anti-Soggy Hack,” you can ensure every bite maintains a distinct, satisfying chew. This method creates a barrier that stands up to heavy red sauce and molten cheese without losing its shape.
The real trick to this recipe is the flash-fry. Most people skip this step because they think it adds too much work or unnecessary fat, but it’s actually the only way to waterproof your corn meal. A quick five-second dip in hot oil changes the molecular structure of the tortilla, making it pliable enough to roll without cracking and tough enough to resist the liquid in the sauce.
The Science of Structural Integrity in Corn Tortillas
Corn tortillas are made through a process called nixtamalization, where dried corn is soaked in an alkaline solution. This process breaks down the corn’s hemicellulose, making the dough pliable but also highly absorbent. When you pour an acidic, tomato-based red sauce over a raw corn tortilla, the liquid immediately begins to dissolve those bonds, leading to that dreaded “mush” factor.
Unlike flour tortillas, which rely on gluten for strength, corn tortillas rely on starch. Therefore, when they get wet, they behave more like a sponge than a wrap. If you don’t treat the surface of the tortilla before assembly, the sauce will penetrate the center of the roll within minutes of entering the oven.
Understanding this behavior is key to a successful platter. A “Platter” style presentation differs from a standard casserole because each enchilada must remain distinct and lift away from the dish cleanly. You aren’t making a lasagna; you’re making individual, sauce-drenched masterpieces that need to hold their own next to piles of rice and beans.
Why Flash-Frying Creates a Moisture Barrier
When you pass a tortilla through hot oil, a process called polymerization begins on the surface. The heat causes the starches to tighten and the oil to fill the microscopic pores of the corn meal. This creates a hydrophobic, or water-repelling, layer that acts as a shield against the moisture in your beef filling and enchilada sauce.
You aren’t looking to turn the tortilla into a hard taco shell. Instead, you want it to become “leathery” and blistered. This texture change is your insurance policy. It ensures that even if you have leftovers the next day, the tortilla will still have a bite to it rather than dissolving into the sauce.
Comparing Oil-Dipping vs. Dry-Toasting Methods
Some recipes suggest dry-toasting tortillas in a cast-iron skillet or steaming them in a microwave to make them pliable. While these methods make the tortillas easier to roll, they do absolutely nothing to prevent sogginess. In fact, steaming actually introduces more moisture into the corn, making it even more prone to falling apart.
Oil is superior because it adds a layer of fat that carries flavor while providing that essential moisture barrier. In a heavy Cheesy Beef Enchilada Platter, the oil also helps the tortilla “fry” slightly while it bakes in the oven. This results in a much richer mouthfeel and a more authentic flavor profile that dry-toasting simply cannot replicate.
Essential Components for the Beef Filling
The foundation of a great enchilada is a savory, well-balanced beef filling. For this platter, I highly recommend using lean ground beef, specifically a 90/10 or 93/7 blend. Since we are adding cheese and sauce directly into the meat, using a higher fat content beef will result in a greasy pool at the bottom of your baking dish.
You want the beef to be crumbly and fine, not in large chunks. This ensures that every inch of the tortilla is filled evenly, preventing air pockets that can cause the enchilada to collapse. Using lean meat also allows the flavors of the spices to shine through without being masked by heavy tallow.
Selecting the Right Aromatics and Spices
Flavor starts with the aromatics. You must cook your finely diced onions and minced garlic until they are completely translucent before adding the beef. If the onions are still crunchy, they will release water inside the rolled tortilla, which can steam the corn from the inside out and ruin your “Anti-Soggy” efforts.
The spice blend is where the warmth comes from. Cumin provides an earthy base, while smoked paprika adds a hint of “charred” flavor that mimics a wood-fired grill. Chili powder acts as the bridge between the two. Always toast your spices with the meat for a minute before adding any liquid to wake up the volatile oils and deepen the aroma.
The Role of Binder: Sauce and Cheese Integration
One of the biggest mistakes home cooks make is putting dry, browned beef inside a tortilla. This leads to the filling falling out the ends the moment you take a bite. To fix this, you need a binder. By stirring a half-cup of enchilada sauce and a handful of cheese directly into the hot beef, you create a cohesive mixture.
This “glue” keeps the beef in place and ensures the inside of the enchilada is just as flavorful as the outside. It also provides a secondary moisture barrier from the inside. As the cheese melts within the beef, it coats the inner wall of the tortilla, further protecting it from the sauce you’ll pour over the top later.
Step-by-Step: Executing the Anti-Soggy Technique
To start the flash-fry, heat about three tablespoons of vegetable oil in a small skillet over medium heat. You don’t need a deep fry; just enough to coat the bottom. Use long metal tongs to grip the tortilla and gently slide it into the oil. It should sizzle immediately but not pop violently.
Count to five, flip it, and count to five again. You’ll see small bubbles or blisters forming on the surface. This is exactly what you want. Immediately move the tortilla to a plate lined with paper towels to blot away the excess oil. The tortilla should feel soft and floppy, almost like a piece of warm silk, but with a slightly toughened exterior.
Preparing the Baking Vessel and Base Layer
Grab a standard 9×13 baking dish. Before you start rolling, spread a very thin layer of enchilada sauce across the bottom. This isn’t for flavor as much as it is for lubrication. It prevents the tortillas from sticking to the glass or ceramic, allowing you to lift them out perfectly when it’s time to serve.
Be careful not to overdo it here. If you put a half-inch of sauce on the bottom, you’re essentially boiling the bottom of your enchiladas. A light “paint job” of sauce is all you need. This keeps the base of the platter clean and prevents the bottom of the tortillas from becoming waterlogged during the 20-minute bake.
The Dip, Fill, and Roll Sequence
Set up an assembly line: your stack of fried tortillas, a shallow bowl of enchilada sauce, your beef mixture, and your baking dish. Dip a tortilla into the sauce to coat both sides lightly. This ensures the flavor is baked into the corn itself. Lay it flat, add about two tablespoons of beef in a line down the center, and roll it tight.
Place the roll seam-side down in the dish. This is crucial! The weight of the filling keeps the seam closed so you don’t need toothpicks. Pack them in like sardines. When they are squeezed tightly together, they support each other’s shape and prevent the sauce from seeping into the sides of the rolls too quickly.
Optimizing Heat for the Perfect Cheese Melt
Preheat your oven to 375 degrees Fahrenheit. This temperature is the “sweet spot” for enchiladas. It is hot enough to bubble the sauce and melt the cheese rapidly, but not so hot that it burns the exposed tips of the tortillas before the center is heated through. You want a fast, intense heat to finish the dish.
When you top the dish with cheese, focus on the center of the rolls. Leave the very ends of the tortillas exposed. These tips will crisp up slightly in the oven, providing a wonderful textural contrast to the cheesy, saucy middle. This “exposed tip” look is also a hallmark of a professional restaurant platter.
Why Monterey Jack and Mexican Blends Excel
For the ultimate melt, Monterey Jack is king. It has a high moisture content and a low melting point, which means it turns into a creamy, stretchy blanket rather than a greasy slick. If you want a bit more punch, a Mexican blend that includes Asadero or Queso Quesadilla cheese adds a lovely tang and even better “pull.”
Avoid using pre-shredded cheddar exclusively. Cheddar has a tendency to break and release oil when heated at high temperatures, which can make your platter look oily. A blend gives you the best of both worlds: the flavor of cheddar and the superior melting physics of Jack or Asadero.
Assembling the Full Enchilada Platter Presentation
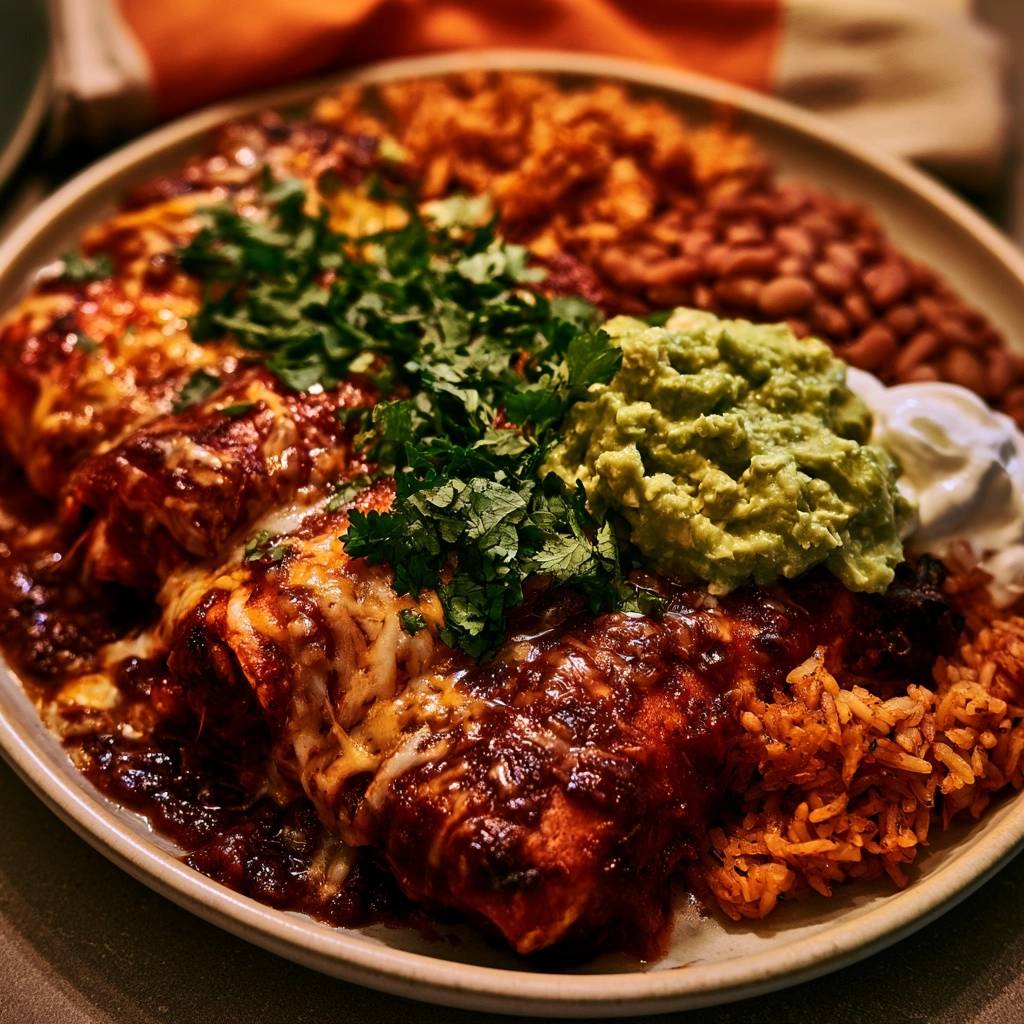
Presentation is what turns a simple meal into a “platter.” Once the dish comes out of the oven, let it sit for about five minutes. This allows the cheese to set slightly so it doesn’t slide off when you plate it. Use a wide spatula to lift two or three enchiladas at a time onto a large serving plate.
The goal is to create a “landscape” of food. The enchiladas are the star, but the sides provide the balance. By plating everything together, the juices from the enchiladas can mingle slightly with the rice, creating a cohesive flavor experience that feels much more intentional than serving sides in separate bowls.
Preparing Spanish Rice and Pinto Beans
Your Spanish rice should be fluffy and dry, not sticky. If the rice is too wet, it will bleed into the enchilada sauce and create a messy plate. I like to toast the dry rice in a little oil before adding liquid to ensure each grain stays separate. This provides a nutty backbone to the meal.
For the pinto beans, make sure they are well-drained. If you’re using canned beans, rinse them thoroughly to remove the metallic-tasting canning liquid. Simmer them with a pinch of cumin and salt just until warm. Placing a neat mound of beans next to the rice creates a beautiful color contrast against the red sauce and yellow cheese.
The Importance of Fresh Garnishes
Garnishes aren’t just for looks; they provide a necessary temperature and flavor contrast. The beef and cheese are rich and hot, so a large scoop of cold, chunky guacamole and a dollop of sour cream are essential. They act as a palate cleanser between bites of the spicy beef.
Don’t be shy with the cilantro. A heavy layer of freshly chopped cilantro adds a bright, citrusy pop that cuts through the heaviness of the melted cheese. It brings a “fresh from the garden” aroma to the table the moment the platter is served, making the whole meal feel lighter and more vibrant.
Troubleshooting Common Enchilada Failures
If your tortillas crack while you are rolling them, they likely weren’t in the oil long enough or the oil wasn’t hot enough. The oil needs to be around 350 degrees Fahrenheit to properly soften the corn fibers. If a tortilla does crack, don’t panic! Just place it in the dish anyway; the cheese and sauce will hide the imperfection once baked.
If your sauce tastes too acidic or “tinny,” it’s likely the brand of canned sauce. You can easily fix this by stirring in a tiny pinch of sugar or a teaspoon of butter into the sauce before using it. The fat or sugar will neutralize the sharp acidity and give the sauce a more rounded, homemade flavor profile.
Preventing Excess Grease in the Baking Dish
Excess grease usually comes from two places: the beef or the cheese. To prevent this, always drain your beef in a colander after browning it. Even “lean” beef can release a surprising amount of liquid. Additionally, don’t over-apply the cheese. While we love a cheesy platter, too much will overwhelm the dish with oil as it melts.
Another pro tip is to blot the tortillas thoroughly after flash-frying. You want the oil *in* the tortilla, not dripping off it. A quick press between paper towels ensures you get the structural benefits of the fry without the greasy aftertaste.
Adjusting Texture for Different Tortilla Brands
Not all corn tortillas are created equal. Artisanal or “thick-cut” tortillas may need 8-10 seconds in the oil to become pliable, while thin, mass-produced grocery store brands might only need 3 seconds. Watch for the “wiggle.” If you lift the tortilla with tongs and it bends easily without snapping, it’s ready.
If you are using blue corn tortillas, be aware that they tend to be heartier and drier than yellow or white corn. They may require a slightly longer soak in the red sauce during the “dip” phase to ensure they don’t turn out too chewy after baking.
Make-Ahead Strategies and Storage Logistics
You should never store fully assembled, unbaked enchiladas in the fridge overnight. Even with the flash-fry hack, the sauce will eventually win the battle against the tortilla if left for 12 hours. The result will be a mushy mess that won’t hold its shape in the oven.
Instead, prep your components separately. Brown the beef, shred the cheese, and even flash-fry the tortillas ahead of time. Store the fried tortillas in a zip-top bag with parchment paper between them. When you’re ready for dinner, you can assemble and bake the platter in under 30 minutes with zero loss in quality.
Reheating Without Losing the Texture
The microwave is the enemy of the corn tortilla. It turns the edges rubbery and the centers soggy. For the best results, reheat leftovers in the oven at 350 degrees Fahrenheit for about 10-15 minutes. This helps re-crisp the tortilla tips and keeps the cheese from becoming chewy.
If you’re in a hurry, an air fryer is a fantastic alternative. Place a single enchilada on a piece of foil and air fry at 320 degrees for 5 minutes. This mimics the original baking environment and preserves that “Anti-Soggy” texture we worked so hard to achieve.
Expert Tips for Flavor Customization
If you want to add more depth to your red sauce, try stirring in a teaspoon of unsweetened cocoa powder. It won’t make the sauce taste like chocolate, but it adds a mole-like complexity and a dark, rich color. A tiny pinch of cinnamon can also provide an unexpected “warmth” that pairs beautifully with the beef.
You can also swap the protein while keeping the same structural techniques. Shredded chicken or even a mix of black beans and sweet potatoes work perfectly here. Just remember to always use a binder (sauce and cheese) inside the filling to keep the platter cohesive and professional.
How do I store leftover beef enchiladas?
Store leftovers in an airtight container in the refrigerator for up to 3 days. For the best texture, avoid stacking them on top of each other, which can cause them to flatten. While you can freeze them, the texture of the corn tortilla may become slightly grainier upon thawing, so fresh is always best.
Why did my tortillas fall apart even after frying?
This usually happens if the tortillas were dipped in the sauce for too long. You want a quick “in and out” dip just to coat the surface. If the tortilla sits in the sauce bowl for more than a second or two, it will begin to absorb too much liquid before it even hits the oven, defeating the purpose of the oil barrier.
Can I use flour tortillas instead of corn?
You can, but the texture will be significantly different. Flour tortillas contain gluten and will become soft and doughy rather than having the slight “bite” of corn. If using flour, skip the flash-frying step entirely, as flour tortillas will just soak up the oil and become greasy rather than forming a barrier.
What is the best substitute for Monterey Jack cheese?
If you can’t find Monterey Jack, Mild Provolone or Muenster are excellent substitutes because they have similar melting points and a mild flavor profile. Avoid using pre-shredded “Taco” blends in a bag if possible, as they are often coated in potato starch to prevent clumping, which can interfere with a smooth melt.
How can I make the red sauce less spicy?
If your enchilada sauce has too much kick, you can mellow it out by whisking in a little bit of sour cream or heavy cream before pouring it over the tortillas. The fats in the dairy will bind with the capsaicin in the peppers, significantly lowering the heat level while adding a lovely creaminess to the platter.
Can I make this recipe gluten-free?
Yes! Most corn tortillas are naturally gluten-free, but always check the packaging to ensure they aren’t processed in a facility with wheat. Additionally, ensure your canned enchilada sauce is labeled gluten-free, as some brands use flour as a thickener. The rest of the ingredients (beef, cheese, rice, beans) are naturally gluten-free.
Cheesy Beef Enchilada Platter
Course: Main CourseCuisine: Mexican-AmericanDifficulty: easy4
servings20
minutes25
minutes45
Minutes720
kcalMexican-American
Ingredients
12 corn tortillas
1 pound lean ground beef
1 small onion, finely diced
2 cloves garlic, minced
2 ½ cups red enchilada sauce (divided)
3 cups shredded Monterey Jack or Mexican blend cheese
1 cup cooked Spanish rice
1 cup whole pinto beans (drained)
1/2 cup chunky guacamole
1/4 cup sour cream
1 cup fresh cilantro, roughly chopped
3 tablespoons vegetable oil (for frying)
1 tablespoon chili powder
1 teaspoon cumin
1/2 teaspoon smoked paprika
Salt and pepper to taste
Directions
- In a large skillet over medium-high heat, brown the ground beef with the diced onions and garlic. Season with chili powder, cumin, smoked paprika, salt, and pepper. Drain any excess fat. Stir in 1/2 cup of the enchilada sauce and 1/2 cup of cheese to the meat mixture to create a cohesive, moist filling. Cook until no pink remains and it reaches 160°F (71°C).
- The Anti-Soggy Hack: Heat 3 tablespoons of oil in a small skillet over medium heat. Using tongs, pass each corn tortilla through the hot oil for about 5-8 seconds per side. The tortilla should become pliable and slightly blistered but not crispy. Drain on paper towels. This oil barrier prevents the sauce from penetrating the corn meal and turning it into mush.
- Preheat your oven to 375 degrees F. Lightly coat the bottom of a 9×13 baking dish with a thin layer of enchilada sauce.
- To assemble, dip a flash-fried tortilla into the remaining sauce to coat both sides. Fill the center with a generous portion of the beef mixture, then roll tightly. Place seam-side down in the baking dish, packing them closely together.
- Pour the remaining sauce heavily over the center of the rolled tortillas, leaving the very tips of the tortillas exposed. Cover the sauce-coated sections with the remaining 2 1/2 cups of shredded cheese.
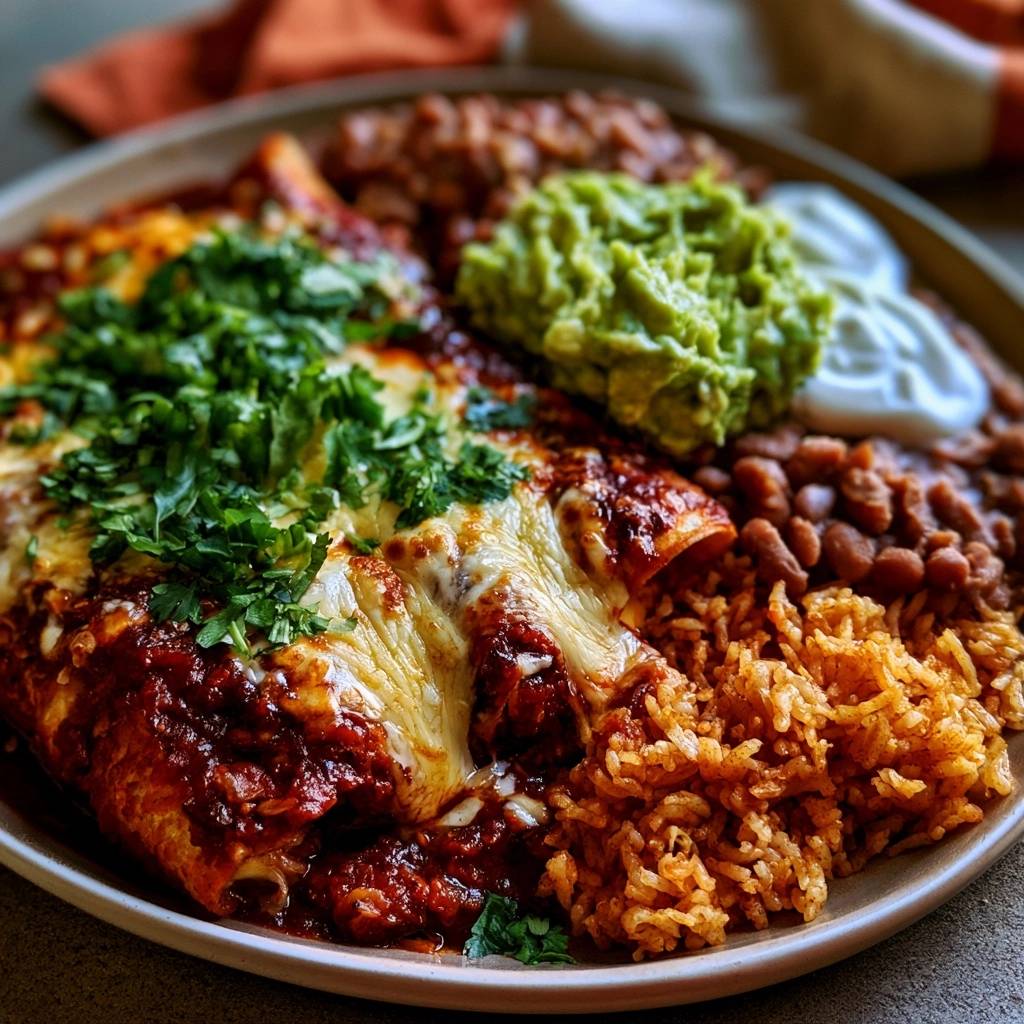
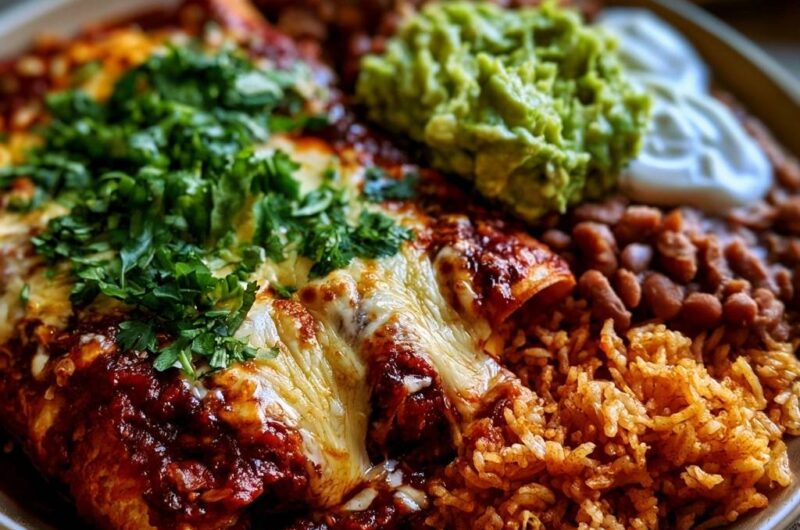
- Bake for 15 to 20 minutes until the cheese is fully melted and shows golden-brown toasted spots, as seen in the image.
- Serve the enchiladas immediately on a platter. Plate with a generous mound of Spanish rice and pinto beans. Top the enchiladas with a very heavy layer of fresh chopped cilantro. Finish with a large scoop of chunky guacamole and a side of sour cream.
Notes
- The flash-fry technique creates a moisture barrier that prevents the corn tortillas from becoming mushy when the sauce is added. For best results, leave the tips of the tortillas exposed when saucing to achieve a slight crunch.