Most vegetable bakes suffer from a common, unappetizing fate: they end up sitting in a pool of their own juices. When you roast butternut squash at low temperatures, the cell walls collapse slowly, releasing water that steams the vegetable rather than browning it. This results in a mushy texture that can’t support the weight of toppings, let alone a towering stack of melted cheese and fruit.
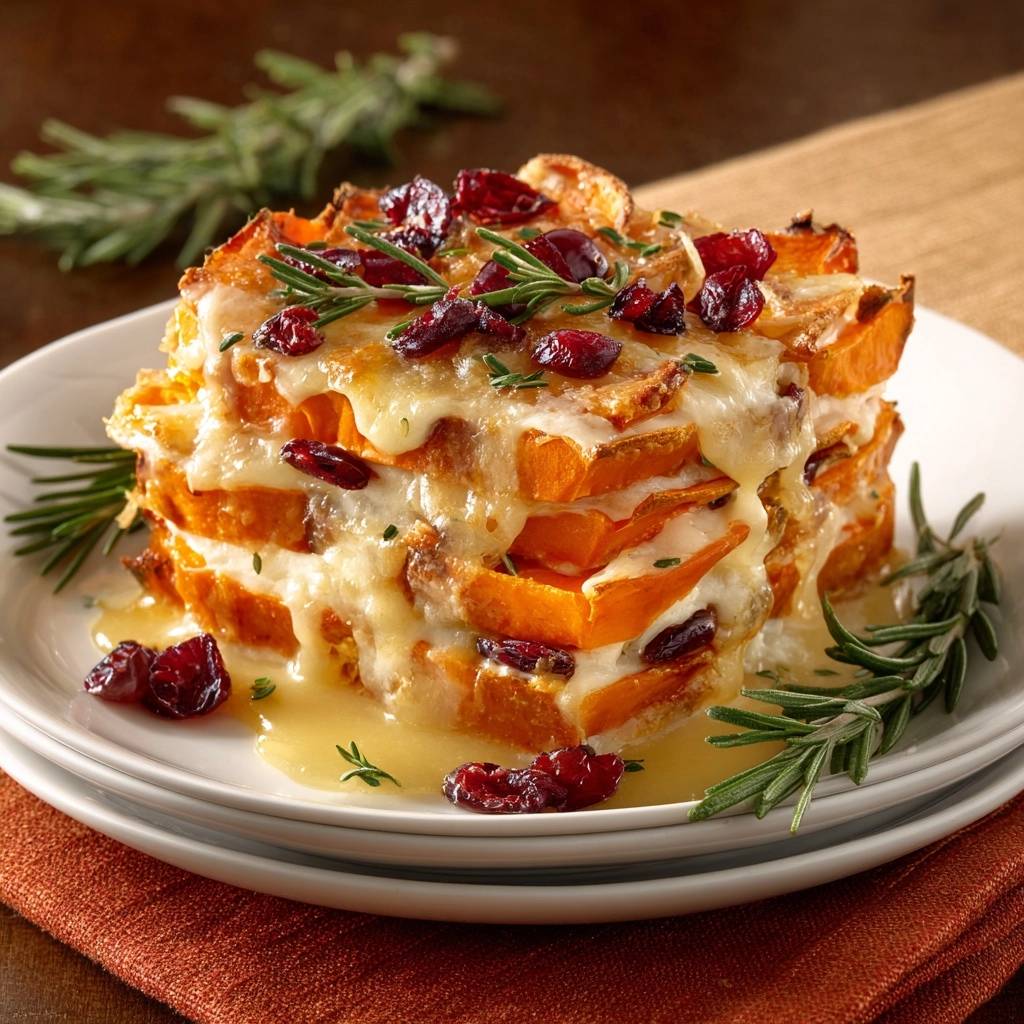
The Cheesy Roasted Butternut Squash Stack is designed with an “Anti-Soggy Bottom” philosophy. By utilizing high-heat roasting and a moisture-wicking layering method, we transform a humble root vegetable into a structural masterpiece. You get a firm, caramelized base that holds its shape, providing a perfect contrast to the gooey, molten Gruyere cascading down the sides.
The secret to this architectural success is the initial sear. We roast the squash rounds at a high temperature before the cheese ever touches the pan. This creates a protective, browned crust that locks in the natural sugars while allowing internal moisture to evaporate. When you finally assemble the stacks, the squash is already cooked to perfection, meaning the second trip to the oven is purely for melting the cheese into a golden, bubbly crown.
The Science of Preventing Mushy Roasted Squash
Butternut squash is packed with water, which is the primary enemy of a crisp roast. When heat is applied, the water inside the squash cells expands and tries to escape. If the oven is too cool, that water lingers on the surface, effectively boiling the squash in its own skin. This is why many home cooks end up with a soft, bland side dish instead of a vibrant, flavorful one.
To combat this, we crank the oven to 425°F (218°C) to trigger the Maillard reaction. This chemical reaction between amino acids and reducing sugars creates that deep brown color and savory, toasted flavor we crave. At this high heat, the moisture on the surface evaporates instantly upon contact with the hot air. This creates a firm exterior barrier that maintains the structural integrity of the round, even after it’s stacked four layers high.
For even deeper flavor, explore how to achieve perfectly caramelized butternut squash.
Furthermore, the high heat caramelizes the natural starches in the squash. This doesn’t just improve the texture; it intensifies the sweetness. By the time you add the salty cheese and tart cranberries, the squash has developed a complex, nutty profile that can stand up to the bold flavors of the toppings without getting lost in the mix.
Why the “Neck Only” Cut Matters
Uniformity is your best friend when building a vertical dish. The neck of the butternut squash is a solid cylinder of dense, orange flesh without any seed cavities. This allows you to slice perfectly even rounds that cook at the exact same rate. If you use the bulbous bottom, you’ll end up with rings that have thin walls and empty centers, which will collapse under the weight of the cheese.
Using the neck also ensures that every bite has the same ratio of squash to cheese. When the rounds are the same diameter, the heat distributes evenly through the stack. This prevents the common issue where the top of a dish is burnt while the middle remains cold and raw. Save the bulbous end for a soup or a mash where shape doesn’t matter.
Essential Components for the Perfect Squash Stack
While the technique is vital, the ingredients do the heavy lifting for the flavor profile. We use Gruyere or Swiss cheese because of their high fat content and superior melting capabilities. Gruyere, in particular, has a distinct nuttiness that mirrors the earthy tones of the roasted squash. Unlike pre-shredded blends, a block of high-quality Gruyere melts into a smooth, velvety blanket rather than a waxy layer.
The choice of oil and herbs is equally important. Extra virgin olive oil provides a fruity base that helps the salt and pepper adhere to the squash. Fresh rosemary is non-negotiable here. Dried rosemary can often feel like eating pine needles, whereas fresh leaves soften in the oven, releasing aromatic oils that permeate the cheese and the honey glaze.
Selecting the Right Butternut Squash
When you’re at the market, look for a squash that feels heavy for its size. This indicates a high moisture content that hasn’t dried out during storage. The skin should be matte and tan; a shiny skin often means the squash was picked too early and won’t be as sweet. Check the stem as well; it should be firm and dry, not shriveled or moldy.
If you have the time, let your squash sit on the counter for a few days before cooking. As squash ages slightly, the starches begin to convert into sugars. This natural ripening process makes for a much more flavorful roast. Just ensure there are no soft spots or bruises on the skin, as these can lead to rot once the squash hits the high heat of the oven.
The Role of Dried Cranberries and Honey
Balance is the key to any great recipe. The richness of the melted cheese and the savory notes of the rosemary need an acidic or sweet counterpoint to keep the dish from feeling too heavy. Dried cranberries provide a chewy texture and a sharp tartness that cuts right through the fat of the Gruyere. They act like little flavor bombs that wake up your palate between bites of creamy squash.
The honey-butter glaze is the final touch that ties everything together. When you melt honey with a bit of unsalted butter, you create a glossy, umami-rich syrup. Drizzling this over the hot stacks allows it to seep into the crevices of the cheese and pool at the base. It adds a luxurious mouthfeel and a floral sweetness that highlights the caramelized edges of the roasted rounds.
You can achieve a similar glaze with honey glazed roasted carrots for a delightful side.
Step-by-Step: Engineering the Cheesy Roasted Butternut Squash Stack
Building these stacks is a three-phase process that prioritizes texture at every turn. You aren’t just throwing things in a pan; you’re engineering a dish that stays upright and delicious from the oven to the table. It starts with a clean workspace and a very sharp knife to ensure those 1/2 inch rounds are consistent.
Preparation is simple but requires attention to detail. Lining your baking sheet with parchment paper is a must. It prevents the natural sugars in the squash from sticking to the metal, which would tear the caramelized crust when you try to flip them. Once your oven is screaming hot, you’re ready to begin the transformation.
Phase 1: Achieving Deep Caramelization
Arrange your squash rounds on the parchment paper, making sure they don’t touch. This is the “Single Layer Rule.” If the rounds are crowded, the air cannot circulate around them, and they will steam instead of roast. You want the hot air to hit every millimeter of the surface area to dry it out and brown it.
Roast for about 20 to 25 minutes. You are looking for a specific visual cue: the edges should be a deep, dark brown, almost bordering on charred. When you flip them halfway through, you should see a beautiful golden crust on the underside. If they look pale, give them another five minutes. That color is where all the flavor lives.
Phase 2: Building Structural Integrity
Once the rounds are roasted and firm, it’s time to build. Place one round down as your foundation. Sprinkle a pinch of cheese and a few cranberries on top. The cheese acts as “culinary glue,” melting to bond the layers together. Repeat this until your stack is 3 to 4 rounds high.
Don’t get too ambitious with the height. A stack that is five or six rounds high is prone to a structural collapse as the cheese melts and becomes fluid. A 3-round stack is the “sweet spot” for stability and portion sizing. Top the final layer with an extra-generous helping of cheese and the chopped rosemary to create a thick, protective cap.
Phase 3: The Glaze and The Rest
Return the stacks to the oven for a quick 5 to 8 minute blast. You aren’t cooking the squash anymore; you’re just waiting for the cheese to transform into a bubbling, cascading waterfall. Watch through the oven door. As soon as the cheese starts to brown and drip down the sides, pull the tray out.
Immediately drizzle the warm honey-butter glaze over the top. Now comes the hardest part: waiting. You must let the stacks rest for at least 3 minutes. This allows the cheese proteins to firm up just enough to hold the stack together. If you try to move them immediately, the rounds will slide apart like a deck of cards. Patience ensures a perfect presentation.
Troubleshooting Common Squash Roasting Errors
If your squash comes out too soft despite the high heat, it’s likely because the rounds were sliced too thin. Anything less than 1/2 inch will lose its structure quickly. To save the meal, you can serve them as individual rounds rather than stacks. They will still taste incredible, even if they can’t stand tall.
If your cheese is burning before it fully melts, your oven’s heating element might be too close to the tray. Move the rack to the middle position for the second bake. If the honey glaze seems too thick to drizzle, simply pop it back in the microwave for 10 seconds. It should be the consistency of warm maple syrup to properly coat the stacks.
Flavor Variations and Ingredient Swaps
While Gruyere is the gold standard for this dish, you can easily swap it for a sharp white cheddar if you want a bolder, tangier bite. For those who prefer a bit of crunch, adding toasted pecans or walnuts between the layers provides a fantastic textural contrast to the soft squash and melted cheese. The nuts also soak up some of the honey glaze, becoming candied in the process.
If you don’t have honey on hand, maple syrup is an excellent alternative that leans into the autumnal vibes of the dish. For a spicy twist, try adding a pinch of red pepper flakes to the honey-butter mixture. The “hot honey” effect works beautifully with the creamy squash and salty cheese, adding a layer of complexity that surprises the palate.
Optimal Pairings for Roasted Butternut Stacks
These stacks are rich and decadent, so they pair best with main courses that offer a bit of acidity or lightness. A simple roasted chicken with lemon and herbs is a classic choice. The citrus from the chicken cuts through the density of the squash and cheese, creating a balanced meal that doesn’t feel overly heavy.
Round Out Your Meal
Explore these complementary dishes that go wonderfully with your roasted squash creation.
- If you enjoy hearty grain bowls, you’ll appreciate the Roasted Butternut Black Rice Kale Bowl, featuring similar squash flavors in a different format.
- For a different kind of comfort food, consider the Zesty Cheeseburger Pasta Salad, offering a familiar yet inventive taste.
For a vegetarian option, serve these alongside a bitter arugula salad tossed in a light balsamic vinaigrette. The peppery greens provide a necessary bite that cleanses the palate between mouthfuls of the sweet and savory stacks. Hearty grains like farro or quinoa also make a great base, as they can soak up any extra honey-butter glaze that pools on the plate.
Make-Ahead Strategies and Storage Tips
You can easily prep the squash rounds up to 24 hours in advance. Roast them through Phase 1, let them cool completely, and store them in an airtight container in the fridge. When you’re ready to serve, simply assemble the stacks with the cheese and cranberries and proceed with the final bake. This makes them an ideal choice for dinner parties where you want to minimize kitchen time.
Leftovers should be stored in the refrigerator for up to 3 days. To maintain the “Anti-Soggy” texture, avoid the microwave at all costs. Reheat the stacks in a 350°F oven for about 10 minutes until the cheese is bubbly again. This helps recrisp the edges of the squash. Do not freeze these stacks; the freezing and thawing process breaks down the squash’s cellular structure, turning it into mush.
Expert Tips for Professional Presentation
To get that “cascading” cheese look seen in high-end restaurants, use a mix of shredded cheese and a small thin slice of cheese on the very top. The slice will melt more uniformly, creating a smooth curtain that drapes over the edges. When drizzling the glaze, start from the center and move in a circular motion to ensure it hits every side of the stack.
Finally, use fresh herbs for the garnish. A few whole sprigs of thyme or a small branch of rosemary tucked into the side of the stack adds height and a pop of vibrant green. This contrast against the deep orange squash and golden cheese makes the dish look as good as it tastes. Serve on a white or light-colored plate to make the colors really stand out.
Frequently Asked Questions
Can I use frozen squash for this recipe?
No, frozen squash is not recommended for this specific stacking technique. Frozen vegetables are blanched before freezing, which breaks down their cell walls. When thawed and roasted, they release too much moisture and become far too soft to support the weight of a stack. For the structural integrity required here, fresh butternut squash is essential.
What if I don’t have parchment paper?
If you are out of parchment paper, a silicone baking mat is the best alternative. If you must use aluminum foil, ensure it is very well-greased with oil or butter. However, be aware that squash tends to stick to foil more easily than parchment, which might make flipping the rounds difficult without tearing the caramelized crust.
Can I make this dish vegan?
Yes, you can adapt this recipe for a vegan diet. Use a high-quality vegan melting cheese (look for ones specifically labeled as “melting” or “mozzarella-style” blocks). Substitute the butter with a plant-based butter alternative and use agave nectar or maple syrup instead of honey. The roasting technique remains exactly the same.
How do I peel a butternut squash safely?
Butternut squash can be slippery and tough to peel. To do it safely, first slice off the top stem and the bottom base to create flat surfaces. Stand the squash upright on its base. Use a sharp Y-peeler or a vegetable peeler to remove the skin in long, downward strokes. If the skin is particularly thick, you can use a chef’s knife to carefully slice the skin away following the curve of the squash.
Why is my cheese greasy instead of gooey?
Greasy cheese usually happens if the oven temperature is too low or if you are using a low-quality, pre-shredded cheese that contains a lot of cellulose (anti-clumping agents). High-quality Gruyere or Swiss has a high fat content that should emulsify into a smooth melt at 425°F. If the oven is too cool, the fat separates from the solids before the cheese can melt properly, resulting in a greasy film.
Cheesy Roasted Butternut Squash
Course: Side DishCuisine: AmericanDifficulty: easy4
servings15
minutes40
minutes340
kcal55
MinutesThis recipe solves the common problem of mushy vegetable bakes by using high-heat roasting and moisture-wicking layering. Butternut squash rounds are caramelized and stacked with Gruyere cheese and dried cranberries for a firm, golden, and savory-sweet result.
Ingredients
1 large butternut squash, neck only, peeled and sliced into 1/2 inch rounds
2 cups shredded Gruyere or Swiss cheese
1/2 cup dried cranberries
3 tablespoons olive oil
2 tablespoons fresh rosemary, chopped
1 teaspoon sea salt
1/2 teaspoon cracked black pepper
1/4 cup honey
1 tablespoon unsalted butter
1 teaspoon fresh thyme leaves (optional garnish)
Directions
- Preheat your oven to 425°F (218°C). This high temperature is the secret to preventing sogginess; it evaporates moisture instantly rather than steaming the vegetable.
- Line a large baking sheet with parchment paper. Arrange the squash rounds in a single layer. Do not crowd the pan or they will steam.
- Brush both sides of the squash with olive oil and season with salt and pepper. Roast for 20-25 minutes, flipping halfway through, until the edges are deeply browned and caramelized.
- While the squash roasts, prepare the honey glaze. In a small saucepan or microwave-safe bowl, melt the honey and butter together until thin and fully combined.
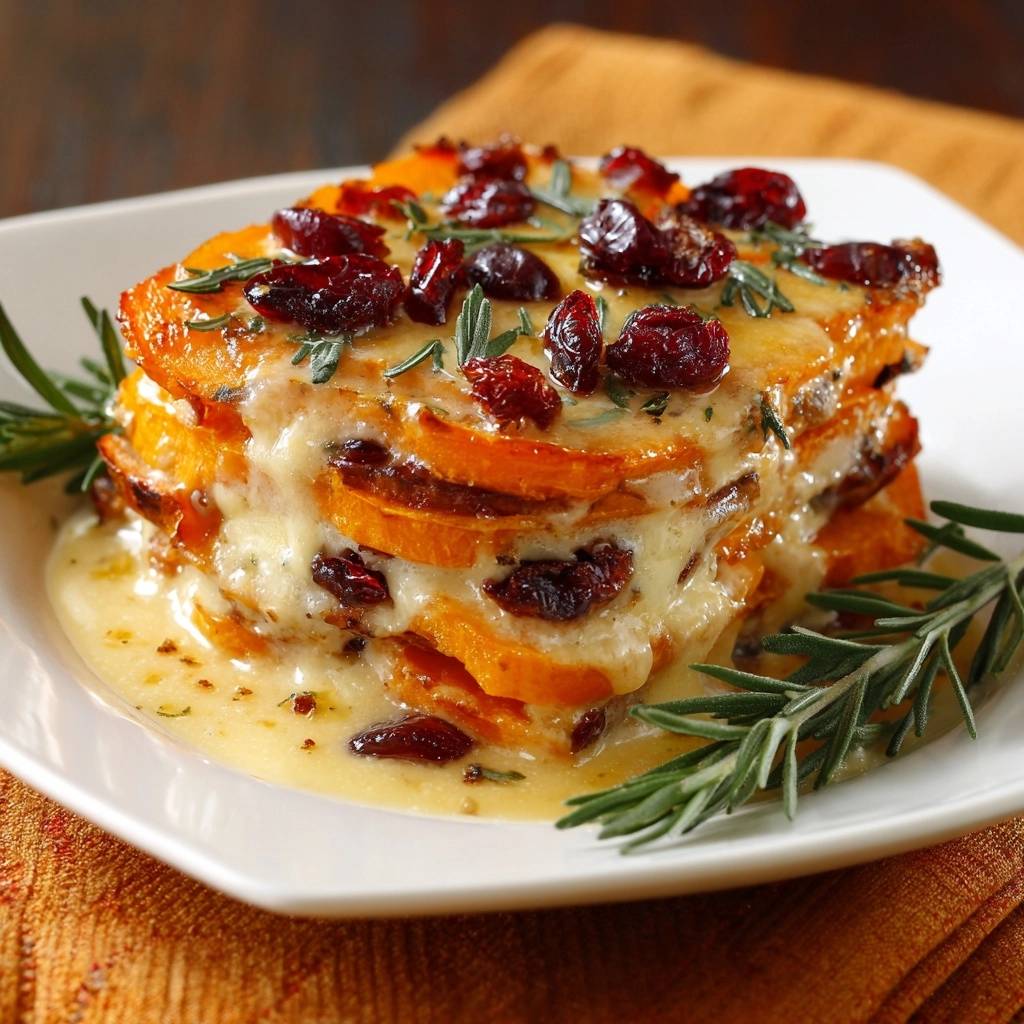
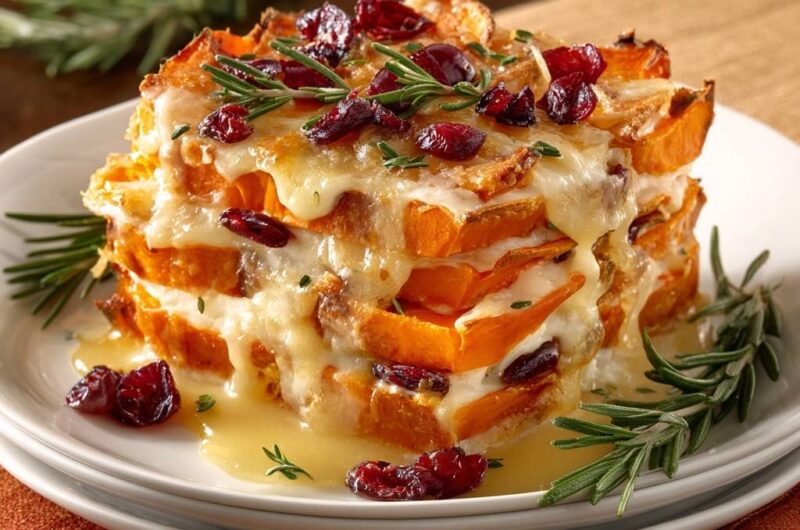
- Remove squash from the oven. To build the stacks as shown in the image, place one roasted round down on a parchment-lined tray. Sprinkle with a generous layer of cheese and a few dried cranberries. Repeat the layers until the stack is 3 to 4 rounds high.
- Top the final layer with a heavy portion of cheese, more cranberries, and the chopped fresh rosemary.
- Return the stacks to the oven for 5 to 8 minutes. Watch for the cheese to melt completely and begin to cascade down the sides of the squash.
- Remove from the oven. Immediately drizzle the warm honey-butter glaze over the stacks, allowing it to pool slightly at the base as seen in the visual.
- Let the stacks sit for 3 minutes before serving. This resting period allows the cheese to set so the stack doesn’t slide apart. Garnish with extra rosemary sprigs and fresh thyme.
Notes
- The high oven temperature of 425 degrees Fahrenheit is essential to evaporate moisture and prevent steaming. Let the stacks rest for 3 minutes after the final bake to ensure the cheese sets and the structure remains stable.