Most cauliflower casseroles suffer from a common, unappetizing flaw: they sit in a pool of bland, grey liquid. This happens because cauliflower is nearly 92% water, and traditional boiling or steaming methods trap that moisture inside the dish. This Cheesy Roasted Cauliflower Gratin completely reimagines the classic side dish by focusing on moisture control and the Maillard reaction.
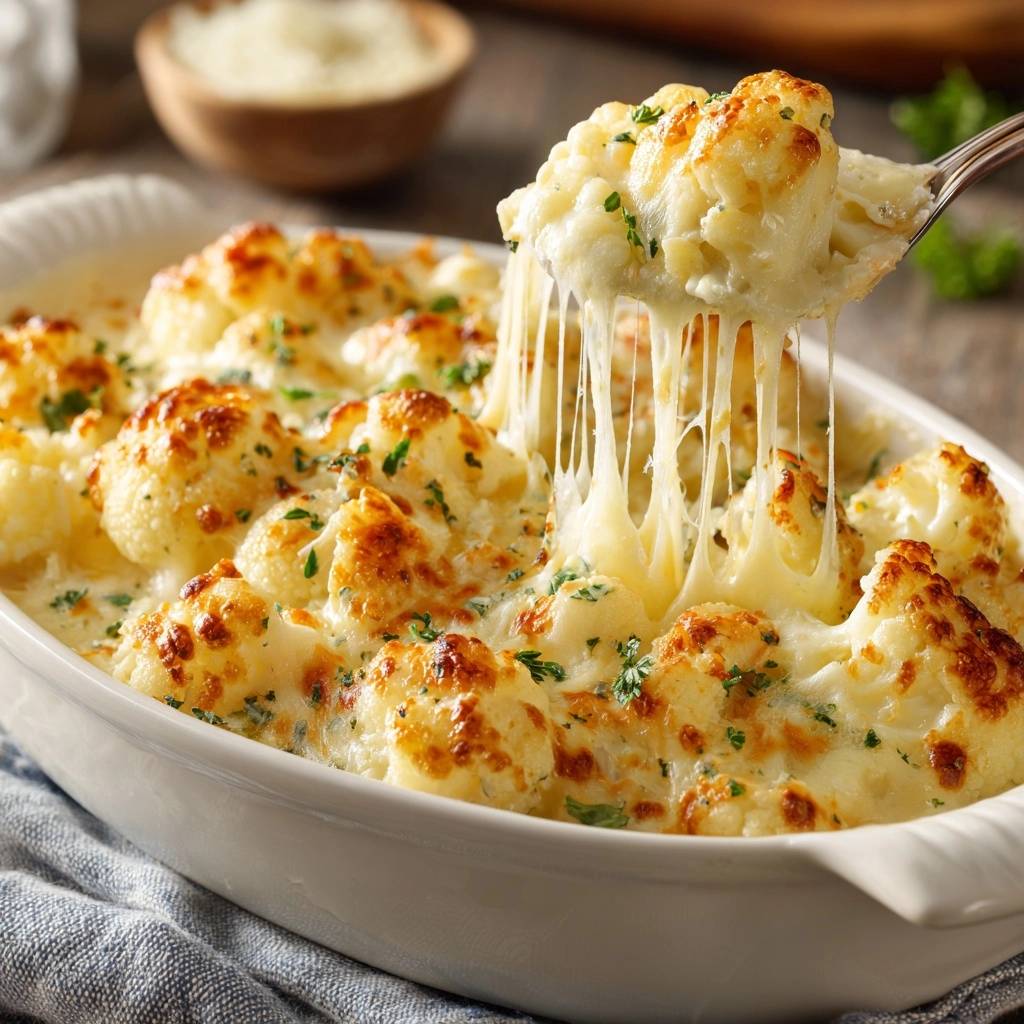
By roasting the florets at high heat before they ever touch the cheese, we transform the vegetable from a soggy filler into a caramelized, nutty base. You get a beautiful contrast between the charred, tender edges of the cauliflower and the rich, gooey blanket of melted mozzarella and parmesan. It is a sophisticated study in texture that finally gives this humble vegetable the respect it deserves.
The secret to this recipe’s success lies in the dry-roast technique. Roasting at 425°F forces the internal water to evaporate quickly, concentrating the natural sugars. This ensures that when you finally pour over the heavy cream and butter, the sauce clings to the florets instead of thinning out into a watery soup. It is the only way to achieve that professional-grade, thick consistency every single time.
The Science of Preventing Watery Cauliflower
To understand why gratins fail, you have to look at the cellular structure of the vegetable. When cauliflower is heated slowly or steamed, its cell walls collapse and release “bound water” into the baking dish. If you add a cream sauce to raw or boiled cauliflower, that released water dilutes the fats, resulting in a broken, oily, and thin mess.
The “Dry-Roast” technique used here is a culinary game-changer. By tossing the florets in olive oil and blasting them with high heat, we create a sear on the outside of each piece. This high-temperature environment (425°F) is essential because it moves the cooking process past simple softening and into caramelization. The water evaporates into the oven air rather than pooling in your casserole dish.
Furthermore, this pre-roasting step ensures the cauliflower is fully cooked and tender before the cheese even enters the equation. Since cheese can burn or become oily if left in the oven too long, roasting the vegetable separately allows for a quick second bake. This results in a perfectly cooked interior and a bubbly, golden-brown crust without any “vegetable soup” at the bottom.
Essential Components for a Rich Gratin
Quality ingredients make a massive difference when you are working with a simple vegetable base. For the best results, you must use low-moisture mozzarella. Fresh mozzarella (the kind stored in water) will release too much liquid and ruin the texture we worked so hard to achieve. Low-moisture mozzarella provides that iconic, stretchy cheese pull while staying stable under the broiler.
The seasoning blend is equally important for building depth. Smoked paprika acts as a bridge between the earthy, sulfurous notes of the cauliflower and the sharp, salty bite of the parmesan. It adds a hint of woodsy flavor that mimics a wood-fired oven. Meanwhile, garlic and onion powders provide a savory foundation that permeates the entire dish without the risk of burning fresh garlic bits at high heat.
When it comes to the sauce, heavy cream is non-negotiable. Milk or half-and-half contains too much water and not enough fat to maintain an emulsion at high temperatures. The heavy cream, combined with a touch of melted butter, creates a velvety coating that stays thick. This high-fat content is what gives the gratin its luxurious mouthfeel and prevents the sauce from breaking into a grainy texture.
Selecting and Prepping the Cauliflower
Start with a head of cauliflower that feels heavy for its size and has tightly curled, creamy white florets. Avoid any heads with dark “sun spots” or loose, crumbly sections. When prepping, aim for large bite-sized pieces. If the florets are too small, they will turn to mush before they get a chance to brown; if they are too large, the centers will stay raw while the outsides burn.
The Role of High-Fat Dairy
We use heavy cream and butter sparingly but effectively to create a rich barrier. The fat in the cream coats the roasted florets, which helps prevent any residual moisture from escaping during the final bake. This creates a cohesive dish where the sauce and the vegetable become one, rather than two separate layers of food.
Phase One: Achieving the Perfect Roast
The first bake is where the flavor is born. After tossing your florets with the oil and spices, spread them out on a large, rimmed baking sheet. The “Single Layer” rule is the most important part of this step. If the cauliflower is crowded or overlapping, it will steam in its own juices rather than roasting. Use two baking sheets if you have to!
You are looking for visual cues here: the edges should be charred and deep golden brown. This charring is actually the Maillard reaction, which creates a savory, complex flavor that raw cauliflower lacks. As the garlic and onion powders toast in the olive oil, they form a flavorful crust on the florets. Don’t be afraid of those dark brown spots; they provide the necessary bitterness to balance the rich cream and cheese later.
Phase Two: Assembling the Cheesy Roasted Cauliflower Gratin
Once the cauliflower is beautifully roasted, transfer it into your 9×13 inch baking dish. At this point, the kitchen should smell incredible. Whisk your heavy cream and melted butter together until smooth. Pour this mixture over the cauliflower, but don’t feel the need to drown it. The goal is a light coating that pools slightly at the bottom to create a creamy base.
Next, layer your cheeses. Combine the mozzarella and parmesan first, then sprinkle them evenly over the top. Focus on covering the tips of the florets. This creates a “shingle” effect where the cheese melts into the nooks and crannies of the cauliflower while the proteins in the cheese toast on the surface. This layering strategy ensures every bite has a mix of creamy sauce and crispy cheese crust.
The Broiler Method for Golden Crusts
The final 10-12 minutes in the oven melt the cheese, but the broiler is what makes it professional. If your cheese looks melted but pale, switch to the broiler for the last 2 minutes. Stay right there and watch it! The transition from golden to burnt happens in seconds. The broiler creates those specific deep brown spots that offer a satisfying crunch and intense flavor.
Remember that “carry-over” cooking will continue for a few minutes after you pull the dish out. The cream will continue to bubble and thicken as it sits. Rotating the dish halfway through the broiling process is a pro move to ensure the heat hits every corner evenly. This results in a stunning, restaurant-quality finish that looks as good as it tastes.
For more cheesy baked squash ideas, see this cheesy baked spaghetti squash recipe.
Troubleshooting Common Gratin Obstacles
If you notice the cheese looks oily or separated, it usually means the oven was too hot or the cheese was a lower quality “oil-filled” brand. To fix this, let the dish sit for five minutes; often, the fats will re-absorb as it cools slightly. If the cauliflower still feels too firm after the initial roast, simply extend the roasting time by five minutes before adding the cheese.
One critical mistake is covering the dish with foil. Never cover a gratin while it is baking! Foil traps steam, which will turn your crispy, roasted cauliflower back into a soggy mess. If the cheese is browning too fast, simply move the rack to a lower position in the oven rather than covering it. This keeps the environment dry and the textures sharp.
Flavor Variations and Ingredient Swaps
While this recipe is a classic, you can easily adapt it to your palate. For a bit of heat, add a half-teaspoon of red pepper flakes to the initial oil toss. If you want a nuttier, more sophisticated flavor profile, swap the mozzarella for Gruyère or Fontina. These cheeses melt beautifully and offer a more complex aroma that pairs perfectly with the roasted cauliflower.
For those who love a bit of crunch, you can mix a handful of toasted breadcrumbs with the parmesan before sprinkling it on top. You could also toss a few whole, peeled garlic cloves onto the baking sheet during the initial roast. They will soften and sweeten, becoming “garlic butter” nuggets hidden throughout the gratin. These small tweaks can change the entire vibe of the dish.
Optimal Pairings for Roasted Cauliflower
This gratin is incredibly rich, so it pairs best with proteins that have a bit of acidity or a clean, seared finish. It is a dream alongside roasted chicken or a pan-seared steak. The creamy texture also complements leaner meats like roasted turkey or even a hearty lentil loaf for a vegetarian feast.
To balance the meal, serve a bright side salad with a lemon vinaigrette. The acidity in the dressing cuts through the heavy cream and mozzarella, refreshing your palate between bites. Avoid serving this with other heavy, cream-based sides like mashed potatoes; instead, opt for something crisp like roasted green beans or a simple arugula salad.
Make-Ahead Instructions and Storage
You can easily prep this dish 24 hours in advance. Roast the cauliflower as directed, let it cool, and store it in the fridge. When you are ready to eat, simply assemble with the cream and cheese and bake. You may need to add 5 extra minutes to the final bake time to ensure the cold cauliflower heats all the way through.
Leftovers should be stored in an airtight container in the refrigerator for up to three days. While the microwave works for a quick lunch, the best way to reheat is in a 350°F oven for about 10 minutes. This helps the cheese regain its structure and prevents the cauliflower from becoming mushy. I do not recommend freezing this dish, as the cream sauce will likely break and become grainy upon thawing.
Expert Tips for Success
Using low-moisture mozzarella is the most important tip for a perfect cheese pull. Fresh mozzarella has too much water for a gratin. Additionally, do not skip the 425°F temperature threshold. Lower temperatures will slow-cook the vegetable, causing it to release water before it browns, which leads to that soggy texture we are trying to avoid.
Always use a rimmed baking sheet for the roasting phase. This catches any oil runoff and prevents it from dripping onto the bottom of your oven. Finally, wait to add the fresh parsley until the very second you serve. The heat of the oven will dull the herb’s volatile oils and turn it brown. Adding it at the end provides a pop of color and a fresh, grassy finish that brightens the heavy fats.
How do I prevent the cauliflower from getting soggy?
The key is the two-step cooking process. By roasting the cauliflower at 425°F on a flat baking sheet first, you evaporate the internal moisture. Most people make the mistake of putting raw cauliflower directly into a dish with sauce, which causes the vegetable to “boil” in its own juices. Roasting first ensures a firm, caramelized texture that holds up against the cream.
Can I use frozen cauliflower for this gratin?
You can, but you must be extra careful. Frozen cauliflower is blanched before freezing, meaning it already has a lot of moisture. Thaw it completely and pat it very dry with paper towels before roasting. You may need to roast it for an extra 5-10 minutes to get the same charred edges as fresh cauliflower. The texture will be slightly softer, but it still works in a pinch.
What can I use instead of heavy cream?
If you don’t have heavy cream, the best substitute is a mixture of 1/2 cup whole milk and 1 tablespoon of flour (whisked together cold) or a heavy dollop of sour cream. However, be aware that milk-based substitutes are more likely to “break” or look curdled at high heat. Heavy cream is used specifically for its high fat-to-water ratio, which creates a stable, velvety sauce.
How do I store and reheat leftovers?
Store leftovers in an airtight container in the refrigerator for up to 3 days. To reheat, place the cauliflower in an oven-safe dish and bake at 350°F for 10-15 minutes until the cheese is bubbly again. Avoid the microwave if possible, as it tends to make the cauliflower rubbery and the cheese oily. This dish does not freeze well because the cream sauce will separate when thawed.
Why did my cheese turn out oily instead of bubbly?
This usually happens if you use pre-shredded cheese that has too much cellulose (anti-clumping agents) or if you use a “fresh” mozzarella with high water content. For the best results, grate your own cheese from a block of low-moisture mozzarella. Also, ensure you don’t over-broil; if the cheese gets too hot for too long, the fat will separate from the solids, leaving an oily residue.
Cheesy Roasted Cauliflower
Course: Side DishCuisine: AmericanDifficulty: easy6
servings15
minutes30
minutes285
kcal45
MinutesThis recipe solves the common problem of watery cauliflower casseroles by dry-roasting the florets first. Combined with a rich cream base and a blend of mozzarella and parmesan, it results in a perfectly tender and golden-brown cheesy dish.
Ingredients
1 large head cauliflower, cut into large bite-sized florets
3 tablespoons olive oil
1 teaspoon garlic powder
1/2 teaspoon onion powder
1/2 teaspoon smoked paprika
Salt and black pepper to taste
2 cups shredded low-moisture mozzarella cheese (for the best cheese pull)
1/2 cup grated parmesan cheese
1/2 cup heavy cream
1 tablespoon unsalted butter, melted
2 tablespoons fresh parsley, finely chopped
Directions
- Preheat your oven to 425°F (220°C). This high heat is the secret to evaporating moisture quickly and achieving the golden edges seen in the image.
- In a large bowl, toss the cauliflower florets with olive oil, garlic powder, onion powder, smoked paprika, salt, and pepper until evenly coated.
- Spread the florets in a single layer on a large, rimmed baking sheet. Do not crowd them; use two sheets if necessary to ensure they roast rather than steam. Roast for 18-20 minutes until the edges are charred and golden.
- In a small bowl, whisk together the heavy cream and melted butter.
- Transfer the roasted cauliflower into a 9×13 inch baking dish. Pour the cream mixture over the florets. This creates a rich, thick base that coats the vegetable without turning into a watery soup.
- Combine the mozzarella and parmesan cheese. Sprinkle the mixture generously over the cauliflower, ensuring the tops of the florets are well-covered to create the toasted cheese crust shown in the photo.
- Return the dish to the oven for 10-12 minutes. For the specific deep golden-brown spots pictured, turn on the broiler for the final 2 minutes, watching closely to prevent burning.
- Garnish with fresh chopped parsley and serve immediately while the cheese is hot and stretchy.
Notes
- To achieve the deep golden-brown spots, use the broiler for the final 2 minutes of cooking. Ensure the cauliflower is not crowded on the baking sheet to prevent steaming.