Few things in the kitchen feel as defeating as pulling a gorgeous cake from the oven only to watch the center slowly cave in. You’ve spent time shelling nuts and measuring flour, yet you’re left with a gummy, sunken crater. This frustration usually stems from structural instability, especially when dealing with heavy ingredients like ground pistachios that weigh down a traditional sponge.
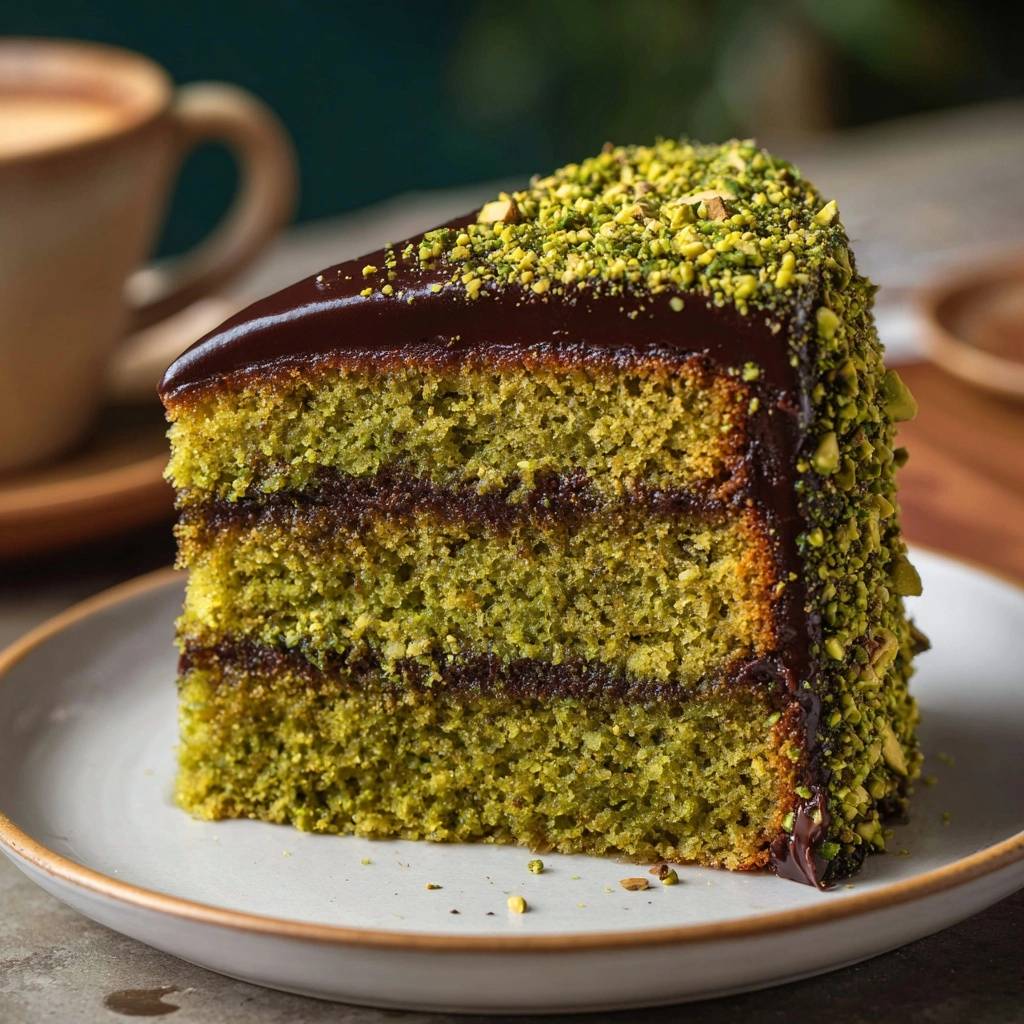
This Chocolate Glazed Pistachio Layer Cake solves that heartache by focusing on architectural integrity. We use a specific mixing technique that builds a sturdy, level crumb capable of supporting thick layers of dark chocolate ganache. You’ll get a cake that stays flat on top and holds its shape perfectly, even under the weight of a dense, crunchy nut coating.
For tips on keeping cake bottoms perfectly tender, check out pink velvet sheet cake squares.
For a similarly moist chocolate cake, check out this moist chocolate bundt cake.
The secret to this success lies in the reverse-creaming method. By coating the flour in fat before adding liquids, we limit gluten development and create a velvet-like texture that is physically incapable of collapsing. This ensures every slice is uniform, moist, and structurally sound from the first bite to the last.
The Structural Science of Pistachio Flour
Pistachios are delicious, but they behave differently than wheat flour because of their high oil content. When you grind pistachios into a fine meal, you’re adding significant weight and fat to the batter. If the nuts are too coarse, they act like little anchors, sinking to the bottom of your pans and leaving the top of the cake weak and airy.
To prevent this, you must pulse your raw pistachios until they reach a flour-like consistency. This fine texture allows the nut particles to suspend evenly throughout the batter. Furthermore, the natural oils in the pistachios interact with the wheat gluten, shortening the strands and creating a tender bite. However, because these oils add moisture, the cake needs the extra lift provided by the baking powder to stay upright. Achieving that sandy, fine grind is the first step in ensuring your cake doesn’t turn into a dense brick.
For more ideas on using this lovely nut, explore our creamy pistachio cheesecake.
Essential Components for the Perfect Layer Cake
Temperature is the most important factor when gathering your ingredients. You must use room temperature eggs, milk, and butter to create a successful emulsion. When these items are at the same temperature, they bond together smoothly. If you use cold milk, it will cause the room-temperature butter to seize up, resulting in a curdled batter and an uneven bake.
The choice of extracts also plays a massive role in the final profile. While vanilla provides a classic base, a touch of almond extract is the real hero here. It acts as a flavor booster that highlights the earthy, “green” qualities of the pistachios. Without it, the nut flavor can sometimes get lost behind the sugar and flour. Additionally, using whole milk ensures the crumb remains rich and soft, providing enough fat to keep the cake moist for days.
Selecting the Right Dark Chocolate for Ganache
For the glaze, the quality of your chocolate dictates the final texture. I recommend a dark chocolate with a cocoa percentage between 60% and 72%. Chocolate in this range has enough cocoa butter to set firmly but remains fluid enough to pour. Avoid using standard chocolate chips with stabilizers or “coatings,” as these often resist melting and can result in a grainy, dull finish. A high-quality bar or premium baking chips will give you that professional, mirror-like shine.
Why the Reverse-Creaming Method Prevents Sinking
Most of us grew up using the traditional creaming method, where you beat butter and sugar until fluffy. While that works for light sponges, it incorporates large air bubbles that can easily pop and cause a cake to sink. Reverse creaming flips the script. You start by mixing the dry ingredients with the butter until the mixture looks like damp sand. This process is revolutionary for layer cakes.
By coating the flour particles in butter first, you create a waterproof barrier. This barrier prevents the liquids from over-developing the gluten once they are added. Therefore, instead of a stretchy, bread-like structure, you get a sturdy, tight crumb that resembles fine velvet. This “sturdy velvet” is exactly what you need to support three layers of cake and a heavy chocolate topping. It provides the strength to hold the weight without sacrificing the melt-in-your-mouth feel we all want in a dessert.
Phase One: Preparing the Pistachio Sponge
Start by whisking your dry ingredients, including that finely ground pistachio flour, in a large bowl. When you add the cubed butter, keep the mixer on low. You are looking for a very specific visual cue: the mixture should look like damp, clumpy sand with no large chunks of butter remaining. This ensures every grain of flour is protected by fat.
More Sweet Treats to Explore
Complement your rich chocolate and pistachio cake with these delightful baked goods.
- For a delightful breakfast or afternoon bite, try these glazed pistachio cranberry scones, featuring similar nutty flavors and a satisfying glaze.
- If you’re craving something light and airy, these fluffy diner-style pancakes offer a wonderful contrast in texture and are a simple pleasure.
Once you add the first half of your liquid ingredients, turn the speed up to medium and beat for a full 90 seconds. This timing is critical. During these 90 seconds, you are building the cake’s internal skeleton. You’ll see the batter transform from a thick paste into a smooth, aerated cream. This specific aeration period creates tiny, uniform air bubbles that stay trapped during the bake, resulting in the flat, stable tops required for easy stacking.
Phase Two: Precision Baking and Cooling
Using three 8-inch pans is much better than using two 9-inch pans for this recipe. The smaller diameter allows the heat to reach the center of the cake more quickly, which prevents the edges from overcooking while the middle is still raw. Divide your batter evenly; using a kitchen scale is the best way to ensure your layers are identical in height.
Bake until a toothpick comes out clean, but do not rush to remove them from the pans. Let the cakes cool completely in the tins. This allows for “carry-over cooking,” where the residual heat finishes setting the delicate center. If you flip the cakes out while they are still warm, the internal structure hasn’t fully bonded yet, and you risk the layers cracking or tearing under their own weight.
Phase Three: Achieving the Glossy Chocolate Ganache
Creating a perfect ganache is all about patience. After you pour the simmering heavy cream over your chocolate, you must let it sit undisturbed for five minutes. This allows the heat to penetrate the chocolate evenly. If you stir too early, the temperature drops too fast, and the fat can separate, leaving you with a greasy mess.
After the rest, whisk gently from the center outward until the mixture is glossy and smooth. At this point, the ganache will be very thin and pourable. You need to let it sit at room temperature until it thickens to a spreadable consistency, similar to peanut butter. If it’s too runny, it will soak into the cake; if it’s too hard, it will tear the sponge. Look for a texture that holds a soft peak when lifted with a spoon.
Phase Four: Assembly and the Signature Nut Coating
Place your first layer on a flat plate and spread a generous amount of ganache. When you stack the next layer, press down very lightly to ensure it’s level. Once all three layers are stacked, use an offset spatula to apply a thin “crumb coat” to the sides. This doesn’t have to be pretty; it just seals in the crumbs and provides a sticky surface for the nuts.
Pour the remaining ganache over the top and let it naturally flow toward the edges. While the chocolate is still wet and tacky, take your crushed pistachios and gently press them into the sides of the cake. I find it easiest to hold a handful of nuts and lightly “slap” them against the side, letting the excess fall back into a bowl. Finish by covering the entire top with more nuts for that signature, textured look.
Troubleshooting Common Pistachio Cake Obstacles
If your cake feels dry, you likely over-baked it or over-mixed the batter in the final stage. Remember to stop mixing as soon as the last of the liquid disappears. If your ganache is too runny even after cooling, your cream-to-chocolate ratio might be off; you can fix this by melting in a few more chocolate chips.
Weak pistachio flavor usually points to the quality of the nuts. Always use raw, unsalted pistachios for the best color and taste. Finally, if your layers are sliding around during assembly, your ganache is likely too warm. Pop the cake in the fridge for 15 minutes to “set” the foundation before you finish the outside coating.
How to Fix a Broken Ganache
If your ganache looks grainy or oily, don’t throw it away! This usually means the emulsion has broken. To fix it, warm a tablespoon of milk and slowly whisk it into the broken mixture. Use vigorous, small circular motions in the center of the bowl. The extra moisture and agitation will help the fats and solids bind back together, restoring that beautiful, silky shine.
Make-Ahead Strategies and Storage Logistics
The high fat content from the ground pistachios is a huge advantage for storage. It keeps the sponge moist for much longer than a standard vanilla cake. You can bake the layers a day in advance, wrap them tightly in plastic wrap, and keep them at room temperature. You can even freeze the individual layers for up to a month; just thaw them in the fridge before assembling.
Once the cake is fully assembled, store it in an airtight container or under a cake dome. It will stay fresh at room temperature for about two days. If you need to keep it longer, refrigerate it, but bring it back to room temperature before serving. This ensures the chocolate ganache softens back up and the pistachio flavors are fully detectable.
Expert Tips for Clean Slicing
To get those perfect, bakery-style slices, you need to let the cake rest for at least one hour after assembly. This gives the ganache time to firm up so the layers don’t slide when the knife goes through. Use a long, sharp thin-bladed knife for the best results.
For the cleanest cuts, dip your knife in a tall glass of hot water and wipe it dry between every single slice. The heat from the blade will glide through the chocolate glaze like butter, preventing the nuts from dragging through the green sponge. This extra step ensures that every guest gets a beautiful, pristine cross-section of your hard work.
How should I store leftovers?
Store any leftover cake in an airtight container at room temperature for up to 2 days. If your kitchen is very warm, you can keep it in the refrigerator for up to 5 days. However, make sure to bring the cake to room temperature for 30 minutes before eating so the chocolate and sponge soften. This cake does not freeze well once fully assembled with the ganache and nuts, as the chocolate can lose its shine and the nuts may lose their crunch.
Why did my cake layers turn out dense?
Density usually happens for two reasons: over-mixing or old leavening agents. When you add the liquid ingredients, only mix until combined. Over-mixing develops too much gluten, which makes the cake tough. Also, check your baking powder. If it is older than six months, it may not provide the lift needed to support the heavy pistachio flour, resulting in a shorter, heavier layer.
Can I use salted pistachios instead of raw?
It is best to use raw, unsalted pistachios for this recipe. Salted pistachios are often roasted, which changes the flavor profile and can make the cake overly salty. If you only have salted nuts, you must rinse the salt off and dry them completely before grinding. Additionally, omit the 1/2 teaspoon of salt called for in the dry ingredients to prevent the cake from becoming unpalatable.
What if I don’t have a food processor to grind the nuts?
If you don’t have a food processor, you can use a high-speed blender in short pulses. Be very careful not to over-process, or you will end up with pistachio butter instead of flour. If you have neither, you can purchase pre-ground pistachio flour or meal at many specialty baking stores or online. Just ensure it is a fine grind rather than coarse pieces.
Why is my ganache dull instead of shiny?
A dull ganache usually happens if the chocolate was overheated or if there wasn’t enough fat in the mixture. Using heavy cream with at least 36% milk fat is essential for that glossy finish. Also, avoid stirring the mixture too vigorously while it is very hot, as this can incorporate air bubbles that dull the surface. If it’s already dull, a tiny bit of light corn syrup whisked in at the end can sometimes restore the shine.
Pistachio Layer Cake
Course: DessertCuisine: AmericanDifficulty: medium12
servings25
minutes35
minutes510
kcal60
MinutesThis three-layer pistachio cake is designed for stability and flavor. By using a specific mixing technique and temperature control, it ensures a level crumb that perfectly supports a heavy chocolate glaze and nut coating without collapsing.
Ingredients
2 cups all-purpose flour
1.5 cups granulated sugar
1 cup finely ground raw pistachios (flour-like consistency)
1 tablespoon baking powder
1/2 teaspoon salt
1 cup unsalted butter, room temperature and cubed
4 large eggs, room temperature
3/4 cup whole milk, room temperature
1 teaspoon vanilla extract
1/2 teaspoon almond extract (to enhance pistachio flavor)
1.5 cups dark chocolate chips (for filling and glaze)
3/4 cup heavy cream
1.5 cups finely crushed pistachios for garnish
Directions
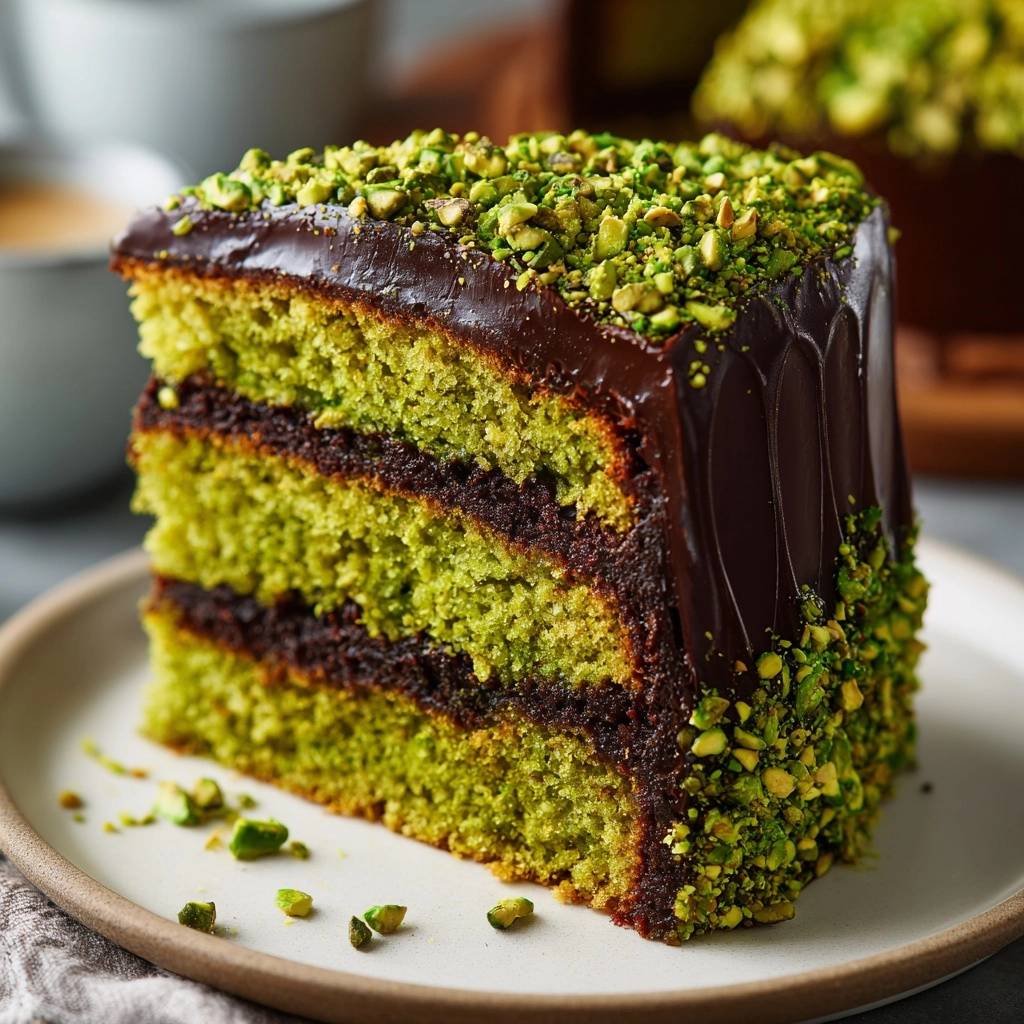
- Preheat your oven to 350°F (175°C). Grease and line three 8-inch round cake pans with parchment paper. (Note: The visual evidence shows a three-layer cake; using three pans ensures even baking and the correct height).
- To prevent sinking, use the reverse-creaming method. In a large bowl, whisk together the flour, sugar, ground pistachios, baking powder, and salt. Add the cubed butter and mix on low speed with a paddle attachment until the mixture resembles fine, damp sand. This coats the flour in fat, which limits gluten development and creates a stable, velvet-like structure that cannot collapse.
- In a separate jug, whisk the eggs, milk, vanilla extract, and almond extract.
- Add half of the liquid mixture to the dry ingredients. Beat on medium speed for a full 90 seconds. This aeration is the secret to a flat, strong top. Add the remaining liquid and mix on low for 30 seconds just until combined. Do not overmix.
- Divide the batter evenly between the three pans. Bake for 28 to 32 minutes or until a toothpick comes out clean. Let the cakes cool completely in the pans; this allows the crumb to set firmly.
- For the ganache, heat the heavy cream until simmering, then pour over the chocolate chips. Let sit for 5 minutes, then whisk until smooth and glossy. Let the ganache cool at room temperature until it reaches a spreadable, thick consistency.
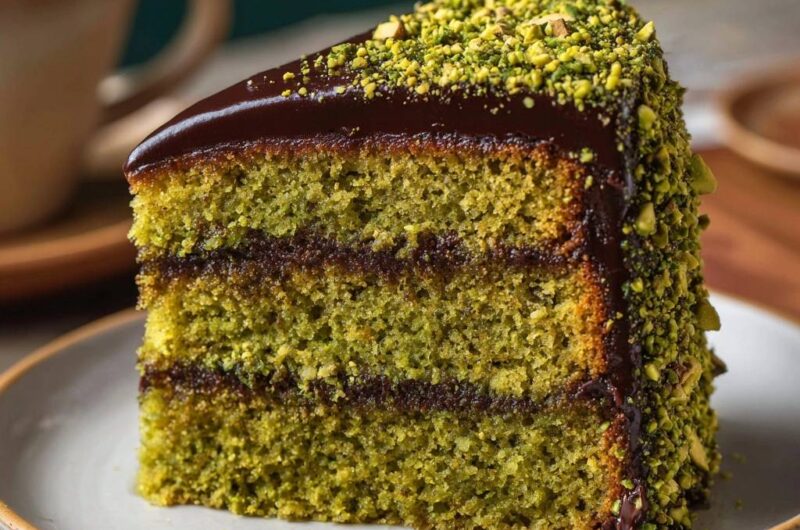
- Place the first cake layer on a plate. Spread a generous, even layer of chocolate ganache. Top with the second cake layer and repeat. Place the third layer on top.
- Pour the remaining ganache over the top, using an offset spatula to smooth it over the top and thinly down the sides.
- Immediately press the finely crushed pistachios into the sides of the cake and across the entire top surface while the chocolate is still wet, matching the dense pistachio coating shown in the image.
- Let the cake rest for at least 1 hour before slicing to ensure the ganache sets and the layers stay perfectly aligned.
Notes
- The reverse-creaming method coats flour in fat to limit gluten development and create a stable structure. Ensure all refrigerated ingredients are at room temperature for the best emulsion.