Imagine slicing into a towering masterpiece where clouds of whipped cream meet the deep, earthy intensity of dark chocolate. The Classic Black Forest Cake is a marvel of textures, but for many home bakers, it feels like a gamble. You want that airy, light-as-air sponge, yet you often end up with a center that sinks or a crumb that feels gummy and dense.
The secret to a professional result isn’t just in the flavor; it’s in the structural integrity of the sponge. This recipe focuses on a specific temperature-controlled method that ensures your cake stands tall and proud. By mastering the balance between moisture and lift, you can finally create a cake that supports heavy cream and tart cherries without collapsing under its own weight.
The real trick to preventing that dreaded sinkhole is the way you handle the hot coffee. Most people pour it in and keep the mixer running, which knocks out the air and overworks the flour. Instead, you’ll fold it in by hand. This gentle touch preserves the bubbles and activates the leavening agents perfectly, giving you a stable, reliable crumb every single time.
The Architecture of a Stable Chocolate Sponge
To get that deep, professional chocolate flavor, we use a technique called “blooming.” When you stir hot coffee into the cocoa powder, the heat dissolves the cocoa solids and releases trapped fats. This process intensifies the chocolate taste far beyond what cold liquids can achieve, making the cake taste like it came from a high-end patisserie.
However, the heat does more than just boost flavor; it triggers the baking soda and baking powder instantly. This immediate reaction creates a surge of carbon dioxide, which is why the folding method is so critical. If you use a high-speed electric mixer at this stage, you’ll develop too much gluten, leading to a tough, rubbery texture that eventually collapses as it cools.
By switching to a spatula and folding the hot liquid down the side of the bowl, you incorporate the coffee without deflating the batter. You’re looking for a smooth, liquid consistency that still feels light. This careful handling ensures the cake has enough internal strength to hold up the layers of fruit and cream that come later.
Essential Components for the Classic Black Forest Cake
Quality ingredients are the foundation of this cake, starting with the cocoa powder. While natural cocoa works well here because of the baking soda, ensure it’s unsweetened to maintain the balance of sugar. The cocoa provides the structure, so don’t skimp on the brand you choose for this specific bake.
Temperature control is your best friend in the kitchen. You must use room temperature buttermilk and eggs to ensure a perfect emulsion. When these ingredients are cold, they can cause the vegetable oil to clump, resulting in an uneven bake. Room temperature liquids bond more easily with the dry ingredients, creating a silky, uniform batter.
For the frosting, you need heavy whipping cream with a high fat content, ideally 36% or higher. This fat content is what allows the cream to hold its shape for hours. If the cream is too thin, your beautiful rosettes will wilt before the cake even hits the table. Always keep your cream in the coldest part of the fridge until the very second you’re ready to whip it.
Selecting the Right Cherries and Syrups
Traditional Black Forest cake requires sour cherries, often labeled as Morello cherries. Their sharp tartness is essential because it cuts through the richness of the sweetened whipped cream and the dark chocolate. Sweet Bing cherries are delicious for snacking, but they can make the finished cake feel cloying and one-dimensional.
If you prefer to keep the recipe simple, use the juice from the cherry jar to soak your cake layers. For a little extra depth, a tiny drop of almond extract mixed into the cherry juice mimics the complex flavor of traditional spirits. This soak is what gives the cake its signature melt-in-your-mouth moisture.
Step-by-Step: Preparing the Temperature-Controlled Batter
Start by sifting your flour, sugar, cocoa, and leavening agents into a large bowl. Sifting isn’t just about removing lumps; it aerates the flour, which contributes to that sought-after light crumb. Once the dry ingredients are whisked, add your buttermilk, oil, eggs, and vanilla, and beat them for exactly two minutes.
Now comes the most important part: adding the hot coffee. Pour the steaming liquid slowly down the inner side of the bowl rather than dumping it directly into the center. Use a large rubber spatula to fold the liquid into the thick chocolate base using a figure-eight motion. You’ll see the batter transform from a thick paste into a thin, glossy liquid.
Stop folding the very second the last streak of white flour disappears. The batter will look quite thin, almost like a heavy soup, but don’t be alarmed. This high moisture content, combined with the activated leavening, is exactly what creates the soft, velvety texture that defines a world-class chocolate sponge.
Precision Baking and the Cooling Phase
Preparation of the pans is just as vital as the batter itself. Grease your 9-inch pans thoroughly, then line the bottoms with parchment paper. This double-layer of protection ensures the cake releases cleanly without leaving its top or bottom stuck to the metal, which is a common cause of structural cracks.
Bake until the cake just begins to pull away from the sides of the pan. This slight “shrink” is a visual cue that the internal structure is set. If you pull it out too early, the steam inside will condense and pull the center down, causing the cake to sink. A toothpick should come out with just a few moist crumbs attached.
Let the cakes rest in their pans for exactly 10 minutes on a cooling rack. This allows the crumb to firm up enough to handle the move. If you try to flip them onto the rack immediately, the cake is too fragile and will likely break. After 10 minutes, slide a knife around the edge and invert them to cool completely.
Stabilizing the Whipped Cream Frosting
Because this cake uses whipped cream instead of heavy buttercream, you have to treat it with care. Start with a bowl and whisk attachment that have been chilled in the freezer for 15 minutes. Cold tools keep the fat in the cream stable, which leads to much faster whipping and a firmer final product.
Begin whipping on medium speed, gradually adding the powdered sugar. Watch the cream closely as it transitions from soft, floppy waves to firm, upright peaks. You want “stiff peaks,” meaning when you lift the whisk, the cream stands straight up without the tip curling over. Be careful not to go too far, or you’ll end up with sweetened butter.
If the cream starts to look grainy, you’ve over-whipped it. You can sometimes save it by gently folding in a tablespoon of fresh, liquid cream to smooth it back out. Once it’s perfectly stiff, use it immediately or keep it in the fridge. Never leave whipped cream sitting out on the counter while you prep other steps.
Assembling Layers for Maximum Structural Support
Before you add the cream, brush the cooled cake layers with your cherry juice or syrup. You want the cake to be moist, but not dripping. A light, even coating across the surface is plenty. This step ensures that every bite has that classic fruit-infused flavor that makes this cake so famous.
To keep the cherries from sliding out the sides, use the “dam” method. Spread a layer of cream on the bottom cake, then pipe or spread an extra thick ring of cream around the very edge. Place your drained cherries inside this ring. This creates a physical barrier that keeps the fruit and juices contained in the center.
Place the second cake layer on top, bottom-side up. The bottom of a cake is always perfectly flat, which gives you a professional, level surface for the final frosting. Press down very gently to settle the layers, then cover the top and sides with the remaining whipped cream using an offset spatula for a smooth finish.
Professional Decorating: Rosettes and Chocolate Shavings
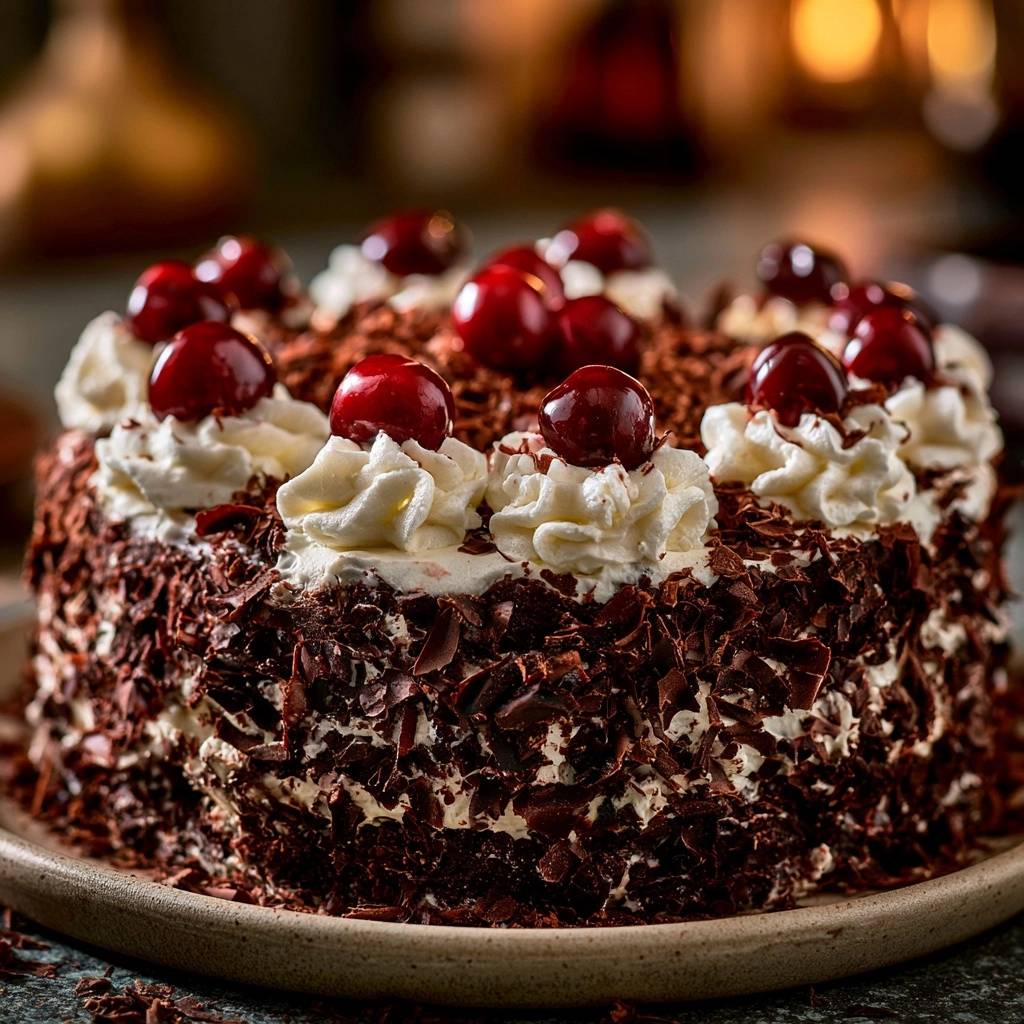
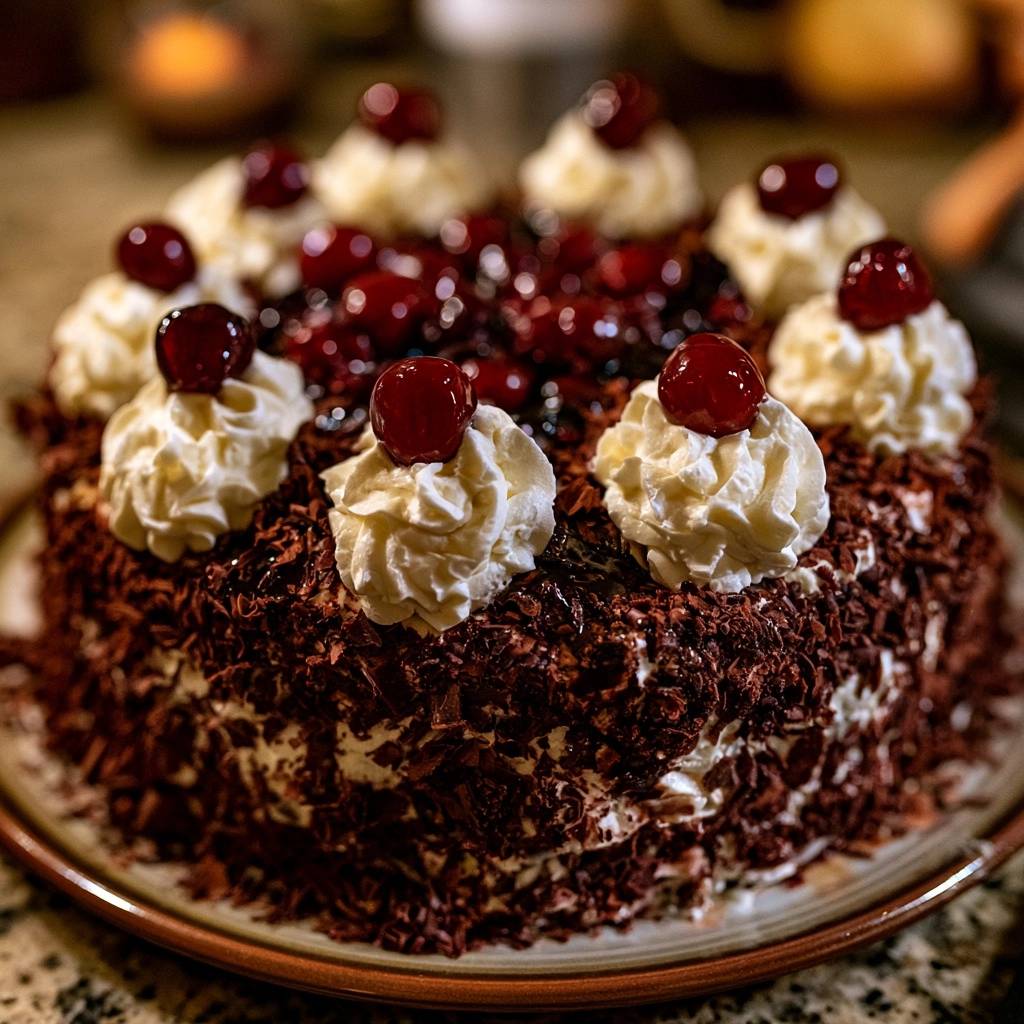
For the classic look, use a piping bag fitted with a large star tip to create 12 rosettes around the top edge. Space them evenly, as these serve as the “perch” for your reserved cherries. This isn’t just for looks; it helps you guide your knife for 12 perfectly even slices when it’s time to serve.
Creating those beautiful chocolate curls is easier than it looks. Take a room-temperature block of dark chocolate and use a vegetable peeler to shave long strips off the side. If the chocolate is too cold, it will just shatter into small bits. If it’s too warm, it will smudge. A quick 10 seconds in a warm spot usually does the trick.
When applying the shavings to the sides of the cake, try not to touch them too much with your bare hands, as your body heat will melt them. Use a bench scraper or a piece of parchment paper to gently press the curls into the cream. Sprinkle the remaining smaller bits into the center of the rosette ring for a finished look.
Troubleshooting Common Black Forest Baking Issues
If your cake still sinks in the middle, check your oven door habits. Opening the door too early lets out the heat and can cause a sudden drop in pressure that collapses the delicate air bubbles. Always wait until at least 25 minutes have passed before you even think about peeking inside.
If you notice your whipped cream “weeping” or leaking water after a few hours, it usually means the sugar wasn’t fully incorporated or the cream wasn’t whipped enough. Using powdered sugar (which contains a little cornstarch) helps stabilize the cream better than granulated sugar. Always ensure the cake is completely cold before frosting.
For a cake that feels a bit dry, don’t be afraid to be more generous with the cherry soak next time. The sponge is designed to be sturdy so it can soak up that liquid without falling apart. If you find the chocolate shavings are melting, chill your hands in cold water and dry them thoroughly before handling the chocolate.
Why Your Cake Must Chill Before Serving
It is incredibly tempting to cut into the cake immediately, but you must wait. A Black Forest cake needs at least four hours in the refrigerator to reach its peak. During this “meld” period, the moisture from the cherries and the cream migrates into the chocolate sponge, softening it into a fudge-like consistency.
This chilling time also allows the fats in the whipped cream to firm up again. If you cut the cake while it’s room temperature, the weight of the top layer will likely squeeze the cream and cherries out the sides. Patience results in a clean, beautiful slice that shows off every distinct layer of chocolate, fruit, and cream.
Make-Ahead Strategies and Storage Logistics
You can easily break this process into two days to save time. Bake the chocolate sponges a day in advance, let them cool completely, and wrap them tightly in plastic wrap. Storing them at room temperature overnight actually makes them easier to slice and handle because the crumb settles and becomes less fragile.
Once the cake is fully assembled, it must stay in the refrigerator. Because of the fresh whipped cream, it shouldn’t sit out for more than 30 to 60 minutes depending on the temperature of your room. Use a cake carrier or a large bowl inverted over the cake to keep it from picking up any “fridge smells.”
While the individual sponges freeze beautifully, the fully assembled cake does not. Freezing whipped cream and whole cherries changes their texture significantly upon thawing, often leading to a watery mess. For the best experience, enjoy the cake within two to three days of assembly while the cream is still light and fresh.
How should I store leftovers?
Store any leftover cake in an airtight container in the refrigerator for up to 3 days. Because the frosting is made of fresh whipped cream, it will eventually start to lose its airy texture and may absorb odors from the fridge if not covered properly. Do not freeze the assembled cake, as the cream and cherries will become watery when thawed.
Why did my chocolate cake sink in the middle?
Cakes usually sink because of over-mixing or opening the oven door too early. When you over-mix the batter after adding the hot coffee, you develop too much gluten, which traps too much air that the structure can’t support. Additionally, a sudden draft from opening the oven door before the cake is set can cause the air bubbles to pop and the center to collapse.
Can I use frozen cherries instead of canned?
Yes, you can use frozen sour cherries, but you must thaw and drain them completely first. Pat them dry with a paper towel to remove excess moisture. You will also need to make a simple syrup or use bottled cherry juice for the “soak” step, as frozen cherries won’t provide the same syrup that canned cherries do.
How can I add more flavor to the cherry juice?
Use the reserved juice from the canned sour cherries. To add more complexity, you can mix 1/4 cup of the cherry juice with a 1/4 teaspoon of almond extract. This provides a lovely fruity and slightly nutty aroma.
My whipped cream is grainy, can I fix it?
Grainy whipped cream is a sign that it is slightly over-whipped and starting to turn into butter. If it hasn’t gone too far, you can fix it by adding one or two tablespoons of fresh, liquid heavy cream and gently folding it in with a spatula by hand. This can often smooth out the texture and save the batch.
Do I really need to use hot coffee?
The hot coffee is essential for “blooming” the cocoa powder, which intensifies the chocolate flavor. It also helps create a very thin batter that bakes into a moist, velvety crumb. You won’t taste the coffee in the finished cake; it simply acts as a flavor enhancer for the chocolate. If you absolutely must avoid it, use boiling water instead.
Classic Black Forest Cake
Course: DessertCuisine: GermanDifficulty: easy12
servings45
minutes35
minutes80
Minutes510
kcalGerman
Ingredients
2 cups all-purpose flour
2 cups granulated sugar
3/4 cup unsweetened cocoa powder
2 teaspoons baking soda
1 teaspoon baking powder
1 teaspoon salt
1 cup buttermilk, room temperature
1/2 cup vegetable oil
2 large eggs, room temperature
2 teaspoons vanilla extract
1 cup hot coffee
1/4 cup cherry juice (for soaking)
2 cups pitted sour cherries, drained (reserve 12 for garnish)
4 cups heavy whipping cream, chilled
1/2 cup powdered sugar
10 ounces dark chocolate shavings (large curls)
Directions
- Preheat your oven to 350°F (175°C). Grease and flour two 9-inch round cake pans and line the bottoms with parchment paper to ensure a clean release.
- In a large bowl, whisk together flour, sugar, cocoa, baking soda, baking powder, and salt until no lumps remain.
- Add buttermilk, oil, eggs, and vanilla. Beat on medium speed for exactly 2 minutes.
- To prevent the cake from sinking, stir in the hot coffee by hand. The heat blooms the cocoa and activates the leavening agents instantly. Pour the hot liquid slowly down the side of the bowl while gently folding with a spatula to incorporate air without overworking the gluten. Over-mixing at this stage is what causes cakes to collapse; stop the moment the batter is smooth.
- Divide batter evenly between pans. Bake for 30 to 35 minutes until a toothpick comes out clean. Cool in the pans for 10 minutes, then transfer to wire racks to cool completely.
- Once cooled, lightly brush the top of each cake layer with cherry juice to ensure a moist crumb.
- In a chilled bowl, whip the heavy cream with powdered sugar until very stiff peaks form.
- Place one cake layer on a serving plate. Spread a thick layer of whipped cream and distribute the drained cherries evenly across the surface.
- Top with the second cake layer. Frost the top and sides of the entire cake with a generous layer of whipped cream.
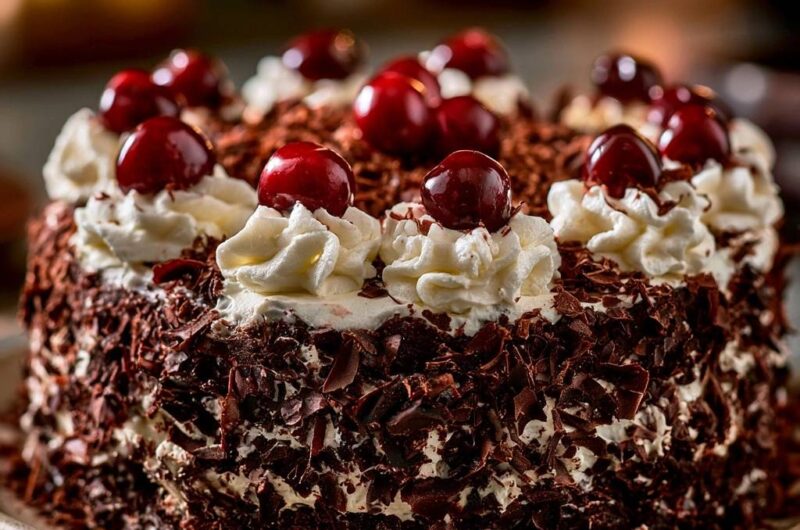
- Using a piping bag with a star tip, pipe 12 large rosettes around the top edge of the cake. Place one reserved cherry on each rosette.
- Press the dark chocolate shavings heavily into the sides of the cake and sprinkle the remaining shavings into the center of the top, as shown in the image.
- Refrigerate for at least 4 hours before serving. This allows the structure to stabilize and the flavors to meld.
Notes
- To prevent the cake from sinking, stir in the hot coffee by hand and avoid over-mixing. Refrigerate for at least 4 hours before serving to allow the structure to stabilize and the flavors to meld.