Imagine plunging a thick, salty tortilla chip into a dip so velvety and rich it clings to every curve of the corn. You’re looking for that perfect balance of smoky char, tangy lime, and a thick, creamy base that never slides off the chip. Most versions of this classic street food favorite end up as a soupy mess at the bottom of the bowl, but we’re changing that today.
The secret to a restaurant-quality scoop lies in how you handle the moisture. By focusing on a stable dairy base and a high-heat sear, you can create a 315-calorie masterpiece in just 15 minutes. It’s the kind of appetizer that disappears within minutes of hitting the table because the texture is just as impressive as the flavor.
I’ve found that the biggest mistake home cooks make is using cold cream cheese or rushing the corn. To get that professional structural integrity, you must beat your cream cheese until it’s completely smooth before adding any other liquids. This creates a reinforced foundation that keeps your dip thick and luscious even as it sits out at a party.
For a similar kick, try this jalapeno bacon chicken dip.
The Science of Moisture Control in Corn
Corn is a deceptive ingredient because those tiny yellow kernels are actually about 75% water. When you heat them up, that water wants to escape. If you cook corn over low or medium heat, it “sweats,” releasing all that liquid into your bowl and turning your dip into a watery soup.
To prevent a runny dip, you have to force that moisture out through evaporation before the corn ever touches the dairy. High-heat charring is the only way to achieve this. The intense heat turns the internal water into steam instantly, leaving behind a concentrated, sweet corn flavor and a firm texture.
Furthermore, removing this excess moisture allows the sugars in the corn to caramelize. This process, known as the Maillard reaction, creates those beautiful brown and black spots. Without this step, your dip will lack the smoky depth that defines authentic Mexican street corn.
Why Cast Iron Outperforms Non-Stick
If you want a true char, reach for your cast iron skillet. Cast iron has incredible heat retention, meaning the temperature won’t drop the second you dump the corn into the pan. This consistent, high heat is vital for searing the outside of the kernel quickly without overcooking the inside.
Non-stick pans often can’t handle the dry, high heat required for this recipe without damaging the coating. In a cast iron pan, the corn gets that signature “pop” and smoky aroma. That char provides a bitter, toasted contrast that cuts right through the richness of the mayo and crema.
Essential Components for a Stable Dip Base
A great dip isn’t just about flavor; it’s about chemistry. Every ingredient in this list serves a specific purpose to ensure the final product is scoopable and stable. You aren’t just mixing things in a bowl; you’re building an emulsion that needs to hold up under the weight of the corn.
For another creamy delight, you might enjoy this jalapeno chicken dip.
The Role of Cream Cheese as a Stabilizer
Using 4 ounces of softened cream cheese is the ultimate “pro move” for this recipe. While many traditional recipes rely solely on mayonnaise or sour cream, those ingredients tend to break down and thin out when they hit warm corn. Cream cheese acts as a structural anchor.
Because cream cheese has a higher fat content and a firmer cold state, it binds the other liquids together. It creates a thick, tacky consistency that ensures the dip stays on your chip rather than dripping down your chin. Just make sure it’s truly room temperature so you don’t end up with tiny white lumps.
Choosing Between Mexican Crema and Sour Cream
Mexican crema is the gold standard here because it’s thinner and sweeter than American sour cream, with a higher fat content that resists curdling. However, if you prefer a bit more “zing,” sour cream is a fantastic substitute. Its higher acidity provides a sharp contrast to the sweet corn.
If you find your sour cream is particularly watery, you can strain it through a paper towel for ten minutes before using it. This little trick ensures you aren’t adding unnecessary liquid back into the base you worked so hard to stabilize.
Cotija: The Salty Backbone of Street Corn
Cotija is a dry, firm Mexican cow’s milk cheese that doesn’t really melt. This is a huge advantage for a dip. Instead of turning into a gooey, stringy mess like mozzarella, Cotija keeps its shape, providing a salty “bite” and adding to the overall thickness of the mixture.
If you can’t find Cotija at your local grocer, a firm Feta is your best bet. Both cheeses offer that punchy, salty finish that balances the smoky paprika and chili powder. Just be sure to crumble it finely so you get a bit of cheese in every single bite.
Step-by-Step: Achieving the Perfect Char
The cooking phase is short, so you need to be focused. You’re looking for a specific visual transformation in the pan. This isn’t about gently warming the corn; it’s about aggressive, intentional browning that develops flavor and removes water.
Preparing the Kernels for High Heat
Whether you’re using fresh corn off the cob or thawed frozen corn, you must pat the kernels dry with a clean kitchen towel. Any surface moisture on the corn will create a layer of steam in the pan. Steam is the enemy of the char.
If the corn is wet, it will boil in its own juices rather than searing. This leads to a mushy texture and a pale color. Take the extra thirty seconds to press the kernels between paper towels until they are bone-dry to the touch.
The 4-Minute Sear Technique
Heat your oil until it’s shimmering and just starting to wisps of smoke. Add the corn and spread it into a single layer. Now, here is the hardest part: don’t touch it. You need to let the corn sit undisturbed for at least 3 to 4 minutes.
You’ll hear the corn popping like popcorn—that’s a good sign! Resist the urge to stir. When you finally flip the kernels, you should see deep, dark golden-brown patches. Once you have that color, stir briefly for another two minutes and get it out of the pan immediately.
Building the Creamy Emulsion
Once the corn is charred, the assembly happens fast. The goal is to integrate the hot corn with the cool dairy without causing the sauce to break or become oily. This is where your technique determines the final mouthfeel.
Whisking for Structural Integrity
Start by beating your softened cream cheese alone in a bowl until it looks like frosting. Only then should you gradually whisk in the Mexican crema and mayonnaise. Adding the liquids slowly allows the fats to bond properly, creating a velvety, uniform sauce.
If you dump everything in at once, the cream cheese will stay in small chunks. A smooth base is essential because it coats the corn kernels evenly. This ensures that every scoop has the same ratio of spice, lime, and cream.
Folding Techniques for Maximum Aeration
When you add the warm corn to the cream mixture, use a spatula to gently fold it in. You don’t want to smash the kernels or beat the air out of the sauce. The “carry-over heat” from the corn is actually your friend here.
The warmth of the corn will slightly soften the minced garlic, taking away that harsh raw bite, and it will help the lime juice permeate the entire mixture. This gentle heat integration creates a cohesive flavor profile where no single ingredient overpowers the others.
More Mexican-Inspired Favorites
Round out your Mexican-inspired meal with these flavorful dishes.
- For a similar cheesy and savory experience, try this Cheesy Chicken Enchilada Skillet Recipe, bringing together tender chicken and melty cheese.
- If you’re craving more Tex-Mex classics, the Loaded Beef Nachos offer a satisfying crunch and rich beef topping.
Visual Presentation and Garnishing Strategy
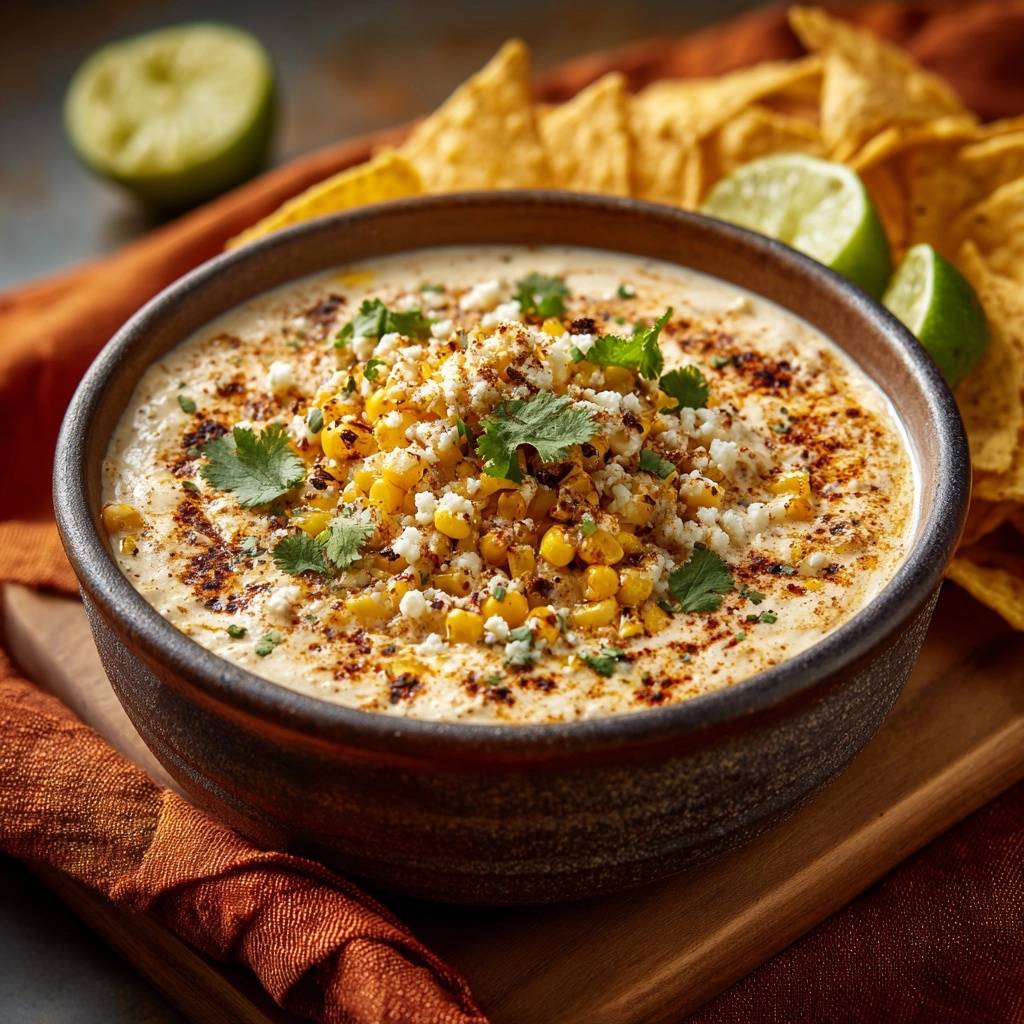
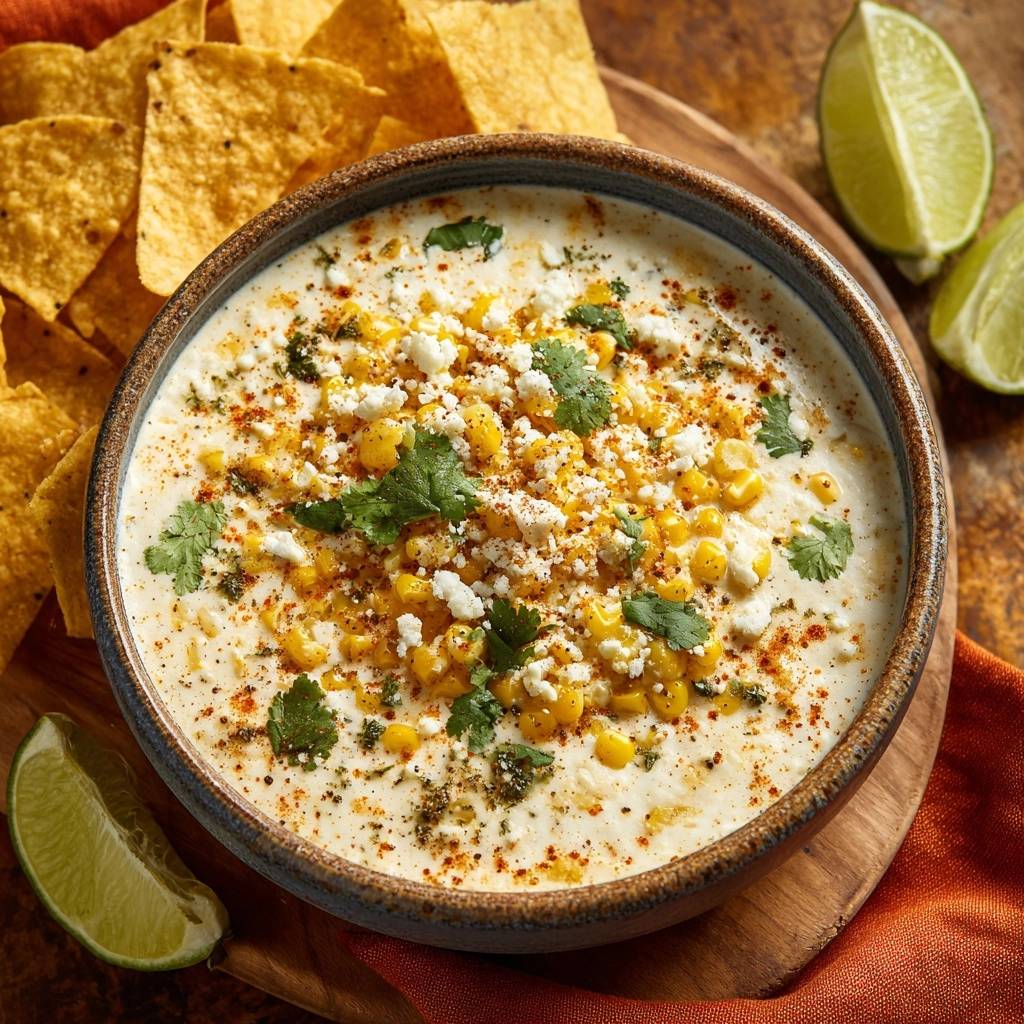
We eat with our eyes first, and a bowl of beige dip isn’t very inviting. To make this look like a high-end appetizer, reserve about half a cup of your best charred corn kernels before you mix everything together. Pile these right in the center of the finished dip.
Dust the top with an extra pinch of smoked paprika for a pop of red, and sprinkle the remaining bright green cilantro around the edges. This high-contrast look tells your guests exactly what’s inside: smoky, fresh, and bold flavors. Serve it in a shallow bowl so there’s more surface area for toppings.
Troubleshooting Common Dip Textures
If your dip feels a bit too thick to scoop without breaking a chip, don’t panic. Stir in an extra teaspoon of lime juice or a tiny splash of milk. The acidity of the lime juice actually helps loosen the proteins in the dairy, making it more fluid without making it “watery.”
On the flip side, if it still feels a little loose, add more crumbled Cotija cheese. The dry cheese will absorb some of the excess moisture and act as a thickening agent. Remember, the dip will also firm up slightly as it cools, so give it a minute to settle before making big changes.
Optimal Pairings for Mexican Street Corn Dip
While standard tortilla chips are the classic choice, they can sometimes snap under the weight of a thick dip. Look for “scoop” style chips or thick-cut, kettle-cooked tortilla chips. For a lower-carb option, thick slices of jicama provide a wonderful, watery crunch that balances the richness of the dip.
You can also think outside the chip bag. This dip makes an incredible topping for grilled chicken breasts or a blackened steak. I’ve even used leftovers as a spread for toasted bolillo rolls to make a quick Mexican-style sandwich. The possibilities go far beyond the appetizer tray.
Make-Ahead Instructions and Storage Limits
You can definitely prep the components of this dip 24 hours in advance. Char the corn and store it in one container, and whisk the cream base together in another. However, I don’t recommend mixing them until you’re ready to serve, as the corn will eventually release moisture into the cream.
Store any leftovers in an airtight container in the fridge for up to three days. Do not freeze this dip. The emulsion of mayonnaise and sour cream will break during the freezing and thawing process, resulting in a grainy, oily texture that just isn’t appetizing.
Expert Tips for Flavor Customization
If you love heat, finely dice a jalapeño and sauté it with the corn during the last two minutes of charring. This softens the pepper and infuses the oil with spice. For a more citrus-forward punch, swap the chili powder for Tajin seasoning, which adds a distinct lime-salt kick.
If you don’t have a cast iron skillet or a grill, you can add a single drop of liquid smoke to the cream base. Be very careful—a little goes a long way! This mimics the flavor of corn roasted over an open flame and adds that “outdoor cookout” vibe even if you’re cooking in a small apartment kitchen.
Frequently Asked Questions
Can I use canned corn for this recipe?
Yes, you can use canned corn, but you must rinse it thoroughly to remove the canning liquid and then pat it extremely dry. Canned corn is softer than fresh or frozen, so be extra careful during the charring phase to avoid overcooking it into mush. It may take an extra minute or two in the skillet to achieve a good color because of the higher moisture content.
How do I reheat leftovers without the oil separating?
The best way to reheat this dip is slowly. Use a small saucepan over low heat and add a teaspoon of water or milk to help re-emulsify the sauce. Stir constantly just until it’s warm. Avoid the microwave if possible, as the uneven high heat will cause the mayonnaise to “break” and turn oily.
Is there a dairy-free alternative that maintains this thickness?
To keep the signature thickness without dairy, use a thick cashew-based cream or an almond-milk cream cheese. Avoid thin coconut milks, as they won’t provide the structural integrity needed for a scoopable dip. You can also use a vegan mayo and swap the Cotija for a salty, crumbled nut-based “feta” alternative.
Why is my cilantro turning bitter?
Cilantro is a delicate herb that loses its bright, citrusy flavor and turns bitter when exposed to high heat for too long. Always fold your cilantro in at the very end of the process, once the corn has had a chance to cool slightly. This preserves the essential oils in the leaves and keeps the dip tasting fresh.
Can I serve this cold?
While this dip is traditionally served warm or at room temperature, it is perfectly safe to eat cold. Keep in mind that the cream cheese base will firm up significantly in the refrigerator. If serving cold, you may want to stir in an extra tablespoon of Mexican crema to ensure it stays creamy enough for dipping.
Mexican Street Corn
Course: AppetizerCuisine: MexicanDifficulty: easy6
servings10
minutes15
minutes315
kcal25
MinutesThis restaurant-quality dip solves the problem of runny corn dips by charring the corn to remove moisture and using a cream cheese base for stability. It is creamy, smoky, and packed with traditional street corn flavors.
Ingredients
4 cups sweet corn kernels (fresh or thawed and patted dry)
1 tablespoon vegetable oil
4 oz cream cheese, softened (The stabilizer to prevent thinning)
1/2 cup Mexican crema or sour cream
1/4 cup mayonnaise
1/2 cup crumbled cotija cheese
1 teaspoon chili powder
1/2 teaspoon smoked paprika
1/4 cup fresh cilantro, chopped
1 clove garlic, minced
1 tablespoon fresh lime juice
Tortilla chips and lime wedges for serving
Directions
- Heat the vegetable oil in a large cast-iron skillet over high heat until shimmering. Add the corn kernels in a single layer.
- To solve the watery dip problem, let the corn sit undisturbed for 3 to 4 minutes until deeply charred on the bottom. This intense heat evaporates the internal moisture that usually thins out the sauce. Stir and cook for another 2 minutes, then remove from heat.
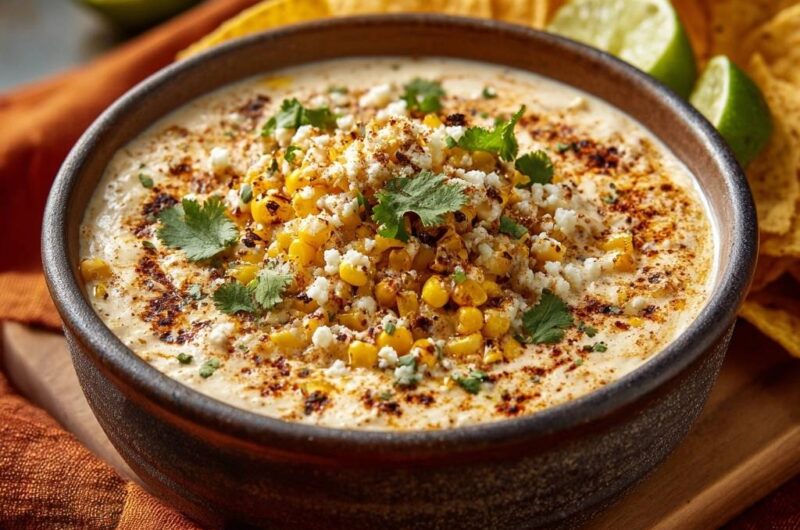
- In a medium bowl, beat the softened cream cheese until smooth. Gradually whisk in the Mexican crema, mayonnaise, minced garlic, and lime juice. The cream cheese provides the structural integrity shown in the image, ensuring the dip stays thick even when warm.
- Reserve 1/2 cup of the charred corn for topping. Fold the remaining warm corn into the cream mixture. The warmth will help the cheeses melt together into a cohesive sauce.
- Stir in half of the cotija cheese and half of the cilantro.
- Transfer the mixture to a serving bowl. To match the visual presentation, pile the reserved charred corn in the center.
- Top with the remaining cotija, cilantro, chili powder, and smoked paprika. Serve immediately with sturdy tortilla chips and extra lime wedges on the side.
Notes
- To prevent a thin consistency, ensure the corn is patted dry before charring and use softened cream cheese as a stabilizer. Serve with sturdy tortilla chips to support the thick texture.