Nothing ruins a meal faster than taking a bite of breaded chicken only to find a mushy, damp crust. Most home cooks struggle with coatings that slide right off or turn soggy the moment they hit the plate. If you’ve ever felt that disappointment, this recipe is your solution.
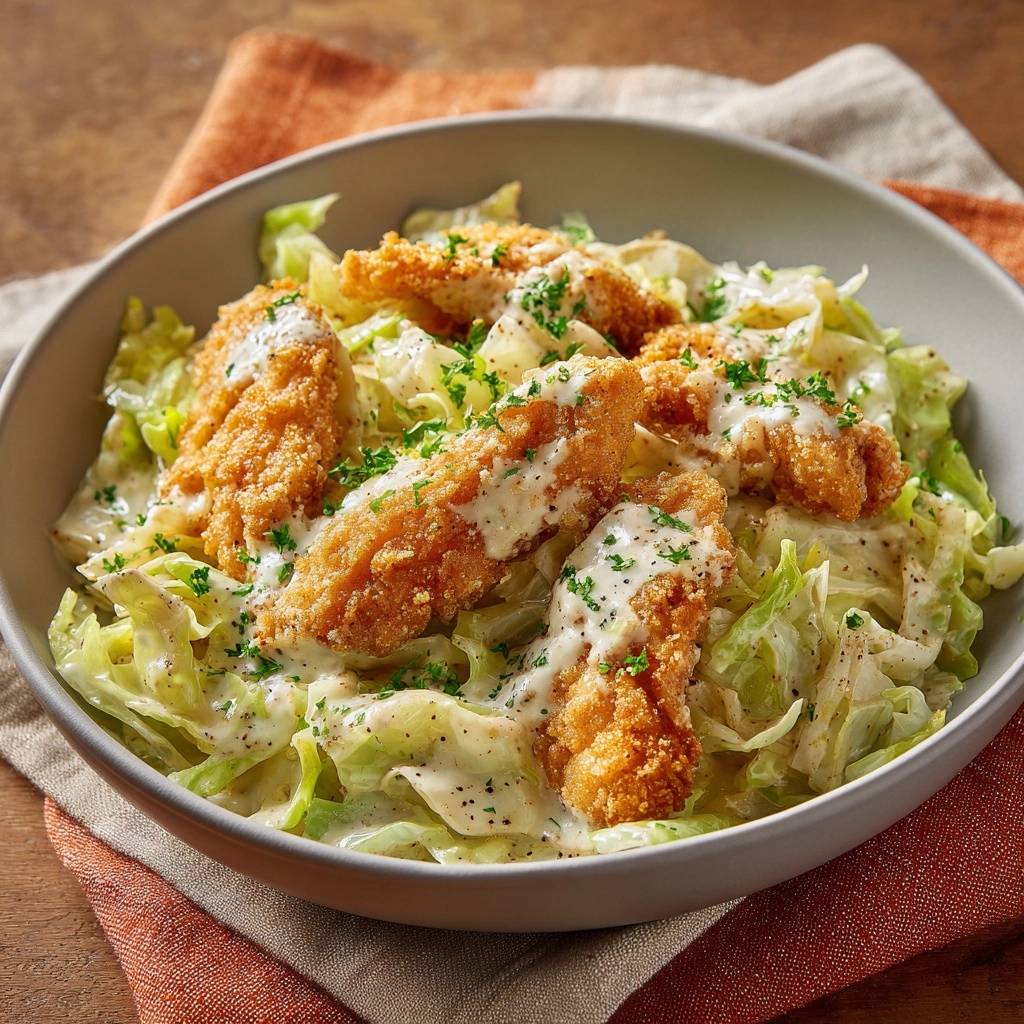
We’re creating a textural masterpiece that pairs shatteringly crisp chicken tenderloins with a cool, creamy cabbage base. The contrast between the hot, crunchy exterior of the meat and the tender-crisp bite of the greens is addictive. You’ll get that satisfying “crunch” in every single mouthful.
The secret to this success is our Anti-Soggy Coating Hack. By using a specific pressing technique and a wire rack cooling method, we ensure the crust stays firm. I’ve found that the biggest mistake people make is resting fried food on paper towels, which actually steams the bottom of your chicken into a soggy mess.
If you’re looking for more ways to achieve perfectly juicy chicken, check out these crispy chicken bites.
The Science of the Anti-Soggy Coating Hack
Frying is essentially a game of moisture management. When chicken hits hot oil, the water inside the meat turns to steam and tries to escape. If your breading isn’t bonded tightly, that steam gets trapped between the meat and the crust, causing the breading to puff out and eventually get soft.
The “palm-press” method solves this by creating a structural bond. When you firmly press the breadcrumbs into the egg-washed chicken with your palm, you eliminate air pockets. This dense layer acts as a moisture-resistant barrier that keeps the juices inside the chicken while the outside crisps up perfectly.
Achieving that deep golden color requires the Maillard reaction, which happens best when your oil stays at a steady 350°F. If the oil is too cool, the breading absorbs grease like a sponge. If it’s too hot, the spices in your breading will burn before the chicken is cooked through. 350°F is the sweet spot for a perfect, mahogany-colored crunch.
Essential Components for the Perfect Bowl
Quality ingredients make a massive difference in a simple bowl like this. I prefer using chicken tenderloins because they are naturally more tender than sliced breast meat. They also have a uniform shape, which means every piece in your pan finishes cooking at exactly the same time.
For the cabbage, we aren’t looking for thin, wispy shreds like a standard coleslaw. Cutting the head into 1.5-inch rustic squares provides a much better mouthfeel. These larger pieces hold up against the creamy dressing without becoming a watery pile of limp greens.
The dressing relies on apple cider vinegar to provide a sharp, fruity acidity. This is crucial because it cuts through the richness of the mayonnaise and the fried coating of the chicken. It brightens the entire dish and keeps the heavy flavors in check.
Choosing the Right Frying Oil
You need an oil with a high smoke point for this shallow fry. Canola and peanut oil are the champions here because they can handle the heat without breaking down or smoking. Peanut oil, in particular, adds a very subtle nutty depth that complements the breadcrumbs.
Avoid using butter or extra virgin olive oil for this step. Butter contains milk solids that will burn at 350°F, leaving bitter black specks on your chicken. Save the fancy olive oil for drizzling; it simply can’t handle the high-heat environment required for a truly crispy crust.
The Role of Dijon and Honey in the Dressing
The dressing isn’t just a sauce; it’s an emulsion. The Dijon mustard acts as a natural stabilizer, helping the oil-based mayo and the watery vinegar stay blended together. Without the mustard, your dressing might separate and look oily on the cabbage.
Honey plays a specific role in balancing the flavor profile. Cabbage can sometimes have a slightly bitter or sulfurous note, especially after blanching. The honey rounds out those sharp edges, creating a mellow sweetness that makes the dressing feel complete.
Preparing the Creamy Cabbage Base
Blanching the cabbage is a quick but vital step. You only want to boil it for about two minutes. You’ll see the color shift to a vibrant, neon green, and that’s your cue to pull it out. It should be tender enough to chew easily but still have a distinct “snap.”
An ice bath is non-negotiable here. If you just drain the cabbage in a colander, the residual heat will keep cooking it until it turns gray and mushy. Plunging it into ice water stops the process instantly, locking in that beautiful color and the perfect texture.
Once the cabbage is cold, you must pat it thoroughly dry. I usually use a clean kitchen towel or several layers of paper towels. Any water left on the leaves will thin out your dressing, turning your creamy base into a soupy, flavorless mess. Dry cabbage is the key to a rich sauce.
Executing the Double-Dredge Technique
To keep your kitchen from becoming a sticky disaster, use the “dry hand/wet hand” method. Use your left hand for the dry flour and breadcrumbs, and your right hand for the wet egg wash. This prevents your fingers from becoming “clubbed” with thick layers of dough.
Start by tossing the chicken in the flour. You want a very thin, even coating, so give each piece a good shake to remove the excess. This flour layer acts as the “glue” that helps the egg wash stick to the meat. If there’s too much flour, the coating will peel off in the pan.
After the egg dip, move the chicken to the breadcrumb bowl. This is where the magic happens. Don’t just toss the chicken in the crumbs; bury it. Use the heel of your hand to press the crumbs firmly into the meat. You want the chicken to look completely encased in a thick, even layer of seasoning.
You’ll know you’ve done it right when the tenderloin feels firm and heavy in your hand. There should be no bald spots where the meat shows through. This dense coating is what creates that incredible “shatter” when you take your first bite.
For an extra crispy bite that lasts, consider these golden chicken bites.
Precision Frying and the Wire Rack Rule
When you’re ready to fry, don’t crowd the pan. If you put too many pieces of cold chicken in at once, the oil temperature will plummet. This leads to greasy, oily breading. Fry in batches, giving each tenderloin enough space to swim without touching its neighbor.
Watch for visual cues rather than just relying on a timer. You’re looking for a deep, golden-brown color and a crust that looks rigid. The chicken should release easily from the bottom of the pan when it’s ready to flip. If it sticks, it usually needs another thirty seconds to finish crisping.
The most important rule of this entire recipe is the Wire Rack Rule. As soon as the chicken comes out of the oil, place it on a wire cooling rack set over a baking sheet. This allows air to circulate around the entire piece of chicken. If you put it on paper towels, the steam from the hot meat gets trapped underneath, softening the crust you just worked so hard to build.
Assembling Your Crispy Chicken and Creamy Cabbage Bowl
When it’s time to build the bowls, start by tossing your dry cabbage with only half of the dressing. This ensures the cabbage is coated but not drowning. You can always add more later, but you can’t take it away once the bowl becomes soupy.
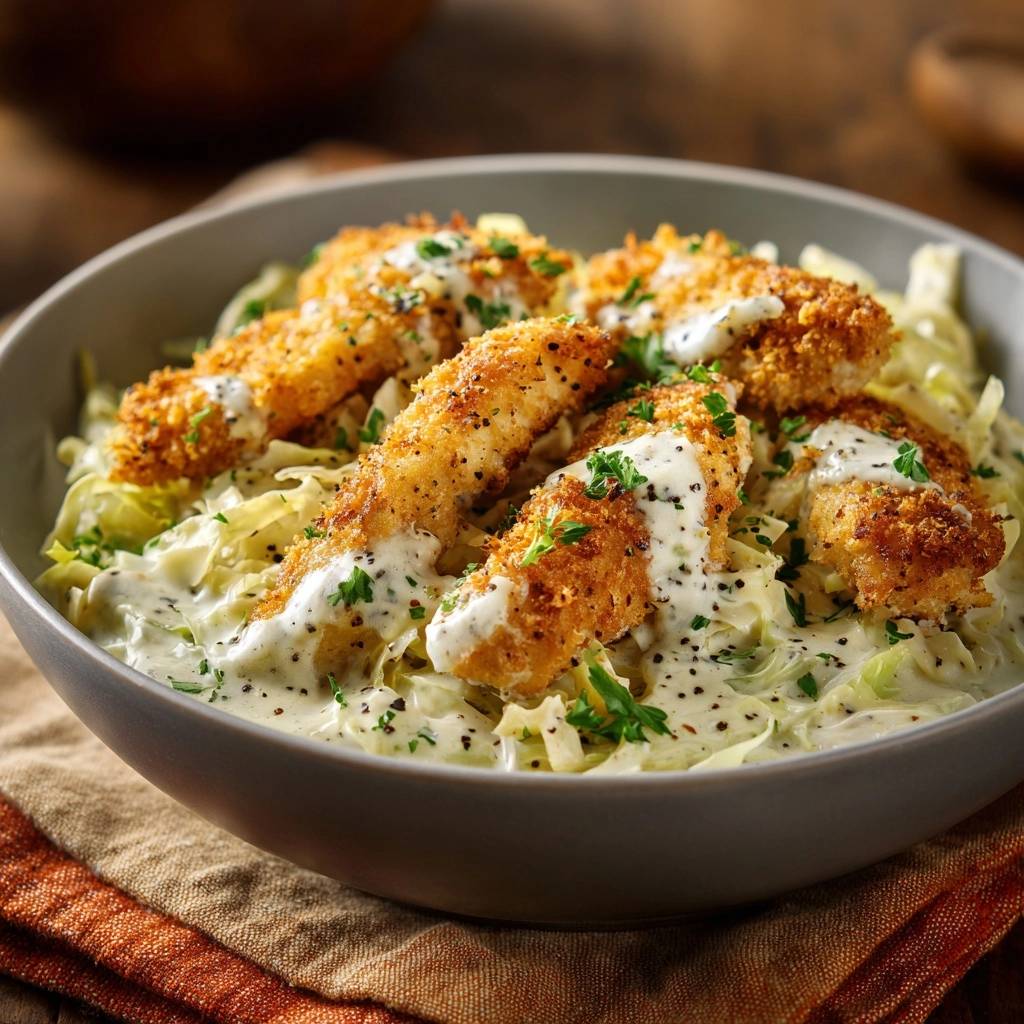
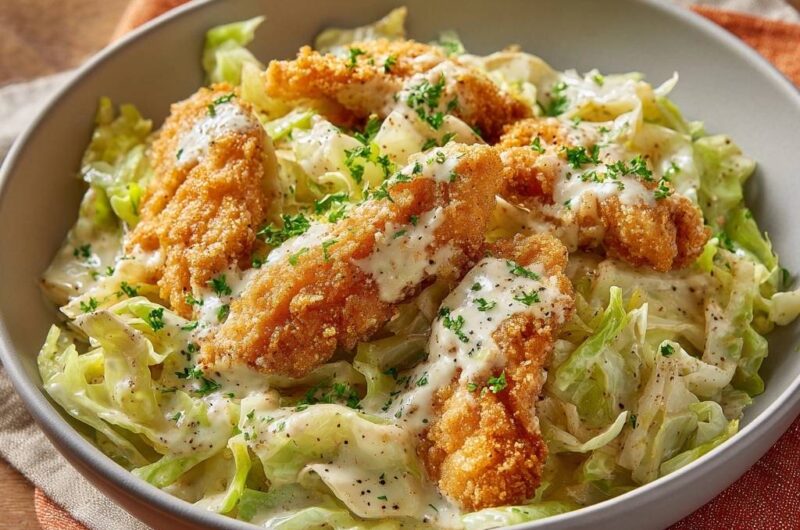
Layer the creamy cabbage at the bottom of the bowl first. I like to leave the chicken tenderloins whole to preserve the maximum amount of crispy surface area. If you prefer to slice them, do it right before serving so the juices don’t have time to soak into the breading.
Drizzle the remaining dressing over the top of the chicken. This allows the sauce to hit the tongue first, followed by the crunch of the crust. Finish with a heavy sprinkle of fresh parsley and some extra cracked black pepper to give the dish a professional, vibrant look.
Complementary Recipes to Try
Round out your meal with these dishes that pair well with the crispy chicken.
- For a touch of sweet and spicy, consider making the Hot Honey Jalapeño Cornbread; its hearty texture and kick will complement the chicken beautifully.
- If you’re looking for a refreshing accompaniment, the Creamy Herb and Pea Potato Salad offers a cool, flavorful contrast.
Flavor Variations and Ingredient Swaps
If you want to add some heat to this bowl, it’s very easy to modify. Add a teaspoon of cayenne pepper to the breadcrumb mixture and stir a tablespoon of sriracha into the dressing. This creates a “spicy creamy” vibe that works beautifully with the cabbage.
For those avoiding gluten, you can swap the all-purpose flour for almond flour and use gluten-free Panko crumbs. The texture will be slightly different, but the “palm-press” method still works to keep the coating attached to the chicken.
You can also add extra texture to the cabbage base. Toasted sunflower seeds or slivered almonds add a nice earthy crunch that plays well with the honey in the dressing. If you want more zip, try adding some thinly sliced radishes or green onions to the cabbage mix.
Troubleshooting Common Texture Issues
If your breading falls off in the pan, it’s usually because the chicken was too wet before the flour step or the oil wasn’t hot enough. Always pat your chicken dry with paper towels before you start the dredging process. Moisture is the enemy of adhesion.
If you accidentally over-blanch your cabbage and it becomes too soft, don’t panic. You can chop it more finely and mix it with a little warm mashed potato or just extra dressing to create a “warm slaw” style base. It won’t have the snap, but it will still taste delicious.
Maintaining oil temperature is the biggest challenge during batch frying. Between batches, give the oil a minute or two to come back up to 350°F. If you see the oil shimmering or starting to wisps of smoke, it’s ready for the next round of chicken.
Expert Tips for Professional Results
One of the best secrets for a flavorful crust is seasoning every single layer. Don’t just salt the chicken; add a pinch of salt and pepper to the flour and the egg wash too. This builds “layers of flavor” so the dish never tastes bland, even in the middle of the coating.
If you have the time, let your breaded chicken sit on a plate in the fridge for about 10 to 15 minutes before frying. This “set time” allows the flour and egg to hydrate, which creates a much stronger bond. The coating will be less likely to flake off when you flip the chicken in the pan.
Always use fresh parsley rather than dried. The oils in fresh herbs provide a bright, grassy finish that cuts through the fried elements of the dish. It makes the whole bowl feel lighter and more like something you’d get at a high-end bistro.
Frequently Asked Questions
Can I use an air fryer for this recipe?
You can certainly use an air fryer, though the texture will be slightly different than the shallow-fried version. To get the best results, preheat your air fryer to 400°F. Spray the breaded chicken very generously with oil spray on all sides to help it brown. Cook for about 10-12 minutes, flipping halfway through, until the internal temperature reaches 165°F.
How do I store and reheat leftovers?
It is best to store the chicken and the cabbage in separate airtight containers in the refrigerator. The cabbage will stay fresh for about two days, though it may release a little water. To reheat the chicken, avoid the microwave as it will make the crust rubbery. Instead, use a toaster oven or air fryer at 350°F for 5 minutes to restore that signature crunch.
What are the best substitutes for mayonnaise?
If you want a tangier or lighter profile, you can substitute the mayonnaise with plain Greek yogurt or sour cream. Because these options are more acidic than mayo, you might want to add an extra teaspoon of honey to balance the flavors. Keep in mind that yogurt is thinner, so your dressing might be a bit more liquid.
Is it possible to make this bowl ahead of time?
You can prep the dressing and blanch the cabbage up to 24 hours in advance. However, for the best experience, the chicken should be fried right before you plan to eat. Fried foods lose their structural integrity as they cool and sit. If you must prep the chicken early, wait to drizzle the sauce until the very last second.
Why is my cabbage watery after mixing?
This usually happens for two reasons: the cabbage wasn’t dried well enough after the ice bath, or it sat in the dressing for too long. Salt in the dressing draws moisture out of vegetables over time. For the best texture, toss the cabbage with the dressing immediately before serving to keep it crisp and creamy rather than watery.
Crispy Chicken
Course: Main CourseCuisine: AmericanDifficulty: easy4
servings15
minutes20
minutes510
kcal35
MinutesA satisfying meal featuring shatteringly crisp chicken tenderloins achieved through a specific dredging and resting technique, paired with tender-crisp blanched cabbage and a creamy homemade dressing.
Ingredients
1.5 lbs chicken breast tenderloins
1 small head green cabbage, chopped into 1.5-inch rustic squares
1 cup all-purpose flour
2 large eggs, beaten with 1 tablespoon water
1.5 cups fine breadcrumbs (plain or Panko)
1 teaspoon garlic powder
1 teaspoon onion powder
1 teaspoon kosher salt
1/2 teaspoon cracked black pepper
1/2 cup mayonnaise
2 tablespoons apple cider vinegar
1 tablespoon honey
1 tablespoon Dijon mustard
1/4 cup fresh parsley, minced
Vegetable oil for frying (canola or peanut oil preferred)
Directions
- Prepare the cabbage: Bring a large pot of salted water to a boil. Blanch the cabbage pieces for 2 minutes until bright green and tender-crisp. Drain immediately and plunge into an ice bath to stop the cooking. Drain again and pat thoroughly dry with paper towels.
- Set up the dredging station: Place flour in the first shallow bowl. In the second, whisk the eggs with water. In the third, combine breadcrumbs, garlic powder, onion powder, salt, and pepper.
- Coat the chicken: Dredge each tenderloin in flour, shaking off the excess. Dip into the egg wash, then press firmly into the breadcrumb mixture. For the “Anti-Soggy” hack, ensure the breadcrumbs are pressed into the meat with your palm to create a dense, moisture-resistant crust.
- Fry the chicken: Heat 1/2 inch of oil in a large heavy-bottomed skillet over medium-high heat until it reaches 350°F. Fry the chicken in batches for 3-4 minutes per side until deep golden brown and the internal temperature reaches 165°F.
- The Crispness Rule: Immediately transfer the fried chicken to a wire cooling rack set over a baking sheet. Do not rest on paper towels, as the trapped steam will soften the bottom crust.
- Make the dressing: In a small bowl, whisk together the mayonnaise, apple cider vinegar, honey, and Dijon mustard until smooth and creamy.
- Assemble: In a large bowl, toss the dry, blanched cabbage with half of the dressing and half of the minced parsley.
- Serve: Divide the creamy cabbage into four bowls. Top with the crispy chicken tenderloins. Drizzle the remaining dressing over the chicken and cabbage. Garnish generously with the remaining parsley and extra cracked black pepper.
Notes
- To maintain maximum crunch, always rest fried chicken on a wire rack instead of paper towels to prevent steam from softening the crust. Ensure cabbage is patted completely dry after the ice bath to prevent the dressing from becoming watery.