Traditional Chicken Cordon Bleu often promises a golden, crunchy exterior but frequently delivers a soggy, greasy disappointment. When you stuff ham and cheese inside a chicken breast, the steam from the fillings gets trapped, turning the breading into a rubbery mess from the inside out. This open-face Crispy Chicken Cordon Bleu Bake flips the script by focusing on an “Anti-Soggy Bottom” philosophy that prioritizes texture above all else.
By moving the toppings to the outside and using a specialized roasting technique, we ensure every square inch of the chicken stays incredibly crisp. You get the classic flavors of salty ham and nutty Swiss cheese without the technical headache of rolling or toothpicking meat. It’s a modern, streamlined approach that respects the ingredients while fixing the structural flaws of the original French-inspired classic.
The secret to this professional-grade crunch lies in a two-step browning process. Most recipes rely on the oven to brown the breadcrumbs, but since chicken cooks quickly, the crumbs often stay pale and soft. We pre-toast the Panko in a skillet with olive oil before it ever touches the chicken, locking in a deep golden color and a shatteringly crisp mouthfeel that holds up even under a blanket of melted cheese.
If you enjoy stuffed chicken, you’ll appreciate the garlic parmesan approach in garlic parmesan stuffed chicken.
The Science of the Anti-Soggy Breadcrumb
Achieving a perfect crust in the oven requires understanding the Maillard reaction, which is the chemical process that creates browned, flavorful food. In a standard oven environment, the moisture from the raw chicken evaporates and often gets absorbed by the breadcrumbs before they have a chance to crisp up. This results in a “steamed” breading that feels more like wet dough than a crunchy coating.
Pre-toasting your Panko breadcrumbs creates a hydrophobic barrier. By coating the crumbs in oil and browning them in a skillet first, you are essentially “sealing” the starch. When the chicken goes into the oven, these toasted crumbs resist the moisture escaping from the meat, maintaining their structural integrity throughout the entire baking process. You aren’t just cooking the crumbs; you’re protecting them.
Why Panko Outperforms Traditional Breadcrumbs
Standard breadcrumbs are finely ground and dense, which leads to a heavy, sandy texture that can feel “dusty” on the palate. Japanese Panko, however, is made from crustless bread that is processed into large, airy flakes. These jagged edges create a massive amount of surface area, allowing for more contact with heat and oil.
These flakes act like tiny skyscrapers on the surface of your chicken, creating air pockets that allow heat to circulate. This extra space is what gives you that signature “light” crunch rather than a hard, tooth-cracking shell. When you press Panko into the chicken, those uneven shapes catch the light and the cheese perfectly, providing a much more satisfying sensory experience.
Essential Components for the Perfect Bake
Success starts with how you prep your poultry. You want to use boneless, skinless chicken breasts, but the key is uniformity. Use a meat mallet or a heavy skillet to pound the chicken to a consistent 1/2-inch thickness. This ensures the entire piece of meat cooks at the same rate, preventing the thin tapered end from drying out while the thick center stays raw.
Quality matters when it comes to your fats and seasonings too. Using a high-quality olive oil for the Panko toast adds a fruity depth that butter can’t achieve without burning. Additionally, don’t skip the garlic and onion powder; these aromatics hydrate slightly during the bake, infusing the meat with savory notes that balance the richness of the cheese and the saltiness of the ham.
Selecting the Right Poultry and Ham
While chicken thighs are often praised for their fat content, chicken breasts are the superior choice for Cordon Bleu. The lean, mild flavor of the breast provides a clean canvas that allows the ham and cheese to shine. Because we are cooking at a high heat for a short time, the breast stays remarkably juicy as long as it isn’t overcooked.
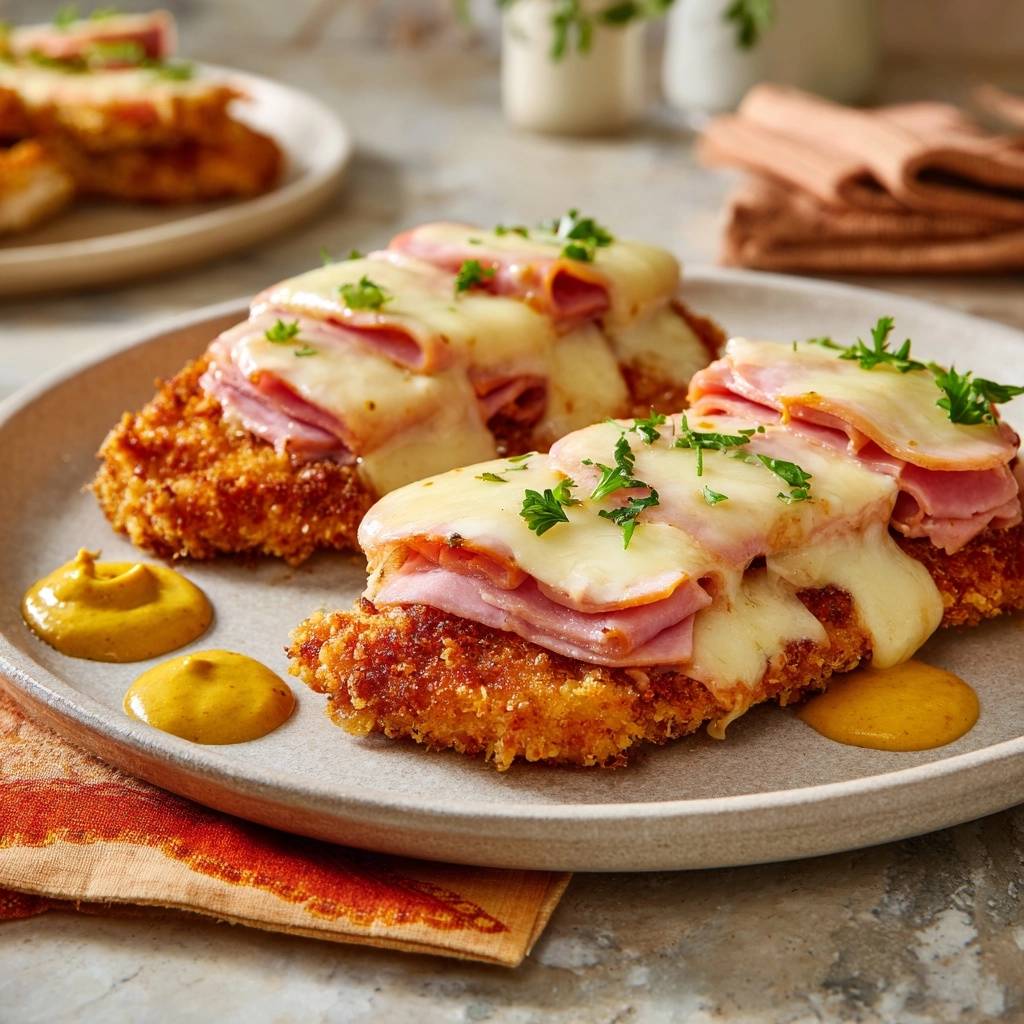
For the ham, look for thinly sliced deli ham rather than thick-cut steaks. Thin slices are much easier to “ruffle” or fold on top of the chicken. This ruffling isn’t just for looks; it creates height and little valleys where the cheese can pool and melt, rather than just sliding off a flat surface. A honey-roasted or black forest ham adds a subtle sweetness that pairs beautifully with the savory crust.
The Cheese Factor: Swiss vs. Gruyère
Swiss cheese is the traditional choice, offering a mild, nutty flavor that everyone loves. However, if you want to take this dish to a gourmet level, Gruyère is the gold standard. Gruyère is a type of Swiss cheese that is aged longer, giving it a more complex, earthy flavor and a superior melting point due to its high oil-to-water ratio.
Regardless of which you choose, always use shredded cheese rather than thick slices. Shredded cheese has more surface area, which means it melts faster and more evenly. It drapes over the ham and clings to the crispy Panko edges, creating those beautiful, bubbly brown spots that make the dish look like it came straight from a restaurant kitchen.
The Dredging Station: A Three-Step System
To get a coating that actually sticks, you must follow the flour-egg-crumb sequence religiously. Think of the flour as a primer; it dries the surface of the chicken so the egg can hold on. The egg wash acts as the glue, and the toasted Panko is your final “paint” layer. If you skip the flour, the egg will slide right off the slick meat, taking your crispy crust with it.
If you’re enjoying the idea of stuffed chicken, you might also like these cranberry and spinach stuffed chicken breasts.
To keep your kitchen from becoming a sticky mess, use the “wet hand, dry hand” technique. Use your left hand for the dry flour and Panko, and your right hand for the egg wash. This prevents your fingers from becoming breaded “clubs,” ensuring that more Panko ends up on the chicken and less on your skin. It makes the process faster and much cleaner.
Seasoning the Base Layer
A common mistake is only seasoning the breadcrumbs. This often results in a dish that tastes flavorful on the outside but bland on the inside. You must season the chicken breasts directly with salt, pepper, and your spice blend before they ever touch the flour. This ensures the seasoning is locked against the meat.
The smoked paprika in this recipe is a secret weapon. It doesn’t make the dish spicy, but it adds a hint of “charred” flavor that mimics the taste of a deep fryer or a grill. It also gives the chicken a beautiful reddish-gold hue underneath the breadcrumbs, making the final presentation look much more vibrant and appetizing.
Step-by-Step: Achieving Professional-Grade Crunch
Once your chicken is breaded, the cooking environment is everything. We preheat the oven to 425°F, which is high enough to set the crust quickly without drying out the interior. However, the most important tool in your arsenal isn’t the oven itself—it’s the wire cooling rack placed inside your baking sheet.
When chicken sits directly on a flat pan, the bottom side sits in its own escaping juices. This creates a soggy, pale underside that ruins the Cordon Bleu experience. By using a wire rack, you allow hot air to circulate 360 degrees around the meat. This “convection” effect dries out the bottom crust just as much as the top, ensuring a uniform crunch all the way around.
Phase One: The Initial High-Heat Roast
The first 12 to 15 minutes are all about the chicken and the crust. You are looking for the Panko to set firmly and the chicken to reach an internal temperature of about 160°F. Don’t worry that this is 5 degrees below the safety zone; the chicken will continue to cook during the second phase when we add the toppings.
During this phase, you’ll notice the aroma of the toasted garlic and onion powder filling the kitchen. The oil drizzle we added right before baking helps the Panko “fry” slightly in the oven heat. If you see any spots that look particularly dry or pale, you can give them a tiny extra spritz of oil, but the pre-toasting usually handles the color perfectly.
Phase Two: The Ham and Cheese Finish
After the initial roast, pull the tray out and work quickly. Fold your ham slices to create “ribbons” of meat on top of each breast. This creates a textured landscape for the cheese. Pile the shredded Swiss or Gruyère generously over the ham. You want enough cheese so that it spills over the sides slightly, creating those crispy “cheese lace” edges on the wire rack.
Return the tray to the oven for a few minutes. If you want that classic “broiled” look with dark brown spots, switch your oven to the broiler setting for the last 60 seconds. Watch it like a hawk! Cheese can go from perfectly melted to burnt in a matter of seconds. You are looking for a bubbly, molten blanket that has just begun to caramelize.
Troubleshooting Common Cordon Bleu Mistakes
If your breading is falling off, it usually means the chicken was too wet before dredging or you didn’t press the Panko in firmly enough. Always pat the chicken dry with paper towels before starting the flour step. When you get to the Panko bowl, don’t just sprinkle the crumbs on; use the palm of your hand to physically press the crumbs into the egg wash.
If your chicken ends up dry, you likely skipped the pounding step. Uneven chicken breasts require more time in the oven to cook the thick part, which inevitably turns the thin part into leather. Use a meat thermometer to pull the chicken at exactly 160°F before adding the cheese. The residual heat and the final melting phase will carry it perfectly to the safe 165°F mark.
Equipment: Why the Wire Rack is Non-Negotiable
In the world of oven-frying, the wire rack is your best friend. Most home ovens heat from the bottom, and a solid metal baking sheet acts as a heat shield. By elevating the chicken, you allow that intense heat to hit the bottom of the breast immediately. This “shocks” the crust into crisping up before the meat can release too much moisture.
If you don’t have a wire rack, you can improvise by creating “coils” out of crumpled aluminum foil to lift the chicken, but a standard cooling rack is much more stable. Just remember to spray the rack with a bit of non-stick spray. The egg wash is a powerful adhesive, and you don’t want to leave your beautiful crispy crust stuck to the metal wires when you try to serve it.
Flavor Variations and Ingredient Swaps
While the classic ham and Swiss combo is iconic, this open-face method is incredibly versatile. For a smoky twist, try using smoked turkey instead of ham and swap the Swiss for a sharp white cheddar. You can even add a pinch of chipotle powder to the flour for a subtle heat that cuts through the richness of the cheese.
If you want an herby profile, mix dried thyme and oregano into the flour. Just ensure any herbs you add to the breading are dried; fresh herbs contain moisture that can interfere with the crunch. If you must use fresh herbs, save them for the very end as a garnish. A little lemon zest grated over the finished cheese can also provide a bright, citrusy lift that balances the salty ham.
Side Dish Pairings for a Balanced Plate
Because this dish is rich, salty, and crunchy, you want sides that offer a fresh, acidic contrast. A simple arugula salad tossed in a sharp lemon vinaigrette is the perfect partner. The peppery bite of the greens and the acid from the lemon cut right through the heavy cheese and fried breadcrumbs, cleansing your palate between bites.
Round out your meal
To complement your crispy chicken bake, consider these vegetable-forward dishes.
- For a bright and fresh addition, try our Roasted Broccoli and Pineapple Salad, which offers a sweet and tangy counterpoint.
- If you enjoy a cheesy bite, our Crispy Cheddar-Stuffed Broccoli Florets provide a similar texture and flavor profile.
Roasted asparagus or steamed green beans with a squeeze of lime also work beautifully. If you want something heartier, a light Dijon-based slaw provides a nice “tang” that echoes the mustard served with the chicken. Avoid heavy, creamy sides like mashed potatoes or mac and cheese, as they can make the entire meal feel overly weighted and one-dimensional.
Make-Ahead Strategies and Storage
You can prep the chicken through the dredging step up to 4 hours in advance. Simply place the breaded (but unbaked) chicken on a plate, cover it loosely with plastic wrap, and keep it in the fridge. This actually helps the breading set even more firmly. However, do not add the ham or cheese until the final minutes of baking, or they will release moisture into the crust while it sits.
If you have leftovers, avoid the microwave at all costs. Microwaves heat by vibrating water molecules, which will turn your crispy crust into a soggy sponge in seconds. Instead, reheat the chicken in an air fryer at 350°F for 3-5 minutes or in a toaster oven. This will reactivate the oils in the Panko and melt the cheese back to its original glory.
Expert Tips for the Home Chef
Always bring your eggs to room temperature before making the egg wash. Cold eggs are more viscous and don’t break down as easily, which can lead to thick, gloopy patches of egg on your chicken that prevent the Panko from sticking evenly. A quick whisk with a tablespoon of water helps thin the proteins for a perfect, even coating.
Another pro tip is to let the chicken rest for just 2 minutes after it comes out of the oven. This allows the juices inside the meat to redistribute. If you cut into it immediately, the moisture will rush out and soak into the bottom crust you worked so hard to keep crispy. Patience for 120 seconds will result in a much better final texture.
How to Tell When the Chicken is Done
Stop using the “cut and peek” method to check for doneness. Slicing into the chicken while it’s cooking lets all the internal juices escape, guaranteed to leave you with dry meat. It also ruins the beautiful presentation of the melted cheese. Invest in an inexpensive instant-read digital thermometer.
Aim for 160°F when you pull the chicken to add the ham and cheese. By the time the cheese is bubbly and you’ve let the meat rest for a couple of minutes, the carry-over cooking will have brought the internal temperature to the FDA-recommended 165°F. This ensures the chicken is safe to eat while remaining as succulent as possible.
The Role of Mustard in the Final Presentation
Mustard isn’t just a condiment here; it’s a functional part of the flavor profile. The sharp, vinegary tang of Dijon or a spicy yellow mustard acts as a “brightener” for the dish. It provides a necessary counterpoint to the fats in the Swiss cheese and the oil in the breadcrumbs.
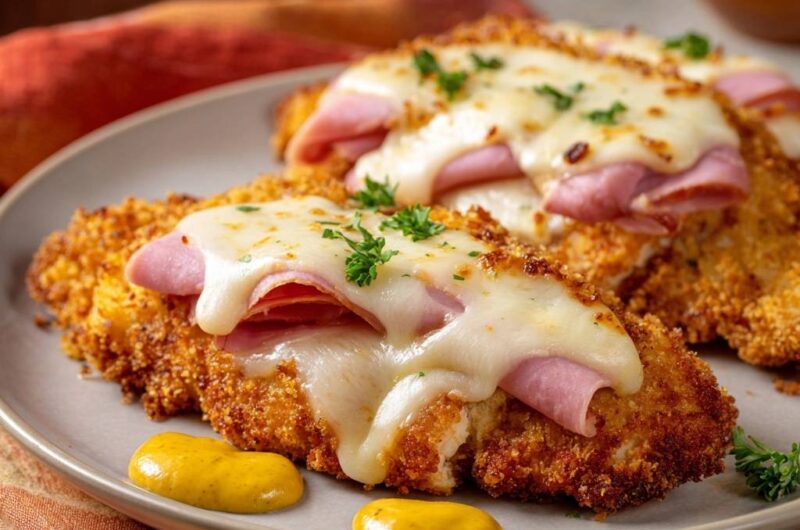
Instead of spreading the mustard over the top (which would soften the crust), serve it in small dollops on the side of the plate or in a ramekin. Dipping each crispy, cheesy bite into the mustard allows you to control the flavor balance while maintaining that hard-earned “Anti-Soggy” crunch until the very last mouthful.
How should I store and reheat leftovers?
Store any leftover chicken in an airtight container in the refrigerator for up to 3 days. To maintain the crispy texture, do not use a microwave for reheating. Instead, place the chicken in an air fryer at 350°F for 4-5 minutes or in a conventional oven at 375°F until the cheese is bubbly and the crust is firm. Freezing is not recommended as the ham and cheese can release moisture upon thawing, making the breading soggy.
Why does the breading fall off my chicken?
Breading usually falls off because the surface of the chicken was too wet or the dredging layers didn’t bond. Ensure you pat the chicken completely dry with paper towels before the flour step. The flour acts as a primer for the egg, and the egg acts as glue for the Panko. Additionally, make sure to press the Panko firmly into the chicken with your palms to “lock” it into the egg wash before baking.
Can I use regular breadcrumbs instead of Panko?
You can use regular breadcrumbs, but the texture will be significantly different. Regular breadcrumbs are much finer and denser, resulting in a harder, sandier crust rather than the light, airy crunch of Panko. If you must use regular crumbs, keep a close eye on the pre-toasting step as they burn much faster than the larger Panko flakes due to their smaller size.
What if I don’t have a wire cooling rack?
The wire rack is essential for 360-degree airflow to prevent a soggy bottom. If you don’t have one, you can create “boosters” by crumpling up small balls or long ropes of aluminum foil and placing them on your baking sheet. Rest the chicken on top of these foil structures to lift it off the pan. This allows the heat to circulate underneath the meat, though a wire rack is much more stable and effective.
Can I use chicken thighs instead of breasts?
Yes, you can use boneless skinless chicken thighs, but you will need to adjust the cooking time. Thighs are more forgiving and stay juicy longer, but they are often uneven in shape. You should still pound them to a uniform thickness. Note that thighs may take an extra 5-7 minutes to reach the target internal temperature compared to the leaner breast meat.
Is there a substitute for the egg wash?
If you have an egg allergy, you can use heavy cream or even a thin layer of Dijon mustard as the “glue” for the breadcrumbs. However, the bond will not be quite as strong as a traditional egg wash. If using mustard as the binder, skip the flour step and apply the mustard directly to the dried chicken before pressing it into the toasted Panko.
Chicken Cordon Bleu
Course: Main CourseCuisine: AmericanDifficulty: easy4
servings15
minutes20
minutes520
kcal35
MinutesThis modern take on a classic dish solves the problem of soggy breading by using an open-face baking method. By toasting breadcrumbs beforehand and baking the chicken on a wire rack, you achieve a professional-grade crunch paired with savory ham and melted Swiss cheese.
Ingredients
4 boneless skinless chicken breasts, pounded to 1/2-inch thickness
2 cups Panko breadcrumbs
3 tablespoons olive oil (divided)
1/2 cup all-purpose flour
2 large eggs, beaten with 1 tablespoon water
1 teaspoon garlic powder
1 teaspoon onion powder
1/2 teaspoon smoked paprika
Salt and black pepper to taste
8 slices deli ham (folded or ruffled)
1.5 cups shredded Swiss or Gruyère cheese (for maximum melt)
Fresh parsley, chopped
Dijon or yellow mustard for serving
Directions
- Preheat your oven to 425°F (220°C). Line a large baking sheet with aluminum foil and place a wire cooling rack on top. Lightly spray the rack with non-stick spray. This rack is essential for 360-degree air circulation to prevent a soggy bottom.
- In a medium skillet over medium heat, combine the Panko breadcrumbs with 2 tablespoons of olive oil. Stir constantly for 3 to 5 minutes until the crumbs are an even, deep golden brown. Remove from heat and transfer to a shallow bowl.
- Season the pounded chicken breasts on both sides with salt, pepper, garlic powder, onion powder, and smoked paprika.
- Set up a dredging station: one bowl with flour, one with the egg wash, and one with the toasted Panko.
- Dredge each chicken breast in flour (shaking off excess), dip completely in the egg wash, and then press firmly into the toasted Panko until heavily coated.
- Place the chicken on the wire rack. Drizzle the remaining 1 tablespoon of oil lightly over the tops to help the crust set. Bake for 12-15 minutes until the chicken reaches an internal temperature of 160°F.
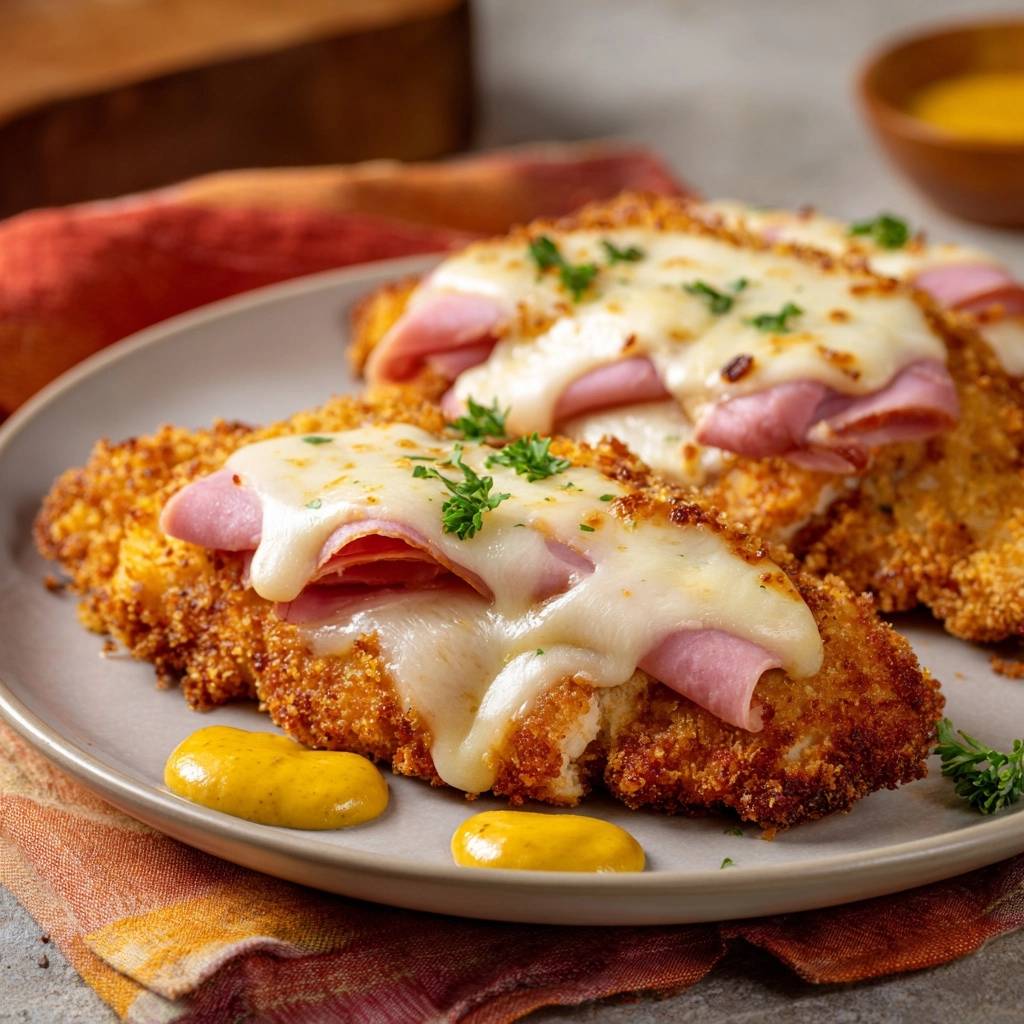
- Remove the tray from the oven. Top each breast with two slices of ham, folding them to create height as seen in the image. Generously cover the ham with the shredded cheese.
- Return to the oven for 3-5 minutes, or switch to the broiler for 1-2 minutes, until the cheese is bubbly, draped over the sides, and starting to brown in spots.
- Garnish with fresh parsley. Serve immediately with dollops of mustard on the plate for dipping.
Notes
- Using a wire cooling rack is essential for 360-degree air circulation to prevent a soggy bottom. For the best results, use Gruyere cheese for a superior melt and flavor profile.