Most home cooks face a frustrating dilemma when making curry. You spend time getting the chicken skin perfectly browned, only to watch it turn into a rubbery, soggy mess the moment it hits the sauce. This “soggy skin syndrome” is the primary reason restaurant curries often feel superior to home-cooked versions.
The secret to a truly elite Crispy Pan-Seared Chicken Curry lies in a specific two-stage technique that treats the chicken and the sauce as two separate entities until the very last second. By focusing on fat rendering and strategic plating, you can enjoy a shatteringly crisp texture alongside a rich, velvety coconut base. It’s all about the contrast between the crunch and the silk.
I’ve found that the real trick isn’t just how you cook the chicken, but how you let it rest. If you set that seared chicken down on a flat plate, the residual steam will destroy your hard work in under a minute. Always use a wire rack to keep the air circulating around the skin while you finish the sauce.
The Physics of Shatteringly Crispy Chicken Skin
Achieving that glass-like crunch on a chicken thigh isn’t luck; it’s basic physics. Moisture is the absolute enemy of the Maillard reaction, which is the chemical process that creates those deep, savory flavors and golden-brown colors. If there’s even a hint of water on the surface of the skin, the pan’s heat will spend its energy evaporating that water instead of crisping the fat.
This is why you must pat the chicken thighs extremely dry with paper towels. Don’t just give them a quick wipe; press down firmly to wick away every drop of moisture from the nooks and crannies of the skin. Once the skin is dry, the salt can do its job of drawing out even more deep-seated moisture, allowing the skin to fry in its own rendered fat.
As the fat renders, it replaces the water in the skin’s cellular structure. This transformation creates a delicate, airy lattice that provides that signature “shatter” when you bite into it. Without proper drying, you’re essentially steaming the chicken, which leads to that chewy, pale skin we all want to avoid.
Why the Cold-Start Searing Method Works
Most recipes tell you to get the pan ripping hot before adding the meat, but that’s a mistake for skin-on chicken. A hot pan seizes the proteins in the skin immediately, trapping a thick layer of unrendered fat underneath. This results in a greasy, flabby texture that feels heavy on the tongue.
Starting in a cold cast-iron skillet allows the temperature to rise gradually. As the pan warms up, the subcutaneous fat begins to liquefy and leak out slowly. By the time the pan is sizzling, the skin has already thinned out significantly, leaving you with a paper-thin layer that crisps up perfectly without a thick layer of blubber underneath.
Essential Components for the Coconut Curry Base
The sauce is the soul of this dish, and the quality of your coconut milk makes or breaks the mouthfeel. You must use full-fat coconut milk here. Light versions are mostly water and stabilizers, which will result in a thin, watery sauce that fails to cling to the rice or support the weight of the chicken.
Full-fat coconut milk provides the necessary lipids to carry the fat-soluble flavors of the curry paste. When simmered, it reduces into a thick, luscious cream that coats the back of a spoon. This richness is essential to balance the saltiness of the fish sauce and the sharp, pungent notes of the fresh ginger and garlic.
Aromatics like minced ginger and garlic should be fresh, never from a jar. Fresh ginger provides a spicy, citrusy heat that cuts through the heavy coconut fats. When these aromatics hit the warm chicken fat in the pan, they release essential oils that create a complex fragrance, building a bridge between the savory chicken and the sweet coconut.
Selecting and Prepping Your Curry Paste
Yellow curry paste is the backbone of this recipe, known for its warm, earthy profile dominated by turmeric, cumin, and coriander. It’s generally milder than green or red pastes, making it a fantastic crowd-pleaser. However, the flavor is “locked” inside the paste until you bloom it in hot fat.
After searing the chicken, you’ll use that flavorful rendered fat to sauté the paste. You’ll notice the color deepen and the aroma intensify within about sixty seconds. This step is vital; it toasts the dried spices within the paste, removing the “raw” taste and ensuring the flavor permeates every drop of the coconut milk added later.
Step-by-Step: Executing the Perfect Pan-Sear
Once your chicken is in the cold pan and the heat is on medium, your biggest job is to do nothing. The “no-touch” rule is sacred for the first 10 to 12 minutes. You might be tempted to lift the chicken to check the color, but every time you move it, you interrupt the heat transfer and the rendering process.
Listen to the sound of the pan. It will start with a gentle hiss that gradually grows into a steady, vigorous sizzle. This change in pitch tells you the moisture is leaving and the fat is taking over. You’re looking for a deep mahogany color—much darker than the pale gold you see on grocery store rotisserie chickens.
When you finally flip the chicken, the skin should feel hard and sound hollow when tapped with tongs. The second side only needs a few minutes to reach an internal temperature of 165°F. Using a meat thermometer is the only way to guarantee juicy meat without overcooking the skin you worked so hard to perfect.
Resting on a Wire Rack vs. Paper Towels
If you take one thing away from this guide, let it be this: never rest crispy chicken on paper towels. While it seems like a good way to soak up grease, it actually traps steam against the bottom of the chicken. That steam will turn your crispy skin into wet cardboard in seconds.
A wire rack set over a baking sheet is the only way to go. It allows air to circulate 360 degrees around the meat. This keeps the skin dry and crisp while the juices inside the chicken redistribute, ensuring every bite is as succulent as the first.
Building the Aromatic Coconut Sauce
After removing the chicken, you’ll have a pan full of “liquid gold”—the rendered chicken fat. After draining the excess, use the remaining tablespoon to deglaze the pan. As you whisk in the coconut milk, use your spatula to scrape up the brown bits (the fond) stuck to the bottom. That’s where the concentrated chicken flavor lives.
The reduction phase is where the sauce gains its character. Simmer it until it reaches a “nappe” consistency, meaning it’s thick enough to coat a spoon without immediately running off. This usually takes about 8 to 10 minutes. If the sauce looks too thin, keep simmering; if it gets too thick, a splash of water or chicken broth will loosen it up.
If you’re enjoying the sauce reduction here, explore another take on spicy red curry chicken.
Finally, balance the “Big Four” flavors. The fish sauce provides salt and umami, the brown sugar adds a mellow sweetness, the lime juice brings essential acidity, and the curry paste provides the heat. Taste the sauce! If it feels flat, it usually needs another squeeze of lime or a pinch of salt to make the flavors pop.
Plating Strategy to Prevent Soggy Chicken
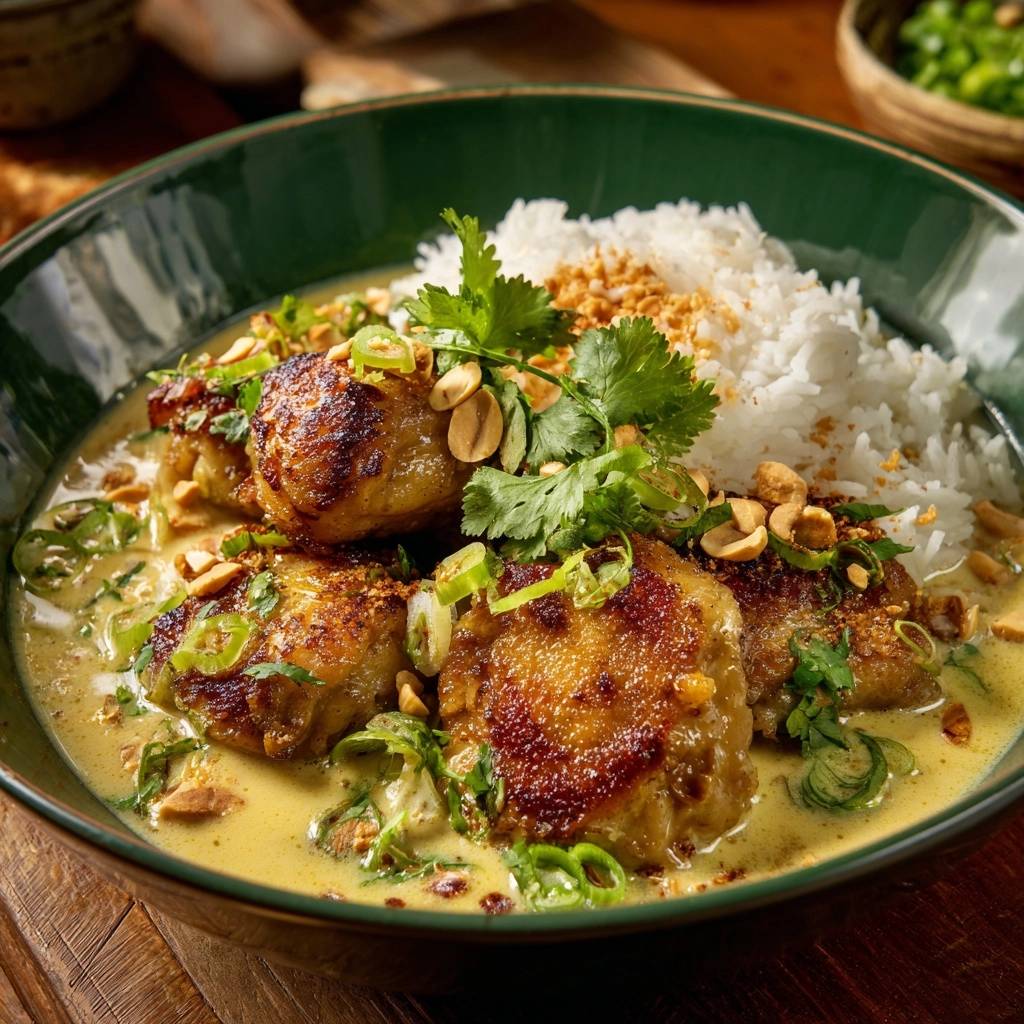
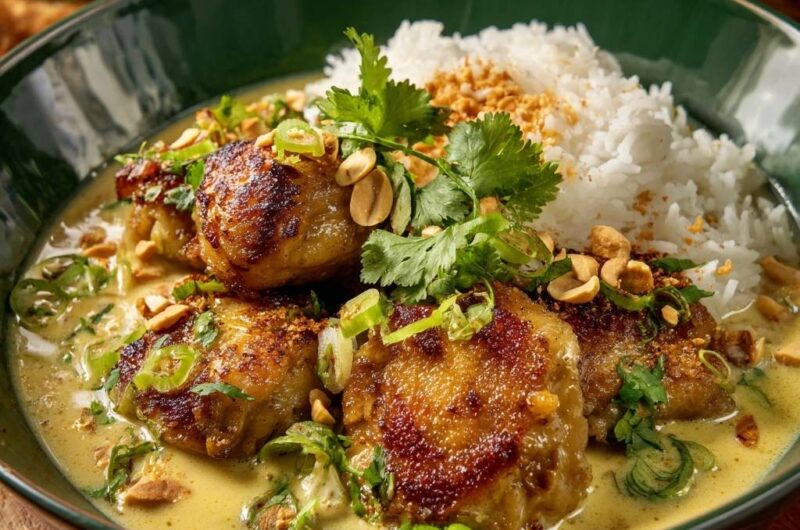
The “Island Method” of plating is the final secret to this dish. Instead of tossing the chicken into the pot of sauce, you’re going to build a landscape in a wide, shallow bowl. Start by pouring a generous pool of the coconut curry sauce into the bottom of the bowl.
Place a tight scoop of jasmine rice right in the center, creating an “island.” Then, nestle the chicken thighs into the sauce around the rice. The key is to submerge only the bottom half of the meat. The crispy skin should sit high and dry above the sauce line, completely untouched by moisture.
This presentation isn’t just for looks. It allows the diner to enjoy the rich, sauce-soaked meat from the bottom while maintaining the integrity of the crunch on top. It’s a functional way to serve curry that respects the textures you spent 45 minutes creating.
Troubleshooting Common Texture Issues
If your skin isn’t getting crispy after 12 minutes, your heat is likely too low. Don’t be afraid to crank it up slightly, but watch for smoking fat. If the skin is browning too fast but the meat is raw, your heat is too high. In that case, finish the chicken in a 375°F oven for 5 minutes to reach the safe internal temperature.
Sometimes a coconut sauce can “split,” meaning the oil separates from the solids and looks curdled. Don’t panic! This often happens if the heat is too high. Simply whisk in a tablespoon of warm water or a little extra coconut milk very vigorously. The sauce should emulsify and become smooth again within a minute of whisking.
If you’re using chicken breasts instead of thighs, be aware they cook much faster. I highly recommend sticking with bone-in, skin-on thighs for this recipe. The extra fat and the bone help protect the meat from drying out during the long searing process required to get the skin truly crispy.
Optimal Side Dishes and Texture Garnishes
Jasmine rice is the traditional and superior choice for this Thai-inspired curry. Its slightly sticky texture and floral aroma complement the coconut milk perfectly. Unlike Basmati, which is fluffy and distinct, Jasmine rice holds together, making it easier to soak up the sauce without becoming a mushy mess.
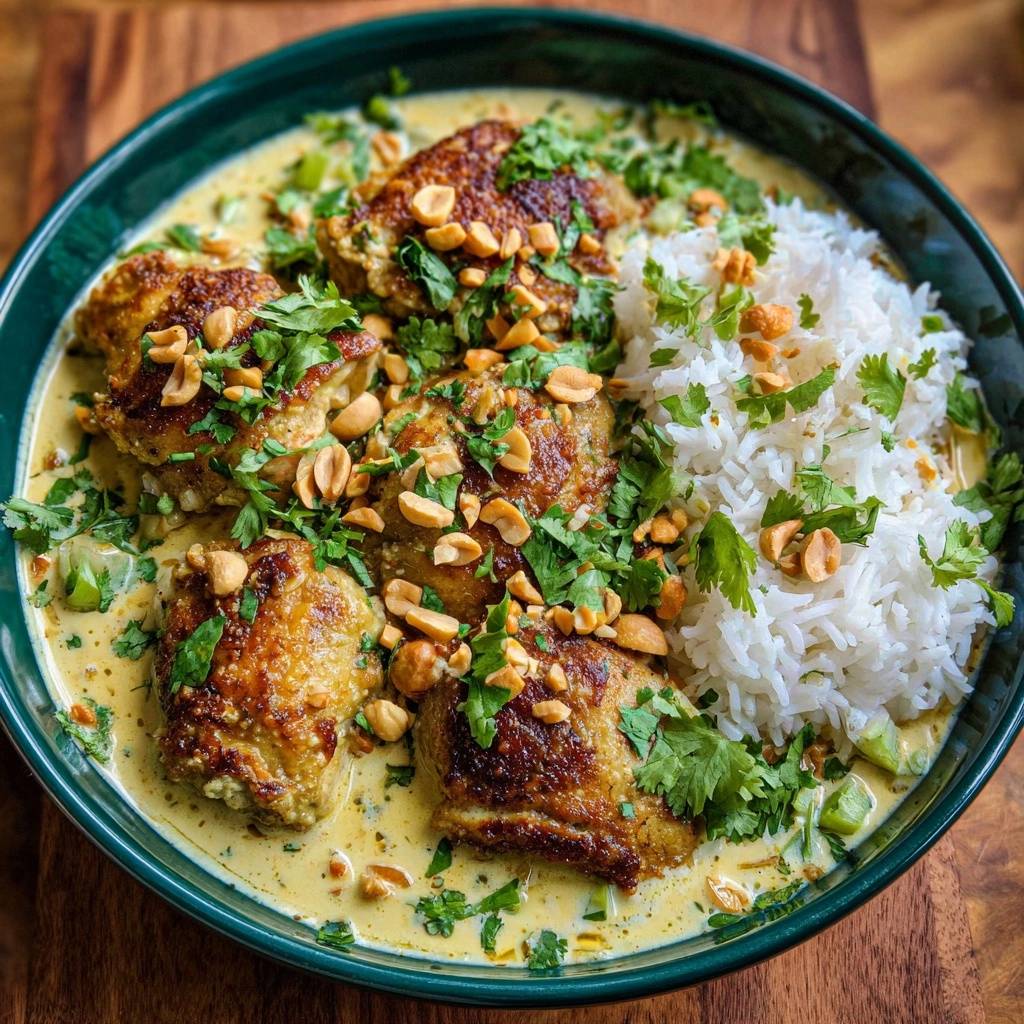
Garnishes are not optional in this dish; they provide the third layer of texture. Roughly chopped roasted peanuts add a dense, earthy crunch that contrasts with the “shatter” of the chicken skin. Fresh green onions and cilantro provide a necessary hit of raw, cool crunch to break up the richness of the cooked sauce.
If you like heat, the sliced green chili adds a bright, sharp spice that wakes up the palate. These raw elements are essential for a balanced bite. Without them, the dish can feel a bit one-dimensional and heavy. The goal is a mix of hot, cold, soft, and crunchy in every spoonful.
Storage and Reheating for Maximum Crunch
Leftover curry is usually delicious, but the crispy skin is a challenge. If you know you’ll have leftovers, store the chicken and the sauce in separate airtight containers. This prevents the skin from absorbing moisture from the sauce while it sits in the fridge.
To reheat, avoid the microwave at all costs—it will turn the skin into rubber. Instead, place the chicken in an air fryer at 375°F for 4 to 5 minutes, or under a broiler for 2 to 3 minutes until the skin sizzles again. Heat the sauce separately in a small saucepan on the stove, then plate using the “Island Method” just like you did the first time.
How long can I store the leftovers?
You can store the chicken and sauce in the refrigerator for up to 3 days. For the best results, keep them in separate airtight containers. I don’t recommend freezing the sauce, as coconut milk can sometimes grain or separate when thawed, losing its silky texture.
Why is my chicken skin still chewy?
Chewy skin usually happens for two reasons: too much moisture or not enough time in the pan. Make sure you pat the chicken bone-dry before cooking. Also, ensure you are using the cold-start method and giving it the full 12 to 15 minutes on the skin side. If you flip too early, the fat won’t have enough time to render out.
Can I use chicken breasts instead of thighs?
You can, but it’s much harder to get the skin crispy without overcooking the meat. Chicken breasts are leaner and dry out quickly. If you use them, look for skin-on, bone-in breasts and be very diligent with a meat thermometer, pulling them as soon as they hit 165°F.
What can I use if I don’t have fish sauce?
If you don’t have fish sauce, you can substitute it with an equal amount of soy sauce or a heavy pinch of sea salt. However, fish sauce provides a unique “funk” and depth of umami that soy sauce can’t quite replicate. If you use soy sauce, the flavor will be slightly more earthy and less bright.
My sauce is too spicy, how do I fix it?
If the curry paste pack more punch than you expected, don’t worry. You can mellow out the heat by adding an extra splash of coconut milk or a little more brown sugar. The fat and sugar help coat the tongue and neutralize the capsaicin from the chilies.
Can I make this recipe gluten-free?
Yes! Most yellow curry pastes are naturally gluten-free, but always check the label for hidden thickeners or soy sauce. Ensure your fish sauce is also certified gluten-free. Since the recipe uses rice and doesn’t require flour for thickening, it is very easy to keep it gluten-free.
Chicken Curry
Course: Main CourseCuisine: Thai-Inspired AmericanDifficulty: medium4
servings15
minutes30
minutes510
kcal45
MinutesA rich and silky coconut curry featuring bone-in chicken thighs with shatteringly crisp skin. This recipe uses a specific rendering technique and strategic plating to ensure the chicken stays crunchy while sitting in a flavorful yellow curry sauce.
Ingredients
4 large bone-in, skin-on chicken thighs
2 tablespoons vegetable oil
1 can (14 oz) full-fat coconut milk
2 tablespoons yellow curry paste
1 tablespoon ginger, minced
3 cloves garlic, minced
1 tablespoon brown sugar
1 tablespoon fish sauce (or salt to taste)
1 tablespoon lime juice
1/2 cup roasted peanuts, roughly chopped
1/4 cup fresh cilantro, chopped
2 green onions, thinly sliced
1 fresh green chili, sliced (optional)
2 cups cooked jasmine rice
Directions
- Pat the chicken thighs extremely dry with paper towels. Moisture is the enemy of crispiness. Season the skin side generously with salt.
- Place chicken skin-side down in a cold cast-iron skillet, then turn the heat to medium. This cold-start method allows the fat to render out slowly, ensuring the skin becomes paper-thin and shatteringly crisp.
- Sear for 12 to 15 minutes without moving the chicken until the skin is deep golden brown and crispy. Flip and cook for 5 to 8 minutes until the chicken is cooked through (internal temperature of 165°F). Remove chicken from the pan and set aside on a wire rack to keep the skin dry.
- Drain all but 1 tablespoon of fat from the pan. Add curry paste, garlic, and ginger, sautéing for 1 minute until fragrant and the paste begins to darken.
- Whisk in the coconut milk and brown sugar. Simmer for 8 to 10 minutes over medium-low heat until the sauce reduces and thickens enough to coat the back of a spoon. Stir in the fish sauce and lime juice.
- To maintain the crunch, do not submerge the chicken in the sauce. Pour the curry sauce into wide bowls first. Place a generous scoop of jasmine rice in the center.
- Nestle the chicken thighs into the sauce around the rice so only the bottom half of the meat is submerged, leaving the crispy skin completely exposed.
- Garnish heavily with crushed peanuts, sliced green onions, fresh cilantro, and green chilies. Serve immediately while the skin is at peak crispness.
Notes
- Always pat the chicken skin extremely dry before cooking. Use a wire rack to rest the chicken after searing to prevent steam from softening the skin. For the best results, use a cast-iron skillet to ensure even heat distribution and superior rendering of fat.