
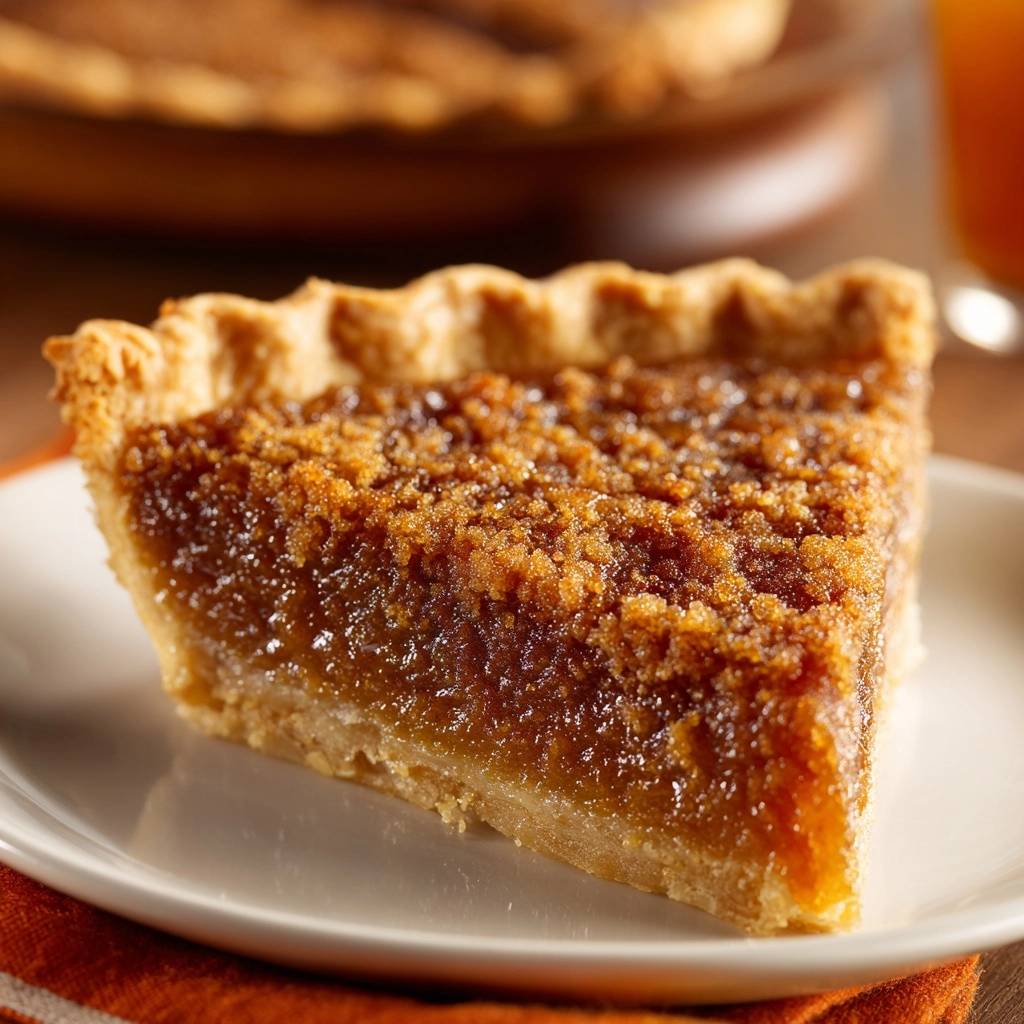
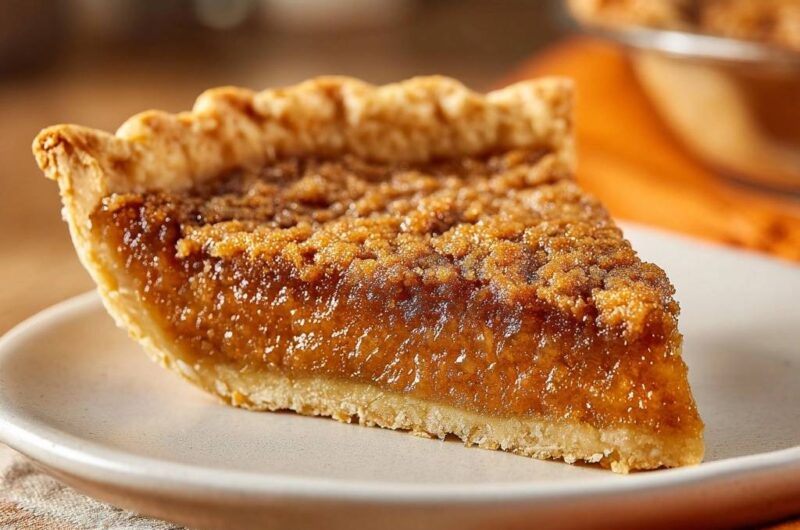
Imagine a pie that defies the laws of gravity and moisture. Most sugar-based pies suffer from a tragic flaw: the “soggy bottom” that turns a promising dessert into a limp, wet mess. This Deep Dish Brown Sugar Crumble Pie is the definitive solution to that heartbreak. It features a crystalline, buttery crumble that shatters upon impact, giving way to a dense, custard-like interior that feels like a warm hug in a crust.
The secret lies in the structural engineering of the bake. We aren’t just tossing ingredients into a tin; we’re building a moisture-proof fortress. By combining a specific par-baking rhythm with a protein-based seal, you get a crust that stays remarkably crisp even under the weight of a gooey, molasses-rich filling. It’s a masterclass in textural contrast, balancing the crunch of the topping with the silky, melt-in-your-mouth center.
Expert bakers know that the real magic happens during the “seal” phase. While many recipes suggest blind baking, they often skip the critical egg white wash. This step creates a literal waterproof barrier on the pastry’s surface. Without it, the high moisture content of the brown sugar filling would seep into the dough pores, ruining that sought-after snap. If you’ve ever struggled with a weeping crust, this technique will be your new best friend.
The Structural Integrity of Deep Dish Pastry
Physics plays a massive role in the success of a deep-dish pie. Because we’re dealing with a significant volume of heavy, sugar-laden filling, a standard shallow pie plate simply won’t cut it. The deep-dish tin provides the necessary height to ensure the filling-to-crust ratio remains balanced. If the walls are too low, the filling overwhelms the pastry, leading to a structural collapse when you try to serve a slice.
Standard crusts often fail because they can’t withstand the prolonged bake time required for a deep-dish center to set. By using a deep-dish method, you allow the heat to penetrate the sides more evenly. This prevents the edges from becoming rock-hard while the middle remains liquid. It’s all about managing the thermal mass of the sugar and cream to ensure every bite is consistent from the rim to the point.
Why Dark Brown Sugar Dictates Texture
Choosing dark brown sugar over light isn’t just about a deeper color; it’s about chemistry. Dark brown sugar contains a higher percentage of molasses, which is naturally acidic and hygroscopic. This means it attracts and holds onto moisture, creating that signature “gooey” factor that makes this pie so addictive. Light brown sugar would result in a drier, more brittle interior that lacks the soul of a true crumble pie.
Furthermore, the molasses adds a complex, slightly bitter undertone that cuts through the intense sweetness. As the pie bakes, the sugar esters interact with the heavy cream, creating a caramelization process that thickens the filling into a fudge-like consistency. Understanding how sugar behaves under heat is the difference between a grainy filling and a smooth, professional-grade custard.
Essential Components for the Perfect Crumble Pie
Quality ingredients are the backbone of this recipe. When you’re whisking your filling, make sure your eggs are at room temperature. Cold eggs won’t emulsify properly with the melted butter and heavy cream, which can lead to a “broken” filling that looks oily. Room temperature fats and proteins bond much more effectively, resulting in a glossy, uniform texture that sets up beautifully in the oven.
Heavy cream is another non-negotiable component. While you might be tempted to swap it for milk or half-and-half, the fat content in heavy cream is what provides that superior, velvety mouthfeel. It acts as a stabilizer for the sugars, preventing the filling from becoming overly runny. If you want a slice that holds its shape while remaining soft, stick to the full-fat cream.
Selecting the Right Flour for the Crumble
For the crumble topping, all-purpose flour is the gold standard. You need a moderate protein content to provide enough structure to hold the butter in place without making the topping tough. Cake flour is too weak and would cause the crumble to dissolve into the filling, while bread flour would make the topping unpleasantly chewy and bread-like.
The goal is a “sandy” texture with distinct, pea-sized chunks of butter. When the cold butter hits the hot oven, the water inside the butter evaporates, creating tiny air pockets that make the crumble light and crisp. If you use flour that’s too fine or too strong, you lose that delicate balance of crunch and melt.
The Science of the Anti-Soggy Bottom
The “Moisture Barrier” is the most important technical step in this entire process. When you brush a hot, par-baked crust with beaten egg white, the proteins in the egg coagulate instantly. This creates an impermeable film that fills the microscopic gaps in the pastry. It’s a much more effective method than using chocolate or jam, as it doesn’t alter the flavor profile of the pie.
Think of it as laminating your crust from the inside out. This barrier prevents the liquid from the filling from migrating into the dough during the second stage of baking. Even after three days in the fridge, a pie treated with an egg white seal will maintain a crispness that other pies lose within hours of leaving the oven.
The Role of Par-Baking and Pie Weights
Par-baking is the process of partially cooking the crust before adding the filling. We use pie weights or dried beans to prevent the dough from “slumping” down the sides of the tin or puffing up in the center. During those first 12 minutes at 375°F, the fats in the crust melt and set the structure of the pastry, ensuring it can hold the heavy filling without buckling.
Without weights, the steam trapped in the dough would create large air bubbles, leaving you with an uneven surface. Once you remove the weights and bake for another 5 minutes, you’re drying out the bottom of the crust. This “pre-drying” is essential because once the wet filling is added, the bottom of the crust will no longer have direct contact with the hot air of the oven.
Step-by-Step: Engineering the Filling and Topping
When mixing your filling, always sift your 1/4 cup of flour into the wet ingredients. This might seem like an extra step, but it prevents “flour pockets”—tiny white clumps of dry flour that refuse to dissolve once they hit the liquid. You’re looking for a mixture that is completely glossy and smooth, indicating that the sugars have begun to dissolve into the eggs and cream.
For more chewy centers, try these oatmeal cream pies.
Don’t over-whisk the filling once the flour is added. You want to incorporate the ingredients until they are just combined. Over-mixing can introduce too much air, which might cause the pie to puff up like a souffle in the oven and then collapse into a wrinkled mess as it cools. A gentle, steady hand is all you need to achieve that perfect, dense consistency.
Achieving the Ideal Crumble Consistency
The secret to a world-class crumble is the temperature of your butter. It must be cold—straight from the fridge. Use your fingers or a pastry cutter to work the butter into the flour and sugar until it looks like coarse meal. You want to see those pea-sized chunks of butter; they are the “flavor bombs” that create the variegated texture of the topping.
Be careful not to over-work the mixture with your hands, as the heat from your palms can melt the butter. If the mixture starts to feel greasy or clumpy, pop it in the freezer for five minutes before sprinkling it onto the pie. A cold crumble ensures that the topping stays on top of the filling rather than sinking into it during the bake.
Thermal Management: The Baking Phase
We start the oven at 375°F for the crust but drop it to 350°F once the filling is added. This temperature shift is crucial. The higher heat sets the crust, while the lower heat allows the sugar-heavy filling to cook through without scorching the edges or the crumble topping. Sugar burns easily, so this lower, slower bake is the key to a deep-dish success.
You’ll know the pie is done when the edges are puffed and set, but the center still has a very slight, jelly-like jiggle. Don’t wait for the center to be completely firm! If it’s firm in the oven, it will be overcooked and rubbery once it cools. The residual heat will finish the cooking process on the counter, leaving you with a perfectly creamy interior.
The Non-Negotiable Cooling and Setting Period
Patience is the hardest part of baking, but for this pie, it’s mandatory. You must let it cool on a wire rack for at least three hours. During this time, the sugar esters and fats are stabilizing. If you cut into the pie while it’s still warm, the filling will run out like a river, and the crust will lose its structural integrity.
This cooling period allows the flavors to deepen and the textures to lock in. As the pie returns to room temperature, the moisture barrier finishes its job, ensuring the crust stays shatteringly crisp. Think of it as the final stage of the recipe; without the set, the engineering of the “anti-soggy” bottom is incomplete.
Troubleshooting Common Deep Dish Obstacles
If you find your crumble is melting into the filling, your butter was likely too warm or you over-mixed the topping into a paste. Next time, keep the crumble in the fridge until the very second you’re ready to sprinkle it. If the crust edges are browning too fast, simply tent them with a ring of aluminum foil halfway through the bake to protect them from the direct heat.
A grainy filling usually means the sugar didn’t have enough time to dissolve into the eggs. To prevent this, make sure your eggs are at room temperature and whisk the sugar and eggs together for a full minute before adding the other ingredients. This ensures a smooth, professional custard every single time.
Preventing Butter Leakage in the Oven
Always place your pie tin on a rimmed baking sheet before putting it in the oven. Deep-dish pies are notorious for “bubbling over” as the butter in the crumble melts and the filling expands. A baking sheet catches any drips, preventing them from hitting the oven floor and creating a smoky kitchen.
The smoke point of butter and sugar is relatively low, so even a few drops on the heating element can cause a mess. Using a baking sheet is a simple safety and cleanliness necessity that saves you from a deep-cleaning session later. Plus, it makes it much easier to slide the heavy pie in and out of the oven.
Storage and Structural Longevity
To maintain the “Anti-Soggy” benefits, store any leftovers in an airtight container. While the pie can sit at room temperature for a few hours, it should be refrigerated if kept overnight due to the egg and cream content. Note that refrigeration can slightly soften the crumble topping over time as it absorbs ambient moisture.
If you want to revive that initial crunch, pop a slice into a toaster oven at 300°F for about five to eight minutes. This will re-crisp the crust and the crumble without overcooking the filling. Do not freeze this pie; the custard base can become grainy and the crust will lose its signature snap upon thawing.
Expert Baking Techniques for Success
Can I use a store-bought crust for this deep dish method?
Yes, you can use a high-quality store-bought refrigerated crust. However, ensure it is a “deep dish” size or roll it out slightly thinner to fit your tin. You must still follow the par-baking and egg-white sealing steps exactly as written to prevent a soggy bottom, as store-bought doughs are often more prone to moisture absorption than homemade lard or butter crusts.
How do I know if my egg white seal is thick enough?
You are looking for a thin, even sheen across the entire interior of the crust. It shouldn’t be a thick pool of egg, but there should be no “dry” spots of flour visible. The heat of the crust will cook the egg white almost instantly, turning it from clear to a faint opaque white. If you see any gaps, brush a little more on to ensure the waterproof barrier is complete.
Can I add nuts to the brown sugar crumble?
Absolutely! Chopped pecans or walnuts make a fantastic addition to the crumble topping. Replace about 1/4 cup of the flour with 1/2 cup of finely chopped nuts. The oils in the nuts will add extra richness and a different type of crunch that complements the deep molasses flavor of the dark brown sugar perfectly.
Why did my filling puff up like a souffle?
This usually happens if the eggs were over-beaten or if the oven temperature was too high. When you whisk eggs vigorously, you incorporate air bubbles that expand in the heat. To avoid this, whisk the filling just until the ingredients are combined and glossy. If it does puff up, don’t panic; it will settle as it cools, though the surface may have a few more wrinkles.
How do I achieve a clean slice every time?
The secret to a clean slice is a sharp, thin-bladed knife and a completely cold pie. Wipe the knife clean with a warm, damp cloth between every single cut. This prevents the sticky brown sugar filling from dragging through the crust. For the very best results, chill the pie in the refrigerator for an hour after it has reached room temperature before slicing.
Optimal Serving Temperatures and Pairings
While this pie is delicious at room temperature, serving it slightly warm can enhance the gooey texture of the center. If you choose to warm it, do so gently to avoid melting the structural fats in the crust. The intense sweetness of the dark brown sugar benefits greatly from a contrast in flavor and temperature.
Pair a slice with a dollop of unsweetened whipped cream or a sharp crème fraîche to balance the sugar. The acidity in the crème fraîche cuts through the richness, making the whole experience feel lighter. Avoid overly sweet ice creams, as they can overwhelm the delicate notes of vanilla and cinnamon in the crumble.
Brown Sugar Crumble Pie
Course: DessertCuisine: AmericanDifficulty: medium8
servings20
minutes55
minutes440
kcal75
MinutesThis recipe solves the dreaded soggy bottom by using a specific par-baking technique and a moisture-barrier layer that ensures your crust stays shatteringly crisp, even under a dense, gooey brown sugar filling.
Ingredients
1 unbaked 9-inch deep dish pie crust
1 egg white, beaten (for moisture barrier)
Filling:
1 1/4 cups packed dark brown sugar
1/2 cup granulated sugar
1/2 cup unsalted butter, melted and cooled slightly
2 large eggs + 1 egg yolk, room temperature
1/2 cup heavy cream
1 teaspoon vanilla extract
1/2 teaspoon salt
1/4 cup all-purpose flour
Crumble Topping:
1/2 cup all-purpose flour
1/2 cup packed brown sugar
1/4 cup cold unsalted butter, cubed
1/2 teaspoon ground cinnamon
Directions
- The Anti-Soggy Foundation: Preheat your oven to 375°F (190°C). Fit the pie dough into a deep-dish tin and crimp the edges. Line with parchment paper and fill with pie weights or dried beans. Bake for 12 minutes. Remove weights and parchment, then bake for another 5 minutes until the bottom is pale gold.
- The Moisture Barrier: Immediately upon removing the crust from the oven, brush the bottom and sides with a thin layer of beaten egg white. This “seals” the pores of the pastry, creating a waterproof shield against the filling. Let the crust cool for 10 minutes.
- Prepare Filling: In a large bowl, whisk together the dark brown sugar, granulated sugar, melted butter, eggs, egg yolk, heavy cream, vanilla, and salt. Sift in the 1/4 cup flour and whisk until the mixture is glossy and smooth.
- Prepare Crumble: In a small bowl, combine the 1/2 cup flour, 1/2 cup brown sugar, and cinnamon. Use your fingers or a pastry cutter to work the cold butter into the mixture until it forms coarse, sandy crumbs with some pea-sized chunks.
- Assemble: Reduce oven temperature to 350°F (175°C). Pour the brown sugar filling into the par-baked, sealed crust. Sprinkle the crumble topping evenly over the entire surface, ensuring it covers the filling completely to the edges.
- Bake: Place the pie on a baking sheet (to catch any butter drips) and bake for 35 to 40 minutes. The edges of the filling should be puffed and set, while the center should have a very slight, jelly-like jiggle.
- The Set: Allow the pie to cool completely on a wire rack for at least 3 hours. This cooling period is non-negotiable; it allows the sugars to stabilize and the crust to maintain its structural integrity for a clean, crisp slice.
Notes
- The 3-hour cooling period is non-negotiable to allow the sugars to stabilize and ensure the crust maintains its structural integrity for a clean slice.