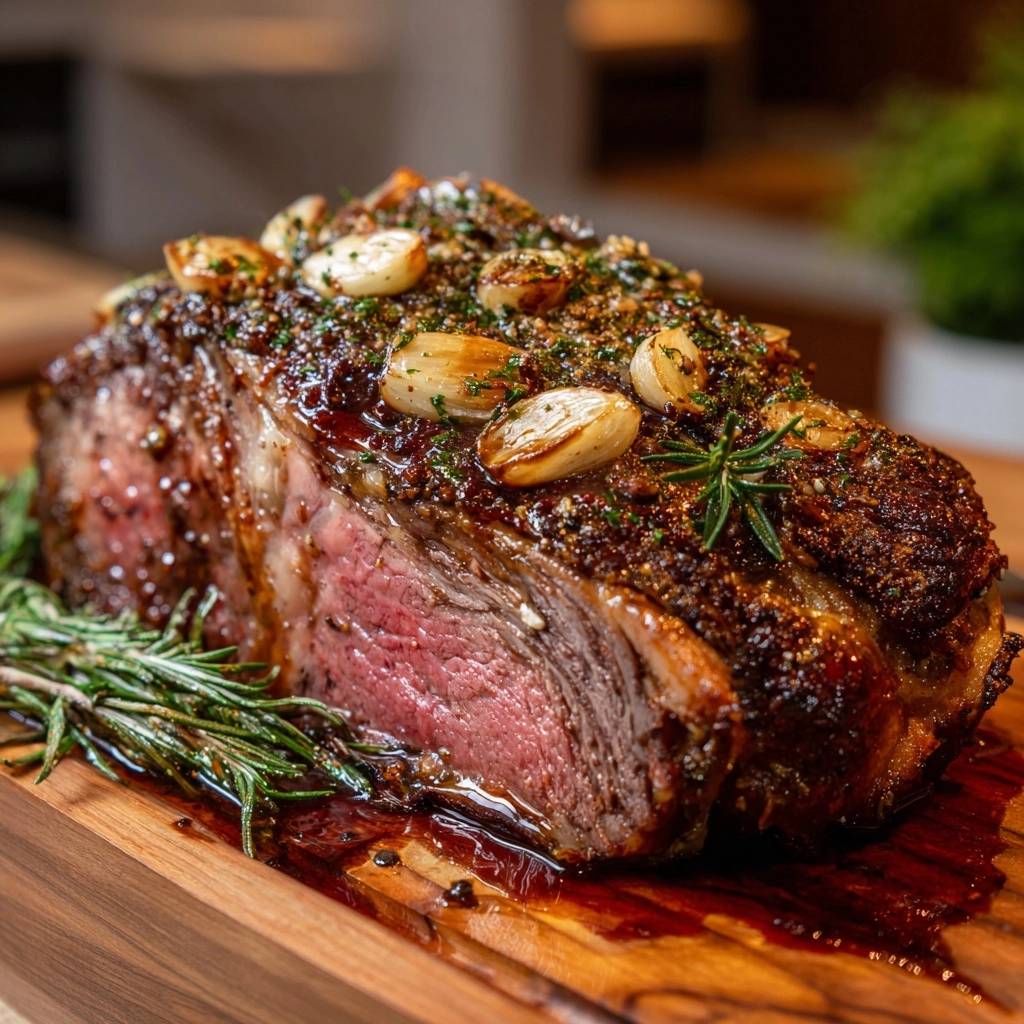
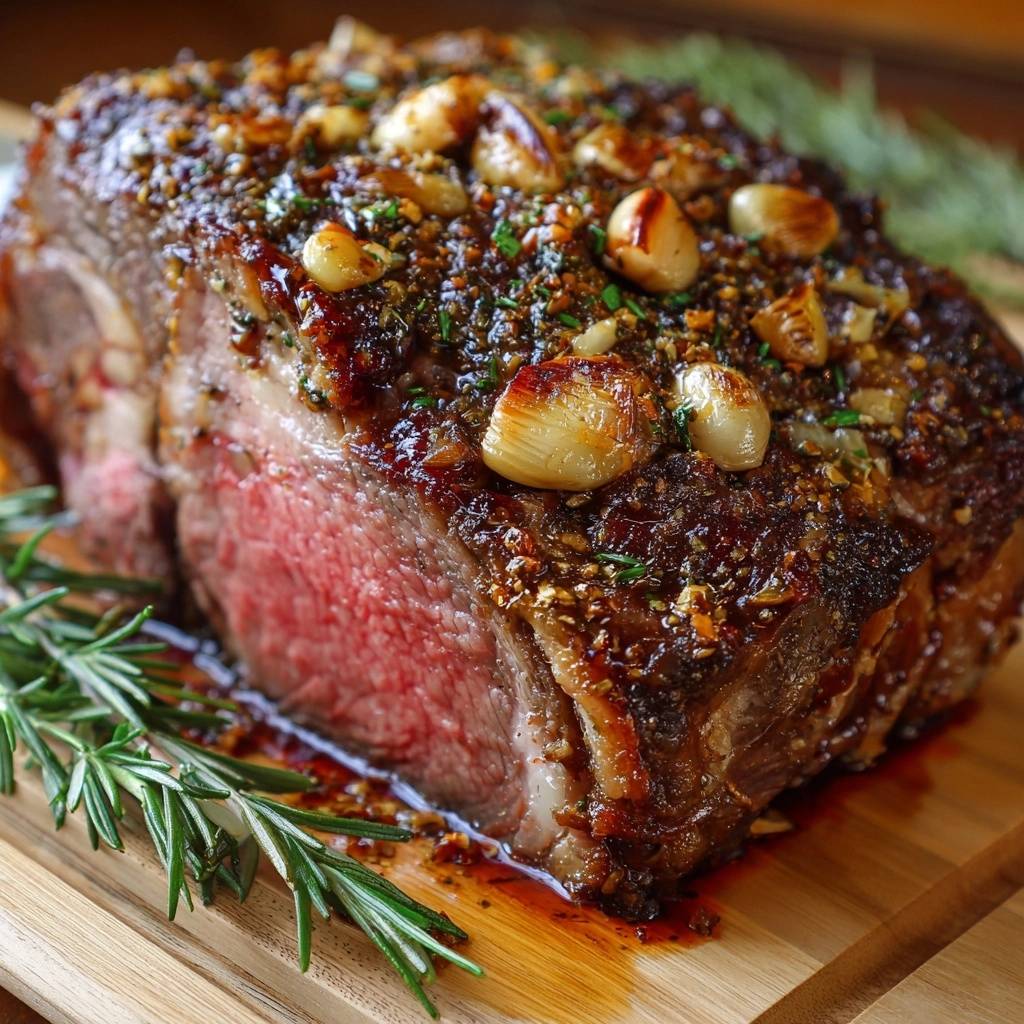
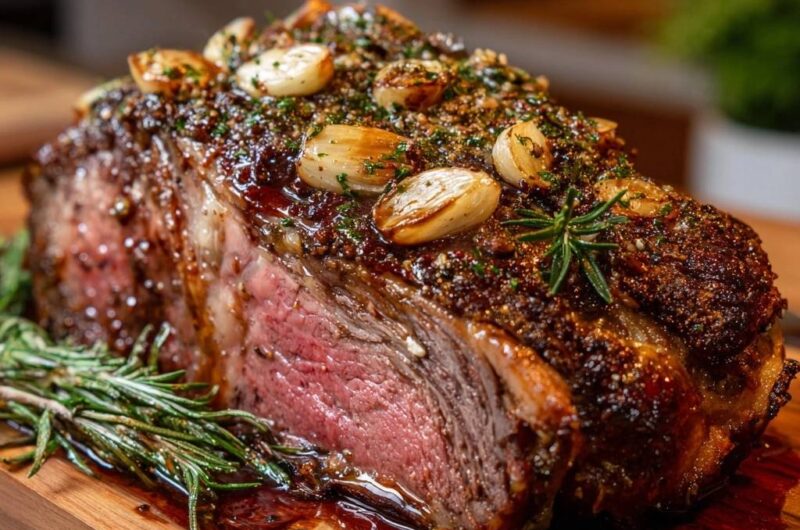
Stop settling for prime rib that looks like a gradient of gray leather on the outside with a cold, raw center. Most home cooks struggle with the “gray ring” of overcooked meat because they blast the roast with high heat from the start. The goal is a uniform, edge-to-edge pink medium-rare center protected by a glass-shattering herb crust that crackles when you slice it.
Achieving this level of perfection requires a shift in how you view time and temperature. You can’t rush a six-pound roast and expect restaurant-quality results. By committing to a 24-hour dry brine and a low-temperature roasting method, you ensure every single bite is as tender as the middle of the roast.
The real secret to this Garlic Herb Crusted Prime Rib is the moisture management. If the surface of your meat is wet when it hits the oven, it steams instead of searing. I always recommend leaving the salted roast uncovered in the fridge overnight. This dehydrates the exterior skin, creating a tacky surface that allows the herb butter to fuse to the meat like a second skin.
The Science of the Reverse Sear Method
Traditional roasting methods usually start with a high-heat sear to “lock in juices,” but science tells us that’s a myth. High heat at the beginning causes the outer muscle fibers to seize up and squeeze out moisture, creating that thick gray band of tough meat. Therefore, we use the reverse sear method to keep the fibers relaxed.
By roasting at a low 225°F, you allow the natural enzymes in the beef to act as a tenderizer while the heat slowly penetrates to the core. This gentle rise in temperature prevents a massive thermal gradient. Consequently, the meat cooks evenly from the outside in, preserving the delicate fats and proteins that make prime rib so luxurious.
Furthermore, this method gives you a much larger window of perfection. When you cook at high heat, the internal temperature can jump five degrees in a matter of minutes. At 225°F, the temperature moves slowly, giving you total control over the final doneness without the stress of overshooting your target.
Selecting the Right Standing Rib Roast
When you head to the butcher, look for a 3-bone standing rib roast, which usually weighs around six pounds. This size is ideal because it provides enough thermal mass to cook slowly without drying out. While “Prime” grade is the gold standard for its heavy marbling, a high-quality “Choice” roast can be just as delicious if it has good fat distribution.
I always advocate for a bone-in roast over a boneless one. The bones act as a natural insulator, protecting the bottom of the meat from direct heat and ensuring a more even cook. Additionally, the bones add structural integrity to the roast, preventing it from flattening out as the fats soften in the oven.
Identifying Superior Marbling and Fat Caps
Look for “white flecks” of intramuscular fat, known as marbling, throughout the eye of the roast. This fat melts during the long cook, basting the meat from the inside. However, don’t ignore the fat cap on the top. You want a layer at least 1/4 inch thick to protect the meat and provide a sturdy base for our garlic cloves.
Essential Components for the Garlic Herb Crust
The crust is more than just seasoning; it is a protective barrier that adds incredible texture. We use softened unsalted butter instead of oil because butter contains milk solids that brown beautifully at high temperatures. This creates a much thicker, more flavorful crust that actually sticks to the meat during carving.
Dijon mustard serves as our secret weapon in this recipe. It acts as an emulsifier, helping the herb butter bind to the fat cap so it doesn’t just slide off into the bottom of the pan. Don’t worry about the sharp mustard flavor; it mellows out significantly in the oven, leaving behind a savory, tangy depth.
Fresh Herbs vs. Dried Alternatives
You must use fresh rosemary and thyme for this Garlic Herb Crusted Prime Rib. Dried herbs often have a dusty, hay-like flavor that can become bitter when exposed to the 500°F finishing heat. Fresh herbs contain volatile oils that bloom in the oven, filling your kitchen with an incredible aroma and providing a bright, piney contrast to the rich beef.
The Role of Coarse Kosher Salt
Never use fine table salt for a large roast. The small grains make it too easy to over-salt, and it doesn’t draw out moisture as effectively. Coarse kosher salt has a larger surface area, which is essential for the dry brining process. It draws moisture out of the meat, dissolves into a concentrated brine, and is then reabsorbed deep into the muscle fibers.
The 24-Hour Dry Brine Technique
Dry brining is the single most important step for a professional-grade roast. When you salt the meat 24 hours in advance and leave it uncovered in the fridge, you are using osmosis to season the meat from the inside out. This ensures that the center of the roast is just as flavorful as the crust.
In addition to flavor, the cold air of the refrigerator dries out the surface of the meat. This “pellicle” or dry skin is what allows the herb butter to adhere perfectly. If you skip this step, the steam from the meat’s surface will likely cause your beautiful herb crust to slough off in the roasting pan.
Step-by-Step: Preparing the Garlic Herb Crusted Prime Rib
Before the roast ever touches the oven, you must let it sit on the counter for at least two hours. This “tempering” process is vital. If you put an ice-cold roast into a low-temperature oven, the outside will finish long before the center reaches 120°F, leading to uneven doneness and a longer cook time.
Integrating Whole Garlic into the Fat Cap
Instead of mincing the garlic into the butter where it might burn, we tuck whole cloves directly into the fat cap. Use a small paring knife to make ten shallow slits. Slide the peeled cloves into these pockets so they are nestled safely. As the roast cooks, the garlic “confits” in the rendering beef fat, becoming buttery and sweet.
Applying the Herb Butter Compound
After tempering, pat the roast completely dry with paper towels to remove any stray moisture. Slather the herb butter mixture over the top and sides, creating a thick, even layer. Think of this as “shingling” the meat. You want the herbs to be visible and densely packed so they form a solid crust during the final sear.
Precision Roasting at Low Temperatures
Place your roast on a wire rack inside a heavy roasting pan. This setup is crucial because it allows the 225°F air to circulate 360 degrees around the meat. If the roast sits directly on the bottom of the pan, the bottom will overcook and become gray while the top stays pink.
Monitoring Internal Temperatures for Medium-Rare
Forget about using a timer; a digital meat thermometer is the only way to guarantee success. You want to pull the roast out of the oven when it hits exactly 120°F. This might seem low, but the internal temperature will continue to rise during the resting period due to carryover cooking.
The Mandatory Pre-Sear Rest Period
This is the most counterintuitive part of the recipe. You must rest the meat for at least 45 minutes *before* you do the final sear. During this time, the muscle fibers relax and reabsorb the juices. If you sear it immediately, the high heat will push those juices right out of the meat.
For another take on achieving a tender beef roast, check out this perfect herb-crusted beef roast.
Tenting the roast loosely with foil keeps it warm while the internal temperature stabilizes. Because the meat has already rested, you won’t have to wait to eat once it comes out of the high-heat sear. This ensures the crust is at its absolute crispiest when it hits the dinner table.
Executing the High-Heat Finishing Sear
Once the meat has rested, crank your oven to 500°F. This final blast of heat is purely for the crust. You are looking for the fat to sizzle, the garlic to turn golden, and the herb butter to darken into a rich brown. This usually takes between 6 to 10 minutes.
Keep a close eye on the oven during this stage. Since the meat is already cooked to perfection, you are only looking for a color change. As soon as the exterior looks like a dark, mahogany crust, pull it out. Because you rested it earlier, you can slice into it immediately.
Troubleshooting Common Prime Rib Obstacles
If your roast is reaching the target temperature too quickly, simply lower the oven to 200°F. Conversely, if the internal temperature “stalls” and stops rising, don’t panic. This is just moisture evaporating from the surface. Stay patient and keep the door closed to maintain a steady environment.
If your crust isn’t browning during the final sear, check your oven temperature with a secondary thermometer. Some ovens struggle to reach a true 500°F. In this case, you can use the broiler setting, but you must rotate the roast every minute to prevent the herbs from burning.
Optimal Tools for Large Format Roasting
A heavy-bottomed roasting pan is essential because it distributes heat evenly and prevents the drippings from burning. Avoid thin, disposable aluminum pans if possible, as they can buckle under the weight of a six-pound roast and cause uneven cooking on the bottom of the meat.
A digital probe thermometer that stays in the meat while it cooks is a game-changer. It allows you to monitor the progress without opening the oven door and letting out the precious low heat. This consistency is what separates a good home cook from a master of the Garlic Herb Crusted Prime Rib.
Carving and Serving for Maximum Tenderness
To carve, first remove the bones by sliding your knife along the curve of the ribs. This leaves you with a solid “eye” of meat that is much easier to slice. Once the bones are removed, slice the roast against the grain into 3/4-inch to 1-inch thick slabs.
Slicing against the grain shortens the muscle fibers, making the meat feel even more tender in your mouth. If you’ve followed the reverse sear method, you should see a beautiful, uniform pink color from the very edge of the crust all the way through the center.
Complementary Side Dishes and Pairings
Prime rib is incredibly rich, so you need side dishes that offer acidity or earthiness to balance the plate. A sharp horseradish cream made with heavy cream and lemon juice is a classic choice. Roasted root vegetables like carrots or parsnips also pair beautifully with the rosemary in the crust.
For a lighter option, a crisp arugula salad with a lemon vinaigrette provides a peppery bite that cuts through the beef fat. Avoid overly heavy, cheesy sides if you want the Garlic Herb Crusted Prime Rib to remain the star of the show.
Managing Leftovers and Reheating Without Overcooking
Never use a microwave to reheat prime rib, as it will turn your medium-rare masterpiece into gray rubber. Instead, place slices in a baking dish with a few tablespoons of beef stock. Cover the dish tightly with foil and warm it in a 250°F oven for about 10 to 15 minutes.
This gentle steaming method revives the meat without cooking it further. The beef stock keeps the slices moist and helps maintain that buttery texture. Leftovers will stay fresh in an airtight container in the refrigerator for up to three days.
How should I store leftover Garlic Herb Crusted Prime Rib?
Store any leftovers in an airtight container in the refrigerator for up to three days. For the best results, keep the roast in one large piece rather than slicing it all at once, as this prevents the meat from drying out. I do not recommend freezing prime rib, as the freezing and thawing process breaks down the cell walls, resulting in a mushy texture and loss of those precious juices.
Why did my prime rib come out with a thick gray ring?
The gray ring is caused by high-heat cooking. When the oven is too hot, the exterior of the meat overcooks before the center can reach the proper temperature. To fix this, ensure your oven is set to a low 225°F and use the reverse sear method. If you skip the low-and-slow phase and go straight to high heat, you will almost always end up with that tough, gray band of meat.
Can I use dried herbs if I don’t have fresh ones?
While you can use dried herbs in a pinch, I strongly advise against it for this specific recipe. Dried rosemary and thyme have a much more concentrated, woody flavor that can become unpleasantly crunchy and bitter during the 500°F sear. If you must use dried, reduce the amount by half and mix them thoroughly into the butter to help them rehydrate before they hit the heat.
What if I don’t have a roasting rack?
If you don’t have a wire rack, you can create a natural one by lining the bottom of your roasting pan with thick slices of onion, celery, and carrots. Place the roast directly on top of the vegetables. This lifts the meat off the bottom of the pan to allow airflow, and as a bonus, the vegetables will caramelize in the beef drippings, creating a delicious base for a jus.
Is the 24-hour dry brine really necessary?
Yes, the dry brine is the difference between a good roast and an elite one. It allows the salt to penetrate deep into the muscle, seasoning the meat throughout rather than just on the surface. Furthermore, it dries out the exterior fat cap, which is the only way to achieve a truly crispy, browned herb crust during the short high-heat finish.
My roast reached 120°F much faster than expected. What do I do?
Ovens can be fickle, and every roast is shaped differently. If your meat finishes early, don’t worry. Simply remove it from the oven, tent it with foil, and let it rest. A prime rib can easily rest for up to 90 minutes and still stay warm. Just wait to do the final 500°F sear until about 15 minutes before you are ready to serve dinner.
Prime Rib
Course: Main CourseCuisine: AmericanDifficulty: medium8
servings20
hours4
hours650
kcal1680
MinutesA premium standing rib roast prepared using the reverse sear technique. By slow-roasting at a low temperature and finishing with a high-heat blast, you achieve a perfectly even medium-rare center with a flavorful, crispy herb and garlic crust.
Ingredients
6 pound standing rib roast (3-bone)
2 tablespoons kosher salt
1 tablespoon coarse black pepper
10 cloves whole garlic, peeled
3 tablespoons fresh rosemary, finely chopped
2 tablespoons fresh thyme, finely chopped
1/4 cup unsalted butter, softened (better for crust adhesion than oil)
1 tablespoon Dijon mustard
Directions
- To solve the issue of uneven cooking, salt your roast generously on all sides 24 hours before cooking. Leave it uncovered in the fridge on a wire rack set over a sheet pan. This dries the surface for a better crust and seasons the meat deeply.
- Take the roast out of the fridge 2 hours before cooking to bring it toward room temperature. This is a critical step to prevent a cold center and ensure even doneness.
- Preheat your oven to a low 225°F (107°C). Low heat is the only way to avoid the gray ring of overcooked meat.
- In a small bowl, mix the softened butter, chopped herbs, Dijon mustard, and pepper. Pat the roast completely dry with paper towels. Rub the herb butter mixture all over the roast.
- Using a small paring knife, make 10 shallow slits in the top fat cap. Insert the whole garlic cloves into these slits so they are nestled into the fat. This allows them to roast and soften without falling off or burning during the high-heat finish.
- Place the roast on a rack in a roasting pan. Insert a meat thermometer into the thickest part of the roast. Bake until the internal temperature reaches exactly 120°F (49°C) for medium-rare.
- Remove the roast from the oven and tent it loosely with foil. Let it rest for at least 45 minutes. The temperature will rise to approximately 130°F (54°C) during this time. Do not skip the rest or the juices will run out, leaving the meat dry.
- While the meat rests, crank your oven to its highest setting (500°F/260°C).
- Place the rested roast back into the hot oven for 6 to 10 minutes just until the exterior is dark brown, the garlic is golden, and the crust is sizzling.
- Since the meat has already rested thoroughly before the sear, you can slice and serve this immediately for the ultimate juicy, edge-to-edge pink result.
Notes
- The 45-minute rest period before the final high-heat sear is mandatory to retain juices. Using a meat thermometer is the only way to guarantee the perfect internal temperature of 120 degrees Fahrenheit before resting.