We’ve all been there, staring down a “sad desk salad” featuring cold, rubbery chunks of chicken that feel more like chewing on a pencil eraser than a gourmet lunch. It’s frustrating because you’re trying to eat well, but the texture is so uninspiring that you’re tempted to order a burger by 2:00 PM. However, a truly great Garlic Herb Grilled Chicken Salad should be a study in contrasts: warm, juicy, herb-crusted protein resting against cold, crisp, snapping greens.
The “No More Dry Meat” philosophy isn’t just a catchy name; it’s a commitment to understanding how heat interacts with poultry. Therefore, we’re moving away from the “toss it in the pan and hope” method. Instead, we’re focusing on temperature control and structural preparation to ensure every bite is succulent. This guide serves as a masterclass in achieving that perfect restaurant-style sear while keeping the interior incredibly moist.
The absolute secret to success here is the rest period. Most home cooks slice into their chicken the second it leaves the heat, which causes all those precious juices to flood the cutting board. By waiting just eight minutes, you allow the muscle fibers to relax and reabsorb that moisture. It’s the difference between a stringy mess and a tender, buttery texture that melts in your mouth.
The Physics of Tender Poultry: Why Pounding Matters
Chicken breasts are naturally uneven, with a thick “head” and a thin, tapered “tail.” If you throw them in a pan as-is, the thin end will turn into leather before the center even reaches a safe temperature. Therefore, you must use mechanical force to create a uniform thickness. This isn’t just about making it look pretty; it’s about the physics of heat distribution.
When you pound the meat to an even 3/4-inch thickness, you’re breaking down tough connective tissues and creating a flat surface area. This ensures that every square inch of the chicken hits the hot pan at the same time. Consequently, the entire piece finishes cooking simultaneously, preventing those dry, overcooked edges that usually plague grilled salads.
To do this properly, place the chicken between sheets of plastic wrap to prevent splattering. Use a meat mallet or even a heavy bottomed skillet to firmly but gently even out the thickest parts. You aren’t trying to pulverize the meat into a pancake; you’re simply seeking a consistent landscape so the heat can do its job efficiently.
Essential Tools for the Perfect Sear
A thin, flimsy non-stick pan is the enemy of a good sear because it loses heat the moment the cold meat touches it. Instead, you should reach for a heavy cast-iron skillet or a weighted grill pan. These tools have high heat retention, which means they stay screaming hot and create that beautiful, golden-brown Maillard reaction we’re after.
In addition to the right pan, a digital meat thermometer is your most important ally in the kitchen. It is the only objective way to know exactly when the chicken is done. Guessing by “feel” or cutting into the meat to check the color is a recipe for disaster, as it lets the juices escape prematurely.
Components of the Garlic Herb Grilled Chicken Salad
Quality ingredients are the foundation of this dish, and each spice in the rub serves a specific purpose. For instance, smoked paprika provides a deep, earthy color and a hint of “charred” flavor without needing an actual outdoor grill. It gives the chicken a professional, sun-kissed look that makes the salad visually appetizing.
Furthermore, we use dried oregano rather than fresh for the initial seasoning. Fresh herbs tend to burn and turn bitter under the high heat of a sear. Dried oregano is more robust and stands up to the pan’s temperature, infusing the oil and the meat with a classic Mediterranean aroma that pairs perfectly with garlic.
Selecting the Right Greens for High-Heat Toppings
When you’re placing warm chicken on top of a salad, the choice of greens is critical. Soft, delicate leaves like spinach or spring mix will wilt into a soggy mess the moment they feel the heat. Therefore, Romaine is the structural champion for this recipe. Its thick ribs and sturdy leaves provide a satisfying crunch that holds up under the weight and temperature of the protein.
To get that restaurant-level “snap,” try washing your chopped Romaine in ice-cold water and spinning it completely dry. This shocks the cells of the lettuce, making it extra crisp. A dry leaf also ensures that your dressing clings to the greens rather than sliding off into a watery pool at the bottom of the bowl.
The Flavor Profile: Garlic, Herbs, and Heat
The dry rub is a carefully balanced ratio designed to pack a punch. We use garlic powder here instead of fresh minced garlic for a very specific reason: fresh garlic burns at a much lower temperature than it takes to cook chicken. By using the powdered version, you get a deep, toasted garlic flavor without any of the acrid bitterness of burnt bits.
The addition of red pepper flakes isn’t just about heat; it’s about visual cues. Those tiny red flecks signal to your brain that the dish is well-seasoned before you even take a bite. When combined with the salt and black pepper, it creates a savory crust that contrasts beautifully with the creamy dressing you’ll drizzle on later.
Step-by-Step: Achieving the Golden-Brown Crust
Once your pan is on the stove, wait until the oil is shimmering and just starting to show a tiny wisp of smoke. This is the “shimmering” stage, and it’s vital for a good sear. When you lay the chicken down, you should hear a loud, aggressive sizzle. If it’s quiet, your pan isn’t hot enough, and the meat will steam rather than sear.
Now comes the hardest part: the “No-Touch Rule.” Do not move, poke, or flip the chicken for at least five minutes. The meat needs uninterrupted contact with the heat to develop a crust. If you try to flip it and it sticks, it’s telling you it isn’t ready. Once that golden-brown layer forms, the chicken will naturally release from the pan on its own.
Watch the sides of the chicken breast as it cooks. You’ll see a white line of cooked meat slowly creeping up from the bottom. When that line reaches the halfway point, it’s time to flip. This visual cue, combined with your timer, ensures you aren’t just guessing at the progress of the internal temperature.
Temperature Control and the 160°F Pull Point
Most people are taught to cook chicken until it hits 165°F in the pan. However, this is why most home-cooked chicken is dry. Because of “carry-over cooking,” the internal temperature will continue to rise by about 5 degrees after you remove it from the heat. Therefore, you should pull the chicken at 160°F.
By removing it at 160°F and letting it rest, the meat gently reaches that safe 165°F mark without the exterior becoming overcooked. This small 5-degree window is the secret to that elusive “juice” that characterizes professional cooking. It’s a subtle shift that makes a massive difference in the final mouthfeel.
The Critical 8-Minute Rest Period
Think of a chicken breast like a bunch of tiny sponges filled with water. When you apply heat, those sponges tighten up and squeeze the water toward the center. If you cut the meat immediately, all that water (the juice) runs out instantly. This results in the “pool of sadness” on your cutting board and dry meat in your bowl.
During the eight-minute rest, the muscle fibers begin to relax and expand again. This allows the juices to redistribute evenly throughout the entire breast. Consequently, when you finally slice into it, the moisture stays inside the meat where it belongs. It’s the most important step in the entire process, so don’t skip it!
Assembling the Salad for Visual Impact
Instead of tossing everything in a giant bowl where the chicken gets lost, use the “Shallow Bowl” method. Lay down your bed of crisp Romaine first. Then, slice your chicken against the grain on a slight diagonal. Slicing against the grain further shortens the muscle fibers, making the meat feel even more tender as you eat it.
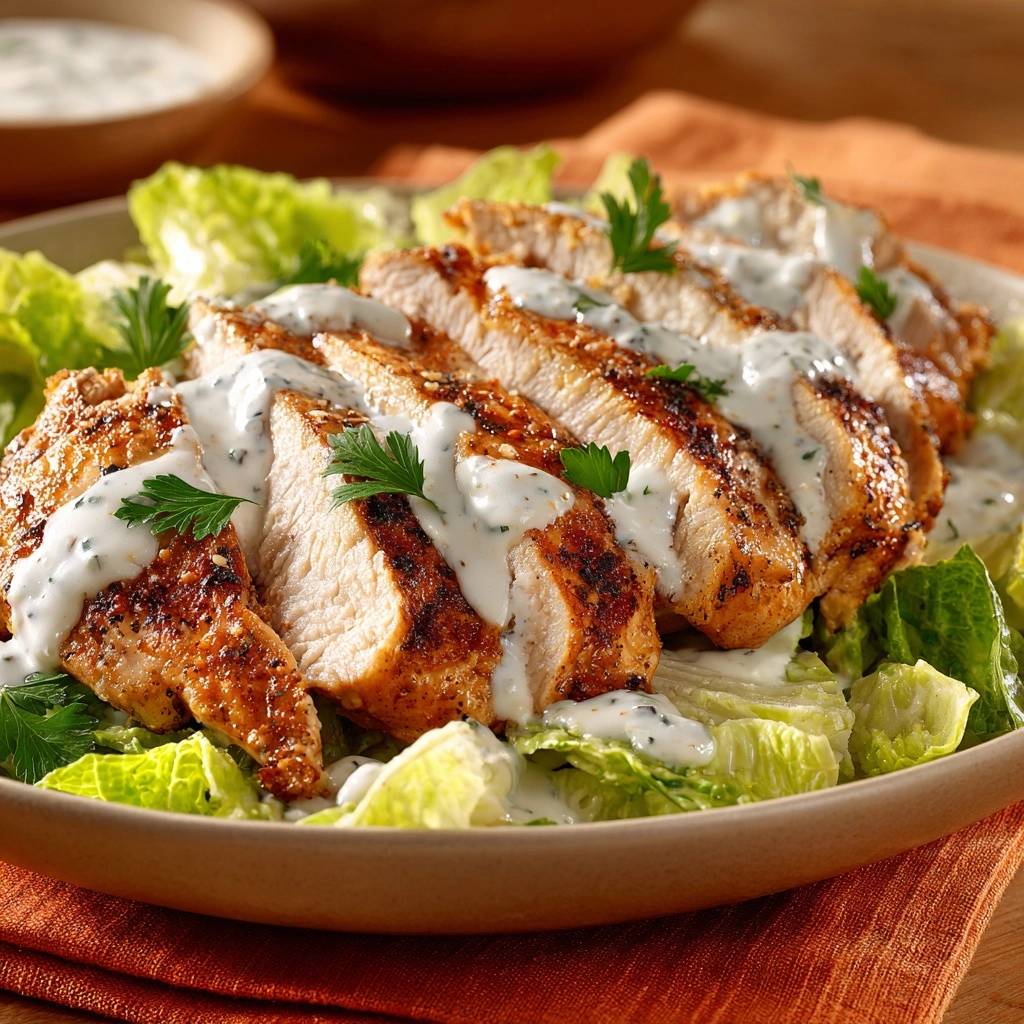
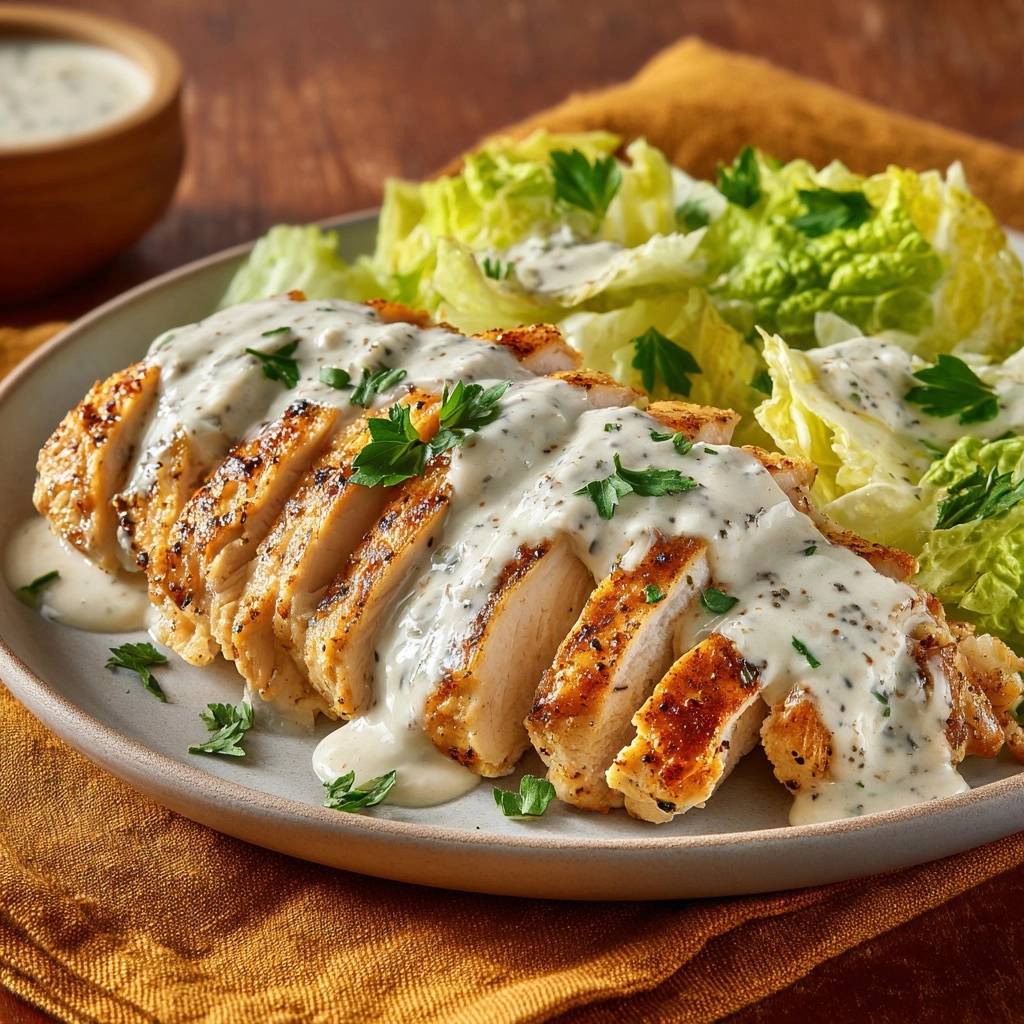
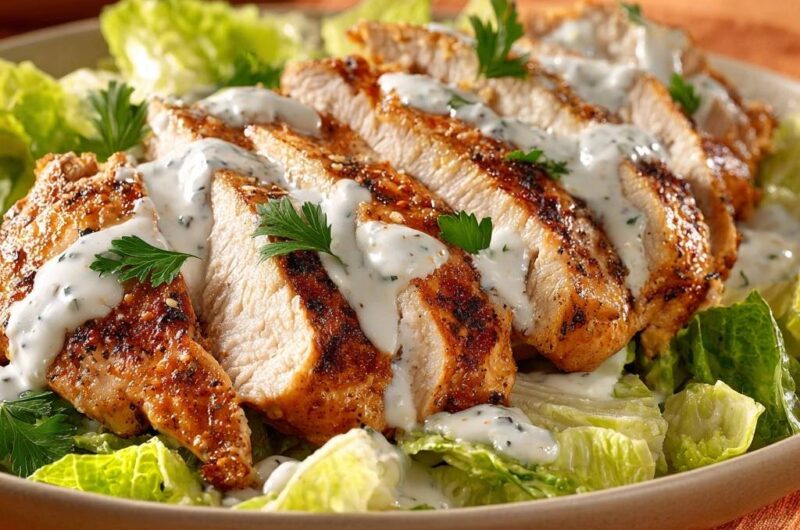
Fan the warm chicken strips over the center of the greens. When you apply the dressing, drizzle it directly over the chicken. The warmth of the meat will slightly thin the dressing, allowing it to seep into the crevices and create a delicious emulsion with the resting juices. Garnish with fresh parsley leaves to add a pop of bright green and a hit of freshness.
Flavor Variations and Protein Swaps
While the garlic-herb profile is a classic, you can easily adapt this method to other flavors. For a Mediterranean twist, add some dried thyme and lemon zest to the rub, then top the finished salad with olives and feta cheese. The pounding and searing technique remains exactly the same regardless of the spices you choose.
For a different take on a beloved classic, check out this classic Caesar salad.
If you’re looking for a vegetarian alternative, this specific garlic-herb rub works wonders on thick slices of halloumi cheese or even firm tofu. For halloumi, you’ll only need about two minutes per side to get a beautiful crust. The goal is always the same: high heat, bold seasoning, and a focus on texture.
Troubleshooting Common Chicken Salad Pitfalls
If you find your lettuce is getting soggy, you’re likely dressing the salad too early or your chicken is still too hot. Ensure you’ve followed the full rest period to let the meat cool slightly. Additionally, always wait to drizzle the dressing until the very moment you are ready to sit down and eat.
If your chicken looks charred on the outside but is still raw in the middle, your heat is too high. In this case, use the “Sear-to-Oven” pivot. Simply pop the whole oven-safe skillet into a 375°F oven for a few minutes until the center reaches 160°F. This allows the middle to catch up without burning the beautiful crust you’ve started.
Expert Tips for Meal Prep and Storage
If you’re making this for meal prep, store the grilled chicken and the lettuce in separate containers. This prevents the greens from wilting and allows you to reheat the chicken independently. To reheat without drying it out, use a low power setting on your microwave or give it a very quick flash in a warm skillet with a teaspoon of water to create steam.
The creamy garlic herb dressing will stay fresh in an airtight jar for about five days. In fact, the flavors often deepen after a day in the fridge. Just give it a good shake before using it to ensure the herbs are well-distributed. Freshly grilled chicken is best within three days for the most optimal texture.
Pairing Suggestions for a Complete Meal
To round out this meal, consider a crisp sparkling apple cider or a refreshing lemon-mint infusion. The acidity in these drinks cuts through the richness of the creamy dressing and cleanses the palate between bites of savory chicken. It’s a sophisticated way to enjoy a weekday lunch.
If you’re extra hungry, a side of toasted sourdough rubbed with a raw garlic clove is the perfect accompaniment. You can use the bread to soak up any extra dressing and chicken juices at the bottom of the bowl. A roasted vegetable medley, like bell peppers and zucchini, also complements the garlic profile beautifully if you want more volume.
Frequently Asked Questions
Can I use chicken thighs instead of breasts?
Yes, you certainly can! Chicken thighs have a higher fat content, which makes them even more forgiving and flavorful. However, they usually take a few minutes longer to cook through. You should still pound them to an even thickness, but aim for an internal temperature of 170°F to 175°F, as dark meat tastes better when the connective tissue has more time to break down.
What if I don’t have a meat mallet?
Don’t worry, you don’t need fancy equipment. A heavy cast-iron skillet, a rolling pin, or even a sturdy wine bottle can work as a substitute. Just make sure to cover the chicken with plastic wrap or a heavy-duty freezer bag first to keep things clean. The goal is simply to apply even pressure to level out the meat.
Is it safe to eat chicken at 160°F?
While the USDA recommends 165°F, pulling the meat at 160°F is a standard professional technique. Because of carry-over cooking, the temperature will continue to rise while the meat rests on the cutting board. As long as the thermometer reaches 165°F during the rest period, it is perfectly safe and much juicier than meat cooked to 165°F directly in the pan.
How do I make the dressing from scratch?
If you’re out of bottled dressing, you can whip up a quick version by mixing a half-cup of Greek yogurt or mayo with a splash of lemon juice, a clove of minced garlic, and a handful of chopped fresh dill or parsley. Add a pinch of salt and whisk until smooth. It’s a fresh, tangy alternative that fits the garlic-herb theme perfectly.
Can I grill this outdoors instead of a skillet?
Absolutely. If using an outdoor grill, set it for medium-high direct heat. Make sure your grates are very clean and well-oiled to prevent sticking. Follow the same “No-Touch Rule” and use your meat thermometer to check the temperature. The smoky flavor from the charcoal or gas grill will add another wonderful layer to the salad.
Garlic Herb Grilled Chicken
Course: Main CourseCuisine: AmericanDifficulty: easy2
servings15
minutes12
minutes410
kcal27
MinutesA restaurant-quality grilled chicken salad featuring tender, herb-crusted chicken breasts served over fresh romaine lettuce with a creamy garlic dressing. The recipe focuses on specific preparation methods to ensure moist and flavorful results every time.
Ingredients
2 large boneless skinless chicken breasts
1 tablespoon olive oil
1 teaspoon garlic powder
1 teaspoon smoked paprika
1/2 teaspoon dried oregano
1/4 teaspoon red pepper flakes (for visual spice flecks)
Salt and black pepper to taste
4 cups chopped romaine lettuce
1/2 cup creamy garlic herb dressing (ranch or Caesar base with fresh dill/parsley)
Fresh flat-leaf parsley for garnish
Directions
- Place the chicken breasts between two sheets of plastic wrap. Use a meat mallet or heavy skillet to pound the thickest part of the breast until the entire piece is an even 3/4-inch thickness. This ensures the edges don’t dry out before the center is cooked.
- Pat the chicken completely dry with paper towels. Rub with olive oil and season generously on both sides with garlic powder, smoked paprika, oregano, red pepper flakes, salt, and pepper.
- Heat a heavy cast-iron skillet or grill pan over medium-high heat. Once the pan is shimmering and hot, add the chicken.
- Sear the chicken for 5 to 6 minutes per side. Do not move or flip the chicken prematurely; this allows the golden-brown crust seen in the image to form. Use a meat thermometer to pull the chicken off the heat when it reaches an internal temperature of 160°F (71°C).
- Transfer the chicken to a cutting board and let it rest for a full 8 minutes. This is the most critical step for “No More Dry Meat”-it allows the juices to redistribute so they don’t run out when sliced.
- Slice the chicken against the grain into thick, diagonal strips.
- Arrange a bed of fresh romaine lettuce in a shallow bowl. Place the warm chicken strips over the greens.
- Generously drizzle the creamy garlic herb dressing over the center of the chicken strips, allowing it to pool slightly in the crevices. Garnish with whole fresh parsley leaves to match the visual presentation.
Notes
- The most critical step is letting the chicken rest for a full 8 minutes after cooking to allow juices to redistribute. Pounding the chicken to an even thickness prevents the edges from drying out while the center cooks.