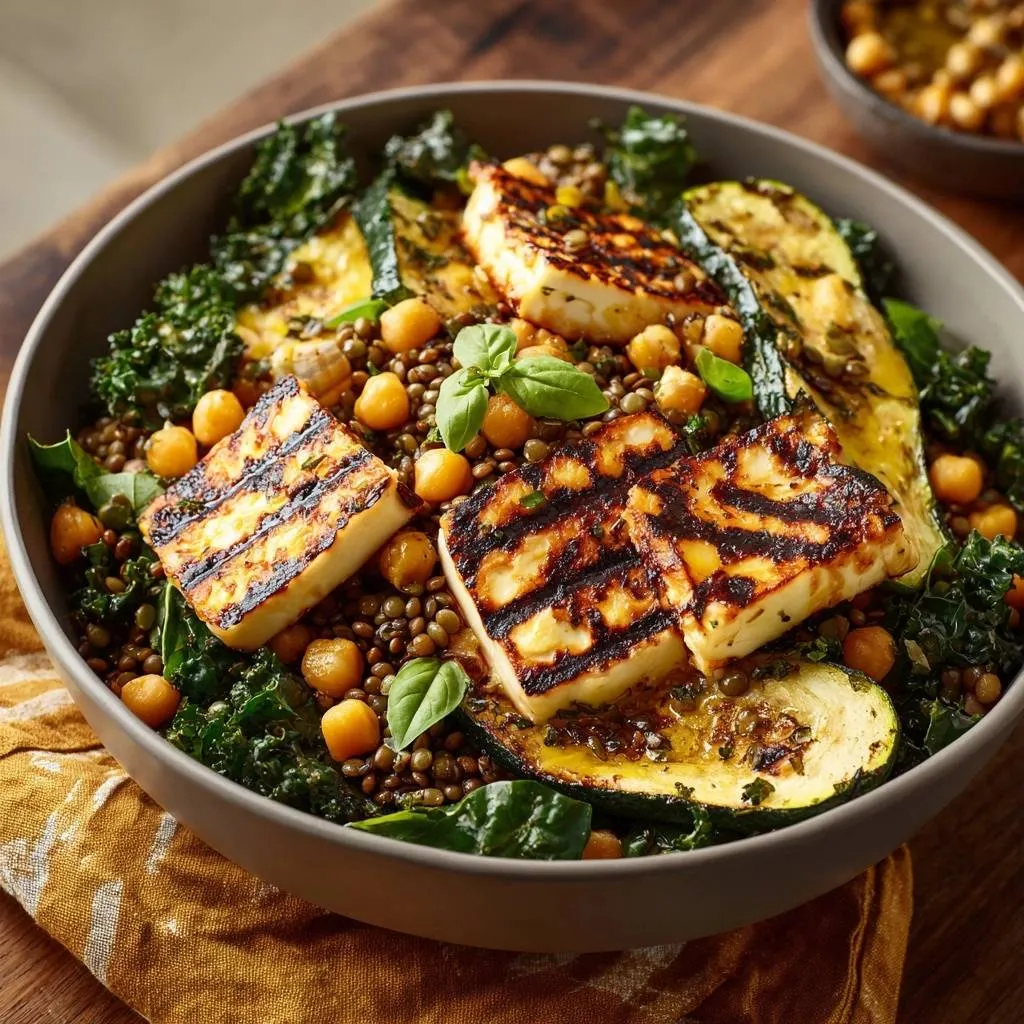
Forget everything you know about that rubbery, “squeaky” cheese that feels like chewing on a pencil eraser. When you treat halloumi with the respect it deserves, it transforms into a salty, golden-crusted masterpiece with a center that yields like softened butter. This Grilled Halloumi and Lentil Power Bowl isn’t just a salad; it’s a masterclass in textural contrast, pairing the earthy bite of French lentils with the shattering crunch of flash-fried chickpeas and the smoky sweetness of charred zucchini.
The beauty of this bowl lies in its balance. You have the dense, protein-rich foundation of pulses meeting the vibrant, tenderized leaves of massaged kale. It’s a meal that feels incredibly substantial without leaving you weighed down. We’re moving away from bland health food and toward a dish where every single component has been seared, massaged, or seasoned to its absolute limit.
The secret to success here is moisture management. If your halloumi or chickpeas are even slightly damp, they’ll steam in the pan rather than sear. I always tell people to treat their halloumi like a fine steak. Pat it bone-dry with paper towels before it touches the heat. That dry surface is exactly what allows the Maillard reaction to occur, creating those deep, dark grill marks that provide a smoky counterpoint to the salty cheese.
Essential Components for the Perfect Power Bowl
To build a bowl that actually satisfies, you need the right variety of lentils. I strictly recommend French Green (Puy) lentils for this recipe. Unlike red or brown lentils, which tend to break down into a mushy puree, Puy lentils hold their pebble-like shape and offer a sophisticated, peppery snap. They provide the structural integrity needed to stand up to the heavy grilled toppings.
The kale is another non-negotiable element that requires a bit of “kitchen therapy.” Raw kale is full of cellulose, which makes it tough and bitter. By massaging the leaves with olive oil and salt, you are physically breaking down those fibers. You’ll actually feel the leaves soften under your hands, transitioning from a rough texture to something silky and vibrant. This process also makes the nutrients much easier for your body to absorb.
Selecting the Right Halloumi and Lentils
When shopping for halloumi, look for blocks stored in brine. This keeps the cheese hydrated and prevents it from becoming overly dry before it hits the pan. You want a brand that feels firm to the touch; a high melting point is the hallmark of quality halloumi, allowing it to char beautifully without turning into a puddle of grease.
For the chickpeas, while dried beans are great, canned chickpeas are actually the secret weapon here. Because they are already hydrated, they develop a wonderful “pop” when fried in hot oil. The exterior becomes crisp and airy, while the inside remains creamy. Just make sure you rinse them thoroughly to remove any metallic canning liquid flavor.
Aromatics and the Lemon-Oregano Vinaigrette
The dressing for this bowl is intentionally sharp. Because halloumi is naturally very salty and rich, you need a high-acid vinaigrette to cut through that fat. Fresh lemon juice provides a bright, citrusy lift that wakes up the earthy lentils. It acts as a bridge between the smoky charred vegetables and the fresh greens.
I prefer dried oregano over fresh in this specific dressing. Dried oregano has a more concentrated, savory profile that leans into the Mediterranean roots of the dish. When whisked with garlic powder and red pepper flakes, it creates a flavor base that infuses the lentils with a deep, herbaceous warmth that fresh herbs sometimes lack.
The Science of Searing Halloumi Without the Squeak
The “squeak” people often complain about comes from the long-strand protein structure of the cheese rubbing against your teeth. To fix this, you need intense, direct heat. High heat causes those proteins to relax and the internal fats to soften. By the time you’ve achieved a dark brown crust, the inside has reached a temperature that eliminates that rubbery resistance.
For another take on this cheese, explore crispy pan-seared halloumi.
A dry sear is your best friend here. Adding oil to the pan often causes the cheese to slide around or, worse, shallow-fry, which prevents those distinct, charred grill lines from forming. Since halloumi has a high fat content already, it will naturally release just enough oil to prevent sticking once the sear is established. Trust the heat and let the pan do the work.
Step-by-Step: Preparing the Pulse and Grain Base
Start with your chickpeas. After draining them, roll them between two paper towels until they are completely dry. Water is the enemy of crispiness; any leftover moisture will cause the oil to splatter and the skins to remain chewy. Fry them in a hot skillet until you see the skins start to slightly split and turn a deep chestnut brown.
You’ll know they’re ready when they sound “hollow” as you shake the pan. This step only takes about 5 to 7 minutes, but it adds a layer of crunch that makes the bowl feel like it came from a high-end bistro. Once they’re done, move them to a side plate so they don’t lose their texture while you prep the rest.
Massaging Kale for Maximum Nutrient Absorption
Place your torn kale in a large bowl and don’t be afraid to get your hands dirty. Drizzle on a little oil and a pinch of salt, then literally knead the leaves like bread dough. You aren’t just mixing; you’re bruising the greens. Within two minutes, the volume of the kale will shrink by nearly half.
The color will shift from a dusty forest green to a deep, glossy emerald. This mechanical breakdown not only improves the flavor by removing the bitterness but also ensures the dressing can actually penetrate the leaves. It turns a “garnish” into a delicious, tender base that you’ll actually want to eat.
Integrating the French Lentils and Dressing
Fold your cooked lentils and those crispy chickpeas into the massaged kale. If your lentils are still slightly warm, that’s even better. Warm pulses act like a sponge, soaking up the lemon-oregano vinaigrette much more effectively than cold ones. Pour about two-thirds of your dressing over this mixture now.
Toss everything thoroughly so every lentil is coated. By dressing the base early, you allow the flavors to marry while you focus on the grilling. This ensures that the bottom of your bowl is just as flavorful as the toppings, preventing that “dry salad” experience at the end of the meal.
Techniques for Charring Zucchini and Halloumi
A cast-iron grill pan is the gold standard for this recipe because it holds onto heat like a champ. Get that pan smoking hot before anything touches it. If you’re using a large pan, remember that the center is usually the hottest. Use “zonal cooking” by placing your zucchini in the center for the best char, then moving them to the edges if they’re cooking too fast.
The goal is a contrast between a blackened exterior and a tender, juicy interior. If the pan isn’t hot enough, the zucchini will just leak water and become soggy. You want to hear a loud sizzle the moment the vegetable hits the metal. That sound is the signal that you’re building flavor.
Achieving Deep Char Marks on Zucchini
The most important rule for the zucchini is: do not move it. Once you place those diagonal rounds on the grill, leave them alone for at least three minutes. Every time you lift or slide them, you interrupt the caramelization process. You want the natural sugars in the zucchini to burn slightly against the ridges of the pan.
Cutting the zucchini into 1/2-inch thick diagonal slices is the “sweet spot.” It provides enough surface area for those beautiful marks while ensuring the center retains a slight “snap.” A thin slice will turn to mush, but a thick, diagonal cut stays meaty and substantial enough to rival the cheese.
If you enjoy slicing zucchini for salads, you might also like this hearty butternut chickpea kale soup.
The Two-Minute Halloumi Sear
Now for the main event. Place your dry halloumi slices onto the smoking grill pan. Watch the clock closely. After about 90 seconds, you’ll see the bottom edges start to look golden. At the two-minute mark, the cheese might even start to “weep” a tiny bit of moisture or bulge slightly—this is the perfect time to flip.
For perfectly golden, crispy halloumi, remember to watch the clock closely to achieve that ideal halloumi kale power bowl texture.
Use a thin spatula to flip them carefully. The second side only needs about 60 seconds. You’re looking for those iconic black stripes. As soon as they’re done, get them out of the pan. Halloumi is at its absolute best in the first five minutes after cooking, so have your bowls ready to go.
Flavor Variations and Ingredient Swaps
If you want to switch things up, this bowl is incredibly versatile. You can swap the zucchini for thick slices of eggplant or even red bell peppers. If you can’t find French lentils, farro or quinoa make excellent substitutes, though you’ll lose that specific peppery bite that Puy lentils provide.
Round Out Your Meal
To complement your grilled halloumi and lentil bowl, consider these fresh additions.
- For a bright and zesty addition, try the Mediterranean Zesty Chickpea Salad, featuring similar bright flavors.
- If you enjoy warm spices, the Moroccan Spiced Carrot and Chickpea Salad offers a flavorful contrast with its aromatic blend.
For those who crave a creamier finish, a quick drizzle of tahini mixed with a splash of warm water and lemon juice works wonders. It adds a nutty depth that plays beautifully with the oregano. You can also add a handful of halved cherry tomatoes at the very end for a burst of fresh acidity.
Avoiding Common Halloumi Pitfalls
If your cheese sticks to the pan, it’s almost always because the pan wasn’t hot enough or you tried to flip it too early. Like a good steak, the cheese will “release” itself from the surface once a proper crust has formed. If it’s resisting the spatula, give it another 30 seconds.
If you find yourself with leftovers, don’t eat the halloumi cold—it will be very rubbery. To revive it, toss the cheese back into a dry, hot skillet for 15 to 20 seconds per side. This will soften the interior again and bring back that melty magic. Never microwave halloumi, as it will turn into a tough, chewy mess.
Equipment: Why Cast Iron and Paper Towels Matter
You might be tempted to use a non-stick pan for easy cleanup, but you’ll never get the same results. Non-stick surfaces can’t safely reach the temperatures required for a true char. Cast iron or carbon steel are essential because they provide the radiant heat necessary to cook the inside of the halloumi while the outside crisps up.
And never underestimate the power of a simple paper towel. Drying the halloumi and the chickpeas is the difference between a “good” meal and a “restaurant-quality” meal. Removing surface moisture ensures that the energy of the pan goes directly into browning rather than evaporating water.
Make Ahead Strategies for Meal Prep
This is a fantastic meal prep dish if you organize it correctly. You can cook the lentils, whisk the dressing, and massage the kale up to 48 hours in advance. In fact, the massaged kale actually holds up better than traditional salad greens and won’t wilt into a soggy mess in the fridge.
Store the fried chickpeas in a separate airtight container at room temperature to keep them crunchy. The only thing you must do “a la minute” is sear the halloumi and zucchini. Since that only takes about 10 minutes total, it’s a very manageable way to have a fresh, hot dinner on a busy weeknight.
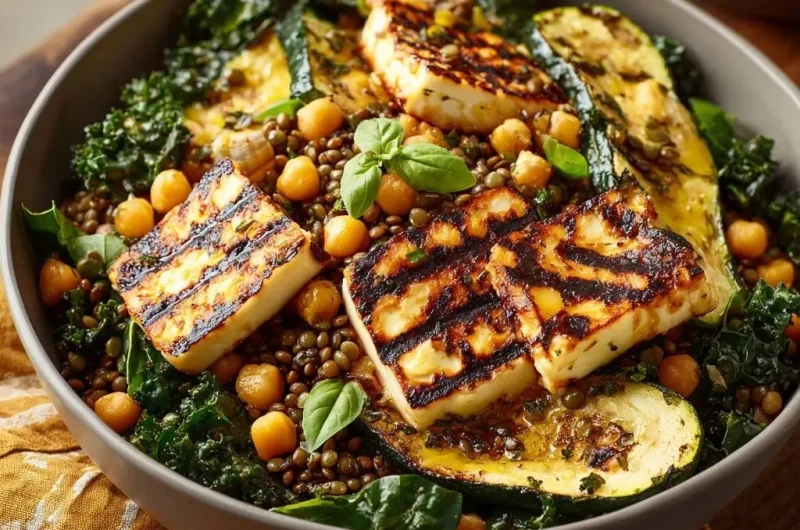
Expert Tips for Plating and Presentation
To get that “Power Bowl” look, don’t just toss everything together in a heap. Start with a generous bed of the lentil and kale mixture. Arrange the charred zucchini rounds in a fan shape on one side, and nestle the hot halloumi slices right next to them. This “deconstructed” look makes the dish feel more intentional and appetizing.
Finish with the remaining dressing, drizzling it specifically over the cheese so it seeps into the grill marks. A handful of fresh basil leaves torn over the top adds a bright, aromatic top-note. The smell of fresh basil hitting the warm cheese is incredible and provides the final layer of complexity this dish deserves.
Troubleshooting Your Power Bowl
Why is my halloumi still rubbery?
This usually happens if the pan temperature was too low. If the cheese doesn’t get hot enough quickly, the proteins don’t soften properly. Next time, wait until the pan is lightly smoking before adding the cheese. Also, ensure your slices are at least 1/2 inch thick; thinner slices can dry out before they melt.
Why is my kale still bitter?
If the kale is tough or bitter, it likely needs more “work.” You have to be quite firm when massaging it. If you’ve massaged it and it’s still not right, add a little more lemon juice or a tiny pinch of sugar to the dressing. The acid and sweetness will help neutralize the lingering bitterness of the greens.
Can I use a different cheese?
You can, but it must be a “non-melting” cheese. Paneer or Queso Panela are the best substitutes because they have a similar high melting point and can withstand the heat of a grill pan. However, they are much milder than halloumi, so you may want to add an extra pinch of salt or some lemon zest to the cheese while searing.
How do I prevent the chickpeas from popping out of the pan?
Chickpeas “pop” when internal steam builds up and escapes through the skin. To minimize this, make sure they are extremely dry before frying. If they start jumping like popcorn, turn the heat down just a touch and use a splatter screen. A little bit of popping is normal and actually a sign that they are getting nice and crispy.
My zucchini is mushy—what happened?
Mushy zucchini is usually caused by crowding the pan. If you put too many slices in at once, the temperature drops and the vegetables steam in their own juices. Cook them in batches if necessary. Also, make sure you aren’t slicing them too thin; a 1/2-inch diagonal cut is essential for maintaining that structural “snap.”
How should I store and reheat leftovers?
Store the lentil and kale base in an airtight container in the fridge for up to 3 days. Keep the halloumi and zucchini in a separate container. When you’re ready to eat, reheat the halloumi and zucchini in a dry skillet over medium-high heat for about 30 seconds per side. This restores the texture much better than a microwave would.
Grilled Halloumi
Course: Main CourseCuisine: Mediterranean-InspiredDifficulty: easy2
servings15
minutes20
minutes540
kcal35
MinutesA nutritious and satisfying bowl that solves the problem of rubbery halloumi. By using a high-heat dry sear, the cheese achieves a golden-black char with a soft, melty center, served alongside massaged kale, lentils, and crispy chickpeas.
Ingredients
8 ounces halloumi cheese, sliced into 1/2 inch thick rectangles
1 cup cooked French green lentils (Puy lentils)
1/2 cup canned chickpeas, drained and patted very dry
1 large zucchini, sliced into thick diagonal rounds
2 cups fresh kale, stems removed and torn into bite-sized pieces
3 tablespoons extra virgin olive oil, divided
1 tablespoon lemon juice
1 teaspoon dried oregano
1/2 teaspoon garlic powder
1/2 teaspoon red pepper flakes (optional)
Fresh basil leaves for garnish
Flaky sea salt and cracked black pepper to taste
Directions
- Prepare the Chickpeas: Heat 1 tablespoon of olive oil in a small skillet over medium-high heat. Add the dried chickpeas and a pinch of salt. Fry for 5-7 minutes, shaking the pan frequently, until the skins are golden and slightly crispy. Set aside.
- Massage the Kale: In a large mixing bowl, combine the kale with a teaspoon of olive oil and a pinch of salt. Massage the leaves firmly with your hands for 2 minutes until they wilt, turn a vibrant dark green, and lose their bitter toughness.
- Build the Base: Add the cooked lentils and the fried chickpeas to the kale. In a small jar or bowl, whisk together the remaining olive oil, lemon juice, oregano, garlic powder, and red pepper flakes. Pour two-thirds of this dressing over the lentil mixture and toss thoroughly.
- Char the Zucchini: Heat a cast-iron grill pan over high heat until it begins to lightly smoke. Lightly brush the zucchini rounds with a tiny bit of oil. Place them on the grill and sear for 3 minutes per side without moving them, ensuring deep, dark char marks develop. Remove and set aside.
- Sear the Halloumi: Pat the halloumi slices completely dry with paper towels. Do not add oil to the pan. Place the dry cheese slices onto the smoking hot grill pan. Sear for 2 minutes on the first side until deep brown/black grill lines appear and the cheese begins to soften. Flip carefully and sear for 1 minute on the other side. The high heat creates a crispy crust that prevents the “squeak” while melting the interior.
- Assemble: Divide the lentil and kale base between two bowls. Arrange the charred zucchini and the hot halloumi slices on top.
- Finish: Drizzle the remaining dressing over the cheese and vegetables. Garnish with fresh basil leaves and a final crack of black pepper. Serve immediately while the halloumi is at its peak melty consistency.
Notes
- The secret to non-rubbery halloumi is ensuring the cheese is patted completely dry and the pan is smoking hot before searing. Do not add oil to the pan when cooking the cheese.