As the golden light of autumn begins to stretch across the kitchen counter, our cravings naturally shift toward the crisp, earthy bounty of the season. There is a specific joy in finding that perfect balance between the lingering freshness of summer greens and the hearty, rustic textures of fall harvest staples. However, many home cooks hesitate to serve a large salad at dinner parties because of the dreaded “Soggy Salad Syndrome.”
You’ve likely experienced it before: a beautiful bowl of greens that looks stunning for five minutes but quickly collapses into a limp, watery mess before the main course even hits the table. This happens because traditional dressing methods inadvertently attack the structural integrity of the leaves. The salt and acid in most vinaigrettes act as a dehydrator, pulling moisture out of the lettuce cells and causing them to shrivel instantly.
The secret to a truly professional Harvest Apple and Walnut Salad lies in a simple but effective moisture-locking technique. By understanding the “Order of Operations,” you can create a protective shield around your greens that keeps them upright and crunchy for much longer. I’m going to show you how to use a hydrophobic oil barrier to ensure your salad stays vibrant and fresh from the first bite to the last.
The Physics of Crispness: Why Salads Wilt
To master the art of the salad, you have to think like a scientist for a moment. Every leaf of red leaf lettuce or spinach is made up of tiny cells filled with water, held together by rigid cell walls. When you sprinkle salt directly onto a leaf, or drench it in a high-acid vinegar, a process called osmosis begins. The salt draws the water out of the cells to balance the concentration on the surface, leaving the leaf flaccid and “weeping” moisture into the bottom of the bowl.
Furthermore, the acid in vinegar begins to break down the chlorophyll and the pectin that keeps the leaves firm. This is why a salad dressed twenty minutes early often looks dull and gray. However, oil is the ultimate protector in this scenario. Because oil is hydrophobic—meaning it repels water—it can act as a raincoat for your greens.
By coating the leaves in a thin, even layer of extra virgin olive oil before any salt or vinegar touches them, you create a physical barrier. This barrier slows down the osmotic process significantly. Therefore, your salad maintains its “loft” and crunch even when sitting on a buffet line. It’s a small change in your routine that yields a massive difference in texture.
Essential Components for the Harvest Apple and Walnut Salad
When a recipe has only a few ingredients, the quality of each one becomes paramount. For this salad, you want a contrast of textures: the soft give of the greens, the snap of the apple, the crunch of the walnut, and the creamy finish of the goat cheese. If one of these is off, the whole experience falters.
I always reach for Honeycrisp apples for this specific dish. While Gala or Fuji are fine in a pinch, Honeycrisps are engineered for that explosive “snap” when you bite into them. They also have a balanced acidity that plays beautifully with the apple cider vinegar in the dressing. Avoid softer varieties like Red Delicious, which can turn mealy and disappear into the greens.
The oil you choose is just as important as the fruit. Since we are using the oil as a sealant, a high-quality extra virgin olive oil is a must. Look for one with a peppery finish to add depth to the salad. Because we aren’t cooking the oil, all its delicate flavor notes will stay intact, providing a rich backbone for the lighter ingredients.
Selecting the Best Greens for Structural Integrity
A mix of spring greens and red leaf lettuce provides a beautiful color palette, but these leaves are notoriously delicate. When you’re shopping, look for leaves that are vibrant and springy to the touch. If the edges are already starting to curl or turn translucent, they won’t stand a chance against the dressing.
The most critical step in prep is ensuring your greens are bone-dry. If there is residual water from washing, the oil won’t be able to stick to the leaves. Use a salad spinner to get them as dry as possible, then let them sit on a clean kitchen towel for a few minutes. A dry leaf is a crisp leaf.
The Role of Toasted Walnuts and Dried Fruit
Raw walnuts are fine, but toasted walnuts are transformative. When you heat the nuts, you trigger the Maillard reaction, which unlocks a deep, smoky aroma and a much crispier texture. It takes the walnut from being a “filler” ingredient to a star player that echoes the earthy tones of the autumn season.
The dried cranberries provide the necessary “chew” and a pop of tartness. In addition to their flavor, they act as little sponges that soak up just a bit of the dressing, becoming plump and flavorful. This contrast against the salty goat cheese creates a “sweet and savory” profile that keeps you coming back for another forkful.
Step-by-Step: Executing the Moisture-Lock Technique
Now that we have our ingredients ready, it’s time to assemble. Remember, the goal here isn’t just to mix things together; it’s to build the salad in a way that preserves its life. We are going to follow a strict order of operations to ensure that moisture-lock works perfectly.
Phase 1: Emulsifying the Base Dressing
Firstly, grab a small glass bowl and whisk together your olive oil, apple cider vinegar, honey, and Dijon mustard. You are looking for the mixture to thicken and become opaque. This is called emulsification. The mustard acts as the “glue” that holds the oil and vinegar together so they don’t separate on the leaf.
Crucially, do not add your salt or pepper to the dressing yet. We want the dressing to be as “moisture-neutral” as possible when it first hits the greens. Keep the whisking vigorous until the dressing looks creamy and smooth. If it looks like it’s separating, just keep whisking for another thirty seconds.
Phase 2: Creating the Hydrophobic Oil Barrier
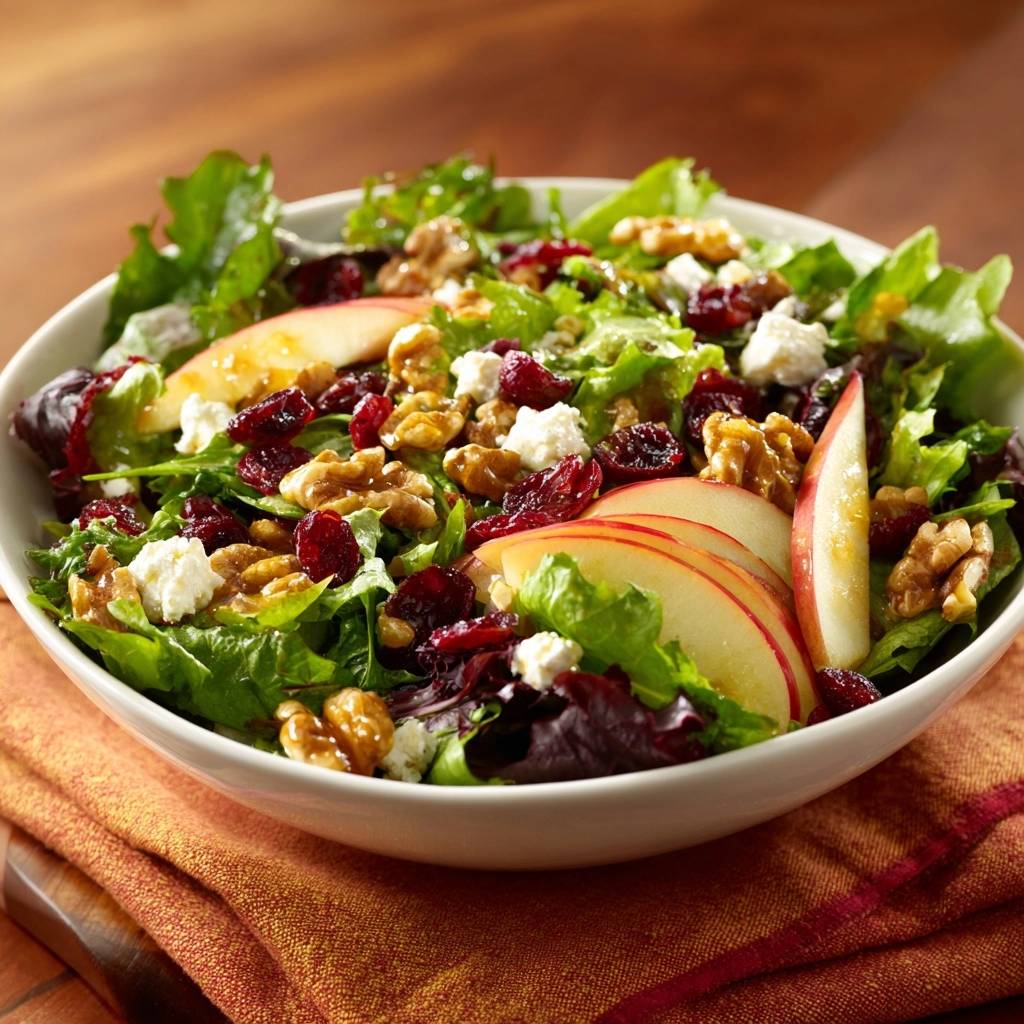
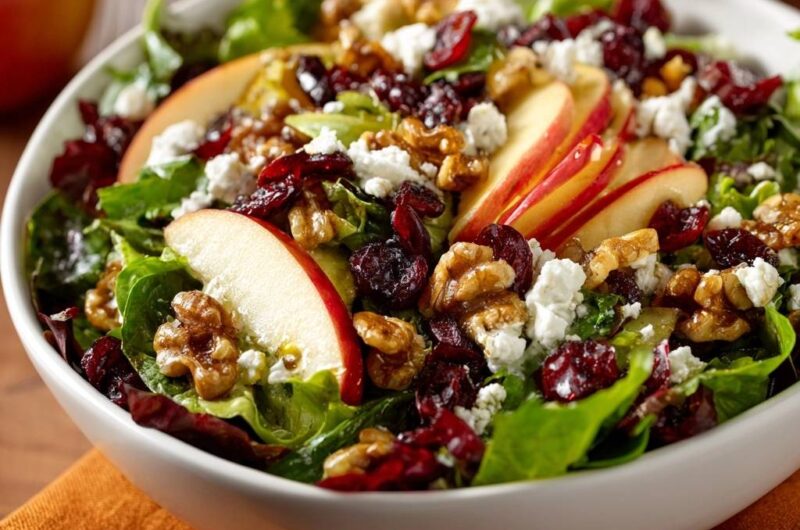
Place your chilled, dry greens into a large bowl. Drizzle the dressing over the top, but don’t just dump it in one spot. Use your hands or large tongs to toss the greens gently. You want every single leaf to have a faint, glistening sheen of oil. This is the “raincoat” we talked about earlier.
Take a moment to look at the leaves. They should look bright and polished, not heavy or weighed down. If you see a pool of dressing at the bottom of the bowl, you’ve used too much. The leaves should have absorbed or been coated by almost all the liquid. This layer of oil is now protecting the cell walls from the vinegar’s acidity.
Phase 3: The Last-Second Seasoning Ritual
Once the leaves are coated, gently fold in your sliced apples, toasted walnuts, and dried cranberries. These heavier items should be distributed evenly so every guest gets a bit of everything. Now comes the most important part: the seasoning. Only at the very last second, right before the bowl goes to the table, sprinkle your sea salt and black pepper over the top.
By delaying the salt, you prevent it from drawing out the water from the apples and greens. Finally, crumble the goat cheese over the top. Don’t toss the salad again after adding the cheese, or it will smear and make the salad look messy. Let the white crumbles sit proudly on top for a beautiful, rustic presentation.
Flavor Variations and Ingredient Swaps
While this combination is a classic, you can easily adapt it based on what’s in your pantry. If you aren’t a fan of walnuts, toasted pecans or even pumpkin seeds (pepitas) work wonderfully. Pecans offer a slightly sweeter, more buttery crunch that pairs exceptionally well with the honey in the dressing.
For a similar fall comfort, check out this roasted pattypan squash and sage flatbread.
For the fruit, thinly sliced pears are a sophisticated alternative to apples. Just make sure the pears are firm; a mushy pear will break apart during the tossing process. If you need a dairy-free option, a creamy nut-based cheese or even some sliced avocado can provide that rich, fatty element that the goat cheese usually offers.
Strategic Pairings for a Harvest Feast
This salad is bright and acidic, which makes it the perfect partner for richer, heavier autumn dishes. It cuts through the density of roasted root vegetables like sweet potatoes or parsnips beautifully. If you’re serving a main course, think about a roasted chicken with herbs or a hearty wild rice pilaf filled with mushrooms.
Because the salad has a touch of sweetness from the honey and apples, it also pairs well with savory, salty sides. A warm loaf of crusty sourdough bread is almost mandatory here to soak up any leftover dressing at the bottom of the plate. The goal is to create a meal that feels balanced, textured, and deeply satisfying.
Troubleshooting Common Salad Mistakes
If your dressing separates before you can use it, don’t panic. This usually happens if the honey or mustard wasn’t fully incorporated. Simply give it another quick whisk or shake it in a small mason jar until it re-emulsifies. It should be thick enough to coat the back of a spoon.
Are your apples turning brown before you can serve? This is called oxidation. To prevent this, you can toss your apple slices in a tiny bit of lemon juice or extra apple cider vinegar immediately after slicing. The acid will stall the browning process, keeping the fruit looking fresh and white for your guests.
If your greens seem a bit limp even before you start, you can try to “shock” them. Submerge the leaves in a bowl of ice water for ten minutes. This rehydrates the cells and can bring a bit of life back to slightly older lettuce. Just remember to dry them thoroughly afterward, or the oil barrier won’t stick!
Expert Tips for Make-Ahead Preparation
While the final assembly must happen at the last minute, you can do 90% of the work in advance. This is the “Deconstructed Prep” method used in professional kitchens. Whisk the dressing and store it in a jar at room temperature. Toast your walnuts and keep them in a small airtight container so they stay crunchy.
You can even slice your apples an hour early if you keep them in a bowl of water with a splash of lemon juice. When your guests arrive, all you have to do is drain the apples, dry the greens, and follow the three-phase assembly. You’ll have a five-star salad on the table in under sixty seconds without any of the stress or the sogginess.
Frequently Asked Questions
Can I use a different vinegar for the dressing?
Yes, you can certainly swap the vinegar, though it will change the character of the salad. White balsamic vinegar is a great substitute because it has a similar sweetness and won’t discolor the greens. Red wine vinegar is much punchier and more acidic, so you might need to add an extra half-teaspoon of honey to balance the flavors. Avoid standard balsamic vinegar if you want to keep the salad looking bright, as the dark color can make the apples look muddy.
How do I toast walnuts without burning them?
Walnuts have a high oil content and can go from toasted to burnt in a matter of seconds. The safest method is using the oven at 350°F. Spread the walnut halves in a single layer on a baking sheet and bake for 5 to 7 minutes. You should start to smell a nutty aroma; that is your cue to check them. Alternatively, you can use a dry skillet over medium heat, tossing them constantly for about 3 to 5 minutes. Always remove them from the hot pan immediately after toasting to stop the cooking process.
What is the best way to slice apples for salads?
For the best mouthfeel, you want uniform, thin wedges. Cut the apple into quarters and remove the core, then slice each quarter into 1/8-inch thick pieces. This ensures that the apple slices are flexible enough to be picked up with a fork alongside the greens. If you prefer a more rustic look, you can “julienne” them into matchsticks, which provides a great crunch and ensures you get a bit of apple in every single bite.
Is there a substitute for goat cheese?
If you find goat cheese too “tangy,” feta is an excellent alternative. It provides a similar creamy texture but with a saltier, more briny finish. For those who prefer a firmer cheese, shaved Manchego or a sharp white cheddar works beautifully with apples and walnuts. If you want something even milder, fresh mozzarella pearls can add a nice creaminess without overpowering the other delicate flavors in the bowl.
How long will the Harvest Apple and Walnut Salad stay crisp?
Even with the moisture-lock oil technique, a dressed salad is a ticking clock. This salad is at its absolute peak within the first 20 minutes of assembly. The oil barrier will protect the leaves for about an hour, but eventually, the weight of the toppings and the ambient humidity will take a toll. If you are hosting a long dinner, it is better to keep the components separate and only toss what you need for the first serving. Leftovers do not store well once dressed, as the greens will inevitably soften overnight.
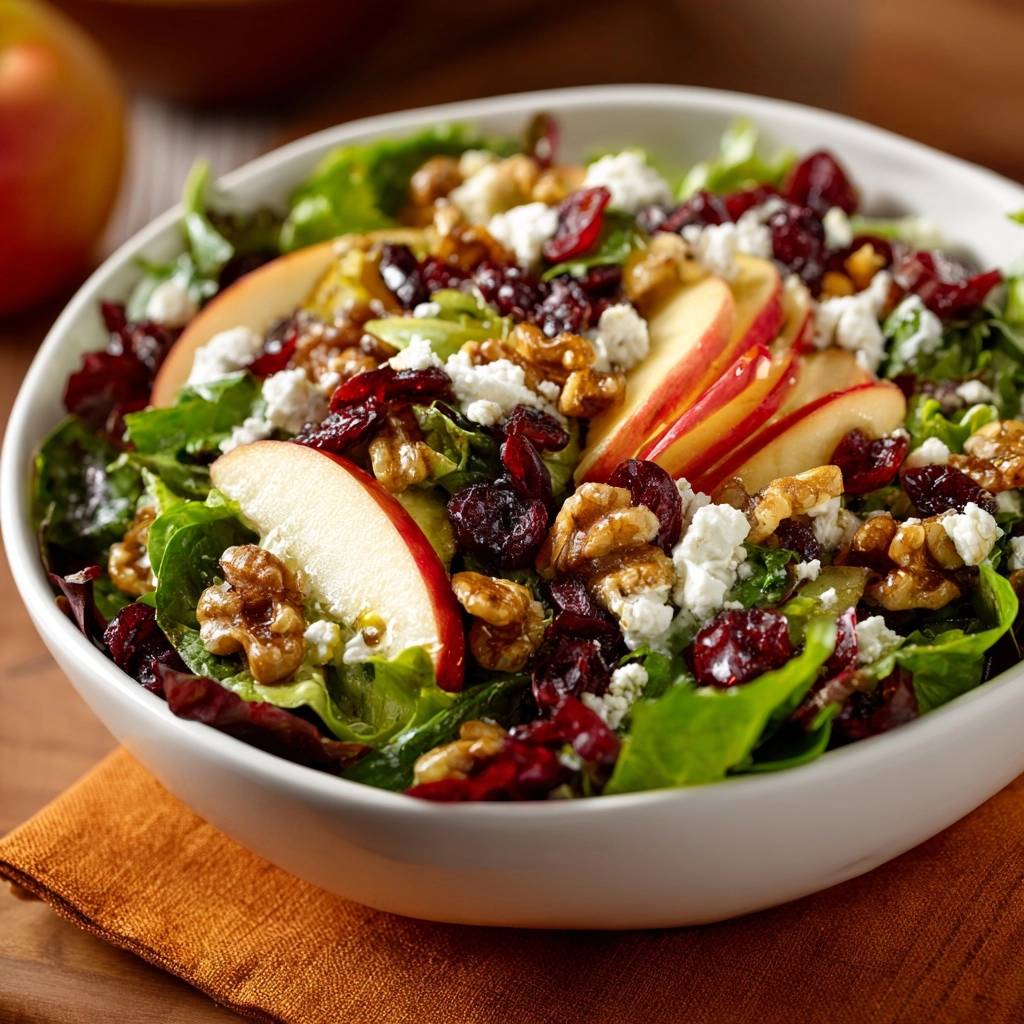
Apple Walnut Salad
Course: SaladCuisine: AmericanDifficulty: easy4
servings15
minutes310
kcal15
MinutesThis Harvest Apple and Walnut Salad uses a specific layering and moisture-locking technique to ensure greens stay crisp. By coating leaves in an oil-based dressing before adding salt, you create a barrier that prevents wilting.
Ingredients
6 cups mixed spring greens and red leaf lettuce
2 large Honeycrisp apples, thinly sliced
1/2 cup dried cranberries
1/2 cup toasted walnut halves
1/2 cup crumbled goat cheese
3 tablespoons extra virgin olive oil
1 tablespoon apple cider vinegar
1 teaspoon honey
1/2 teaspoon Dijon mustard
Pinch of sea salt and black pepper
Directions
- To solve the soggy leaf problem, start by whisking the olive oil, apple cider vinegar, honey, and mustard in a small bowl until fully emulsified. Do not add the salt to the dressing yet.
- Place your dry, chilled greens in a large chilled bowl. Drizzle only the oil-based dressing over the greens and toss gently. The oil creates a hydrophobic barrier that protects the leaves from wilting.
- Once the leaves are lightly coated in oil, add your sliced apples, walnuts, and dried cranberries.
- Sprinkle the sea salt and black pepper over the salad only at the very last second before serving. Salt draws out moisture from greens, so delaying this step is the key to maximum crunch.
- Top with crumbled goat cheese and serve immediately. This method ensures the greens stay upright and crisp rather than turning into a limp, watery mess.
Notes
- The secret to preventing soggy leaves is to coat the greens in oil first to create a hydrophobic barrier and only add salt at the very last second before serving.