
There is nothing quite like the comfort of a thick, rustic soup that feels like a warm hug in a bowl. However, many home cooks struggle with bean soups that end up looking more like flavored water than a satisfying meal. You want a broth that has body and soul, not a thin liquid where the ingredients just sink to the bottom.
The secret to a truly great Hearty White Bean and Ham Soup lies in starch management. Most recipes fail because they don’t coax the natural starches out of the beans to create a velvety texture. By using a specific mashing technique, we can transform a standard broth into a rich, silky base that clings to every piece of savory ham and tender carrot.
For another take on this core idea, check out the creamy sausage and white bean soup.
I’ve found that the key to professional-level soup is understanding how to build layers of flavor while controlling the consistency. This isn’t just about tossing ingredients into a pot; it’s about a few intentional steps that ensure your soup is never watery. One quick tip: always use a heavy-bottomed pot like a Dutch oven to maintain even heat and prevent the thickened broth from scorching.
For another satisfying bowl, check out this hearty ham and white bean soup.
The Anatomy of a Thick Bean Broth
To achieve that signature creamy mouthfeel without adding heavy cream or flour, you have to look at the science of the legumes. Cannellini and Great Northern beans are the champions of this dish because they have a high starch content and a thin skin. This combination allows them to break down just enough to thicken the liquid while still holding their shape during a long simmer.
A “brothy” soup is light and clear, but a “velvety” soup has a certain weight to it. When you mash a portion of the beans, you release amylose and amylopectin starches into the chicken broth. These starches act as natural thickeners, creating a permanent emulsion that gives the soup a luxurious, rib-sticking quality that feels much more indulgent than it actually is.
Why Canned Beans Outperform Dried for Speed
While purists often argue for dried beans, canned beans are actually superior when you want a thick soup in under an hour. The canning process involves high-heat pressure cooking, which softens the bean’s exterior and interior uniformly. This makes the “mashing technique” significantly more effective because the beans turn into a smooth paste instantly.
If you use dried beans that haven’t been soaked long enough, they can remain grainy even after mashing. Canned beans provide a reliable, creamy consistency every single time. Just make sure you rinse them thoroughly to remove the metallic taste of the canning liquid, allowing the clean flavors of the ham and herbs to shine through.
Essential Components for Hearty White Bean and Ham Soup
Quality ingredients are the foundation of any simple recipe. Since this soup has a relatively short ingredient list, each item needs to pull its weight. I always recommend using a low-sodium chicken broth. This is crucial because ham is naturally cured and salty; using a full-sodium broth can quickly make the dish inedible as the liquid reduces and concentrates the salt.
The choice of onion also matters more than you might think. Yellow onions are the workhorse here because they have a higher sugar content than white onions. As they sauté, they provide a subtle sweetness that balances the salty ham and earthy beans. It creates a rounded flavor profile that hits every part of your palate.
Selecting the Right Cut of Ham
The ham you choose dictates the depth of the smoky flavor in your soup. If you have leftover holiday ham, that is the gold standard because the bone-in glaze adds incredible complexity. However, a thick-cut ham steak from the grocery store works beautifully for a weeknight meal. Just ensure you dice it into uniform, bite-sized cubes so you get a bit of protein in every spoonful.
If you want an even deeper, smokier profile, you can add a smoked ham hock to the pot while it simmers. The collagen in the hock will melt into the broth, adding even more body and a sticky, rich texture. Just remember to remove the hock and shred any meat off it before serving.
The Role of Fresh Dill and Aromatics
Most people reach for parsley or rosemary for bean soup, but fresh dill is the unconventional hero that makes this recipe pop. Dill offers a bright, grassy, and slightly citrusy finish that cuts through the heavy, savory notes of the beans and meat. It provides a necessary “lift” to the dish that keeps it from feeling too weighed down.
Using a generous amount of dill isn’t just for garnish; it’s a flavor strategy. By stirring half of it in at the very end, you preserve its volatile oils and vibrant green color. This creates a beautiful visual contrast against the creamy white beans and orange carrots, making the dish look as fresh as it tastes.
Step-by-Step: Building the Flavor Foundation
The first step to a great soup is the sauté. You want to “sweat” your mirepoix—the onions, carrots, and celery—over medium heat. The goal isn’t to brown them quickly, but to let them soften slowly until the onions are translucent and the carrots begin to release their natural oils. This creates a sweet, aromatic base for the rest of the ingredients.
If you rush this step with high heat, the vegetables might char, which can leave bitter flecks in your beautiful white soup. Patience here pays off in the form of a more cohesive and mellow flavor. Once the vegetables are soft, add the garlic for just sixty seconds. Garlic burns easily, and burnt garlic will ruin the entire pot with a harsh, acrid taste.
Searing the Ham for Maximum Umami
Before you pour in your broth, toss the diced ham into the pot with the softened vegetables. This is where the Maillard reaction comes into play. By letting the ham sear for a few minutes, you develop a golden-brown crust on the meat and create a “fond”—those little brown bits—on the bottom of the pot.
When you finally add the chicken broth, those brown bits will deglaze and dissolve into the liquid. This adds a massive punch of umami and a deeper golden hue to your broth. It’s a small step that separates a “good” home-cooked soup from a “great” restaurant-quality one.
The Secret Technique: Natural Starch Emulsification
This is the most important part of the process. Take one full cup of your drained beans and put them in a small bowl with a ladle of broth. Use a fork or a potato masher to crush them until they form a completely smooth, thick paste. When you stir this back into the pot, it acts as a natural binder.
Unlike a flour roux or a cornstarch slurry, this bean paste won’t separate or become gummy when the soup cools. It creates a permanent, silky emulsion that thickens the broth from within. You get all the creaminess of a chowder without any of the heavy dairy, keeping the soup healthy and light yet incredibly satisfying.
Why Simmering Uncovered is Non-Negotiable
Many people instinctively put a lid on their soup to make it boil faster, but for this recipe, you must simmer uncovered. Simmering uncovered allows for evaporation, which is the natural way to concentrate flavors. As the steam escapes, the liquid reduces, and the bean starches begin to bind more tightly with the broth.
This reduction process is what creates that “clinging” texture. You want the broth to coat the back of a spoon. If you keep the lid on, the moisture stays trapped, and you’ll likely end up with the watery consistency we are trying to avoid. Watch the pot; as the level drops slightly, the flavor intensifies.
Troubleshooting Common Soup Consistency Issues
If you find your soup is still a bit thinner than you’d like after 20 minutes of simmering, don’t panic. Simply take another half-cup of beans out of the pot, mash them up, and stir them back in. This gives you total control over the final thickness without needing to add extra ingredients.
On the flip side, if the soup becomes too thick (which can happen if it sits on the stove too long), just splash in a little extra chicken broth or water. Remember that soup always appears thinner when it’s boiling hot and will naturally thicken as it cools slightly in the bowl. Aim for a consistency that is just slightly thinner than you want it to be when it’s on the stove.
Flavor Variations and Ingredient Swaps
This recipe is a fantastic canvas for variations. If you want a lighter version, you can swap the ham for diced smoked turkey breast. It still provides that essential smoky element but with less fat. You can also stir in a handful of chopped kale or baby spinach during the last five minutes of cooking for a boost of color and nutrition.
For those who like a bit of heat, a pinch of red pepper flakes added with the garlic can provide a nice back-of-the-throat warmth. Just be careful not to overdo it, as you don’t want to mask the delicate flavor of the fresh dill and white beans.
Vegetarian Adjustments Without Losing Depth
You can absolutely make a hearty version of this soup without meat. To replace the savory depth of the ham, use a teaspoon of smoked paprika or a few drops of liquid smoke. These ingredients mimic the “charred” flavor that ham usually provides.
Swap the chicken broth for a high-quality vegetable stock. To ensure the vegetarian version doesn’t taste flat, I recommend adding a tablespoon of soy sauce or nutritional yeast. These provide the umami that meat usually contributes, ensuring your vegetarian soup is just as “hearty” as the original.
Optimal Pairings for a Complete Meal
Because this soup is so rich and creamy, it pairs perfectly with something crunchy. A thick slice of toasted sourdough bread is the ideal vessel for soaking up the last bits of broth. The slight tang of the sourdough complements the savory ham beautifully.
Completing Your Meal
Beyond this satisfying soup, explore other comforting bean and vegetable dishes.
- If you enjoyed the beans in this soup, you might also enjoy a robust Pasta e Fagioli, another Italian bean soup.
- For a vegetable-forward option that also warms you up, consider this Hearty Vegetable Soup recipe.
If you want something lighter on the side, try a simple arugula salad with a sharp lemon vinaigrette. The bitterness of the greens and the acidity of the lemon act as a palate cleanser between bites of the rich soup. Roasted root vegetables, like parsnips or beets, also make a wonderful earthy accompaniment.
Make-Ahead, Storage, and Freezing Protocols
Bean soup is one of those rare dishes that actually tastes better the next day. As the soup sits in the fridge, the starches continue to settle and the flavors of the garlic, thyme, and ham meld together more deeply. It’s the perfect candidate for meal prep on a Sunday evening.
When storing, let the soup cool to room temperature before transferring it to an airtight container. It will stay fresh in the refrigerator for up to four days. When you go to reheat it, you might notice it has turned into a thick gel; this is normal! Just add a splash of water or broth when warming it up on the stove to bring it back to the perfect consistency.
Freezing Thickened Soups Successfully
This soup freezes remarkably well because it doesn’t contain dairy, which can sometimes break or grain after thawing. To freeze, leave about an inch of headspace in your container, as the liquid will expand as it turns to ice. It will keep perfectly for up to three months.
For the best results, thaw the soup overnight in the refrigerator before reheating. Avoid microwaving from frozen if possible, as this can cause the beans to become mushy. Reheating slowly on the stovetop ensures the texture remains silky and the vegetables stay intact.
Expert Tips for Professional Results
If you want to take this soup to the absolute next level, try adding a Parmesan rind to the pot while it simmers. The rind dissolves slightly, releasing a massive amount of salty, nutty umami into the broth. Just remember to fish out whatever is left of the rind before you serve it.
Another pro move is the “acid finish.” Right before serving, stir in a teaspoon of fresh lemon juice or a dash of white wine vinegar. You won’t taste the acid itself, but it acts like a volume knob for all the other flavors, making the ham taste smokier and the beans taste creamier. It’s the secret weapon of professional chefs.
Adjusting Salt in Cured Meat Recipes
Seasoning is the most common place where soup goes wrong. Because ham and chicken broth both contain salt, and because the soup reduces as it simmers, the saltiness will intensify over time. If you salt at the beginning, you risk a “salt bomb” by the time the soup is finished.
Always wait until the very end—after the soup has simmered and reduced—to do your final taste test. Only then should you add salt if it’s needed. Usually, a generous amount of black pepper is all you’ll need to finish the dish, as the ham provides plenty of sodium on its own.
Frequently Asked Questions
Can I use a slow cooker for this method?
Yes, you can use a slow cooker, but you should still sauté the vegetables and sear the ham in a pan first for the best flavor. Add everything to the slow cooker and cook on low for 6 to 7 hours. About 30 minutes before serving, perform the mashing technique to thicken the broth. Keep the lid off during that final 30 minutes to allow some moisture to escape.
What is the best substitute for Cannellini beans?
Great Northern beans are the closest substitute and work perfectly. Navy beans are another option, though they are smaller and will break down faster, potentially making the soup even thicker. Avoid using chickpeas or kidney beans, as their skins are too tough and they won’t create the same creamy texture when mashed.
How do I fix a soup that is too salty?
If the ham made the soup too salty, the best fix is to add more bulk. You can add more unsalted broth or even a peeled, diced potato. The potato will absorb some of the salt as it cooks. Alternatively, adding a little more acid (lemon juice) or a pinch of sugar can help mask the perception of saltiness on your tongue.
Can I use dried herbs instead of fresh dill?
You can use dried thyme during the simmering process, but I strongly recommend sticking with fresh dill for the finish. Dried dill loses almost all of its characteristic “brightness” and can taste a bit like hay. If you can’t find fresh dill, fresh parsley or even a little lemon zest would be a better substitute than dried dill.
Why did my beans stay hard?
If you are using canned beans, they should never be hard. However, if you used dried beans and they won’t soften, it’s usually due to “hard water” or old beans. Very old dried beans lose their ability to absorb water. Additionally, adding acidic ingredients like tomatoes or lemon juice too early in the cooking process can toughen the skins of dried beans, so always add acids at the very end.
White Bean and Ham Soup
Course: Main CourseCuisine: AmericanDifficulty: medium6
servings15
minutes45
minutes310
kcal60
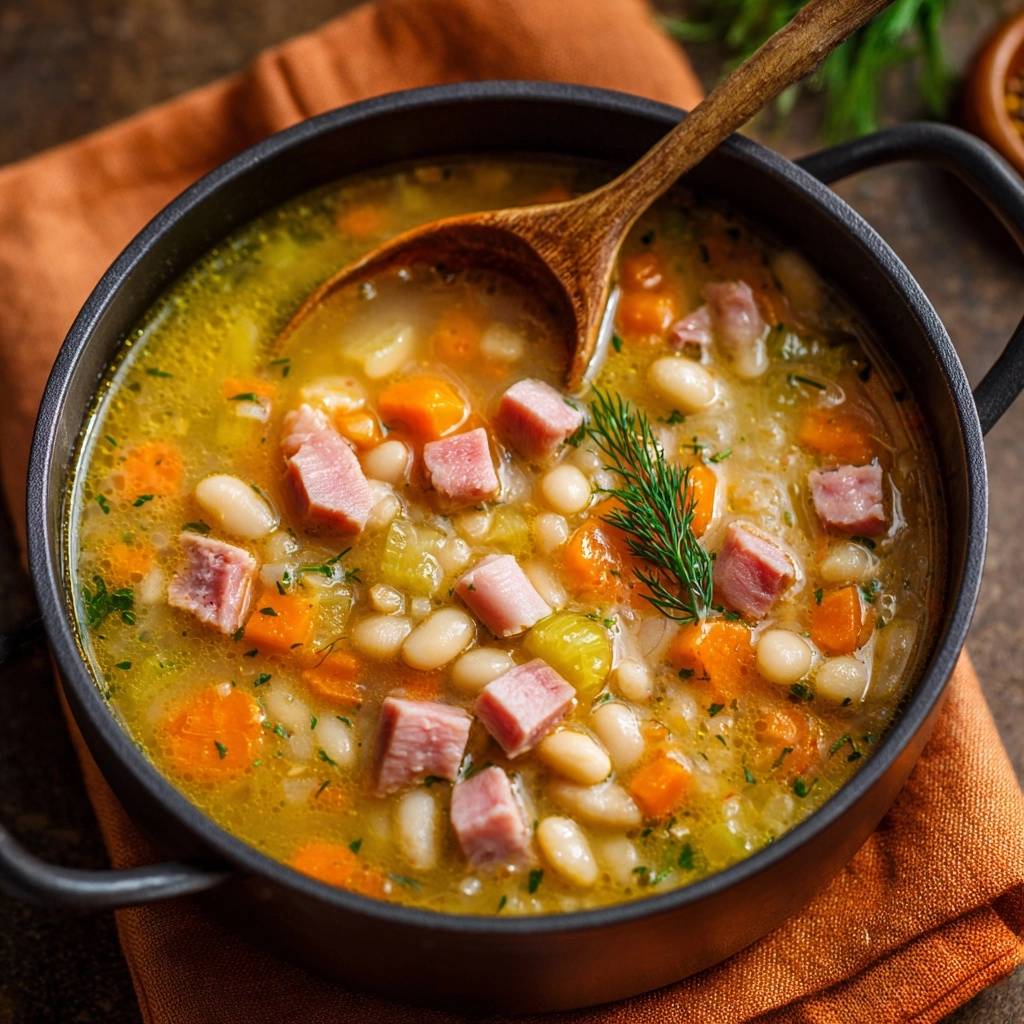
MinutesThis hearty soup features Cannellini beans, diced ham, and fresh dill. By mashing a portion of the beans, the broth achieves a naturally thick consistency that avoids the common pitfall of watery bean soups.
Ingredients
2 cans (15 ounces each) Cannellini or Great Northern beans, rinsed and drained
1.5 cups cooked ham, diced into thick, bite-sized cubes
2 large carrots, peeled and sliced into rounds
1 yellow onion, finely diced
2 stalks celery, diced
3 cloves garlic, minced
5 cups low-sodium chicken broth (reduced from 6 to ensure thickness)
1 teaspoon dried thyme
1 bay leaf
2 tablespoons olive oil
1/2 cup fresh dill, roughly chopped (generous amount for visual accuracy)
Salt and black pepper to taste
Directions
- Heat the olive oil in a large Dutch oven or heavy pot over medium heat. Add the onion, carrots, and celery. Saute for 6 to 8 minutes until the vegetables are softened and the onions are translucent.
- Stir in the minced garlic and cook for just 1 minute until fragrant to avoid burning.
- Add the diced ham to the pot and cook for 3 to 4 minutes, allowing the edges to slightly brown and release savory fats into the base.
- Pour in 5 cups of chicken broth, the dried thyme, and the bay leaf. Bring the mixture to a boil.
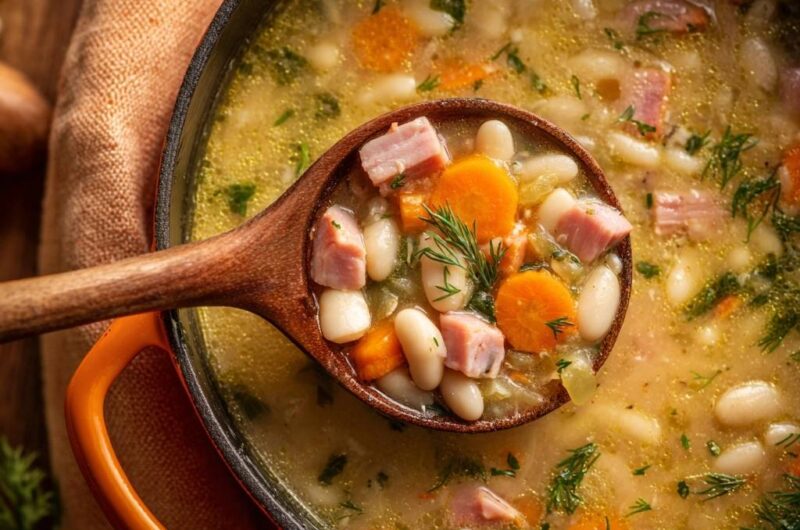
- To solve the watery broth problem, take 1 full cup of the drained beans and place them in a small bowl with a splash of broth. Use a fork or potato masher to crush them into a completely smooth paste. Stir this bean paste back into the pot. This is the secret to the naturally thick, silky texture seen in the image.
- Add the remaining whole beans to the pot. Reduce the heat to medium-low and simmer uncovered for 25 to 30 minutes. Simmering uncovered is essential to allow the liquid to reduce and thicken further.
- Remove the bay leaf. Taste and adjust seasoning with salt and pepper.
- Stir in half of the fresh dill. Ladle the soup into bowls and garnish heavily with the remaining fresh dill to achieve the vibrant, herb-forward look of the finished dish. Serve hot.
Notes
- Simmering uncovered is essential to allow the liquid to reduce and thicken further. Using the bean mashing technique provides a silky texture without needing heavy cream or flour.