Most holiday dinners face a common enemy: the “cardboard effect.” We’ve all been there, chewing through a slice of turkey breast that feels more like a desert than a celebratory meal. Because turkey breast is incredibly lean, it often loses its moisture long before the center reaches a safe temperature.
This Herb-Crusted Stuffed Turkey Breast changes the game by using a strategic moisture-lock technique. By butterflying the meat and sealing a savory stuffing inside, you create a barrier that protects the delicate proteins from the harsh oven air. It’s the ultimate solution for anyone tired of dry, flavorless poultry.
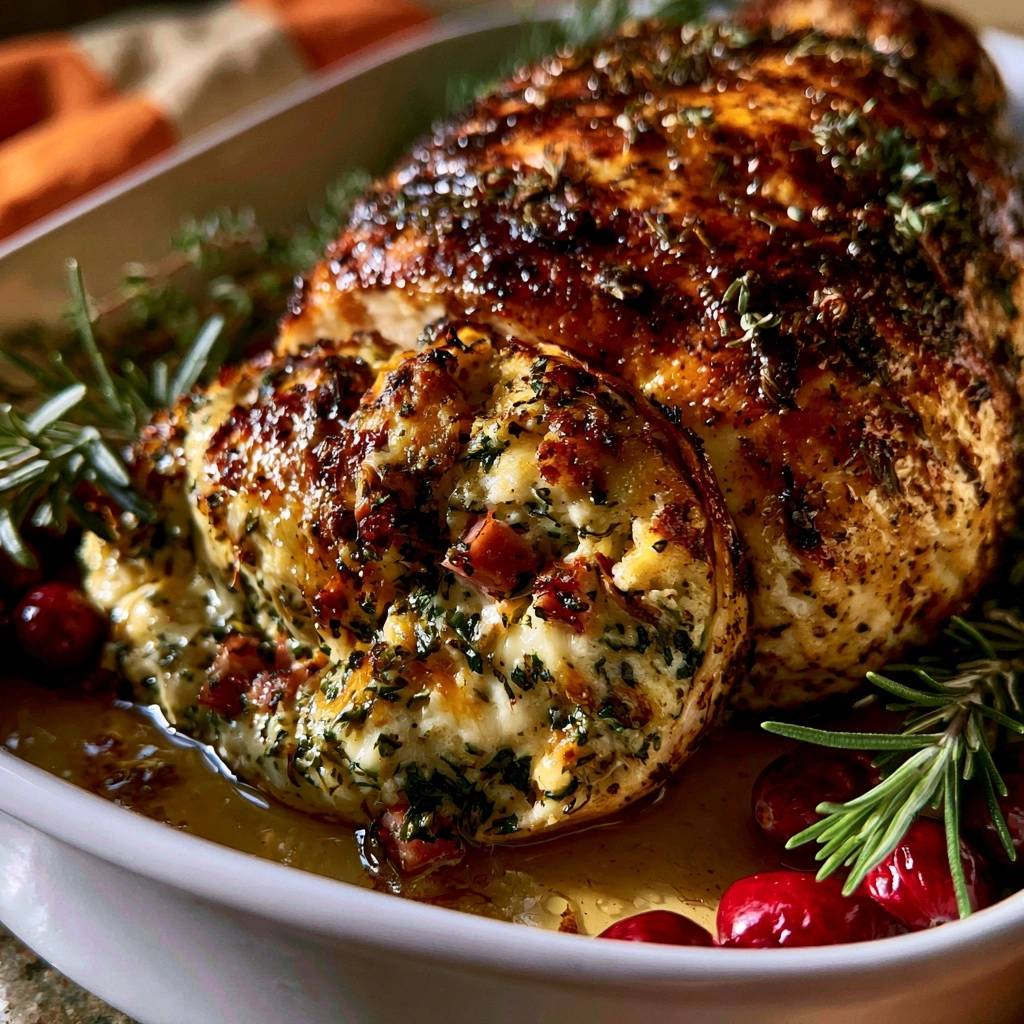
The real secret to this recipe’s success is the continuous basting ritual. You aren’t just cooking the meat; you’re essentially “frying” the herbs into the skin with hot, infused butter every twenty minutes. This creates a deep mahogany crust that shatters with a crunch, revealing a center that is dripping with juice.
The Anatomy of a Moist Turkey Breast
Turkey breast is composed of white meat fibers that are much shorter and leaner than the dark meat found in legs or thighs. Without the intramuscular fat found in other cuts, these fibers tighten and squeeze out moisture the moment they get too hot. This is why traditional roasting often fails.
To combat this, we use a skin-on preparation. The skin acts as a natural raincoat, keeping the internal moisture from evaporating. When you layer herb-infused fats under and over that skin, you create a pressurized environment that forces flavor into the meat while the fat lubricates the fibers.
Selecting the Right Poultry Cut
When you’re at the butcher counter, look for a boneless, skin-on turkey breast weighing between 3 and 4 pounds. This specific size is the “sweet spot” for heat penetration. It’s thick enough to hold a generous amount of stuffing but small enough to cook through before the exterior becomes tough.
If you can, choose a fresh bird over a previously frozen one. Frozen turkey often loses cellular integrity during the thawing process, which leads to more juice leaking out in the pan. If you must use frozen, ensure it is completely thawed and patted bone-dry before you start the prep.
Essential Components for the Herb Crust
High-fat, unsalted butter is the primary vehicle for flavor in this dish. Using unsalted butter allows you to control the seasoning perfectly without the roast becoming a salt bomb. It carries the aromatic oils of the herbs deep into the turkey’s surface.
Fresh rosemary and thyme are non-negotiable here. Dried herbs often turn bitter or dusty under high heat, whereas fresh sprigs release a bright, piney fragrance that defines the dish. A touch of smoked paprika is my favorite “pro” addition; it provides a subtle earthiness and helps the skin achieve that stunning dark-gold color.
Preparation: The Butterfly and Pound Method
Even cooking is a matter of physics. A whole turkey breast is naturally tapered, meaning the thin end will turn to jerky before the thick end is done. To fix this, you must butterfly the meat by slicing it down the middle—without cutting all the way through—and opening it like a book.
Once opened, place the meat between two sheets of plastic wrap. Use a meat mallet or a heavy rolling pin to pound it to a uniform 1-inch thickness. This step ensures that every square inch of the turkey reaches the finish line at the exact same time, preventing any dry edges.
Applying the Internal Flavor Base
Seasoning the outside isn’t enough; you need to flavor the meat from the inside out. Before adding the stuffing, rub about one-third of your herb butter directly onto the meat you just pounded. This butter will melt into the fibers as the turkey roasts, acting as an internal basting liquid.
Don’t be shy with the salt and pepper at this stage. Since the stuffing is savory, the meat needs a strong base of seasoning to stand up to the rich filling. This layer of butter also helps the stuffing “stick” to the meat, preventing large air pockets from forming during the roll.
Engineering the Perfect Stuffing Core
The stuffing isn’t just a side dish; it’s a moisture-sealer. By mixing prepared breadcrumbs with savory beef-alternative bacon bits and shredded white cheddar, you create a dense, flavorful core. The cheese is the secret weapon here, acting as a binder that keeps the stuffing moist and creamy.
As the cheese melts, it creates a fatty barrier on the inner walls of the turkey. This prevents the meat’s juices from being absorbed by the breadcrumbs, keeping the turkey moist and the stuffing decadent. It provides a beautiful visual contrast when you finally slice into the roast.
Securing the Roast with Kitchen Twine
Trussing the turkey is a vital technical step. After rolling the breast tightly around the stuffing, you must secure it with kitchen twine every two inches. This tight seal is what prevents steam from escaping, which would otherwise dry out the interior.
Think of the twine as a way to maintain a perfect cylinder. A uniform shape ensures that the heat from the oven hits the meat evenly from all sides. If the roll is loose, the stuffing might leak out, and the meat will cook unevenly, leading to those dreaded dry patches.
The Heat Shield: Achieving Crispy Skin
Now it’s time to apply the remaining herb butter to the exterior. This creates a “heat shield” of fat. For the best results, make sure the skin is as dry as possible before rubbing the butter on. Moisture on the skin’s surface will steam the meat rather than crisping it.
As the turkey roasts, the Maillard reaction takes over. The proteins in the skin and the sugars in the butter brown beautifully, while the herbs become suspended in the fat. This creates a textured, flavorful crust that protects the lean meat underneath from the direct heat of the oven.
The Role of the Pan Liquid
Never roast a turkey breast in a dry pan. Adding a half-cup of chicken broth to the bottom of the dish creates a small amount of steam that keeps the environment humid. It also prevents the drippings and butter from burning on the bottom of the pan.
Tossing in fresh cranberries adds a necessary acidic brightness. As they burst in the heat, their tart juices mix with the herb butter and broth, creating a built-in sauce. This acidity cuts through the richness of the butter and cheese, balancing the entire flavor profile.
Precision Roasting and the Basting Ritual
Set your oven to 375°F. This temperature is high enough to crisp the skin but moderate enough to cook the center without scorching the outside. Once the turkey is in, the “20-minute rule” begins. Every twenty minutes, you must open the oven and spoon those pan juices back over the top.
This basting ritual is what gives the turkey its glossy, professional finish. You are essentially re-applying the fat and herbs, ensuring the skin never dries out. It’s the difference between a dull, matte roast and a shimmering, centerpiece-worthy masterpiece.
Monitoring Internal Temperature for Safety
A meat thermometer is the only way to guarantee success. You want to pull the turkey out of the oven the second it hits 160°F in the thickest part of the meat. If you wait until it hits 165°F in the oven, it will be overcooked by the time you eat it.
This is because of “carry-over cooking.” The residual heat on the surface of the meat continues to travel inward even after the bird is out of the oven. Pulling it at 160°F allows it to coast perfectly to the safe 165°F mark while it rests on the counter.
The Critical Resting Phase
Patience is the most important ingredient in this recipe. When meat cooks, the muscle fibers tighten and push juices toward the center. If you slice the turkey immediately, all those precious juices will run out onto your cutting board, leaving the meat dry.
Transfer the roast to a board and tent it loosely with foil for at least 15 minutes. This allows the muscle fibers to relax and reabsorb the moisture. The loose tent is key; if you wrap it too tightly, the steam will soften that crispy herb crust you worked so hard to achieve.
Troubleshooting Common Poultry Pitfalls
If you notice the skin is browning too quickly before the center is hot, don’t panic. Simply lay a small piece of foil over the top of the turkey to shield it from the direct heat. This allows the interior to continue cooking while the skin stays a perfect golden brown.
If your stuffing feels too dry when you’re mixing it, add a tablespoon of broth or melted butter before rolling. You want it to hold its shape when squeezed. If the twine cuts too deeply into the meat, you’ve tied it too tight; it should be snug enough to hold the shape, but not so tight that it mangles the breast.
Expert Tips for Professional Presentation
To get those perfect, restaurant-style rounds, use a very sharp carving knife or a serrated bread knife. A dull blade will tear the meat and pull the stuffing out. Slice in one smooth, sawing motion rather than pressing down hard on the roast.
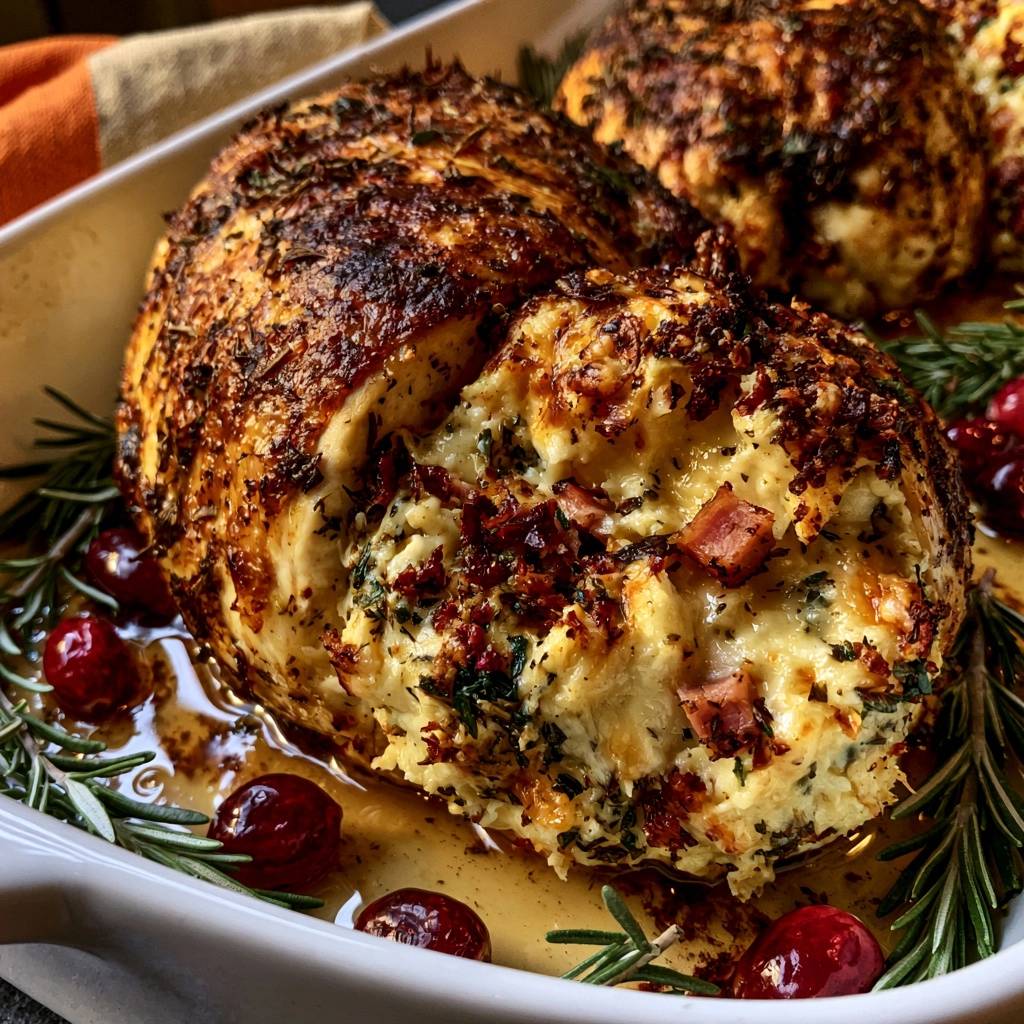
For a stunning presentation, arrange the slices on a platter and spoon the roasted cranberries and pan juices over the top. Garnish with fresh, un-chopped rosemary sprigs. The contrast between the dark mahogany skin, the white meat, and the bright red berries is breathtaking.
Side Dish Pairings for Herb-Crusted Poultry
Since this turkey is rich and buttery, you want sides that offer a bit of contrast. Garlic mashed potatoes are a classic choice, providing a creamy base for the pan juices. Roasted root vegetables like carrots or parsnips also pair beautifully with the rosemary and thyme notes.
A crisp green salad with a citrus-based vinaigrette is another excellent option. The acidity in the dressing helps cleanse the palate between bites of the cheesy, savory stuffing. For a drink, sparkling apple cider or a tart cranberry spritzer complements the flavors without overpowering them.
Frequently Asked Questions
Can I use a bone-in turkey breast for this recipe?
You can, but you will need to remove the bone yourself to butterfly and stuff the meat. If you choose to roast it on the bone without stuffing, the cook time will increase by about 15 to 20 minutes. For this specific stuffed method, a boneless breast is much easier to roll and ensures even heat distribution.
How do I store leftovers so they don’t dry out?
The best way to store leftovers is to keep the roast as whole as possible. Slicing the entire breast before refrigerating exposes more surface area to the air, which leads to dryness. Place the remaining roast in an airtight container with a spoonful of the pan juices and keep it in the fridge for up to three days. Reheat gently in the oven covered with foil.
Can I make the herb butter in advance?
Yes, you can prepare the herb butter up to three days in advance. Store it in the refrigerator in a sealed container. However, make sure to take it out at least an hour before you start cooking. It needs to be very soft and spreadable so you can rub it onto the turkey without tearing the skin or meat.
What is the best substitute for white cheddar in the stuffing?
If you don’t have white cheddar, mozzarella or Gruyère are excellent substitutes. You want a cheese with a good melting point that provides a creamy texture. Avoid very hard cheeses like Parmesan for the filling, as they won’t provide the moisture-sealing “gooey” factor that makes the stuffing so successful.
Why did my stuffing fall out when I sliced the turkey?
This usually happens for two reasons: either the roll wasn’t tight enough or the turkey didn’t rest long enough. The resting period allows the cheese to firm up slightly and the meat to “set” around the filling. Also, ensure you are using a very sharp knife to slice through the twine and meat in one clean motion.
Herb-Crusted Stuffed Turkey Breast
Course: Main CourseCuisine: AmericanDifficulty: easy6
servings30
minutes1
hour15
minutes105
Minutes410
kcalAmerican
Ingredients
1 large boneless turkey breast (3 to 4 pounds), skin-on
1/2 cup unsalted butter, softened
3 tablespoons fresh rosemary, finely chopped (plus sprigs for garnish)
3 tablespoons fresh thyme, finely chopped (plus sprigs for garnish)
1 tablespoon garlic powder
1 teaspoon smoked paprika
1 cup prepared herb and breadcrumb stuffing
1/2 cup cooked bacon bits
1/2 cup shredded white cheddar or mozzarella (to match the visual creamy texture)
1/2 cup fresh cranberries for the pan
1/2 cup chicken broth (for the pan)
Salt and black pepper to taste
Kitchen twine
Directions
- The Moisture-Lock Prep: Start by butterfly opening the turkey breast so it is an even thickness. Place it between two sheets of plastic wrap and pound lightly to a uniform 1-inch thickness. This is the secret to even cooking. Season both sides generously with salt and pepper.
- The Flavor Layer: In a small bowl, mix the softened butter with the chopped rosemary, thyme, garlic powder, and paprika. Rub one-third of this herb butter directly onto the meat inside the butterfly cut.
- The Stuffing Technique: Mix the prepared stuffing, bacon bits, and shredded cheese in a bowl. Spread the mixture over the meat, leaving a one-inch border. Roll the breast tightly and secure it with kitchen twine every two inches. This tight seal prevents the juices from escaping during the roast.
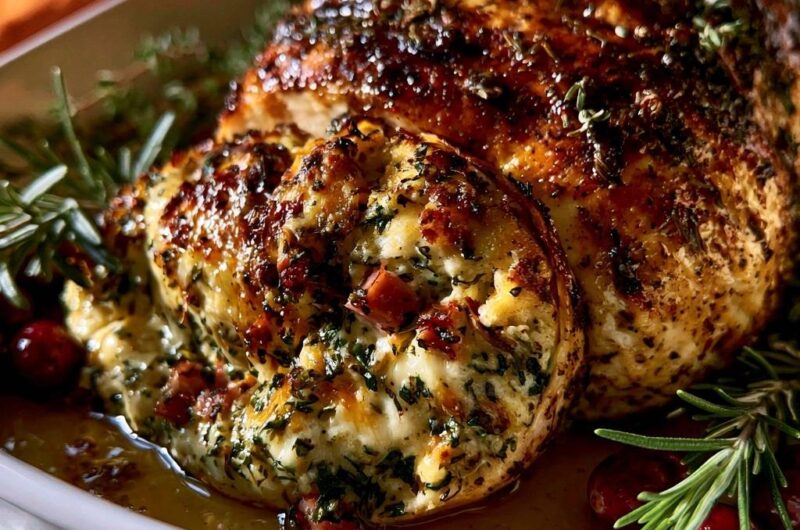
- The Heat Shield: Rub the remaining herb butter heavily all over the outside of the skin. This creates a fat barrier that prevents the lean turkey meat from drying out in the oven heat and creates the deep mahogany crust seen in the image.
- The Roast: Place the turkey in a baking dish. Pour 1/2 cup chicken broth into the bottom of the dish to prevent the drippings from burning. Surround the turkey with fresh cranberries and extra herb sprigs. Roast at 375°F (190°C).
- The Basting Secret: Every 20 minutes, use a spoon to pour the melted herb butter and juices from the bottom of the dish back over the top of the turkey. This continuous basting is the only way to achieve that glossy, herb-flecked finish without dehydrating the meat.
- The Rest: Remove from the oven when the internal temperature hits 160°F (71°C). Transfer to a board and tent loosely with foil for at least 15 minutes. The carry-over heat will bring it to the safe 165°F while allowing the juices to redistribute. Remove twine and slice into thick rounds to reveal the moist, cheesy stuffing.
Notes
- Ensure you let the meat rest for at least 15 minutes after roasting. The carry-over heat will bring the internal temperature to the safe 165 degrees Fahrenheit while allowing the juices to redistribute for maximum moisture.