Forget those thin, watery broths that leave you reaching for a snack an hour later. Most people struggle with creamy soups because the dairy separates or the cheese turns into a gritty, clumped mess at the bottom of the bowl. This Loaded Philly Cheesesteak Soup solves that problem with a specific tempering technique that creates a velvety, restaurant-quality base every single time.
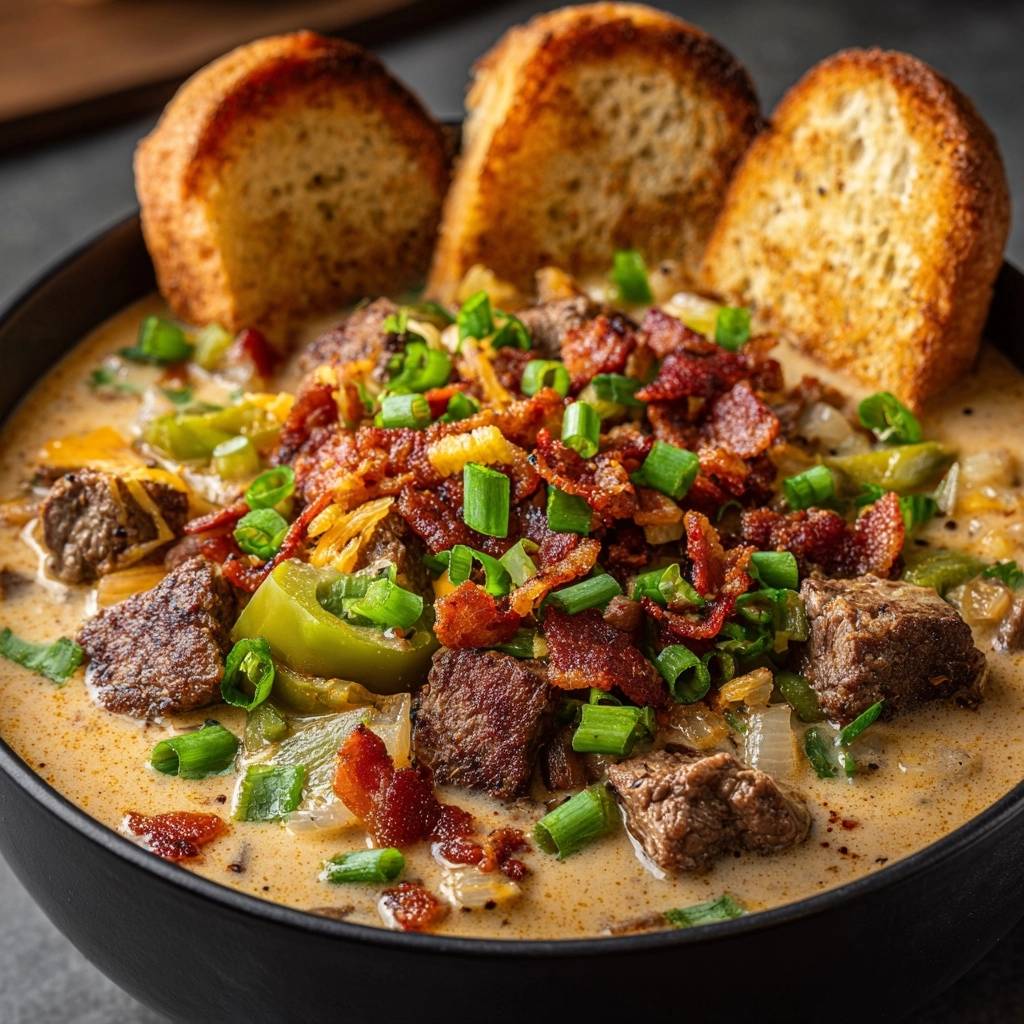
We are transforming the iconic sandwich into a stable, emulsified liquid meal that captures every savory note of seared beef and melted cheese. With a hearty 620 kcal density per serving, this is the ultimate cold-weather staple for when you need something truly rib-sticking. It is about more than just tossing ingredients in a pot; it is about the technical “order of operations” that keeps the texture silk-smooth.
The secret to that professional finish lies in the roux and the temperature control. By cooking the flour in butter before adding your liquids, you create a structural net that holds the fats and proteins together. If you have ever had a soup “break” on you, it is likely because you skipped this stabilizing step or let the heat climb too high after the cheese went in.
For a hearty, grain-free option, check out ground beef and pepper soup.
The Anatomy of a Stable Cream Soup
Creating a stable emulsion is pure kitchen science. When you add high-fat dairy and cheese to a hot broth, the proteins want to tighten up and squeeze out the fat, which leads to that unappealing curdled look. You need a mediator to keep everyone playing nice in the pot.
That is where the roux comes in. The starch molecules from the flour act as a physical barrier, preventing the cheese proteins from clumping together. This ensures that as the cheddar melts, it integrates into the broth rather than turning into a rubbery ball. It is the difference between a broken sauce and a luxurious, coating mouthfeel.
Essential Components for the Loaded Philly Cheesesteak Soup
Quality ingredients are the backbone of this dish. Since we are only simmering the beef for about 10 minutes, you need a tender cut like ribeye or sirloin. Tougher cuts like chuck roast require hours to break down, but ribeye offers that immediate melt-in-your-mouth texture that mimics a classic cheesesteak.
Your beef broth should be the best you can find. I always recommend a high-quality, low-sodium beef broth so you can control the salt profile yourself. For the vegetables, chop your green peppers into large, sturdy chunks. You want them to soften but still provide a distinct “pop” of texture against the creamy base.
Why Freshly Grated Cheddar is Non-Negotiable
If you take away one tip today, let it be this: grate your own cheese. Pre-shredded bagged cheese is coated in potato starch or cellulose to keep the shreds from sticking together in the plastic. While convenient, that coating will never fully dissolve, leaving your soup with a persistent, gritty texture.
A block of sharp cheddar has a much higher moisture content and zero additives. When you hand-grate it, the cheese melts into the broth almost instantly. This results in a glossy, perfectly smooth finish that looks as good as it tastes.
Selecting the Right Beef: Ribeye vs. Sirloin
Ribeye is the gold standard for flavor because of its beautiful fat marbling. That fat renders down into the soup, adding a richness that is hard to beat. However, if you prefer a leaner bite, sirloin is a fantastic choice that still stays tender during a quick cook.
Whichever you choose, make sure to slice the beef against the grain. This shortens the muscle fibers, ensuring every cube is easy to chew. If you find the meat is too slippery to slice thinly, pop it in the freezer for 15 minutes to firm it up before you start your prep.
Step-by-Step: Building the Flavor Foundation
The first step is all about the sear. Get your Dutch oven screaming hot and add the beef in batches. If you crowd the pan, the meat will steam in its own juices and turn grey instead of developing that deep, dark brown crust known as the Maillard reaction.
That crust is where the “beefy” flavor lives. As you sear, you will notice brown bits sticking to the bottom of the pot. Don’t scrub those away! That is the “fond,” and it is the concentrated essence of the meat that will eventually flavor your entire broth.
Sautéing Aromatics and Creating the Roux
Once the meat is out, the onions and peppers go in to pick up those beefy flavors. You are looking for the onions to become translucent and the peppers to just start softening. This usually takes about 5 to 7 minutes over medium heat.
Now, sprinkle the flour over the vegetables. You need to stir this constantly for at least two minutes. This “cooks off” the raw flour taste. You aren’t looking to make a dark brown roux like a gumbo, just a pale, nutty-smelling paste that coats the vegetables.
Deglazing and Simmering for Depth
Slowly pour in your beef broth, one cup at a time. Use a wooden spoon to scrape the bottom of the pot vigorously. You will see the broth turn a rich, dark color as the fond dissolves into the liquid. This is the moment the soup’s personality really starts to show.
Return the beef and any accumulated juices to the pot. Let it simmer gently for 10 minutes. This short window allows the flavors of the peppers, onions, and beef to marry without overcooking the meat into a rubbery state.
The Tempering Technique: Preventing Curdled Dairy
This is the most critical part of the process. If you pour cold heavy cream directly into a boiling pot, the temperature shock will cause the proteins to seize and curdle. We use the “Anti-Grainy Technique” to bridge that temperature gap.
Whisk your cream in a separate bowl, then add a ladle of the hot soup broth into the cream. Whisk them together until the cream feels warm to the touch. Now, you can safely pour this warmed mixture back into the main pot without any fear of separation.
The Figure-Eight Melt Method
Turn your heat down to the absolute lowest setting. High heat is the enemy of cheese. Add your freshly grated cheddar one handful at a time, stirring in a slow figure-eight motion. This gentle movement ensures the cheese is evenly distributed as it melts.
Wait until the first handful is completely invisible before adding the next. Whatever you do, do not let the soup come back to a boil once the cheese is in. If it gets too hot, the emulsion will break, and you will lose that velvety texture you worked so hard to build.
Troubleshooting Common Texture Issues
If your soup feels a bit too thin, don’t panic. You can let it simmer for a few extra minutes before adding the dairy to reduce the liquid. If it is already finished and still too thin, a small cornstarch slurry (equal parts cornstarch and cold water) can thicken it up quickly.
If the soup starts to separate or look “broken,” you can sometimes save it with an immersion blender. A quick pulse can help re-emulsify the fats. If the broth tastes too salty, add a splash more cream or serve it with extra unsalted toasted baguette to balance the palate.
Optimal Pairings and Serving Suggestions
This soup is incredibly rich, so you need a side that can cut through that decadence. The buttered, toasted baguette is a must. It provides a crunchy vessel for soaking up the cheese base and mimics the bread of the original sandwich.
If you’re looking for another hearty soup with a satisfyingly crispy top, check out this beef French onion soup.
I also love serving this alongside a crisp, acidic side salad. A simple mix of greens with a sharp lemon vinaigrette provides a necessary brightness that refreshes your taste buds between spoonfuls of the 620 kcal soup.
Storage and Reheating Without Breaking the Sauce
Because this is a dairy-heavy, roux-based soup, it requires a little extra care when reheating. Store leftovers in an airtight container in the fridge for up to three days. I don’t recommend freezing this soup, as the dairy and flour structure often changes texture once thawed, becoming grainy or watery.
When you are ready for round two, avoid the microwave. The uneven heat of a microwave will almost certainly break the cheese emulsion. Instead, warm it in a small saucepan over low heat on the stove, stirring frequently until it is just heated through.
Expert Tips for Maximum Flavor
To really push the umami over the top, try adding a few shakes of Worcestershire sauce during the simmering stage. It adds a fermented depth that complements the beef perfectly. A teaspoon of Dijon mustard stirred in with the cream also adds a subtle tang that makes the cheddar pop.
Don’t skip the smoked paprika. While it adds a very faint hint of smokiness, its primary job is to give the soup that classic, golden-orange Philly glow. It makes the dish look as rich as it tastes.
Customizing Your Loaded Philly Cheesesteak Soup
While the classic version is hard to beat, you can easily tweak this to your liking. If you love a “Provolone style” cheesesteak, swap half the cheddar for shredded provolone and add some sautéed mushrooms. You can even use sliced chicken breast if you prefer a lighter poultry version.
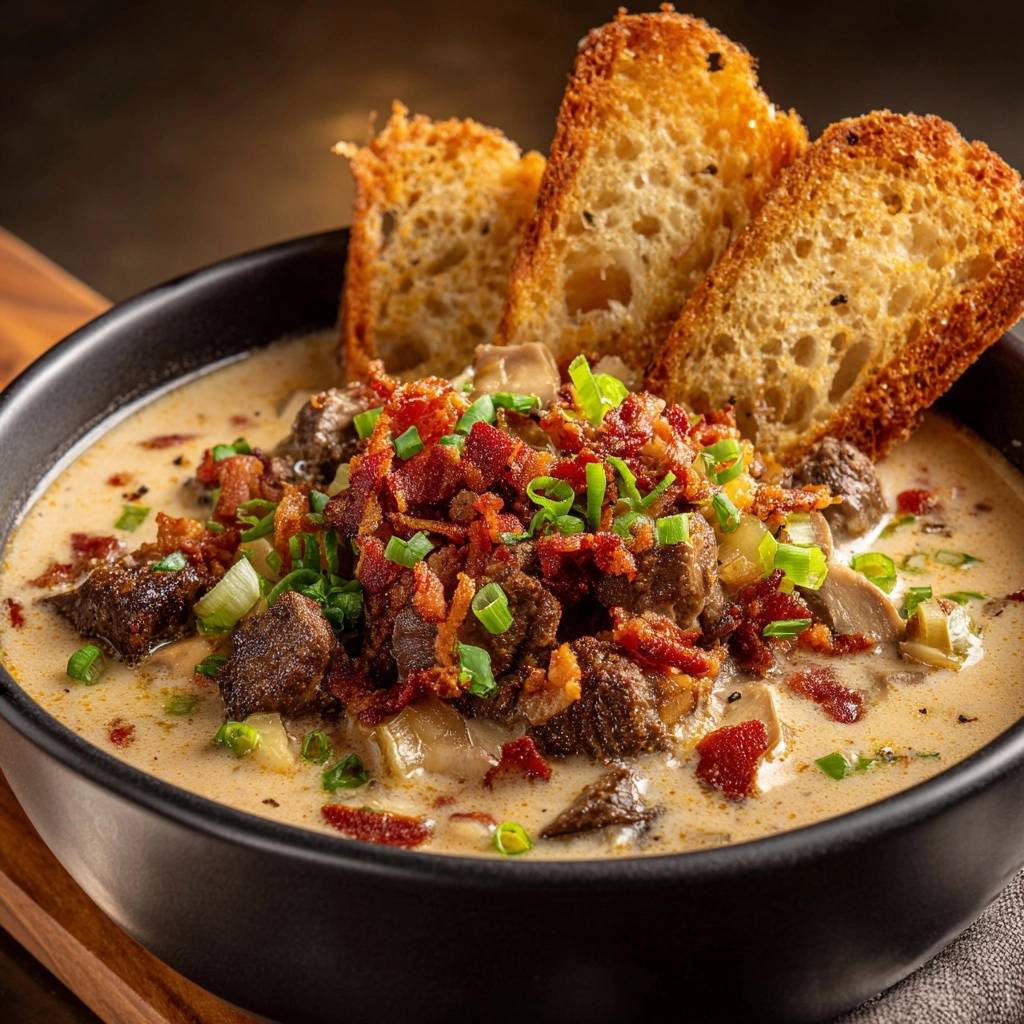
Just make sure to keep the “Loaded” toppings. The crispy bacon crumbles and fresh green onions aren’t just garnishes; they provide the essential textural contrast. That crunch against the creamy soup is what makes every bite exciting.
Frequently Asked Questions
Can I use milk instead of heavy cream?
You can use whole milk, but the soup will not be nearly as stable or creamy. Heavy cream has a higher fat content which helps prevent curdling when mixed with the acidic beef broth and melted cheese. If you use milk, be even more careful with your heat levels to avoid separation.
What is the best pot for this soup?
A heavy-bottomed pot, like a cast-iron Dutch oven, is the best choice. These pots distribute heat evenly and retain it well, which is crucial when you turn the heat down to low to melt the cheese. Thin-bottomed pots often have “hot spots” that can scorch the dairy.
How do I make this gluten-free?
To make this gluten-free, replace the all-purpose flour with a gluten-free all-purpose blend or use a cornstarch slurry at the end of the simmering process. If using cornstarch, mix 2 tablespoons with 2 tablespoons of cold water and whisk it into the simmering broth before adding the dairy.
Round Out Your Meal
To complement your hearty cheesesteak soup, consider these comforting options.
- For a similar hearty feel, try this Crockpot Loaded Potato Soup, featuring satisfying chunks without being mushy.
- If you’re looking for a lighter, yet filling, breakfast or brunch addition, this Easy Veggie Egg Bake makes a great choice.
Why is my beef tough?
Beef usually turns out tough for two reasons: you either used a cut with too much connective tissue (like chuck) or you boiled it too hard. Stick to ribeye or sirloin and ensure the soup stays at a gentle simmer rather than a rolling boil during the 10-minute cook time.
Can I use Provolone instead of Cheddar?
Yes, Provolone is a classic Philly choice! However, Provolone has a lower melting point and can become “stringy” rather than “creamy.” For the best results, use a mix of half Provolone and half Sharp Cheddar to get the flavor of the former and the smooth melt of the latter.
Philly Cheesesteak Soup
Course: Main CourseCuisine: AmericanDifficulty: medium4
servings15
minutes30
minutes620
kcal45
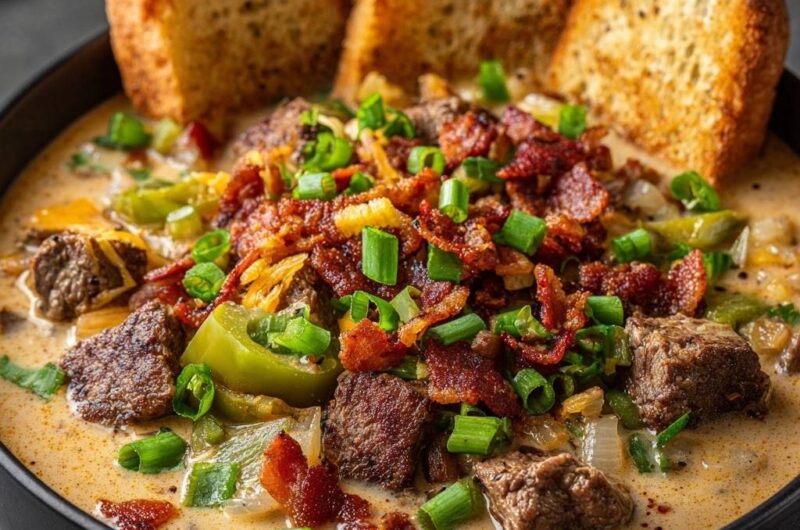
MinutesThis hearty soup combines seared beef sirloin, sautéed peppers, and onions in a rich cheddar cheese base. It is topped with crispy bacon and green onions, served with toasted baguette slices.
Ingredients
1.5 pounds beef sirloin or ribeye, cut into 1-inch cubes
1 large yellow onion, diced
2 green bell peppers, chopped into large chunks
4 cups high-quality beef broth
1 cup heavy cream
2 cups shredded sharp cheddar cheese (freshly grated for best melting)
6 slices thick-cut bacon, fried until crispy and crumbled
1/2 cup sliced green onions
3 tablespoons butter
3 tablespoons all-purpose flour
1 teaspoon garlic powder
1/2 teaspoon smoked paprika (for color and depth)
Salt and black pepper to taste
1 baguette, sliced into thick rounds and toasted with butter
Directions
- Heat a large heavy-bottomed pot or Dutch oven over medium-high heat. Add a splash of oil and sear the beef cubes in batches. Do not crowd the pan; you want a deep, dark brown crust on the outside while keeping the centers tender. Remove the beef and set aside on a plate.
- In the same pot, melt the butter. Add the onions and green peppers. Sauté for 5-7 minutes until the onions are translucent and the peppers are tender but still hold their shape.
- Sprinkle the flour over the vegetables and stir constantly for 2 minutes. This creates a roux that will stabilize the cream and cheese later.
- Slowly whisk in the beef broth, one cup at a time, scraping the bottom of the pot to incorporate the “fond” (the browned beef bits). Bring to a gentle simmer until slightly thickened.
- Stir in the garlic powder and smoked paprika. Return the seared beef (and any juices from the plate) to the pot. Reduce heat to low and simmer for 10 minutes.
- The Anti-Grainy Technique: Turn the heat to the lowest possible setting. In a separate bowl, whisk the heavy cream. Slowly add one ladle of the hot soup broth into the cream to “temper” it, then pour the warmed cream mixture into the pot.
- Gradually add the shredded cheese one handful at a time. Stir in a slow figure-eight motion until each handful is completely melted before adding the next. Crucial: Do not let the soup boil once the cheese is added, as high heat will break the emulsion and cause graininess.
- Taste and adjust salt and pepper. Ladle the soup into bowls. Top generously with the crispy bacon crumbles and a heavy handful of fresh green onions. Serve immediately with the buttered toasted baguette slices tucked into the side of the bowl.
Notes
- To prevent graininess, use freshly grated cheese and ensure the soup does not boil once the cheese has been added. Tempering the cream with hot broth before adding it to the pot helps maintain a smooth emulsion.