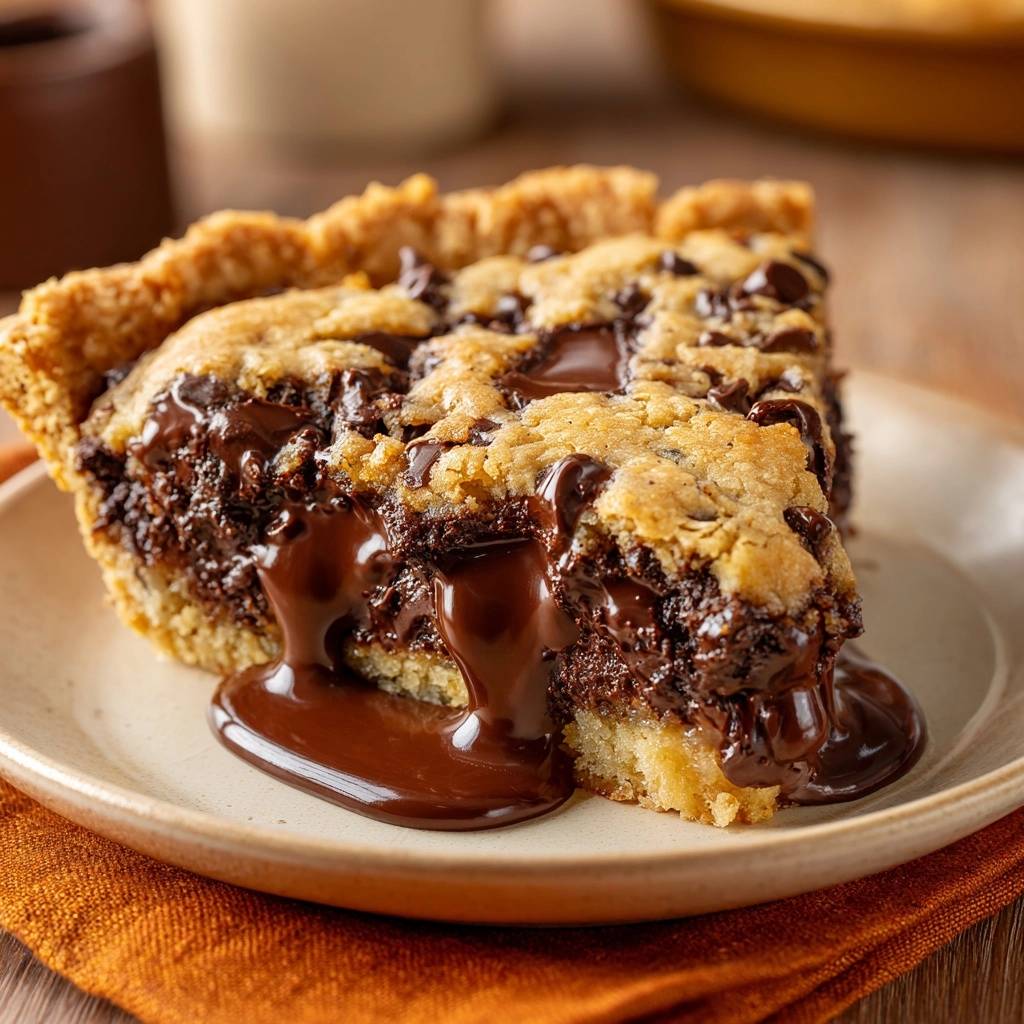
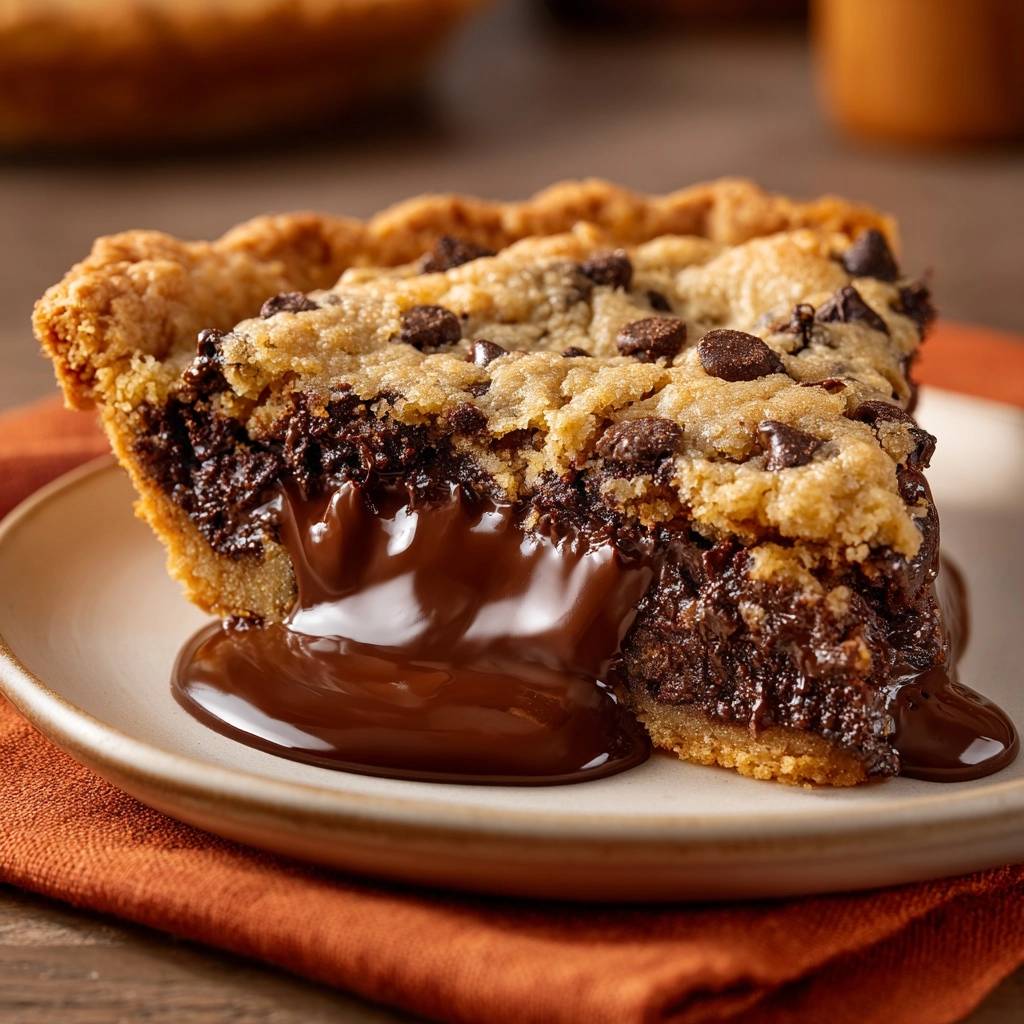
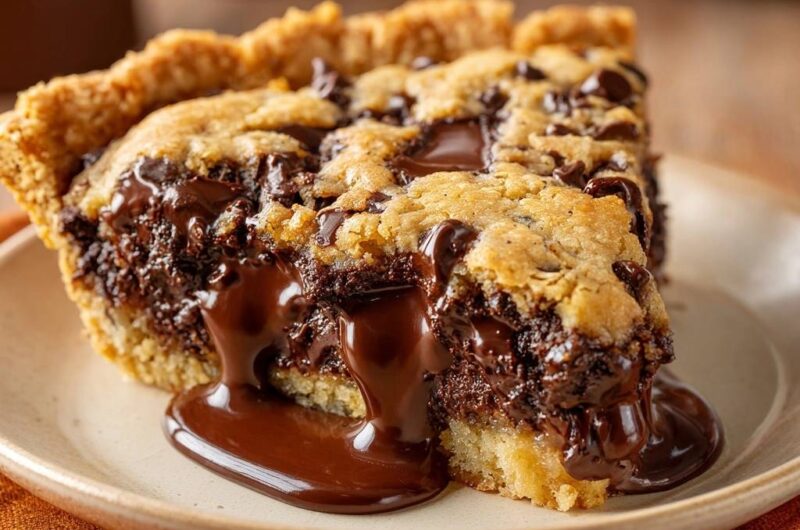
Imagine slicing into a golden, buttery cookie crust only to have a river of dark, velvety chocolate flow across your plate. Most cookie cakes end up dry or crumbly, but this version uses a specific architectural approach to ensure a permanent liquid center. By moving away from standard dough-only recipes, you create a dessert that balances a crisp, shortbread-style exterior with a core that stays fluid long after it leaves the oven.
The secret to this success lies in the “Anti-Soggy Bottom” methodology. You aren’t just throwing dough into a tin; you’re building a structural barrier that protects the pastry from the moisture of the chocolate. This prevents that dreaded gummy texture that ruins most filled pies. Instead, you get a distinct snap from the crust followed by the rich, gooey texture of the molten interior.
To pull this off perfectly, you must use a preheated baking sheet. Placing your pie directly onto a hot surface at the start of the bake ensures the bottom crust sets immediately. This thermal shock creates a crisp seal that holds up against the heavy ganache. It’s a small professional step that makes the difference between a messy failure and a bakery-quality masterpiece.
The Architecture of a Molten Lava Center
Standard cookie dough cannot stay liquid at room temperature because the flour and eggs eventually set into a solid structure. To achieve a true “lava” effect, this recipe introduces a heavy cream-based ganache layer. This mixture of fat and cocoa solids remains viscous and fluid even as the surrounding cookie dough bakes into a firm, chewy shell.
Choosing 60% cacao dark chocolate for the core is a deliberate move to balance the sugar levels. Since the cookie dough contains both granulated and brown sugars, a milk chocolate center would make the dish cloyingly sweet. The higher cacao percentage provides a sophisticated bitterness that cuts through the richness, while the heavy cream ensures the center never fully solidifies.
Essential Components for the Perfect Cookie Pie
Every ingredient in the dough serves a structural purpose. Using an extra egg yolk is vital because it adds fat and lecithin, which creates a dense, chewy texture rather than a cakey one. This density is necessary to support the weight of the molten core without the pie collapsing inward during the cooling process.
You must use softened butter rather than melted butter for the dough. Softened butter allows you to cream the sugars effectively, trapping tiny air pockets that provide just enough lift. If the butter is oily or melted, the dough will spread too quickly, potentially mixing with the ganache and ruining the distinct layers you’ve worked to build.
Don’t skip the sea salt. While it might seem like a minor seasoning, salt is a technical necessity here. It heightens the perception of the chocolate’s flavor and balances the fat from the heavy cream. A pinch of high-quality salt transforms the profile from a simple sugar rush into a complex, professional-grade dessert.
Selecting the Right Chocolate Percentages
The fat content in heavy cream interacts with the cocoa solids to create a specific viscosity. Dark chocolate has more cocoa mass and less sugar, which allows it to emulsify into a thick, glossy pool. If you try to use milk chocolate for the core, the high sugar and dairy solids often cause the center to become grainy or overly thin when heated.
Semi-sweet chips are perfect for the dough itself because they hold their shape better under heat. This creates a texture contrast between the solid chips in the dough and the liquid ganache in the center. Using two different types of chocolate provides a multi-dimensional experience that keeps the palate engaged.
The Science of the Egg Wash Seal
The egg wash is your primary defense against a soggy crust. When you brush a beaten egg over the par-baked pastry, the proteins in the egg denature and coagulate as they hit the heat. This creates a thin, moisture-proof film that acts as a physical barrier between the wet ganache and the porous crust.
Without this seal, the fats and liquids from the molten center would migrate into the pastry during the second bake. This would result in a soft, greasy bottom that lacks structural integrity. By taking five minutes to apply this “liquid gold” coating, you ensure the crust stays as crisp as a fresh cracker.
Preparing the Foundation: Par-Baking the Crust
Par-baking is the process of partially cooking the crust before adding the filling. You must use pie weights or dried beans during this stage to prevent the pastry from shrinking down the sides of the pan. The weight keeps the bottom flat and the sides tall, creating a sturdy “bucket” for your cookie dough and chocolate.
Look for a light golden color and a matte finish on the pastry. Once you remove the weights and apply the egg wash, the final few minutes of par-baking will set the seal. Remember to keep your baking sheet in the oven during this entire process; that residual heat is what guarantees the bottom of the pie cooks through completely.
Engineering the Molten Ganache Core
When making the ganache, patience is your best tool. After pouring the simmering heavy cream over your dark chocolate chips, you must let it sit undisturbed for at least two minutes. This allows the heat to penetrate the center of the chips evenly, preventing the chocolate from seizing or becoming lumpy.
Whisk the mixture starting from the center and moving outward in small circles. You’ll see it transform from a muddy mess into a glossy, mirror-like liquid. Let the ganache cool on the counter for about ten minutes before assembly. It should be thick enough to coat a spoon but still fluid enough to pour easily.
Mixing and Layering the Cookie Dough
The creaming process should take about three minutes until the butter and sugar look pale and fluffy. Once the dry ingredients are in, mix only until the white streaks of flour disappear. Overmixing develops gluten, which will make your cookie pie tough and bread-like instead of tender and soft.
Assembly requires a gentle touch. Press the first half of the dough firmly into the bottom and up the sides of the crust to create a nest. After pouring in the ganache, flatten small discs of the remaining dough in your palms. Lay these “lily pads” of dough across the surface of the chocolate. Don’t worry about small gaps; the dough will expand and fuse together as it bakes.
Thermal Management: The Precision Bake
Baking at 350°F provides the perfect balance of browning the exterior while gently warming the interior. When the timer goes off, the edges of the cookie dough should be a deep golden brown. However, the center should still have a slight jiggle when you gently shake the pan. This jiggle indicates the ganache is still liquid.
The “Carryover Cooking” phase is the final secret. Turn off the oven and crack the door open about four inches, leaving the pie inside for five minutes. This allows the crust to finish crisping from the baking sheet’s heat while the cookie dough sets slowly. It prevents the thermal shock that can cause the top of the pie to crack or sink.
Troubleshooting Common Texture Issues
If your center solidifies completely, you likely overbaked the pie or used a chocolate with too low a fat content. Next time, pull the pie out when the center looks slightly underdone. If the crust breaks or crumbles when sliced, it usually means the par-baking was skipped or the egg wash wasn’t applied thoroughly enough to prevent moisture migration.
In high-altitude environments, the dough may spread faster. You can fix this by adding two extra tablespoons of flour to the dough to give it more structure. In very humid kitchens, ensure your pie crust stays chilled until the very second it goes into the oven to maintain its flaky texture.
Optimal Serving Temperatures and Pairings
Timing is everything for the “lava” effect. You must let the pie rest for 10 to 15 minutes so the cookie dough can firm up enough to hold its shape, but don’t wait much longer. If the pie cools to room temperature, the ganache will thicken into a soft fudge rather than a flowing liquid.
What to Try Next
Since you’re enjoying this rich chocolate chip cookie pie, here are more sweet baked treats you might like.
- For another delightful breakfast or dessert, check out these fluffy diner-style pancakes, offering a soft texture that complements rich flavors.
- If you appreciate a light and airy bake, give these fluffy golden pancakes a try for a similarly satisfying texture.
Because this pie is incredibly rich, you want pairings that provide a clean contrast. A glass of cold-brew coffee or unsweetened almond milk works beautifully. The bitterness of the coffee or the neutrality of the nut milk cleanses the palate between bites, allowing you to appreciate the different chocolate notes without feeling overwhelmed.
Storage and Reheating for Maximum Fluidity
If you have leftovers, store them in an airtight container at room temperature for up to two days. Do not refrigerate this pie, as the cold will cause the fats in the ganache to crystallize, making the center hard. If you must keep it longer, wrap individual slices tightly and freeze them.
To revive the molten center, the microwave is actually better than the oven. Heat a single slice for 15 to 20 seconds on medium power. This targets the moisture in the ganache, liquefying the center quickly without drying out the cookie exterior. An oven takes too long to penetrate the core and often results in a dry, overcooked crust.
Expert Baking Inquiries
Can I use store-bought cookie dough?
You can use store-bought dough in a pinch, but it carries structural risks. Commercial doughs often have a higher oil-to-flour ratio, which can cause the top layer to sink into the ganache. If you use it, mix in two tablespoons of all-purpose flour to stiffen the dough so it can “float” properly on top of the liquid center.
For another take on creating wonderfully textured cookies, explore these frosted dark chocolate toffee cookies.
For another rich chocolate treat, check out these double chocolate hazelnut cookies.
Why did my chocolate core sink to the bottom?
This usually happens if the base layer of cookie dough is too thin or if the crust wasn’t par-baked. The par-baked base acts as a solid shelf. If that shelf is weak, the heavy ganache will seep through. Ensure you press the bottom layer of dough firmly and evenly to create a strong foundation for the chocolate.
Is a deep-dish pan mandatory?
Yes, a deep-dish pan is highly recommended. This recipe involves three distinct layers: the pastry, the base dough, and the ganache. A standard shallow pie tin doesn’t have the vertical wall height to contain these layers safely. Using a shallow pan increases the risk of the chocolate bubbling over and creating a mess in your oven.
For another layered bake, check out the deep dish brown sugar crumble pie.
How do I prevent the crust edges from burning?
Since the cookie dough needs about 25 minutes to bake, the thin edges of the pastry crust can sometimes brown too quickly. If you notice the edges getting dark after 15 minutes, loosely cover them with strips of aluminum foil or use a silicone pie protector. This shields the delicate pastry while allowing the center of the pie to finish cooking.
Molten Lava Chocolate Chip Cookie Pie
Course: DessertCuisine: AmericanDifficulty: medium8
servings20
minutes45
minutes480
kcal65
MinutesThis recipe solves the common soggy bottom issue by par-baking the crust and using a specific layering technique. It combines a crisp shortbread-style crust with a gooey, molten dark chocolate center and classic chocolate chip cookie dough.
Ingredients
1 unbaked 9-inch deep-dish pie crust (chilled)
1 large egg (for egg wash)
Cookie Dough Layers:
3/4 cup unsalted butter, softened
1/2 cup granulated sugar
1/2 cup packed light brown sugar
1 large egg + 1 egg yolk
1 teaspoon vanilla extract
1 3/4 cups all-purpose flour
1/2 teaspoon baking soda
1/2 teaspoon sea salt
1 cup semi-sweet chocolate chips
The Molten Core:
1/2 cup heavy cream
1 cup dark chocolate chips (60% cacao)
1/2 cup semi-sweet chocolate chunks (for the top)
Directions
- Preheat oven to 350°F (175°C). Place a heavy baking sheet on the center rack to preheat.
- Par-bake the crust: Prick the bottom of the chilled pie crust with a fork. Line with parchment paper and pie weights (or dried beans). Place on the hot baking sheet and bake for 10 minutes. Remove weights, brush the bottom with a beaten egg wash to “seal” the pastry, and bake for 5 more minutes until golden. This is the primary defense against a soggy bottom.
- Prepare the Molten Core: In a small microwave-safe bowl, heat the heavy cream until it begins to simmer. Pour over 1 cup of dark chocolate chips. Let sit for 2 minutes, then whisk until smooth and glossy. Set aside to thicken slightly.
- Make the Cookie Dough: In a large bowl, cream the softened butter and sugars until light and fluffy. Beat in the egg, yolk, and vanilla. Gradually mix in the flour, baking soda, and salt. Fold in 1 cup of chocolate chips.
- Assembly: Take half of the cookie dough and press it into a thin, even layer across the bottom and sides of the par-baked crust.
- Pour the chocolate ganache (Molten Core) over the bottom dough layer.
- Take the remaining cookie dough and flatten small discs of it in your hands, placing them gently over the liquid chocolate until the top is covered. It is okay if there are small gaps; the dough will spread. Top with the extra chocolate chunks.
- Bake: Place the pie back onto the preheated baking sheet. Bake for 25-30 minutes. The edges should be deep golden brown, but the center should still have a slight jiggle.
- The “Anti-Soggy” Finish: Turn off the oven and crack the door open, leaving the pie inside for 5 minutes. This allows the crust to finish crisping from the residual heat of the baking sheet without overcooking the molten center.
- Serve: Let cool for only 10-15 minutes. To achieve the “lava” flow shown in the image, the pie must be sliced and served while warm.
Notes
- To achieve the signature lava flow, serve the pie warm about 10 to 15 minutes after baking. The egg wash on the par-baked crust is essential for sealing the pastry against moisture.