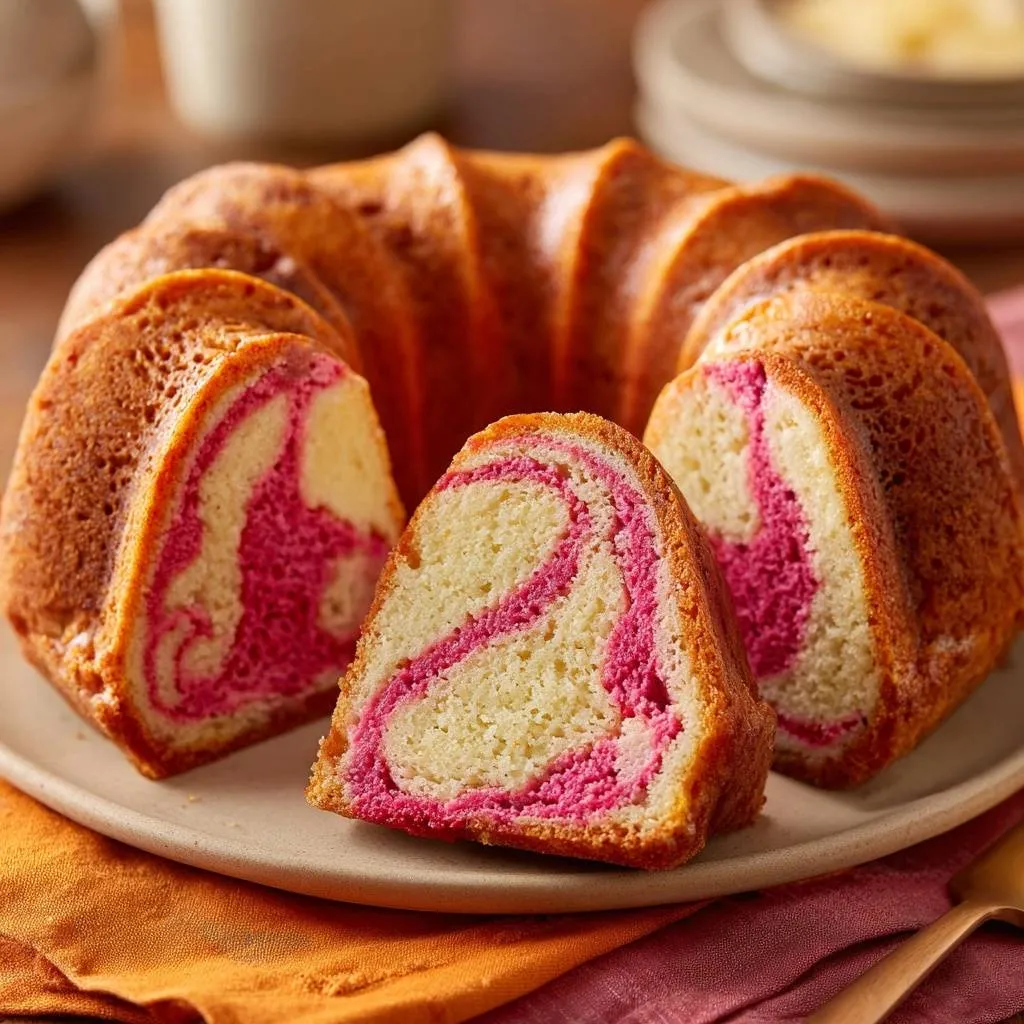
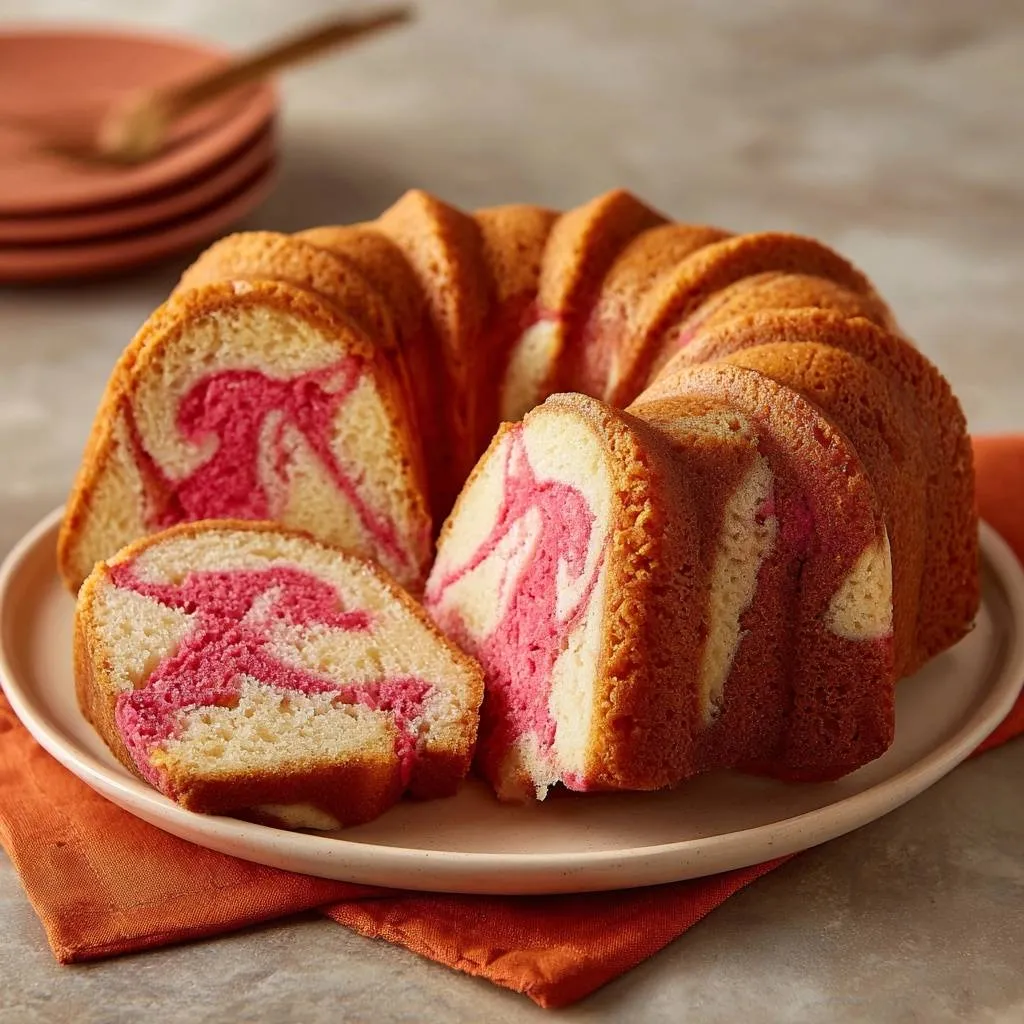
The moment of truth in any baker’s kitchen happens when you flip a Bundt pan over. You hold your breath, hoping the intricate design emerges intact rather than leaving half the cake glued to the metal. This Raspberry Swirl Bundt Cake is designed to eliminate that anxiety entirely while delivering a stunning visual contrast of neon pink ribbons against a golden, buttery crumb.
Most bakers struggle with Bundt cakes because the high sugar content acts like a literal adhesive against the pan’s ridges. However, by using a specific homemade barrier and controlling the density of your fruit swirl, you can achieve a professional result that looks like it came from a high-end bakery. The secret lies in the “cake goop” method, which provides a much more reliable release than any store-bought spray.
To ensure your cake has that perfect, tight crumb that doesn’t crumble when sliced, you must use room temperature ingredients. When your butter, eggs, and milk are all at the same temperature, they form a stable emulsion that traps air. If you use cold milk, it will curdle the creamed butter, leading to a heavy, greasy texture rather than a light and velvety one.
Essential Components for a Moist Raspberry Crumb
Creating a cake that is both sturdy enough to hold its shape and moist enough to melt in your mouth requires a balance of fats and proteins. All-purpose flour is the backbone of this recipe. It provides more structure than cake flour, which is necessary because the raspberry preserves add significant weight and moisture to the batter. Without that protein strength, the cake might collapse under its own richness.
The fats in this recipe come from both unsalted butter and large eggs. Butter provides that classic, nostalgic flavor, while the eggs act as the primary binder. You’ll notice the recipe calls for four eggs, which might seem like a lot, but they are essential for the lift and “spring” of the cake. When you beat the eggs into the creamed sugar, you are building the structural walls that will support the raspberry swirl.
Milk serves as the hydrating agent that activates the baking powder. By using whole milk, you add a touch of extra fat that contributes to a tender “mouthfeel.” If you substitute with skim or low-fat milk, the cake will still bake, but it won’t have that same luxurious, creamy finish. Always measure your milk and let it sit on the counter for at least thirty minutes before you start mixing.
The Role of Seedless Raspberry Preserves
While fresh raspberries are delicious, they are unpredictable in a heavy Bundt batter. Fresh berries release a lot of water as they bake, which can create soggy pockets or “mushy” spots in your cake. Seedless preserves offer a concentrated flavor and a consistent sugar-to-moisture ratio. This ensures the raspberry sections bake at the same rate as the plain vanilla sections.
The addition of an extra quarter-cup of flour to the raspberry portion is a critical technical step. Fruit preserves are denser than cake batter. If you don’t “toughen” that portion with a little extra flour, the pink batter will sink straight to the bottom of the pan during the bake. This extra flour keeps the swirl suspended exactly where you want it for that perfect marbled look.
Achieving High-Contrast Visuals with Gel Coloring
If you rely solely on the preserves for color, the heat of the oven will often turn the pink into a dull, brownish-purple. This happens because of the Maillard reaction, where sugars brown under heat. To keep the swirl looking vibrant and modern, a few drops of neon pink gel food coloring are necessary. Gel is superior to liquid coloring because it provides intense pigment without thinning out the batter.
The Science of the Foolproof Pan Release
The “Cake Goop” used in this recipe is a game-changer for anyone who loves the look of a Bundt but hates the cleanup. This mixture of melted butter, vegetable oil, and flour creates a physical barrier that stays put on the walls of the pan. Unlike commercial sprays that can slide down the sides or leave a sticky residue, this paste clings to every nook and cranny.
The chemistry here is simple but effective. The oil provides the slickness, the butter adds flavor and helps with browning, and the flour gives the batter something to “grip” as it climbs the walls of the pan. This prevents the cake from shrinking too quickly or tearing. Because the flour is already suspended in the fat, you won’t end up with those unsightly white flour patches on the outside of your finished cake.
Surface tension plays a huge role in baking. A well-greased pan allows the steam to push the cake upward evenly. If the batter sticks to even one small spot, it creates tension that can cause the cake to crack across the top. By using a pastry brush to apply the goop, you ensure that the surface tension is uniform across the entire intricate design of the Bundt mold.
Applying the Barrier Coating Correctly
When applying your homemade release paste, you want a thin, even coat. Use a silicone or natural bristle pastry brush to work the mixture into the deep grooves of the pan. Pay special attention to the center tube, as this is often where cakes stick the most. It is the hottest part of the pan and the area where the batter spends the most time in contact with the metal.
Avoid letting the mixture pool in the bottom of the design. If you have a heavy layer of goop in the crevices, it can actually “fry” the exterior of the cake, leading to hard, crunchy edges that detract from the soft crumb. If you see a puddle forming, use your brush to spread it back up the sides. The goal is a matte, slightly opaque coating that covers every millimeter of the interior surface.
Step-by-Step: Mixing the Raspberry Swirl Bundt Cake
The creaming method is the foundation of this cake’s texture. You should beat the butter and sugar for a full four to five minutes. You’ll see the mixture transform from a gritty, yellow paste into a pale, almost white, fluffy cloud. This process creates millions of tiny air pockets. When the baking powder hits the heat of the oven, it releases carbon dioxide into these pockets, causing the cake to rise beautifully.
When it comes time to add your dry and wet ingredients, do so in stages. Start with a third of the flour, then half the milk, and repeat. This prevents the batter from “breaking” or becoming over-saturated. Mix only until you no longer see streaks of white flour. Overmixing at this stage develops gluten, which will turn your elegant Bundt into something that feels more like a loaf of tough bread.
The batter should be thick and hold its shape when dropped from a spoon. If it feels too runny, you may have over-beaten the eggs or used butter that was too melted rather than just softened. A thick batter is your friend here, as it helps keep the raspberry swirl from bleeding into the vanilla sections, preserving the distinct colors.
Creating the Marbled Interior
To get that professional marble, layering is key. Start with a base of vanilla batter to act as a foundation. When you add the raspberry dollops, try to keep them centered in the ring of the pan. This ensures that when you swirl, the pink stays in the middle of the slice rather than touching the edges of the pan where it might brown too much.
For those who enjoy a good swirl, you might also appreciate the nutty texture found in a Southern Pecan Cake.
Use a butter knife or a small skewer for the swirling. Insert it into the batter and move it in a figure-eight motion exactly twice around the pan. It is incredibly tempting to keep swirling, but resist the urge! Every extra turn blends the two colors together. If you over-swirl, you’ll end up with a solid pink cake instead of the high-contrast marbling that makes this recipe so special.
Thermal Precision and the 10-Minute Cooling Window
Baking at 350°F provides the perfect balance between rising and browning. Because Bundt pans are thick and hold a lot of batter, they take a long time to bake through to the center. A skewer test is the only way to be sure it’s done. Insert it into the deepest part of the cake; it should come out with a few moist crumbs but no wet batter. If the skewer is clean and dry, the cake might be overbaked.
The ten-minute cooling rule is non-negotiable. When the cake first comes out of the oven, the structure is too fragile to move. If you flip it immediately, it will likely collapse. However, if you wait too long, the sugars in the cake will begin to cool and “set,” acting like glue against the pan. Set a timer the moment the pan hits the cooling rack.
During these ten minutes, you will actually see the cake begin to pull away from the edges of the pan. This is a sign that the internal steam is loosening the bond between the cake and the “goop” barrier. After ten minutes, place your wire rack over the pan, take a deep breath, and flip it in one confident motion. You should feel the weight of the cake drop onto the rack almost instantly.
Troubleshooting Common Bundt Baking Obstacles
If your cake turns out dry, the most likely culprit is overbaking. Every oven runs differently, so start checking your cake at the 50-minute mark. Another cause for dryness is overmixing the flour, which creates a tough, dense crumb. Remember to stop the mixer as soon as the last bit of flour disappears into the batter.
If you find your raspberry swirl has sunk to the bottom, it usually means the raspberry batter was too thin. Make sure you don’t skip the extra quarter-cup of flour in the pink mixture. Also, ensure your preserves are truly “preserves” and not a thin fruit syrup or jelly, which lacks the necessary body to stay suspended in the cake.
Cracks on the bottom of the cake (which becomes the top once flipped) are usually caused by an oven that is too hot. This causes the outside of the cake to set before the middle has finished rising. The internal pressure then bursts through the crust. If this happens, don’t worry! A simple dusting of powdered sugar or a thick glaze will hide any structural imperfections beautifully.
Preventing a Sunken Center
A sunken Bundt cake is often the result of “peeking.” Opening the oven door in the first 30 minutes of baking causes a sudden drop in temperature. This can shock the leavening agents and cause the delicate air bubbles to pop before they have been set by the heat. Keep the door closed until you are ready to perform the skewer test.
Additionally, check the expiration date on your baking powder. Baking powder loses its potency over time, especially in humid environments. If your leavener is old, it won’t have the strength to lift the heavy, butter-rich batter, resulting in a dense, sunken middle that never quite cooks through properly.
Make-Ahead Strategies and Storage Logistics
This cake actually tastes better on the second day. The moisture from the raspberry preserves migrates into the surrounding crumb, making the whole cake incredibly tender. You can store it at room temperature under a cake dome for up to three days. If your kitchen is particularly warm, you may want to refrigerate it, but be sure to wrap it tightly in plastic wrap to prevent it from drying out.
For long-term storage, this Bundt freezes beautifully. You can freeze the entire cake or individual slices. Wrap each slice in a double layer of plastic wrap and then a layer of aluminum foil. This prevents freezer burn and keeps the raspberry flavor fresh. When you’re ready to eat, let the slices thaw at room temperature for about an hour for that just-baked texture.
Expert Tips for Professional Presentation
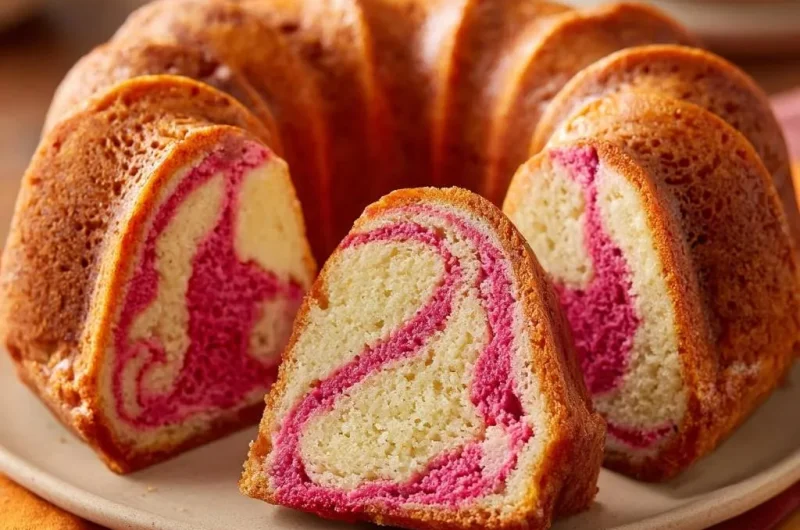
To get those sharp, clean lines in your swirl, you must wait until the cake is completely cold before slicing. If you cut into a warm cake, the steam will cause the crumb to tear, and the pink swirl will look blurred. Use a long, serrated bread knife and use a gentle sawing motion rather than pressing down firmly.
While this cake is stunning on its own, you can enhance the presentation with a simple tart lemon glaze. The acidity of the lemon cuts through the sweetness of the raspberry perfectly. Alternatively, a light dusting of powdered sugar highlights the intricate ridges of the Bundt design. Pair a slice with a cup of hot tea or a glass of sparkling cider for a sophisticated afternoon treat.
Frequently Asked Questions
How do I store leftovers to keep them moist?
The best way to store this cake is in an airtight container at room temperature. Because of the high butter content, it will stay moist for about 3 to 4 days. If you need to keep it longer, wrap it tightly in plastic wrap and freeze it. Avoid the refrigerator if possible, as the cold air can sometimes pull moisture out of the crumb, making it feel stale faster.
Why did my cake stick even though I greased the pan?
Sticking usually happens for two reasons: either the “goop” wasn’t applied to every single crevice, or the cooling time was off. If you let the cake cool for more than 10 to 15 minutes in the pan, the sugar in the raspberry preserves begins to harden and act like glue. If it does stick, try placing the bottom of the pan in a sink of hot water for a minute to loosen the sugars before trying to flip it again.
Can I use frozen raspberries instead of preserves?
It is not recommended to swap the preserves for frozen berries in this specific recipe. Frozen berries release too much liquid, which will change the density of the swirl and likely cause it to sink or create large holes in the cake. If you want more fruit flavor, stick with high-quality preserves and perhaps add a half-teaspoon of raspberry extract to the batter.
What can I use if I don’t have a pastry brush?
If you don’t have a pastry brush, you can use a clean paper towel or even your fingers to apply the “cake goop.” The goal is to ensure a thin, visible layer covers every part of the pan’s interior. Just be careful to get into the very bottom of the ridges, as those are the most common “sticking points” for Bundt designs.
Can I make this recipe in a regular loaf pan?
Yes, you can split this batter between two standard 9×5 inch loaf pans. However, the baking time will be shorter, likely around 40 to 45 minutes. You will still want to use the “cake goop” to ensure they release cleanly, and the marbling technique remains exactly the same. Just be sure not to overfill the pans; they should be no more than two-thirds full.
Bundt Cake
Course: DessertCuisine: AmericanDifficulty: medium12
servings20
minutes55
minutes360
kcal75
MinutesThis recipe combines a classic moist cake base with a bold pink raspberry marble. It highlights a specific greasing method using a homemade paste to prevent the cake from sticking to intricate Bundt pan designs.
Ingredients
3 cups all-purpose flour
2 teaspoons baking powder
1/2 teaspoon salt
1 cup unsalted butter, softened
2 cups granulated sugar
4 large eggs, room temperature
1 teaspoon vanilla extract
1 cup whole milk, room temperature
1/2 cup seedless raspberry preserves
1/4 cup all-purpose flour (for the raspberry swirl)
3-4 drops neon pink gel food coloring (to achieve the visual intensity shown)
For the Foolproof Pan Release (Cake Goop):
1 tablespoon melted butter
1 tablespoon vegetable oil
1 tablespoon all-purpose flour
Directions
- The Secret to Foolproof Pan Release: In a small bowl, whisk together the 1 tablespoon melted butter, 1 tablespoon oil, and 1 tablespoon flour until it forms a smooth paste. Using a pastry brush, coat every single ridge and the center tube of your Bundt pan thoroughly. This creates a professional-grade non-stick barrier.
- Preheat your oven to 350°F (175°C).
- In a medium bowl, whisk together the 3 cups flour, baking powder, and salt.
- In a large bowl or stand mixer, cream the softened butter and sugar together on medium-high speed until very light and fluffy, about 4 to 5 minutes. Add eggs one at a time, beating well after each addition, then stir in the vanilla.
- Gradually add the dry ingredients to the butter mixture, alternating with the milk (start and end with flour). Mix on low speed until just combined; do not overmix.
- Prepare the Swirl: Transfer 1 ½ cups of the batter to a separate bowl. Stir in the raspberry preserves, the extra 1/4 cup of flour (to ensure the swirl doesn’t sink to the bottom), and the pink gel food coloring until the color is vibrant and uniform.
- Spoon half of the plain batter into the prepared pan. Drop large dollops of the raspberry batter on top, then cover with the remaining plain batter. Use a butter knife to swirl the batters together in a figure-eight motion only twice to maintain the distinct, bold marbling seen in the image.
- Bake for 55 to 65 minutes, or until a skewer inserted into the thickest part of the cake comes out clean.
- Let the cake cool in the pan for exactly 10 minutes. This is the critical window where the cake structure firms up but the “goop” hasn’t yet hardened.
- Place a wire rack over the top of the pan and firmly flip it over. The cake will slide out perfectly. Allow it to cool completely before slicing to ensure the swirl remains sharp and defined.
Notes
- The 10-minute cooling window is critical; cooling too long may cause the ‘goop’ to harden and stick, while cooling too little may cause the cake to break.