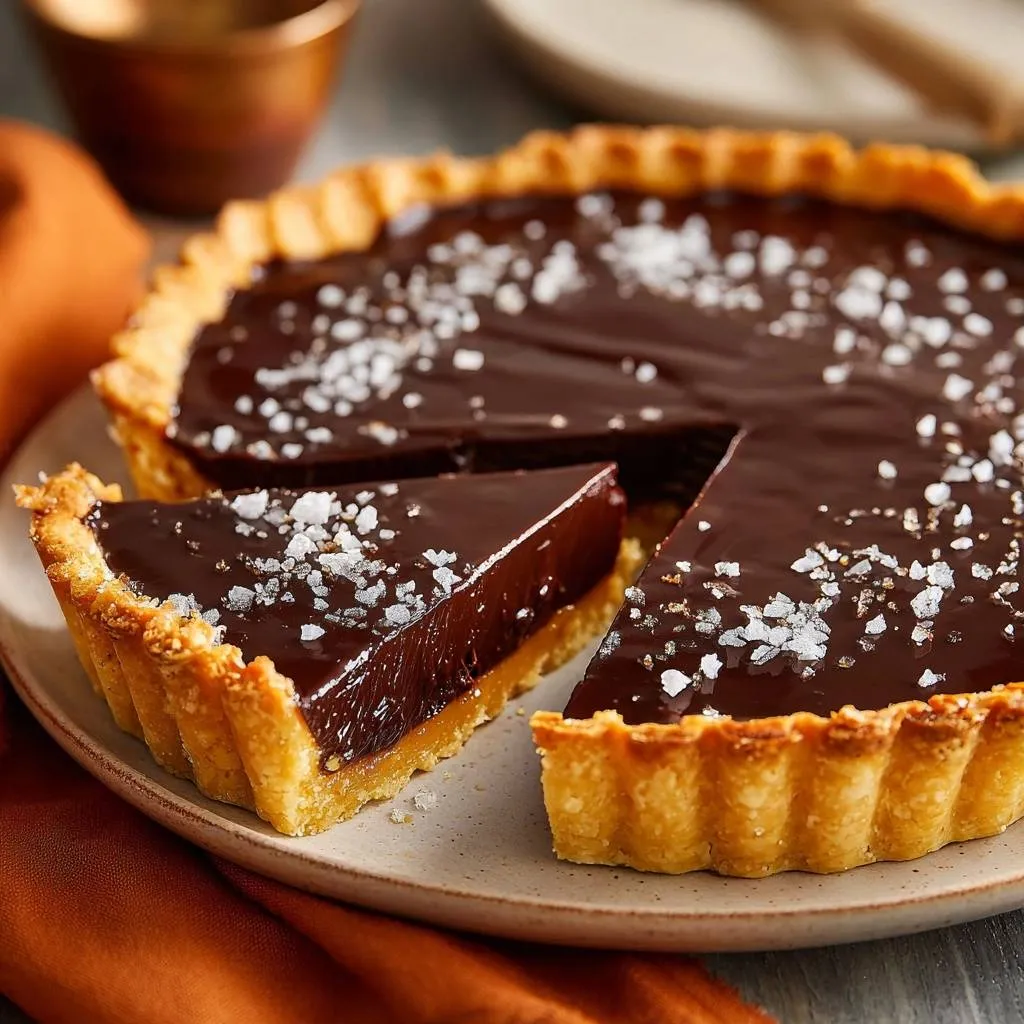
Imagine the sound of a silver fork snapping through a buttery, golden crust, only to be met by the resistance of a thick, gooey caramel and the velvet-smooth embrace of dark chocolate. This tart isn’t just a dessert; it’s a masterclass in architectural baking. The secret to its professional profile lies in the hidden layer of salted caramel tucked beneath the ganache. This golden ribbon acts as both a flavor powerhouse and a structural barrier, ensuring every bite delivers a perfect contrast of temperatures and textures.
Achieving that “shatteringly crisp” pastry requires more than just a good recipe; it requires understanding how moisture moves. Most home bakers struggle with tarts that turn soft within hours. However, by blind-baking the shell to a deep mahogany and sealing it with a protein barrier, you create a foundation that stays crisp for days. The interplay between the cold, snappy chocolate and the room-temperature, flowing caramel creates a sensory experience that rivals any high-end patisserie.
For an equally crisp crust on a savory bake, check out the secrets behind caramelized onion tart.
The real magic happens during the cooling phase. You’ll notice the ganache takes on a mirror-like sheen while the caramel remains hidden until the very first slice is pulled away. To get that perfect finish, the secret is the “flash-chill” method. By freezing the caramel layer for just ten minutes before adding the chocolate, you prevent the two from bleeding together, maintaining those sharp, distinct layers that define a world-class dessert.
Essential Components for the Perfect Chocolate Tart
When you’re working with so few ingredients, quality is your only hiding place. For the ganache, you need dark chocolate with 60% to 70% cocoa solids. This specific range provides enough cocoa butter to ensure the tart sets firmly enough to slice, while the bitterness balances the intense sweetness of the caramel. If you go too dark, the ganache can become brittle; too light, and it won’t hold its shape against the caramel layer.
The heavy cream is equally vital. You must use a cream with at least 36% milk fat. This high fat content is what creates a stable emulsion, giving you that silky, melt-on-the-tongue mouthfeel. Lower fat alternatives like half-and-half will result in a runny mess that never truly sets. In addition, the butter should be at room temperature so it whisks into the warm chocolate without causing the mixture to seize.
Finally, let’s talk about the salt. Table salt is far too aggressive and fine for this application. You want Maldon-style flaky sea salt. These large, pyramid-shaped crystals provide a delicate crunch and a burst of salinity that cuts through the richness of the chocolate. Plus, they look stunning against the dark, glossy surface of the finished tart.
Selecting the Right Salted Caramel Consistency
Not all caramels are created equal. For this tart, you need a “filling” consistency rather than a thin dessert sauce. If you pour a runny ice cream topping into your crust, it will soak into the pastry or ooze out the sides the moment you cut a slice. Look for a caramel that is thick and sluggish at room temperature.
If you’re using store-bought caramel, give it a stir. It should hold its shape on the spoon for a few seconds before sliding off. If it feels too thin, you can gently simmer it in a small saucepan for five minutes to reduce the moisture. This ensures the caramel stays exactly where you put it, creating that beautiful golden stripe in every slice.
The Science of a Crisp Tart Shell
The “soggy bottom” is the enemy of every pastry chef. This happens when the moisture from the filling migrates into the crust, turning a crisp pastry into something doughy and sad. Blind baking is the first line of defense. By baking the crust with weights first, you set the structure of the walls. Then, by baking it again without weights, you dry out the floor of the tart completely.
To avoid a ruined crust, consider techniques for your rich chocolate tart, especially with moist fillings.
Gluten development also plays a huge role here. When you press the dough into the fluted ridges of the pan, you want to be firm but gentle. If you overwork the dough, the gluten becomes elastic and will shrink away from the edges in the oven. Pressing it firmly into the “teeth” of the pan helps anchor the dough, ensuring those beautiful scalloped edges stay tall and proud after baking.
Temperature is your best friend during this process. If the dough is too warm when it hits the oven, the butter melts before the flour can set, leading to a slumped crust. Always ensure your pastry shell is chilled before it goes into that 375°F oven. This thermal shock helps create the flaky layers we’re looking for.
Why the Egg White Wash is Non-Negotiable
Think of the egg white wash as a raincoat for your pastry. After the initial blind bake, brushing a thin layer of beaten egg white over the hot crust creates a hydrophobic seal. The heat of the pan cooks the protein instantly, forming a clear, waterproof barrier that prevents the caramel from softening the crust.
This step is the difference between a tart that is good for one hour and a tart that stays perfect for two days. It’s a small detail that yields massive results. Make sure you get into the corners where the base meets the sides, as that’s usually where moisture likes to pool and cause trouble.
Step-by-Step: Preparing the Pastry Foundation
Preheat your oven to 375°F and get that rack in the center position. When you fit the pastry into the 9-inch pan, use a small scrap of excess dough to push the pastry into the fluted edges. This prevents your warm fingers from melting the butter. Trim the edges flush with the top of the pan for a clean, professional look.
Line the crust with parchment and fill it to the very brim with pie weights. If you don’t have weights, dried beans work perfectly. Bake for 15 minutes until the edges are set. Once you remove the weights, you’ll notice the bottom looks a bit pale and damp. This is when you “dock” the dough by pricking it with a fork to let steam escape.
Brush on that egg white and pop it back in for another 8 to 10 minutes. You are looking for a deep, golden-brown color. A pale crust is an undercooked crust, and it won’t have the structural integrity to hold the heavy ganache. Let it cool completely on a wire rack before you even think about adding the caramel.
Achieving the Perfect Ganache Emulsion
Making ganache is an exercise in patience. Place your finely chopped chocolate in a glass bowl. In a saucepan, bring the heavy cream to a gentle simmer. You’ll see small bubbles forming around the edges. Don’t let it reach a rolling boil, or you risk scorching the cream and ruining the flavor of the chocolate.
Pour the hot cream over the chocolate and then—this is the hard part—don’t touch it. Let it sit for five minutes. This allows the heat to penetrate the chocolate evenly. If you stir too early, the temperature drops too fast, and you’ll end up with grainy bits of unmelted chocolate in your tart.
After five minutes, start whisking in tiny circles right in the center of the bowl. You’ll see a dark, glossy “nucleus” form. Slowly expand your circles outward until the whole mixture is smooth. Stir in the room-temperature butter and vanilla last. The butter is the secret to that professional “mirror” sheen that makes the tart look like it came from a bakery window.
Temperature Control for the Caramel Layer
Once your crust is cool, spread the salted caramel in an even layer. Now, here is the pro move: put the tart in the freezer for 10 minutes. You want that caramel to be cold and firm to the touch. If the caramel is warm or even room temperature when you pour the ganache, the two will swirl together.
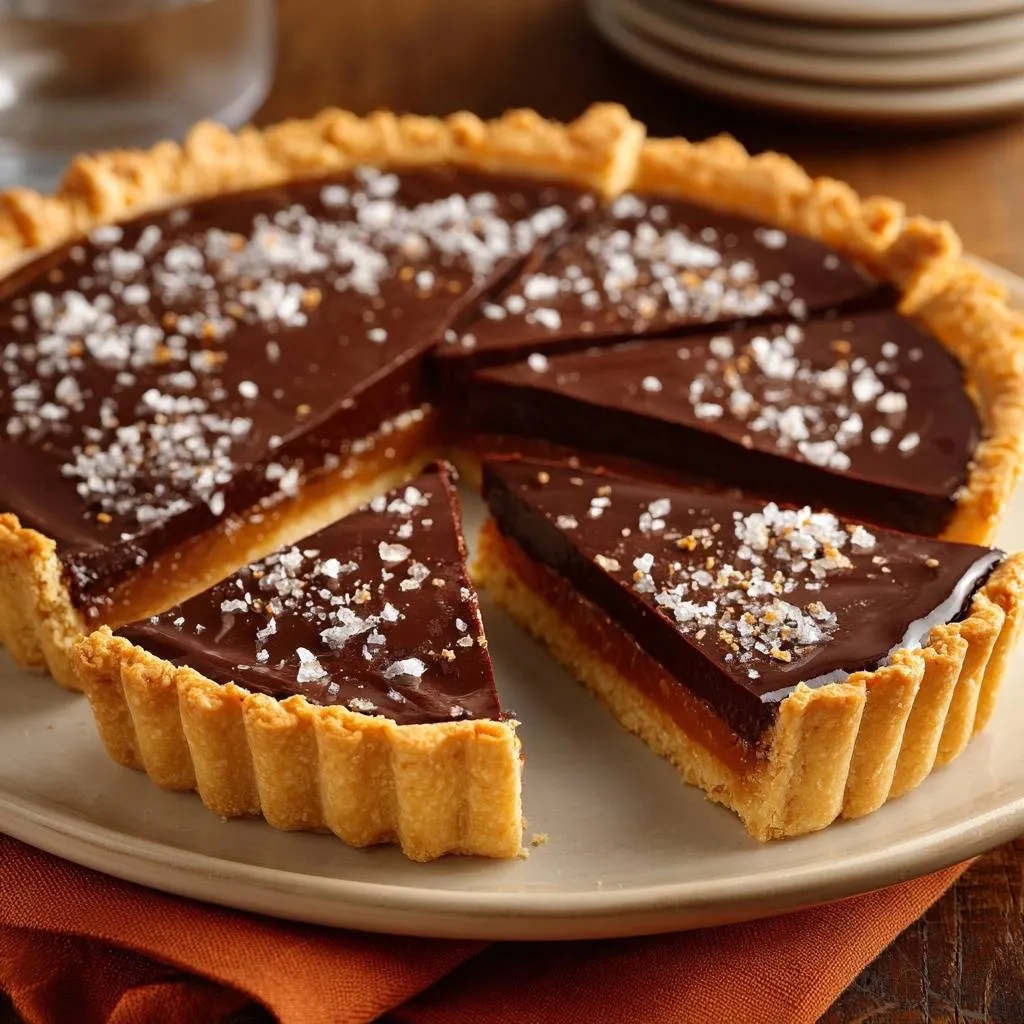
By flash-chilling the caramel, you create a solid surface for the ganache to glide over. This ensures that when you cut into the tart, you see a sharp, distinct line of gold beneath the dark chocolate. It’s these clean lines that separate an amateur dessert from a professional masterpiece.
Troubleshooting Common Ganache and Crust Issues
If your ganache looks oily or “broken,” don’t panic. This usually happens if the cream was too hot or you whisked too vigorously. You can fix it by adding a tablespoon of room-temperature heavy cream and whisking gently. The extra moisture helps the fat and liquids re-emulsify into a smooth sauce.
If your tart shell cracks when you’re taking it out of the pan, you can make “pastry glue.” Simply crush a few graham crackers or extra pastry scraps and mix them with a tiny bit of melted butter. Press this mixture into the crack like spackle. Once it chills, no one will ever know it was there.
A common mistake is adding the flaky salt too early. If the ganache is still hot, the salt will simply dissolve into the chocolate, leaving you with a salty tart but no visual “pop.” Wait about 30 minutes until the ganache has started to set but is still slightly tacky. This allows the crystals to stick without disappearing.
Professional Slicing and Presentation Techniques
To get those razor-sharp slices you see in food magazines, you need a tall glass of hot water and a clean kitchen towel. Dip a long, sharp knife into the hot water for a few seconds to heat the blade. Wipe it completely dry, then make one confident cut straight down through the tart.
The heat from the blade melts the cocoa butter just enough to glide through the ganache like butter. Crucially, you must wipe the knife clean and re-dip it in hot water between every single cut. If you don’t, the chocolate and caramel from the previous slice will smear across the top of the next one, ruining the clean look.
For the salt, try a decorative pattern. A light scatter around the perimeter looks elegant, or you can do a concentrated “stripe” of salt down the center of each slice. The contrast of the white crystals against the dark chocolate is visually striking and signals to your guests exactly what flavors to expect.
Make-Ahead Logistics and Storage Standards
This tart is actually better if you make it a day in advance. Giving it 24 hours in the refrigerator allows the flavors of the vanilla, chocolate, and caramel to meld together. It also ensures the ganache is fully set all the way through to the center, making it much easier to handle and slice.
Store the tart in an airtight container in the fridge. Chocolate is like a sponge for odors, so if you leave it uncovered, it might end up tasting like the onions or leftovers sitting next to it. A proper container keeps the chocolate tasting fresh and prevents the crust from absorbing too much humidity.
Whatever you do, do not freeze the assembled tart. While the crust and ganache freeze okay, the caramel layer changes texture when thawed. It can become grainy or weep moisture, which will ruin that perfect “shatteringly crisp” crust you worked so hard to achieve. It stays fresh in the fridge for up to three days.
Expert Tips for Customizing Your Tart
Once you’ve mastered the base recipe, you can start playing with flavors. A sophisticated twist is to infuse the heavy cream with whole espresso beans or orange zest while you’re heating it. Just make sure to strain the cream through a fine-mesh sieve before pouring it over the chocolate.
More Chocolate and Coffee Delights
To complement your rich chocolate tart, consider these other sweet and coffee-inspired recipes.
- For a refreshing coffee break alongside your tart, you might enjoy this creamy copycat iced coffee, offering a cool contrast.
- If you’re craving more intense chocolate flavor, this moist chocolate Bundt cake shares a similar depth that pairs well with the tart.
If you want a “Double Chocolate” profile, you can swap the standard shortcrust for a cocoa-based pastry. Simply replace two tablespoons of the flour in your favorite pastry recipe with high-quality Dutch-processed cocoa powder. This adds a deep, earthy note that complements the sweetness of the caramel beautifully.
Another great variation is to add a layer of toasted hazelnuts or pecans on top of the caramel before pouring the ganache. This adds a surprising crunch and a nutty depth that pairs perfectly with the dark chocolate. Just ensure the nuts are finely chopped so they don’t interfere with the clean slicing of the tart.
Frequently Asked Questions
Can I use milk chocolate instead of dark?
You can, but it requires a bit of caution. Milk chocolate has a much higher sugar content and less cocoa butter than dark chocolate, which means it is softer at room temperature. If you use 100% milk chocolate, the tart may not set firmly enough to support the weight of the caramel. If you prefer a sweeter taste, I recommend using a 50/50 blend of milk and dark chocolate to maintain the structural integrity of the ganache.
How do I prevent the salt from melting?
Salt melts when it comes into contact with moisture, often caused by “sweating” in the refrigerator. To prevent this, let the tart sit at room temperature for about 30 minutes after pouring the ganache before you sprinkle the salt. Then, refrigerate it uncovered for the first hour to let the heat escape before sealing it in a container. For the best results, you can even wait to add the salt until just before you serve the tart.
What if my caramel is too thin?
If your caramel sauce is runny, it will bleed into the chocolate or make the crust soggy. The best fix is to pour the caramel into a small saucepan and simmer it over medium-low heat for about 5 to 7 minutes. This evaporates excess water and thickens the sugars. Let it cool completely before spreading it into the tart shell. If you’ve already put it in the tart, the 10-minute freezer chill is absolutely mandatory to keep it in place.
Why did my crust shrink down the sides?
Crust shrinkage is usually caused by two things: overworking the dough or not letting it rest. When you mix flour and water, gluten forms. If you stretch the dough to fit the pan, those gluten strands act like rubber bands and pull back in the heat of the oven. To prevent this, always let your dough rest in the fridge for at least 30 minutes before rolling, and never “stretch” it into the pan—gently drape it and press it in instead.
How long will the tart stay crisp?
Thanks to the egg white wash technique, this tart stays remarkably crisp for 2 to 3 days when stored in an airtight container in the refrigerator. Without the egg wash, the moisture from the caramel would likely soften the crust within 12 hours. For the absolute best texture, I recommend serving it within 48 hours of assembly.
Salted Dark Chocolate Ganache Tart
Course: DessertCuisine: French and AmericanDifficulty: medium8
servings30
minutes25
minutes480
kcal55
MinutesThis decadent tart combines a shatteringly crisp shortcrust pastry with a rich, silky dark chocolate ganache and a secret layer of salted caramel. The caramel acts as a flavor barrier to prevent a soggy bottom, resulting in a sophisticated dessert with perfect textures.
Ingredients
1 pre-made shortcrust pastry shell (unbaked)
1 egg white, lightly beaten
1/2 cup store-bought or homemade thick salted caramel sauce
9 ounces high-quality dark chocolate (60 to 70 percent cocoa), finely chopped
1 cup heavy cream
2 tablespoons unsalted butter, room temperature
1 teaspoon vanilla extract
1.5 tablespoons coarse flaky sea salt (Maldon style)
Directions
- Preheat your oven to 375°F (190°C). Fit the pastry dough into a 9-inch fluted tart pan with a removable bottom, pressing firmly into the ridges. Trim the edges flush with the top of the pan.
- Line the crust with parchment paper and fill to the brim with pie weights or dried beans. Bake for 15 minutes.
- Remove the weights and paper. Prick the bottom with a fork (docking) and brush the bottom and sides with a thin layer of beaten egg white. Return to the oven for 8-10 minutes until the crust is deeply golden and fully cooked. Let the crust cool completely.
- Once the crust is cool, spread an even layer of thick salted caramel sauce over the bottom. Place the tart in the freezer for 10 minutes to set the caramel so it doesn’t bleed into the chocolate.
- Place the chopped chocolate in a heat-proof glass bowl.
- In a small saucepan, bring the heavy cream to a gentle simmer over medium heat. Remove from heat just as bubbles begin to break the surface; do not let it reach a rolling boil.
- Pour the hot cream over the chocolate and let it sit undisturbed for 5 minutes.
- Gently whisk from the center outward in small circles until the mixture is glossy and smooth. Stir in the room-temperature butter and vanilla until fully incorporated.
- Pour the ganache over the chilled caramel layer. Gently tap the pan on the counter to pop any air bubbles and smooth the top.
- Let the tart sit at room temperature for 30 minutes. Sprinkle the coarse flaky sea salt generously in a decorative pattern as shown in the image.
- Refrigerate for at least 3 hours until firm. For the clean, professional slices seen in the photo, dip a sharp knife in hot water and wipe it dry between every cut.
Notes
- For clean and professional slices, dip a sharp knife in hot water and wipe it dry between every cut. Ensure the caramel layer is chilled in the freezer before adding the ganache to prevent the layers from mixing.