The scent of a slow-cooked roast wafting through the house is the ultimate signal of a cozy weekend. However, many home cooks face the heartbreak of a roast that looks beautiful but eats like a piece of shoe leather. You’ve likely been there: you wait eight hours only to find the meat is stringy, dry, or stubbornly tough despite the long soak in broth.
This frustration usually stems from a misunderstanding of how heat interacts with muscle fiber. Most people either boil the meat by using too much liquid or rush the process with high heat, which causes the proteins to seize up and squeeze out their moisture. To fix this, we use the “Low-and-Slow Moisture Seal” technique to ensure every bite is succulent.
The secret to success lies in the initial sear and the precise liquid level in your pot. By browning the exterior deeply and keeping the broth halfway up the roast, you create a self-basting environment. This method doesn’t just cook the beef; it transforms the very structure of the meat into something you can eat with a spoon.
The Science of Collagen and Fork-Tender Beef
Beef chuck is a hardworking muscle filled with connective tissue called collagen. If you cook it quickly, like a steak, it stays rubbery and impossible to chew. Therefore, you must apply gentle, consistent heat over several hours to melt that collagen into silky gelatin.
Gelatin is what gives the sauce its body and the meat its “melt-in-your-mouth” feel. While boiling meat at 212°F can actually toughen the fibers, a steady 275°F oven provides the thermal sweet spot. This temperature is high enough to break down the tough bits but low enough to keep the muscle fibers from drying out.
Maintaining this temperature ensures the fat renders slowly, basting the meat from the inside out. If you rush this process, you’ll end up with “pot-boiled beef” instead of a true roast. Patience is your most important ingredient when you’re aiming for that perfect, shreddable texture.
Essential Components for a Savory Pot Roast
A 3-pound beef chuck roast is the undisputed king of this dish. When you’re at the butcher counter, look for a piece with heavy white veins of fat running through it, known as marbling. This internal fat is what keeps the meat moist during the long stay in the oven.
Aromatics like garlic, yellow onion, and fresh sage provide the foundational layers of flavor. These ingredients need to be robust because they have to stand up to eight hours of cooking. Fresh herbs are non-negotiable here; dried herbs often turn bitter or lose their punch during such a long braise.
Selecting the Right Cut of Beef
While you might see rump roast or brisket on sale, the chuck roast is superior for slow cooking. It comes from the shoulder and contains the perfect ratio of fat to lean protein. Rump roast is often too lean and becomes “mealy” when slow-cooked, while brisket can be finicky to get right without a smoker.
The Role of Acids and Umami Boosters
Tomato paste and Worcestershire sauce aren’t just for color; they provide essential acidity and umami. The acid in the tomato paste helps gently weaken the meat fibers, making them more receptive to the broth. Meanwhile, the Worcestershire sauce adds a fermented depth that makes the beef taste “beefier.”
The Maillard Reaction: Why Searing is Mandatory
The Maillard reaction is a chemical dance between amino acids and sugars that happens when meat hits a hot pan. This is where that deep, savory crust comes from. If you skip this step, your roast will look gray and lack the complex, roasted flavor that defines a great pot roast.
Before the meat touches the oil, you must pat it completely dry with paper towels. Moisture is the enemy of a good sear; if the meat is wet, it will steam instead of brown. You want to hear a loud sizzle the moment the beef hits the heavy pot.
Avoid the temptation to move the meat too soon. Let it sit for a full five or six minutes per side until it releases naturally from the pan. This dark brown crust is essentially “concentrated flavor” that will eventually dissolve into your gravy, giving it a professional finish.
Step-by-Step: Executing the Moisture Seal Technique
Transitioning from the stovetop to the oven is where the real transformation begins. You’ve built the color; now you need to build the environment for the meat to relax. This phase requires a heavy-bottomed pot, like a Dutch oven, which holds heat evenly and prevents hot spots that could scorch the sauce.
Phase 1: Building the Fond and Deglazing
After searing the meat, you’ll notice dark bits stuck to the bottom of the pot. This is called “fond,” and it is culinary gold. When you pour in your broth or optional liquid, use a wooden spoon to scrape every single bit of that fond into the liquid.
This process, called deglazing, captures all the caramelized sugars from the meat and incorporates them into the sauce. You’ll see the liquid turn a deep, rich brown almost instantly. This ensures that no flavor is left behind in the pan.
Phase 2: The Five-Hour Initial Braise
The meat needs a “head start” before any vegetables enter the pot. For the first five hours, the roast sits in the liquid, which should only come halfway up the sides. This is the “Moisture Seal” part of the technique.
By not submerging the meat entirely, the top half of the roast gets hit with gentle steam while the bottom half braises. This prevents the meat from tasting “boiled.” The tight-fitting lid keeps all that moisture inside, creating a pressurized environment that forces flavor into the beef.
Phase 3: Timing the Vegetable Addition
One of the biggest mistakes in pot roast history is adding carrots and potatoes at the very beginning. By the time the meat is done, the vegetables have turned into a mushy paste. Instead, wait until the five-hour mark to tuck them in.
Adding the baby potatoes and carrots for the final 2.5 to 3 hours allows them to become tender while still holding their shape. They soak up the seasoned beef juices without disintegrating. This results in a platter where every component has its own distinct texture.
For beautifully browned vegetables alongside your roast, consider checking out these crispy Hasselback potatoes.
Troubleshooting Common Pot Roast Failures
If you check your meat after seven hours and it feels tough, don’t panic. It almost always means it hasn’t cooked long enough, not that it’s overcooked. Connective tissue is stubborn; sometimes it needs an extra thirty minutes to finally “give up” and soften.
If your broth tastes too salty, it’s likely because the liquid reduced more than expected. You can easily fix this by adding a splash of water or unsalted broth. Conversely, if the flavor feels flat, a tiny teaspoon of apple cider vinegar can brighten the whole pot without making it taste like pickles.
Refining the Sauce: The Cornstarch Slurry Method
Once the meat is tender, the liquid in the pot is packed with flavor but might be a bit thin. To turn it into a glossy gravy, use a cornstarch slurry. Mix equal parts cornstarch and cold water in a small bowl until smooth before whisking it into the simmering juices.
The sauce will transform from a thin juice to a thick, velvet-like gravy in about two minutes. This coating is what makes the dish feel truly indulgent. It clings to the meat and vegetables rather than just pooling at the bottom of the plate.
Optimal Side Dishes for Slow-Cooked Beef
Since this roast is incredibly rich and savory, you want sides that offer a bit of contrast. A crisp green salad with a sharp lemon vinaigrette is perfect for cutting through the fat. The acidity cleanses your palate between bites of the tender beef.
Crusty sourdough bread is another essential companion. You’ll want something sturdy to mop up every last drop of that thickened gravy. If you want more greens, try steamed green beans tossed with a little garlic and lemon zest for a bright, fresh crunch.
Storage and Reheating for Maximum Flavor Retention
Pot roast is famous for tasting even better the next day. As it sits in the fridge, the flavors continue to meld and the beef absorbs more of the seasoned liquid. Store everything together in an airtight container to keep the meat from drying out.
When reheating, avoid the microwave if possible, as it can make the beef rubbery. Instead, place the meat and gravy in a covered dish in a 300°F oven for about 20 minutes. This gently warms the fibers without shocking them, preserving that fork-tender texture you worked so hard to achieve.
Expert Tips for the Perfect Braise
Using a heavy-bottomed Dutch oven is always superior to a standard slow cooker for this recipe. The cast iron provides “surround heat” that mimics a professional braising oven. Slow cookers primarily heat from the bottom, which can lead to uneven cooking over long periods.
Always let the meat rest for at least 10 minutes before shredding it. Even though it’s been cooking for hours, the fibers need a moment to reabsorb the juices. If you pull it apart the second it comes out of the pot, all that delicious moisture will spill out onto the platter.
Is a Slow Cooker or Oven Better?
The oven is generally better because it provides dry heat from all sides, which helps the top of the roast develop a beautiful color. A slow cooker creates a very wet environment that can sometimes result in a “steamed” flavor. However, if you must use a slow cooker, use the “Low” setting for 9-10 hours.
Can I Substitute the Herbs?
Sage, rosemary, and thyme are the “holy trinity” of savory roasting. If you don’t have sage, you can use marjoram for a similar earthy tone. Avoid using delicate herbs like parsley or cilantro during the cook, as they will simply disappear in the heat; save those for a fresh garnish at the end.
How to Scale for Large Crowds
If you need to feed twelve people, buy two 3-pound roasts rather than one 6-pound roast. Two smaller roasts will cook more evenly and provide more surface area for that delicious crust. You don’t need to double the broth; just ensure the liquid still reaches halfway up the sides of the meat.
Achieving the Perfect Shred
You’ll know the beef is ready when you can press a fork into the center and it slides in with zero resistance. Don’t finely shred the meat into tiny bits. Instead, pull it into large, chunky pieces. This keeps the meat from cooling down too fast and provides a more satisfying “steak-like” bite.
How should I store leftovers?
Store your pot roast in an airtight container in the refrigerator for up to 4 days. Make sure the meat is submerged or well-coated in the gravy to prevent it from drying out. You can also freeze the meat and gravy for up to 3 months, but the potatoes may become slightly grainy after thawing.
Why is my pot roast still tough after 8 hours?
This is almost always because the collagen hasn’t finished breaking down yet. Every piece of meat is different, and some “stubborn” roasts simply need more time. Put the lid back on and give it another 30 to 45 minutes; it will eventually reach that shreddable stage.
Can I make this without the red wine?
Absolutely. While the wine adds a nice acidity and depth, you can easily replace it with an equal amount of beef bone broth. To mimic the complexity of the wine, add a teaspoon of balsamic vinegar or extra Worcestershire sauce to the pot during the deglazing step.
What if my gravy is too salty?
If the sauce reduced too much and tastes overly salty, do not add more salt! You can drop a peeled, halved raw potato into the sauce for the last 20 minutes to absorb some salt, or simply dilute the gravy with a little water or unsalted stock before serving.
Can I use frozen beef for this recipe?
It is highly recommended to thaw the beef completely before cooking. Searing a frozen block of meat is impossible, and you won’t get the Maillard reaction needed for flavor. Furthermore, starting with frozen meat throws off the timing and can lead to an unevenly cooked center.
Pot Roast
Course: Main CourseCuisine: AmericanDifficulty: medium6
servings20
minutes8
hours485
kcal480
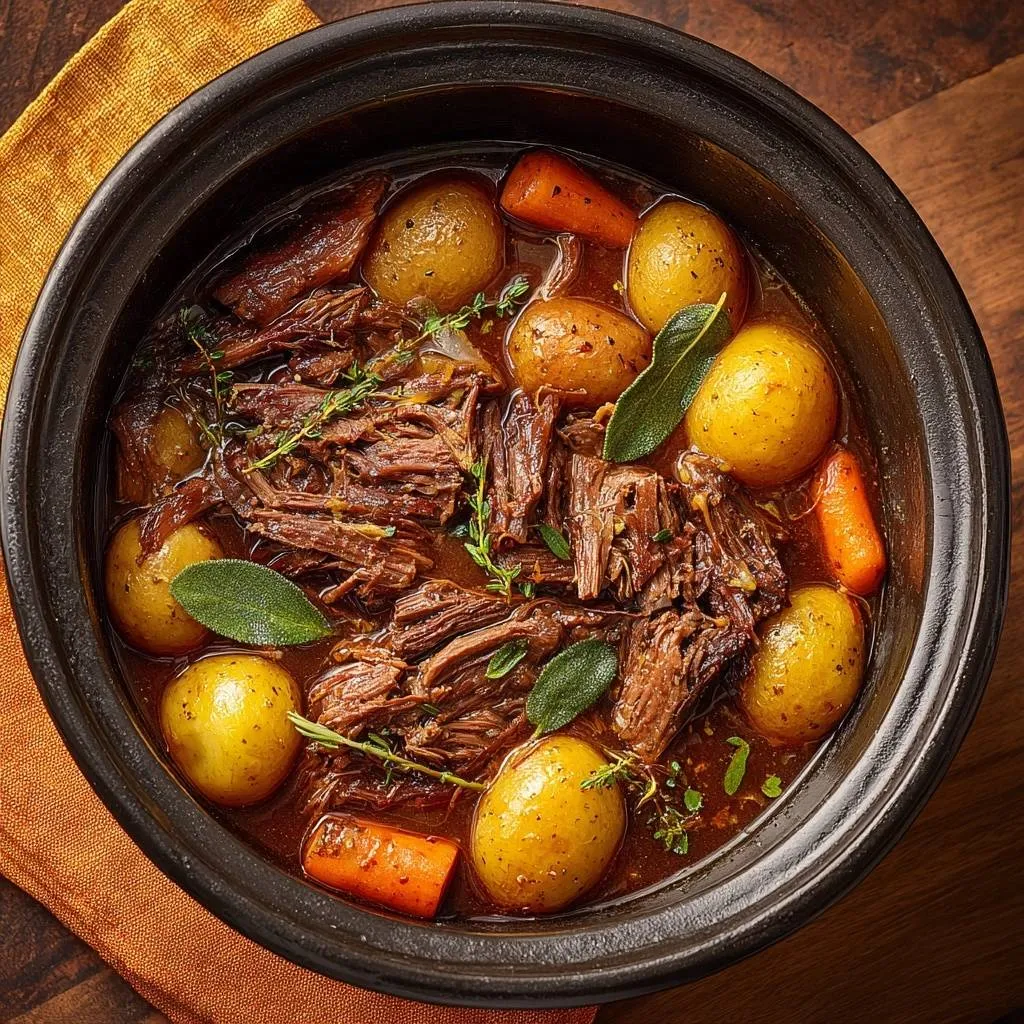
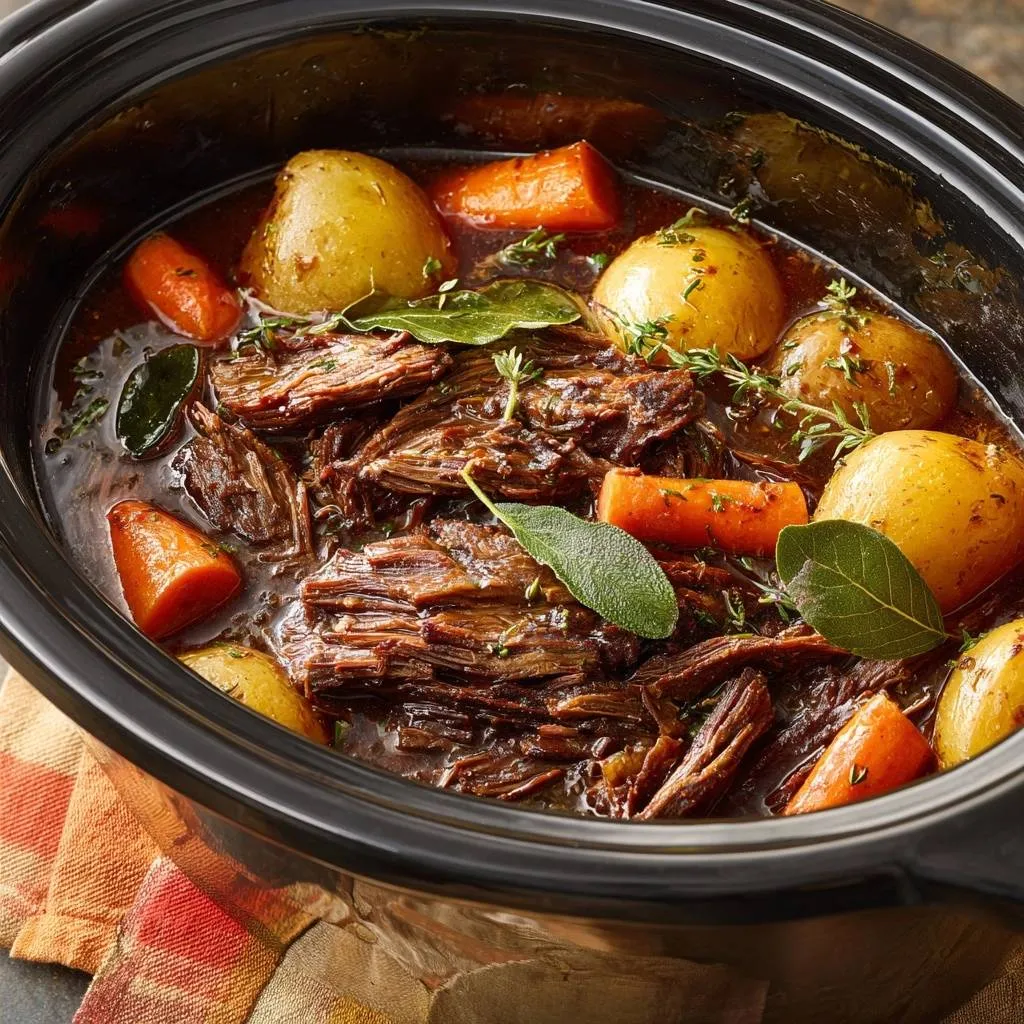
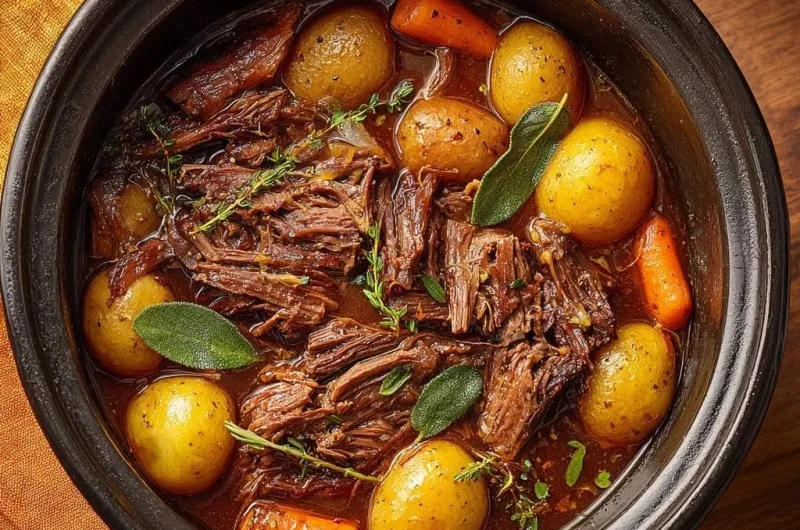
MinutesA hearty and comforting beef chuck roast slow-cooked with baby potatoes, carrots, and aromatic herbs in a rich bone broth and red wine reduction.
Ingredients
3 pounds beef chuck roast, trimmed
1 pound baby yellow potatoes, whole
3 large carrots, cut into 2-inch chunks
1 large yellow onion, sliced
3 cups beef bone broth
1/2 cup dry red wine (optional, for depth)
3 tablespoons tomato paste
1 tablespoon Worcestershire sauce
4 cloves garlic, smashed
3 sprigs fresh thyme
3 sprigs fresh rosemary
6 fresh sage leaves (4 for cooking, 2 for garnish)
2 tablespoons vegetable oil
1 tablespoon cornstarch mixed with 1 tablespoon water (optional, for thickening)
Salt and black pepper to taste
Directions
- Pat the beef completely dry with paper towels. This is the most important step for a deep sear. Season generously with salt and pepper on all sides.
- Heat the oil in a large heavy pot or Dutch oven over medium-high heat. Sear the beef for 5 to 6 minutes per side until a dark brown crust forms. This Maillard reaction develops the deep color and flavor seen in the final dish.
- Remove the meat and set aside. Lower the heat to medium and add the onions and garlic, cooking for 3 minutes until softened. Stir in the tomato paste and cook for 1 minute to caramelize.
- Pour in the red wine (if using) or 1 cup of the beef broth to deglaze the pan, scraping up all the browned bits (fond) from the bottom with a wooden spoon.
- Place the roast back into the pot. Add the remaining broth and Worcestershire sauce. The liquid should come about halfway up the side of the meat. Add the thyme, rosemary, and 4 sage leaves.
- Cover with a tight-fitting lid. To solve the tough meat problem, cook on the lowest possible heat setting on the stovetop or in a 275°F (135°C) oven for 5 hours.
- After 5 hours, quickly tuck the whole baby potatoes and carrots around the meat. Replace the lid immediately. Continue cooking for another 2.5 to 3 hours. This prevents the vegetables from disintegrating while ensuring the meat reaches a shreddable state.
- Once the beef shreds easily with a fork, remove the meat and vegetables to a platter. If the juices are too thin, whisk in the cornstarch slurry and simmer for 2 minutes until glossy and thickened.
- Shred the beef into large chunks and return to the pot. Garnish with fresh thyme sprigs and the remaining fresh sage leaves as shown in the image. Serve hot.
Notes
- Patting the beef dry before searing is essential for a deep crust. Adding vegetables later in the cooking process prevents them from becoming mushy.