
Imagine pulling a heavy pot from the oven and lifting the lid to reveal a masterpiece of deep mahogany beef and vibrant vegetables. The aroma of rosemary and garlic fills your kitchen, signaling that a truly comforting meal is finally ready. We’ve all experienced the disappointment of a pot roast that looks beautiful but tastes like dry, stringy wood fibers. This recipe solves that “stringy meat” syndrome by focusing on the science of low-and-slow heat.
A perfect pot roast should never require a steak knife; it should yield to the gentle pressure of a dinner fork. You’re looking for a glossy, velvet-like gravy that clings to the meat rather than a thin, watery broth. By controlling the temperature and mastering the sear, you’ll transform a humble, tough cut of beef into a luxurious centerpiece that rewards your patience with every melt-in-your-mouth bite.
The secret to this success lies in the initial sear and the moisture level in the pot. If you boil the meat in too much liquid, it becomes gray and flavorless. However, by braising it halfway submerged, you create a self-basting environment that keeps the muscle fibers moist while the connective tissue melts into gelatin. This is the ultimate Sunday vibe, bringing everyone to the table for a meal that feels like a warm hug.
For a similar experience with vegetables, try this tender pot roast.
Selecting the Best Cut for Slow Roasting
When you’re at the butcher counter, reach for the beef chuck roast every single time. This cut comes from the shoulder of the cow, an area that does a lot of work and is packed with connective tissue and intramuscular fat. While it’s too tough for a quick sear on the grill, it is the undisputed king of the slow roast because that collagen eventually breaks down into rich, silky gelatin.
You might see Brisket or Bottom Round nearby, and while they can work, they often lack the marbled fat needed to stay juicy over a four-hour cook. Brisket is delicious but can be finicky, often requiring a much longer cook time to reach the same level of tenderness. Stick with a thick, well-marbled chuck roast to ensure your gravy has that signature body and your meat stays succulent.
Essential Components for a Rich Braising Liquid
The liquid in your pot isn’t just a cooking medium; it’s the foundation of your future gravy. I always recommend using a high-quality beef broth, preferably low-sodium. This gives you total control over the salt levels, especially since the liquid will reduce and concentrate in flavor as it roasts for hours in the oven.
Tomato paste is your secret weapon for building umami, that savory “fifth taste” that makes meat dishes pop. When you sauté the paste until it turns a dark brick red, you’re caramelizing the natural sugars and deepening the color of the sauce. Fresh rosemary is also non-negotiable here. Dried herbs can sometimes taste dusty or medicinal in long braises, but fresh sprigs release a piney, floral oil that cuts through the richness of the beef.
If you want to add a sophisticated layer of acidity, a splash of dry red wine works wonders. It helps break down the proteins and adds a fruity complexity that broth alone can’t provide. If you prefer to skip it, simply use a bit more broth to deglaze the pan. The goal is a liquid that is savory, slightly acidic, and deeply aromatic.
The Role of Aromatics and Root Vegetables
Yellow onions and garlic provide the aromatic backbone of this dish, melting into the sauce until they almost disappear. For the star vegetables, baby yellow potatoes are the superior choice over Russets. Their waxy texture allows them to hold their shape through two hours of roasting, whereas starchy Russets might disintegrate into the gravy and make it grainy.
The Science of the Maillard Reaction
Browning your meat isn’t just about making it look pretty; it’s about a chemical process called the Maillard reaction. This occurs when amino acids and reducing sugars react under high heat, creating hundreds of different flavor compounds. This is where that “meaty” taste actually comes from, and it’s a step you cannot skip if you want a professional-grade roast.
To get a proper crust, you must pat the beef bone-dry with paper towels before it hits the oil. If the meat is wet, it will steam instead of sear, leaving you with a gray exterior and zero flavor. You want a deep, dark brown crust on every single side. This “fond” or browned bits left in the pan will eventually dissolve into your braising liquid, giving your gravy its characteristic dark color and intense flavor.
Step-by-Step: Searing and Deglazing for Maximum Flavor
Start by heating your oil in a heavy Dutch oven until it’s shimmering but not smoking. When you drop the beef in, you should hear a loud, aggressive sizzle. Leave it alone for at least five minutes per side. If you try to flip it and it sticks, it’s not ready yet. Once the beef is removed, the butter and onions go in to pick up those tasty bits left behind.
As you add the garlic and tomato paste, keep things moving so nothing burns. When you pour in your deglazing liquid, use a wooden spoon to scrape the bottom of the pot vigorously. Those brown bits are “culinary gold.” They contain all the concentrated beef flavor that will make your gravy taste like it came from a high-end steakhouse. Once the bottom of the pot is clean, you’ve successfully captured all that flavor.
Managing Oven Temperature for Fork-Tender Results
The “sweet spot” for a perfect braise is 300°F. At this temperature, the heat is high enough to melt the tough collagen but low enough that the muscle fibers don’t seize up and squeeze out all their moisture. If you cook a roast at 350°F or higher, the meat will often turn out dry and “corky,” even if it’s sitting in liquid.
Remember the “halfway up” rule for your liquid. Braising is a combination of simmering and steaming. If you submerge the meat completely, you’re boiling it, which can lead to a loss of texture and flavor. By leaving the top half of the roast exposed to the moist air inside the pot, you get a better flavor profile and a more tender result. Ensure your lid fits tightly to keep that precious steam inside.
Timing the Vegetable Addition
One of the biggest mistakes people make is throwing the vegetables in at the very beginning. If you cook a carrot for four hours, it becomes a flavorless mush. By waiting until the two-hour mark, you give the beef the head start it needs. This ensures that when the meat is finally tender, the potatoes and carrots are perfectly cooked—soft enough to yield to a fork but firm enough to hold their shape on the plate.
Transforming Braising Liquid into Glossy Gravy
Once the meat is resting, your pot will be filled with a thin, flavorful liquid. To turn this into a true gravy, move the pot to the stovetop. A cornstarch slurry is the easiest way to get a glossy finish without the risk of lumps that you sometimes get with a flour roux. Whisk the cold water and cornstarch together until smooth before adding it to the simmering pot.
You must bring the liquid to a full boil for about two minutes to “activate” the starch. You’ll see the sauce transform from a cloudy brown to a clear, deep mahogany. You’re looking for the “nappe” consistency, which is a fancy chef term meaning the sauce is thick enough to coat the back of a spoon without immediately running off. This ensures the gravy stays on the meat where it belongs.
Troubleshooting Common Pot Roast Issues
If your meat is still tough after four hours, don’t panic—it simply needs more time. Every cow is different, and some cuts have more stubborn connective tissue than others. Just put the lid back on and give it another 30 minutes. On the flip side, if your gravy tastes too salty, try adding a splash of water or a tiny bit of honey to balance the flavors.
If you find your meat is dry despite being in liquid, you likely had the oven temperature too high or the lid wasn’t sealed properly. To fix this for the current meal, shred the meat and let it soak in the hot gravy for ten minutes before serving. This allows the dry fibers to absorb some of the moisture back in, saving the dish at the last second.
Optimal Side Dishes for Beef Pot Roast
Since this roast is incredibly rich and savory, you want side dishes that offer a bit of contrast. A crisp green salad with a sharp lemon vinaigrette is a fantastic way to cleanse the palate between bites of beef. The acidity cuts right through the heavy fats and keeps the meal feeling balanced rather than weighed down.
Steamed green beans with a squeeze of lemon or roasted asparagus also provide a nice crunch. If you’re a fan of tradition, you can’t go wrong with a thick slice of crusty sourdough bread. It’s the perfect tool for mopping up every last drop of that glossy gravy. Avoid serving this with other heavy, creamy dishes like mac and cheese, as the meal can become overwhelmingly rich.
Storage, Reheating, and Repurposing Leftovers
Pot roast is one of those rare dishes that actually tastes better the next day. As it sits in the fridge, the flavors continue to marry and deepen. You can store leftovers in an airtight container for up to four days. When reheating, do it gently on the stove with a splash of broth to keep the meat from drying out.
If you want to freeze it, the beef and gravy freeze beautifully for up to three months. However, be aware that the potatoes may become slightly grainy after thawing. For a fun twist on leftovers, shred the beef and toss it with some pappardelle pasta for a quick ragu, or pile it onto toasted buns with melted provolone for the ultimate roast beef dip sandwich.
Expert Tips for Success
Always slice your beef against the grain. If you look closely at the meat, you’ll see the muscle fibers running in one direction. By cutting perpendicular to those lines, you’re shortening the fibers, making the meat much easier to chew. It’s a small detail that makes a massive difference in the final texture.
Using a heavy-bottomed pot, like a cast-iron Dutch oven, is essential for even heat distribution. Thin pots can create hot spots that might scorch your gravy during the long roast. Finally, never skip the resting period. Let the meat sit for at least 10 to 15 minutes before slicing. This allows the juices to redistribute throughout the roast so they don’t all run out onto the cutting board the moment you make your first cut.
How do I store leftovers and does this freeze well?
You can store this pot roast in an airtight container in the refrigerator for up to 4 days. It actually tastes better on day two! For freezing, place the meat and gravy in a freezer-safe bag or container for up to 3 months. I recommend freezing the meat and sauce but leaving the potatoes out, as they can become grainy and mealy once thawed and reheated.
Why is my pot roast still tough after the recommended cooking time?
If the meat is tough, it almost always means it needs more time in the oven. Chuck roast is full of collagen that only breaks down after reaching a certain internal temperature over time. If it’s not “fork-tender,” simply put the lid back on and continue roasting in 30-minute increments. It will eventually give in and become tender!
Can I make this without the red wine?
Absolutely. While red wine adds a lovely depth and acidity, you can easily substitute it with an equal amount of beef broth. To mimic the acidity that wine provides, you can add a teaspoon of balsamic vinegar or Worcestershire sauce to the broth. This will keep the flavor profile complex without using any specialized ingredients.
What if I don’t have a Dutch oven?
If you don’t have a heavy Dutch oven, you can perform the searing and sautéing steps in a regular large skillet. Once you’ve deglazed the skillet, transfer everything into a deep baking dish. Cover the dish very tightly with two layers of heavy-duty aluminum foil to ensure no steam escapes, then proceed with the oven roasting as directed.
Why are my vegetables mushy?
Vegetables turn to mush when they are overcooked. This usually happens if they are added at the very beginning of the four-hour cook time. By following the two-stage method and adding the carrots and potatoes halfway through, you ensure they cook just long enough to be soft but still hold their structural integrity.
How do I fix a gravy that is too thin?
If your gravy hasn’t thickened enough after the cornstarch slurry, let it simmer for a few more minutes on the stove. The liquid needs to reduce slightly to concentrate. If it’s still too thin, mix another teaspoon of cornstarch with a teaspoon of cold water and whisk it in. Always remember the liquid must come to a boil to fully activate the thickening power of the starch.
Beef Pot Roast
Course: Main CourseCuisine: AmericanDifficulty: medium6
servings20
minutes4
hours540
kcal240
MinutesA foolproof method for beef chuck roast that avoids tough, dry meat. By searing the beef and slow-roasting at 300°F with aromatics, wine, and root vegetables, you create a succulent family dinner with a thick, glossy homemade gravy.
Ingredients
3 pound beef chuck roast
1 pound baby yellow potatoes, left whole
4 large carrots, peeled and cut into 2-inch chunks
1 large yellow onion, chopped (for flavor base)
3 cups beef broth
1/2 cup dry red wine (optional, for depth)
2 tablespoons tomato paste
4 cloves garlic, minced
3 sprigs fresh rosemary
2 tablespoons vegetable oil
2 tablespoons butter
Salt and black pepper to taste
2 tablespoons cornstarch mixed with 2 tablespoons cold water (slurry)
Fresh parsley, chopped for garnish
Directions
- The most important step to prevent tough meat is the initial sear. Pat the beef completely dry with paper towels. Season generously with salt and pepper on all sides.
- Heat the oil in a large heavy pot or Dutch oven over medium-high heat. Sear the beef for 5 to 7 minutes per side until a deep, dark brown crust forms. Remove the beef and set aside.
- Lower the heat to medium. Add the butter and the chopped onion. Sauté for 5 minutes until softened. Add the garlic and tomato paste, stirring for 1 minute until fragrant and the paste turns a deep brick red.
- Pour in the red wine (if using) or 1/2 cup of the beef broth to deglaze the pan, scraping the bottom with a wooden spoon to release all the browned bits (fond).
- Pour in the remaining beef broth. Place the beef back into the pot. The liquid should come about halfway up the side of the roast.
- Cover with a tight-fitting lid and transfer to a 300°F (150°C) oven. Roast for 2 hours.
- After 2 hours, remove the pot from the oven. Arrange the whole baby potatoes and carrot chunks around the meat. Submerge them slightly in the liquid. Add the rosemary sprigs on top.
- Cover and return to the oven for another 1.5 to 2 hours, or until the beef is fork-tender and the vegetables are soft but hold their shape.
- Transfer the meat and vegetables to a serving platter. Tent with foil to rest.
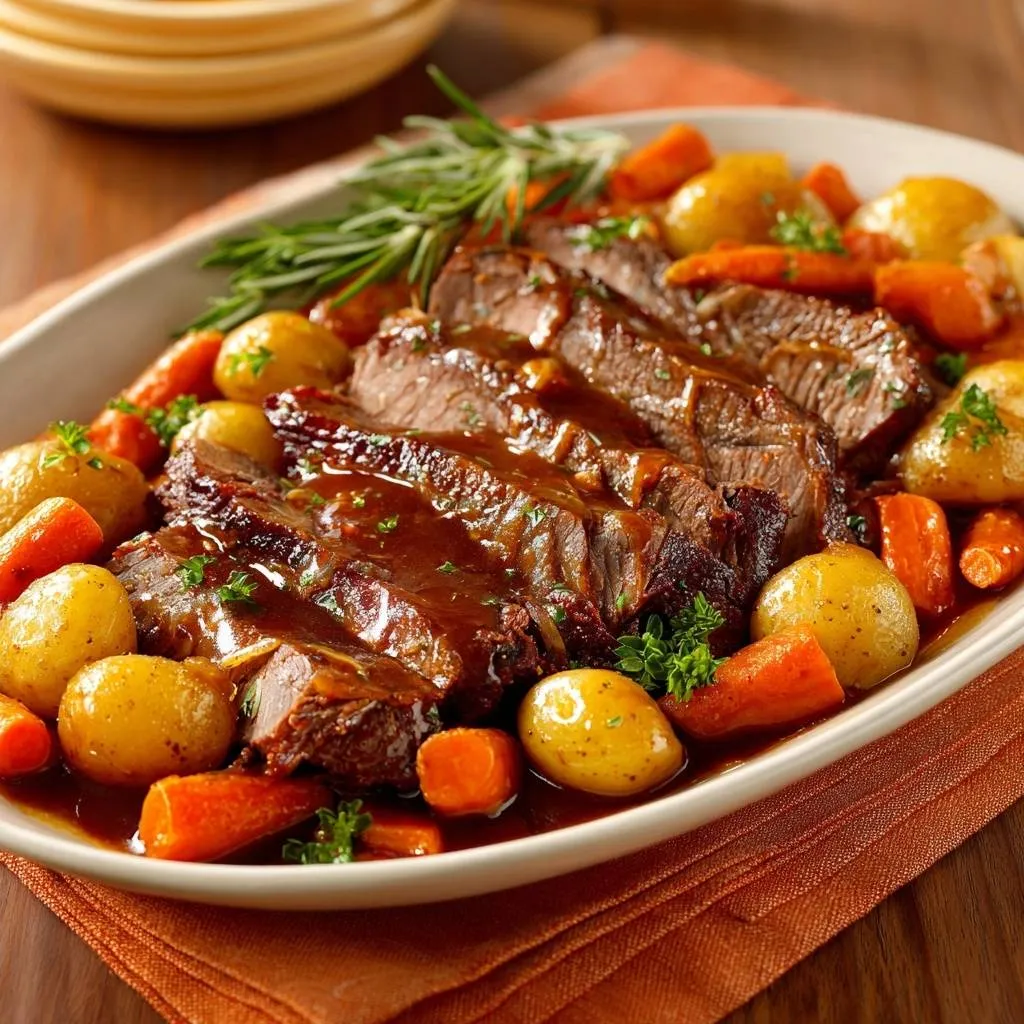
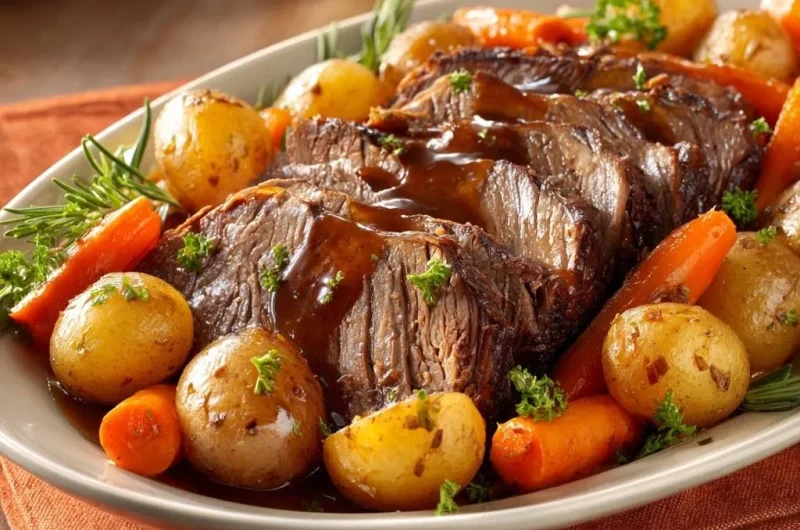
- To achieve the thick, glossy gravy shown in the image, place the pot on the stove over medium heat. Remove the rosemary stems. Whisk the cornstarch slurry into the simmering juices. Boil for 2-3 minutes until the sauce thickens and coats the back of a spoon.
- Slice the beef against the grain into thick portions. Arrange the potatoes and carrots around the meat, pour the hot gravy generously over the center, and garnish with fresh parsley and additional rosemary.
Notes
- The secret to preventing tough meat is the initial sear on a completely dry roast. Always slice the beef against the grain to ensure maximum tenderness. If skipping the wine, replace it with an equal amount of beef broth.