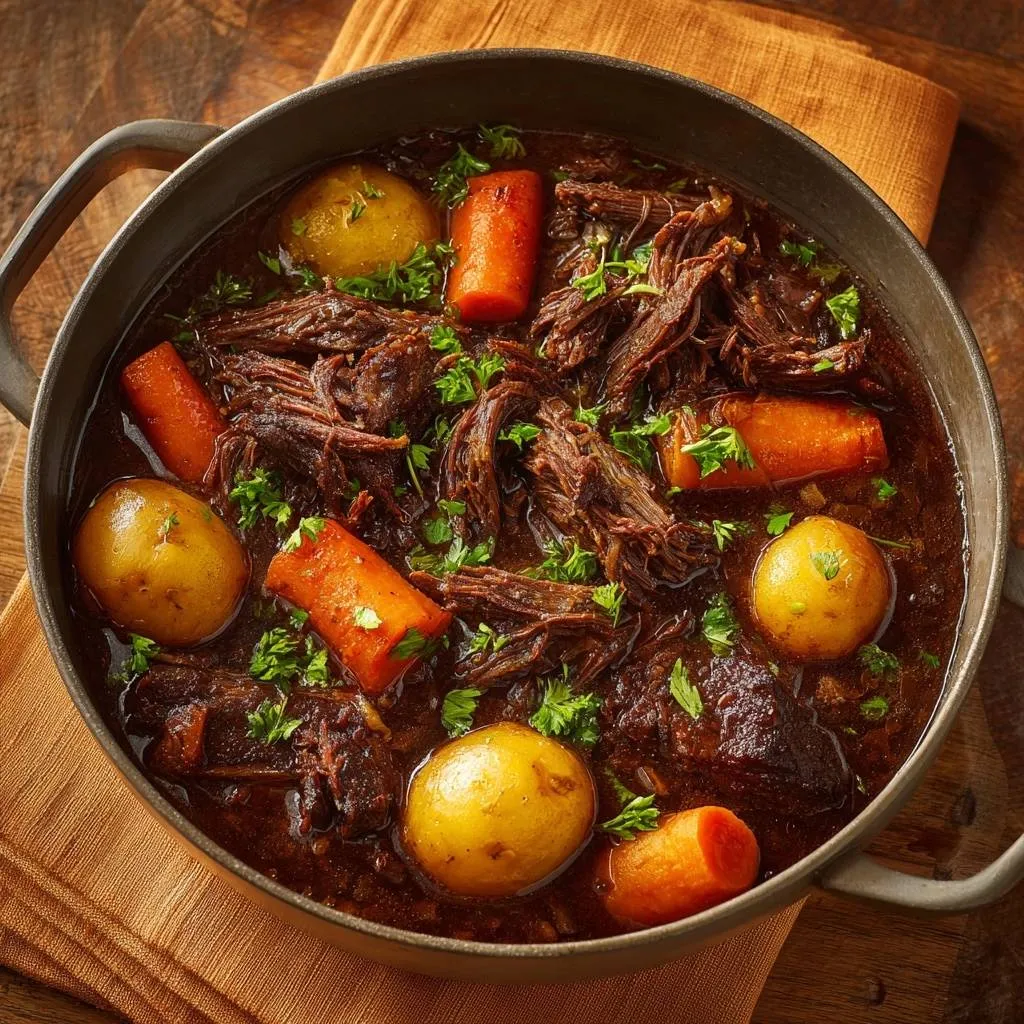
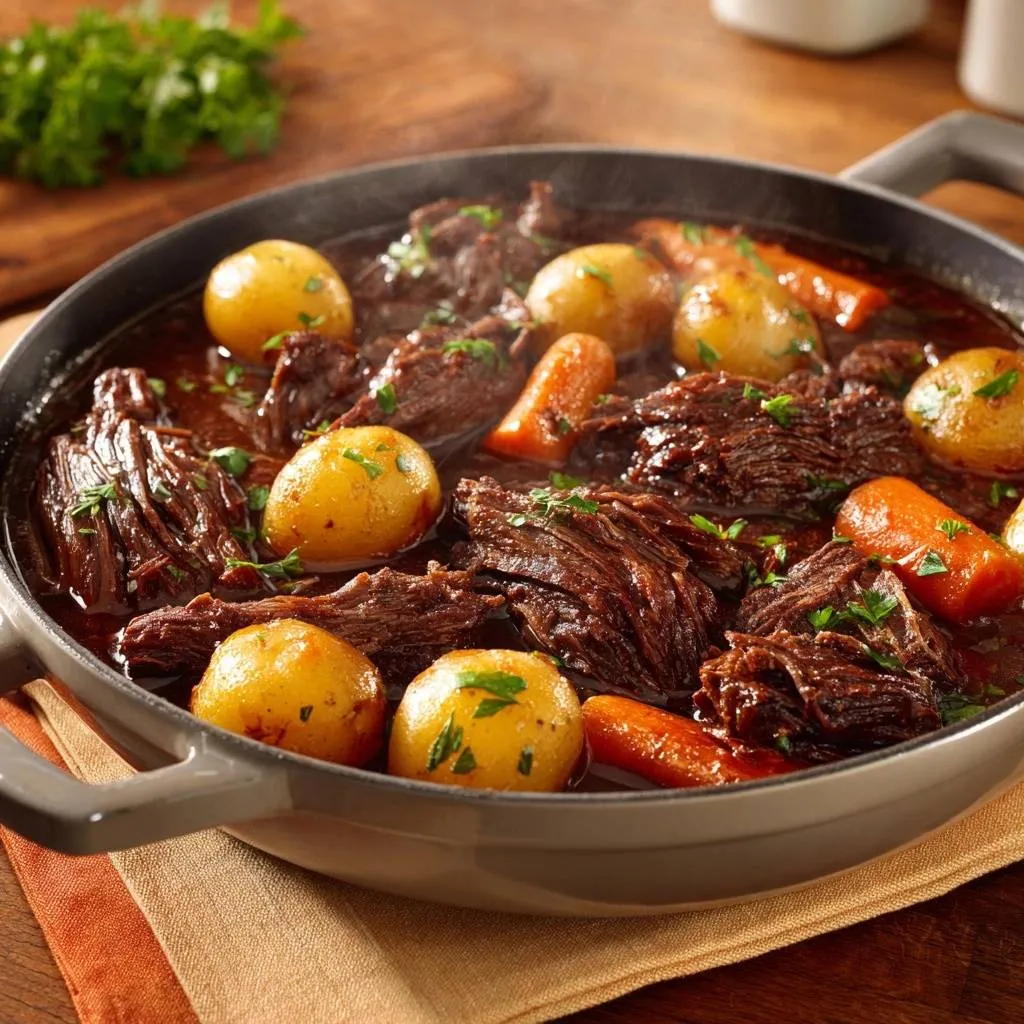
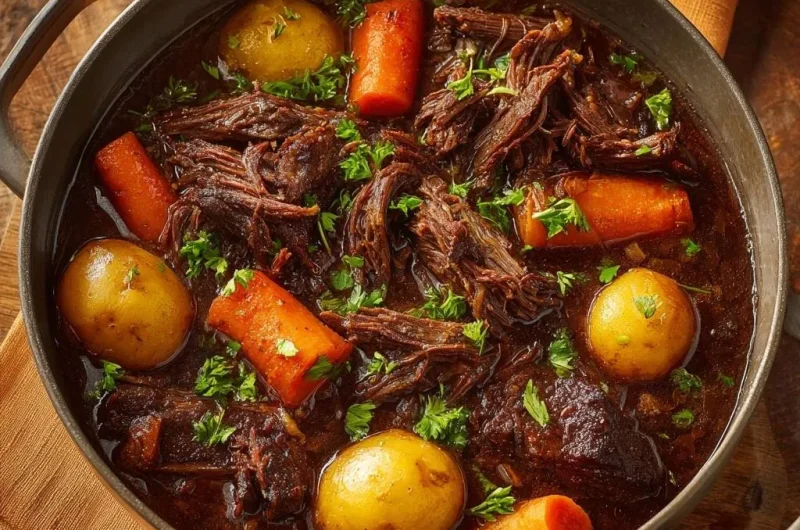
Imagine pulling a heavy Dutch oven from the stove and lifting the lid to reveal a deep, mahogany sauce bubbling around massive, ropey strands of beef. The aroma hits you first—a heady mix of earthy thyme, sharp garlic, and the complex sweetness of a reduced red wine base. Unlike standard stews where the vegetables have surrendered into a grainy mush, this version showcases vibrant carrots and intact baby potatoes that hold their shape perfectly against the fork-tender meat.
Most home cooks struggle with the “stew slump,” where every ingredient ends up with the same muddy texture and muted flavor. We solve this by using a staggered-entry philosophy, treating the beef and the vegetables as two different stages of the same journey. By the time you sit down to eat, you aren’t just eating a bowl of soup; you’re experiencing a rustic, structured braise that feels like it came from a professional French kitchen.
The secret to this specific texture lies in the size of the beef. While most recipes call for one-inch cubes, we start with massive three-inch chunks. This larger surface area allows the beef to withstand a long, slow simmer without disintegrating, eventually allowing you to hand-shred it into those thick, juicy ribbons that catch and hold the rich gravy. It’s a small change that completely transforms the mouthfeel of the final dish.
The Science of Succulent Chuck Roast
Beef chuck is the undisputed king of the stew pot because it’s packed with connective tissue and collagen. In a quick-cooking scenario, this cut would be tough and inedible. However, when you subject it to low, steady heat, that tough collagen undergoes a physical transformation into silky gelatin. This process usually begins in earnest once the internal temperature of the meat stays between 160°F and 180°F for an extended period.
Choosing three-inch chunks over smaller cubes is a strategic move for the long haul. Smaller pieces have more surface area exposed to the liquid, which can actually cause the individual muscle fibers to dry out even as the collagen melts. Larger chunks protect the interior of the meat, ensuring that once you shred it at the end, every strand is dripping with moisture and flavor.
Why Fat Content Dictates Tenderness
When you’re at the butcher counter, look for a roast with heavy white flecks known as marbling. This intramuscular fat is your best friend during a three-hour simmer. As the heat rises, this fat renders slowly, essentially self-basting the beef from the inside out. This internal lubrication is what prevents the meat from feeling “stringy” or dry between the teeth.
Essential Components for a Rich Braising Base
A great stew is built on layers of umami, and it starts with your aromatics. Yellow onions provide a foundational sweetness, while fresh garlic adds a sharp punch that mellows into a nutty undertone. We also lean heavily on tomato paste and Worcestershire sauce. These aren’t just for color; they provide a concentrated savory depth that mimics the effect of a long-aged stock.
Quality matters here because the sauce will reduce and concentrate. If you use ingredients that are overly salty or artificial, those flavors will become unpleasantly dominant by the time the timer dings. Always opt for fresh garlic over the jarred variety to avoid a bitter aftertaste in the final reduction.
Selecting the Right Red Wine
The wine isn’t just for flavor; its natural acidity helps break down the tough muscle fibers in the beef. You want a dry red with enough “backbone” to stand up to the beef, such as a Cabernet Sauvignon, Merlot, or Syrah. Avoid anything labeled “sweet,” as the sugar will caramelize too much and throw off the balance of the savory gravy.
If you prefer to cook without traditional wine, you can easily replicate the depth and acidity. Use a high-quality red grape juice or a non-alcoholic red wine, but be sure to add a tablespoon of balsamic vinegar. The vinegar provides that necessary acidic “bite” that cuts through the richness of the beef fat, keeping the sauce from feeling too heavy on the palate.
The Role of High-Quality Beef Broth
Since this recipe involves a long reduction, the salt content of your broth is critical. I always recommend a low-sodium beef broth or a homemade brown stock. As the liquid evaporates, the salt stays behind. If you start with a full-sodium commercial broth, your stew might end up saltier than the sea by the time the beef is tender.
The Maillard Reaction: Searing for Maximum Flavor
If you put gray meat into a pot, you’ll get a gray-tasting stew. The Maillard reaction is the chemical process that happens when proteins and sugars are exposed to high heat, creating that beautiful brown crust. This crust is where the “beefy” flavor lives. To get a perfect sear, you must pat the beef chunks completely dry with paper towels. Moisture is the enemy of browning; if the meat is wet, it will steam instead of sear.
Don’t rush this step by crowding the pan. If you put too many pieces in at once, the temperature of the Dutch oven will drop, and the meat will release its juices. Work in batches, giving each chunk enough space to breathe. You’re looking for a dark, mahogany crust on all sides. That dark residue left on the bottom of the pot is culinary gold.
Step-by-Step: Building the Braise
Once the meat is seared and removed, the real building begins. You’ll notice brown bits stuck to the bottom of your pot—this is called the “fond.” When you pour in your red wine, use a wooden spoon to scrape those bits up vigorously. This process, called deglazing, incorporates all that concentrated roasted flavor directly into your sauce foundation.
After deglazing, return the beef and its juices to the pot. Add your broth, thyme, and bay leaves. The liquid should come about three-quarters of the way up the meat. You aren’t boiling the beef; you’re gently bathing it. Keep the heat at a bare simmer—just a few lazy bubbles breaking the surface—to ensure the meat stays tender rather than becoming rubbery.
Developing the Roux with Onion and Flour
We use the “Singer” method to thicken this stew. After the onions and garlic are soft, you sprinkle the flour directly over the vegetables. This allows the flour to soak up the fat in the pan, creating a roux-like paste. It’s vital to cook this mixture for about two minutes until it turns a light golden brown. This removes the “raw” flour taste, ensuring your sauce is smooth and nutty rather than pasty.
The Staggered-Entry Method for Perfect Vegetables
The biggest mistake in stew-making is throwing the carrots and potatoes in at the beginning. By the time the beef is tender after three hours, a carrot will have turned into a flavorless orange mush. By waiting until the 2.5-hour mark to add your vegetables, you give them exactly enough time to become fork-tender while maintaining their structural integrity and bright color.
When the vegetables are tender, consider serving them with creamy mashed potatoes.
This method ensures that when you bite into a carrot, it still tastes like a carrot. It provides a necessary textural contrast to the soft, shredded beef. You want the vegetables to be submerged just enough to cook through, but not so long that they begin to dissolve into the sauce and thicken it with starch.
Why Whole Baby Potatoes Outperform Cubes
Baby potatoes are the secret weapon of a rustic stew. Because they are kept whole, the thin skin acts as a natural protective barrier. This prevents the interior starch from absorbing too much acid from the wine, which can sometimes make cubed potatoes feel grainy or mealy. Plus, there’s something incredibly satisfying about pressing your spoon into a whole, buttery potato that has been bathed in beef drippings.
Achieving the Signature Rustic Shredded Texture
Once the timer goes off and the vegetables are tender, it’s time for the final transformation. Take two large forks and gently pull apart those three-inch chunks of beef. Because you cooked them low and slow, they should yield with almost no resistance. Don’t over-shred them into a fine mince; you want large, ropey strands that look rustic and substantial.
This texture is what gives the dish its “visual weight.” When you ladle it into a bowl, the shredded beef creates a nest that holds the sauce and the vegetables. It looks much more appetizing than uniform cubes and provides a much better surface area for the rich red wine gravy to cling to every single bite.
Troubleshooting Your Red Wine Beef Stew
If your sauce looks a bit thin at the end, don’t panic. Simply remove the lid and turn the heat up to a medium simmer for about ten minutes. This evaporates the excess water and concentrates the flavors. Conversely, if the meat still feels tough after 2.5 hours, it simply needs more time. Every cow is different, and sometimes those connective tissues just need an extra thirty minutes of patience to finally melt.
Always taste for salt at the very end. Because the sauce reduces, the saltiness will increase over time. If you find it’s a bit too salty, a tiny splash of water or a pinch of sugar can help balance it out. If the flavor feels “flat,” a teaspoon of Worcestershire sauce or a tiny drop of balsamic vinegar can wake up the entire pot.
Make-Ahead Strategies and Storage
This stew is a prime candidate for meal prep because it actually tastes better the next day. As the stew cools, the flavors continue to meld and the beef absorbs even more of the braising liquid. If you’re making this for a dinner party, consider cooking it a day in advance. Just be sure to cool it quickly in shallow containers before putting it in the fridge to ensure food safety.
When reheating, do it gently on the stovetop over medium-low heat. If you blast it in the microwave, you risk toughening the beef and overcooking the potatoes. If the sauce has thickened too much in the fridge (which it will, thanks to all that natural gelatin), just add a splash of beef broth or water to loosen it back up to its original glory.
Optimal Pairings for a Hearty Beef Braise
Because this stew is so rich and savory, you want sides that offer contrast. A thick slice of toasted sourdough is mandatory for mopping up the extra gravy. If you want something more substantial, serve the stew over a bed of creamy polenta or buttered egg noodles. The mildness of the grains allows the complex red wine sauce to really shine.
To cut through the fat, a simple side salad with a sharp lemon vinaigrette or some bitter greens like arugula works wonders. The acidity in the salad refreshes your palate between bites of the heavy beef, making the whole meal feel more balanced and less like a “food coma” in a bowl.
The Importance of Fresh Parsley Garnish
Never skip the parsley. After three hours of simmering, the flavors in the pot are very “deep” and “bassy.” A handful of freshly chopped parsley adds a hit of chlorophyll and brightness that acts as a high note. It provides a fresh enzyme crunch and a pop of color that makes the dish look as vibrant as it tastes. It’s the finishing touch that moves the dish from a home-cooked meal to a restaurant-quality experience.
Expert Tips for Success
Can I use a slow cooker for this specific staggered method?
Yes, you can, but you must still sear the meat in a pan first to get that flavor. Cook the beef on low for 6-7 hours, then add the vegetables for the final 1.5 to 2 hours. The stovetop is generally better for sauce reduction, so you might need to thicken the slow cooker version with a little cornstarch slurry at the end.
Why is my beef still tough after 3 hours?
Toughness in a stew usually means the collagen hasn’t finished breaking down yet. It’s rarely a matter of overcooking; it’s almost always a matter of needing more time. Keep the heat low and give it another 30 minutes. Once it hits that magic temperature, it will suddenly turn tender.
Can I substitute dried herbs for fresh?
This recipe uses dried thyme because it stands up well to long cooking times. If you want to use fresh thyme, use three times the amount (about 2 tablespoons of fresh leaves). Fresh parsley should always be used at the very end as a garnish, as its delicate flavor would be lost during the long simmer.
How do I fix a sauce that is too salty?
If the reduction went too far and the salt is overwhelming, add a peeled, halved raw potato to the pot and simmer for 15 minutes; it will absorb some of the salt. Alternatively, adding a splash of unsalted broth or a tiny bit of honey can help mask the saltiness without thinning the sauce too much.
What is the best Dutch oven size for 3 pounds of beef?
A 5-quart to 7-quart Dutch oven is ideal. You want enough room to sear the meat without it being cramped, and enough depth so the liquid can comfortably cover the beef and vegetables without boiling over. Heavy cast iron is preferred because it holds a very steady, even heat.
Red Wine Beef Stew
Course: Main CourseCuisine: AmericanDifficulty: medium6
servings20
minutes3
hours30
minutes550
kcal180
MinutesThis recipe achieves a rich, deep flavor and ideal texture by searing large beef chunks and adding vegetables later in the process to prevent them from becoming mushy. The result is a hearty stew with thick, ropey beef shreds and vibrant, firm vegetables.
Ingredients
3 pounds beef chuck roast, cut into large 3-inch chunks
2 tablespoons vegetable oil
1 large yellow onion, diced
4 cloves garlic, minced
2 tablespoons tomato paste
1/4 cup all-purpose flour (for thickening)
3 cups beef broth
1 cup dry red wine (or non-alcoholic red wine with 1 tablespoon balsamic vinegar)
1 tablespoon Worcestershire sauce
2 teaspoons dried thyme
2 bay leaves
1 pound small yellow baby potatoes, kept whole
4 large carrots, peeled and cut into thick 2-inch cylinders
Salt and black pepper to taste
1/2 cup fresh parsley, roughly chopped for garnish
Directions
- Pat the beef chunks completely dry with paper towels. Season generously with salt and pepper.
- Heat oil in a large heavy-bottomed Dutch oven over medium-high heat. Sear the beef in batches until a deep, dark brown crust forms on all sides. Remove beef and set aside.
- Lower heat to medium. Add onions and cook until softened and translucent, about 5 minutes. Stir in garlic and tomato paste, cooking for 1 minute.
- Sprinkle the flour over the onion mixture and stir for 1-2 minutes to cook out the raw flour taste.
- Slowly pour in the red wine to deglaze the pan, scraping the bottom vigorously to release the “fond” (brown bits).
- Return the beef and any accumulated juices to the pot. Add the beef broth, Worcestershire sauce, thyme, and bay leaves. The liquid should almost cover the beef. Bring to a gentle simmer, cover tightly, and cook on low heat for 2.5 hours.
- After 2.5 hours, add the whole baby potatoes and thick carrot chunks to the pot. Submerge them slightly in the liquid. Cover and continue simmering for 45 to 60 minutes.
- Once the vegetables are fork-tender, use two forks to gently break the large beef chunks into the thick, ropey shreds seen in the image. Do not over-shred; keep the pieces large and rustic.
- Remove the bay leaves. Taste and adjust salt and pepper. If the sauce is too thin, simmer uncovered for 5-10 minutes.
- Ladle into bowls, ensuring each serving has whole potatoes and intact carrots. Garnish heavily with fresh chopped parsley to match the visual presentation.
Notes
- For a non-alcoholic version, substitute the red wine with 1 cup of beef broth and 1 tablespoon of balsamic vinegar. Ensure beef is patted dry before searing to achieve a proper crust.