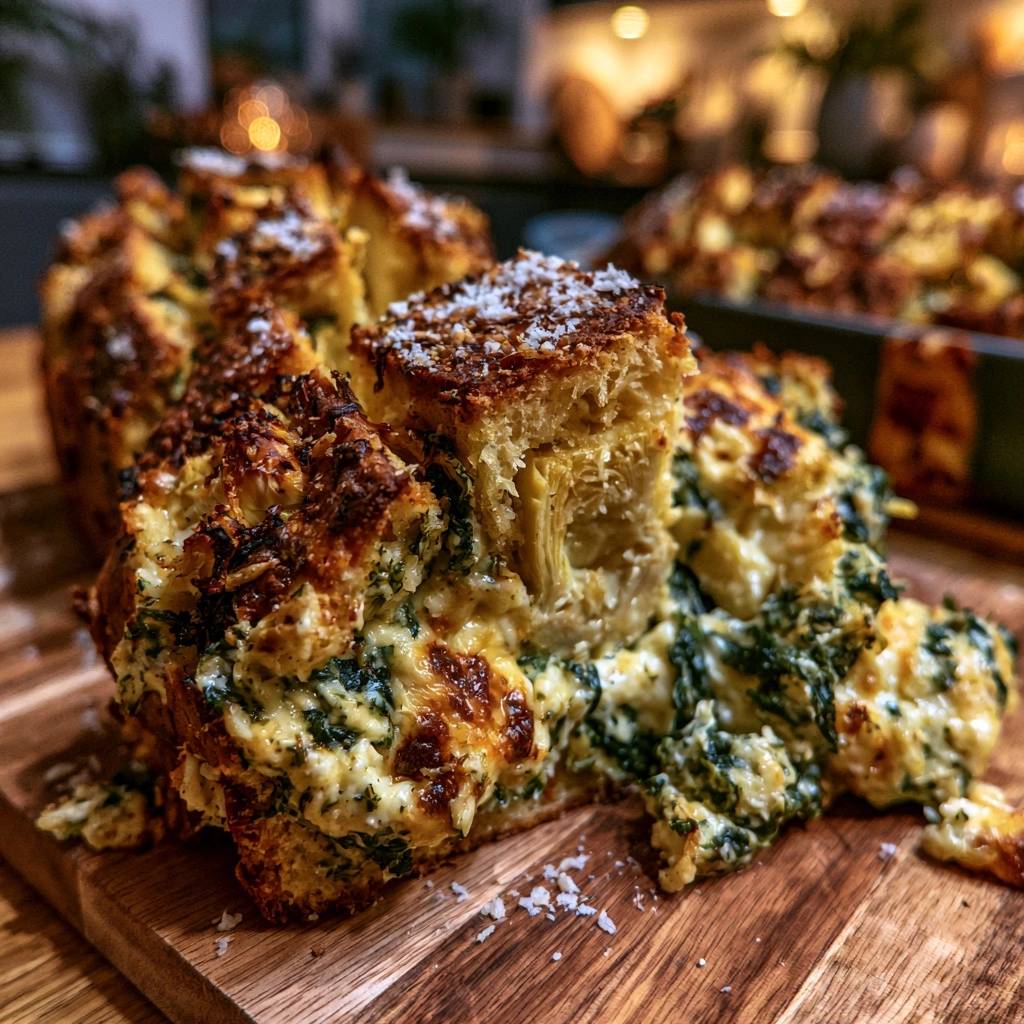
Imagine pulling a warm, golden cube of sourdough from a steaming loaf, only to find it’s perfectly crisp on the outside and dripping with a molten, creamy spinach and artichoke center. Most people struggle with this dish because the bread turns into a soggy, oil-soaked mess before the cheese even melts. However, when you master the balance of moisture control and high-heat finishing, you create an appetizer that is truly the star of any table.
The secret to this Spinach Artichoke Pull-Apart Bread isn’t just in the seasoning; it’s in the structural integrity of the loaf. We’re moving away from the heavy, wet dips that drown the bread and instead focusing on a “dry-fill” technique. This ensures every bite has that satisfying crunch you crave while maintaining a rich, velvety interior that rivals your favorite restaurant dip.
I’ve found that the real game-changer is the “Texture Lock” butter seal. By brushing a parmesan-infused butter over the bread fibers before the final bake, you create a hydrophobic barrier. This prevents the moisture from the vegetables from seeping into the crumb, keeping the bread fluffy and the crust shatteringly crisp. It’s a simple step, but it’s the difference between a mushy loaf and a masterpiece.
The Science of Preventing Soggy Bread
When you combine high-moisture ingredients like spinach and artichokes with porous bread, physics usually works against you. As the loaf heats up, the water trapped in the vegetables turns to steam and then condenses into the bread’s starch structure. This process, known as starch gelatinization, is what causes that dreaded “soggy bottom” that ruins so many pull-apart recipes.
To fight this, we use fat as a protective shield. Fat and water don’t mix, so by saturating the exposed bread surfaces with melted butter, we create a barrier that repels the vegetable juices. Furthermore, the high-heat finish at the end of the recipe evaporates any residual surface moisture, ensuring the Maillard reaction can occur, which gives us that beautiful brown color and toasted flavor.
Why Wringing Spinach is Non-Negotiable
Frozen spinach is a notorious water-retention expert. Even after it’s thawed, the cellular walls of the leaves hold onto a surprising amount of liquid that will leak out the moment it hits the oven. Simply draining it in a colander won’t cut it; you have to be aggressive to get the results you want.
The best method is to place the thawed spinach in a clean, lint-free kitchen towel. Twist the towel tightly and squeeze with all your might over the sink. You’ll be shocked at how much green liquid comes out. You want the spinach to feel almost like dry wool before it goes into your cheese mixture. This ensures the creaminess comes from the fats, not from excess water.
Artichoke Preparation for Maximum Crunch
Canned artichoke hearts are packed in brine, which is another enemy of a crispy loaf. While marinated artichokes are tasty, they often carry too much oil and vinegar for this specific application. Stick to canned hearts in water, but treat them with the same respect as the spinach.
After draining and roughly chopping them, spread the pieces out on several layers of paper towels. Press down firmly with more towels on top to blot away every drop of moisture. By removing this brine, you ensure the artichokes provide a concentrated, earthy flavor and a meaty texture without compromising the bread’s crunch.
Essential Components for the Perfect Loaf
Quality ingredients are the foundation of this dish. Since there are relatively few components, each one has to work hard. We use a blend of mozzarella and parmesan because they serve different purposes. Mozzarella provides that iconic, stretchy “cheese pull” that everyone loves, while parmesan adds a sharp, salty punch and helps create a crusty exterior.
The base of the filling relies on cream cheese for body, but the addition of sour cream or Greek yogurt is vital. These ingredients add a necessary tanginess that cuts through the richness of the cheeses. Without that acidity, the filling can feel heavy and one-dimensional on the palate. Always use full-fat versions for the best mouthfeel and to prevent the filling from breaking under high heat.
Selecting the Right Bread Base
The bread is the vessel for all that cheesy goodness, so it needs to be sturdy. A round sourdough boule or a dense Italian loaf is your best bet. These breads have a thick, chewy crust and a tight enough crumb to hold the filling without falling apart. Avoid soft, pre-sliced sandwich breads or airy French baguettes, as they lack the structural integrity to handle the weight of the spinach and artichoke mixture.
The Cheese Blend: Meltability vs. Flavor
If you have the time, grate your cheese fresh from the block. Pre-shredded cheeses are coated in potato starch or cellulose to prevent clumping in the bag. While convenient, these coatings prevent the cheese from melting into a smooth, cohesive sauce. Freshly grated mozzarella will give you a much better stretch, and freshly grated parmesan will incorporate more evenly into the butter wash.
Step-by-Step: Constructing the Pull-Apart Grid
Creating the grid pattern is where the fun begins. Use a sharp serrated knife to slice the bread. You want to cut about 1-inch apart, going deep into the loaf but stopping about half an inch before you hit the bottom crust. If you cut all the way through, the loaf will lose its shape and the filling will leak out onto the baking sheet.
Once your grid is cut, it’s time to stuff. Don’t just smear the filling on top. Use a small spoon to gently pry the bread cubes apart and push the spinach mixture deep into the “wells.” You want the filling to be tucked away inside the bread. This protects the cheese from burning and ensures that every single bite, even the very bottom of the cube, is loaded with flavor.
The Two-Stage Baking Process
We bake this loaf in two distinct stages to achieve the perfect texture. The first stage involves wrapping the loaf loosely in foil and baking at 375°F. This creates a small steam chamber that melts the cheese all the way to the center of the loaf without drying out the bread. It ensures the interior is hot and gooey.
The second stage is the “crisping phase.” By removing the foil and cranking the heat to 425°F, you allow the moisture on the surface to evaporate quickly. This is when the butter and parmesan on the crust begin to sizzle and brown. Keep a close eye on it during these last 10 minutes; you’re looking for a deep golden hue and a visible bubble in the cheese.
Applying the Parmesan-Butter Barrier
Before the loaf goes into the oven, you’ll brush it with a mixture of melted butter, parmesan, and sea salt. Be generous here. Use a pastry brush to get the butter into the edges of the cracks and all over the top of each bread cube. This isn’t just for flavor; it’s a technical step that fries the surface of the bread slightly, creating a crunch that lasts even as the bread cools down.
Troubleshooting Common Bread Baking Issues
If you notice the top of your bread is browning too quickly before the cheese in the middle has melted, don’t panic. Simply lay a piece of foil loosely over the top (tenting it) to deflect the direct heat while the center finishes cooking. Every oven is different, so use your eyes and nose as your guide.
If your filling feels too runny, it’s likely because the spinach wasn’t dry enough or you used a low-fat sour cream. You can fix this by extending the uncovered baking time by a few minutes to help some of that moisture evaporate. Conversely, if the bread feels too hard, you might have overbaked it during the second stage. Next time, shorten the high-heat phase by two or three minutes.
Flavor Variations and Ingredient Swaps
While the classic spinach and artichoke combo is hard to beat, you can easily customize this loaf. For a Mediterranean twist, try adding some finely chopped sun-dried tomatoes. Just make sure they are drained of all oil and patted dry so they don’t add extra moisture to the bread. A few cloves of roasted garlic mashed into the cream cheese can also add a wonderful depth of flavor.
Adding a Spicy Kick
If you like a bit of heat, red pepper flakes are your best friend. Instead of just mixing them into the cheese, try whisking them into the melted butter. This infuses the fat with spice, which then carries that heat into every crevice of the bread. It provides a more consistent, warming glow rather than occasional spicy bites.
Herb-Infused Crust Options
You can elevate the aroma of your sourdough by adding dried herbs to the butter wash. Dried oregano or thyme works beautifully with the earthy artichokes. If you have fresh rosemary, mince it very finely and mix it with the sea salt before sprinkling it over the finished loaf. The heat from the bread will release the rosemary’s oils, creating an incredible scent as you serve it.
Make-Ahead Strategies and Storage
You can absolutely prepare the spinach and artichoke filling up to 24 hours in advance. Store it in an airtight container in the fridge. However, do not stuff the bread until you are ready to bake. If the filling sits inside the raw bread for too long, the moisture will migrate into the dough, and no amount of high-heat baking will save it from being soggy.
If you have leftovers, store them in an airtight container in the refrigerator for up to three days. To reheat, avoid the microwave at all costs, as it will turn the bread rubbery. Instead, use an air fryer at 350°F for about 5 minutes or a toaster oven. This will reactivate the fats in the crust and bring back that essential crunch while remelting the cheese center.
Expert Tips for Serving a Crowd
Presentation is everything with a pull-apart loaf. I love serving this on a large wooden cutting board. Wood is better than ceramic or metal because it doesn’t trap steam underneath the loaf, which helps keep the bottom crust crisp while people are picking at it. It also makes for a rustic, inviting centerpiece.
Because this dish is very rich and savory, it pairs beautifully with something bright and fresh. A simple arugula salad with a lemon vinaigrette provides a sharp contrast that cleanses the palate between cheesy bites. If you’re serving this as part of a larger meal, it also goes wonderfully alongside a clear vegetable broth or a light tomato soup.
Frequently Asked Questions
Can I use fresh spinach instead of frozen?
Yes, you can use fresh spinach, but you will need a very large amount because it wilts down significantly. Sauté about 15 ounces of fresh spinach until completely wilted, then let it cool and wring it out in a towel just like you would with frozen spinach. If you don’t sauté it first, the raw leaves will release too much water inside the bread during baking.
What if I accidentally cut through the bottom of the bread?
Don’t worry, it happens! If you slice through the bottom crust, create a “cradle” out of aluminum foil. Shape the foil tightly around the bottom and sides of the loaf to hold it together and prevent the cheese from leaking out onto the pan. The loaf will still taste delicious, though it might be a bit messier to pull apart.
Can I use a different cheese like Provolone or Fontina?
Absolutely. Provolone and Fontina are both excellent melting cheeses that would work well in place of mozzarella. Just ensure you keep the parmesan in the mix, as its lower moisture content and high salt levels are crucial for the flavor profile and the crust’s texture.
How do I keep the bread warm during a party?
The best way to keep the loaf warm is to leave it on a wooden board and cover it loosely with a piece of parchment paper or a clean kitchen towel. Avoid plastic wrap, as it will trap steam and make the crust soft. If it cools down too much, you can pop it back into a 350°F oven for 5 minutes to refresh the melt.
Why is my bread still soggy despite wringing the spinach?
If you followed the drying steps and it’s still soggy, you might be over-stuffing the very top of the bread. If the filling sits in a thick layer over the crust, it prevents steam from escaping. Make sure the filling is packed down into the cracks and that the tops of the bread cubes are mostly exposed so they can crisp up properly.
Spinach Artichoke Pull-Apart Bread
Course: AppetizerCuisine: AmericanDifficulty: easy8
servings20
minutes30
minutes50
Minutes380
kcalAmerican
Ingredients
1 large loaf unsliced sourdough or crusty Italian bread
10 ounces frozen chopped spinach, thawed and squeezed bone-dry
1 can (14 ounces) artichoke hearts, drained, squeezed dry, and roughly chopped
8 ounces cream cheese, softened
1/2 cup sour cream or Greek yogurt (for extra creaminess)
1 1/2 cups shredded mozzarella cheese
3/4 cup grated parmesan cheese, divided
3 cloves garlic, minced
1/2 teaspoon red pepper flakes
1/2 teaspoon onion powder
6 tablespoons unsalted butter, melted
1/2 teaspoon sea salt
Flaky sea salt (for finishing)
Directions
- Preheat your oven to 375°F (190°C). Line a baking sheet with parchment paper.
- The Anti-Soggy Secret: Place your thawed spinach in a clean kitchen towel and wring it out until absolutely no more liquid escapes. Do the same with the chopped artichokes by pressing them firmly between several layers of paper towels. Removing this excess water is the only way to prevent a soggy loaf.
- In a medium bowl, combine the cream cheese, sour cream, mozzarella, 1/2 cup of the parmesan, garlic, red pepper flakes, onion powder, dried spinach, and dried artichokes. Mix until well combined and thick.
- Slice the bread lengthwise and then crosswise in 1-inch intervals to create a grid pattern. Cut deep, but be careful not to cut through the bottom crust.
- Use a small spoon or butter knife to gently pry open the crevices. Stuff the cheese and vegetable mixture deep into every crack. Do not overfill the very top; ensure the filling is packed down into the bread “wells.”
- The Texture Lock: Mix the melted butter with the remaining 1/4 cup of parmesan and the sea salt. Brush this generously over the exposed tops of the bread cubes and into the edges of the cracks. This fat barrier crisps the bread fibers before they can absorb moisture from the melting cheese.
- Wrap the entire loaf loosely in aluminum foil. Bake for 20 minutes to allow the center to melt thoroughly.
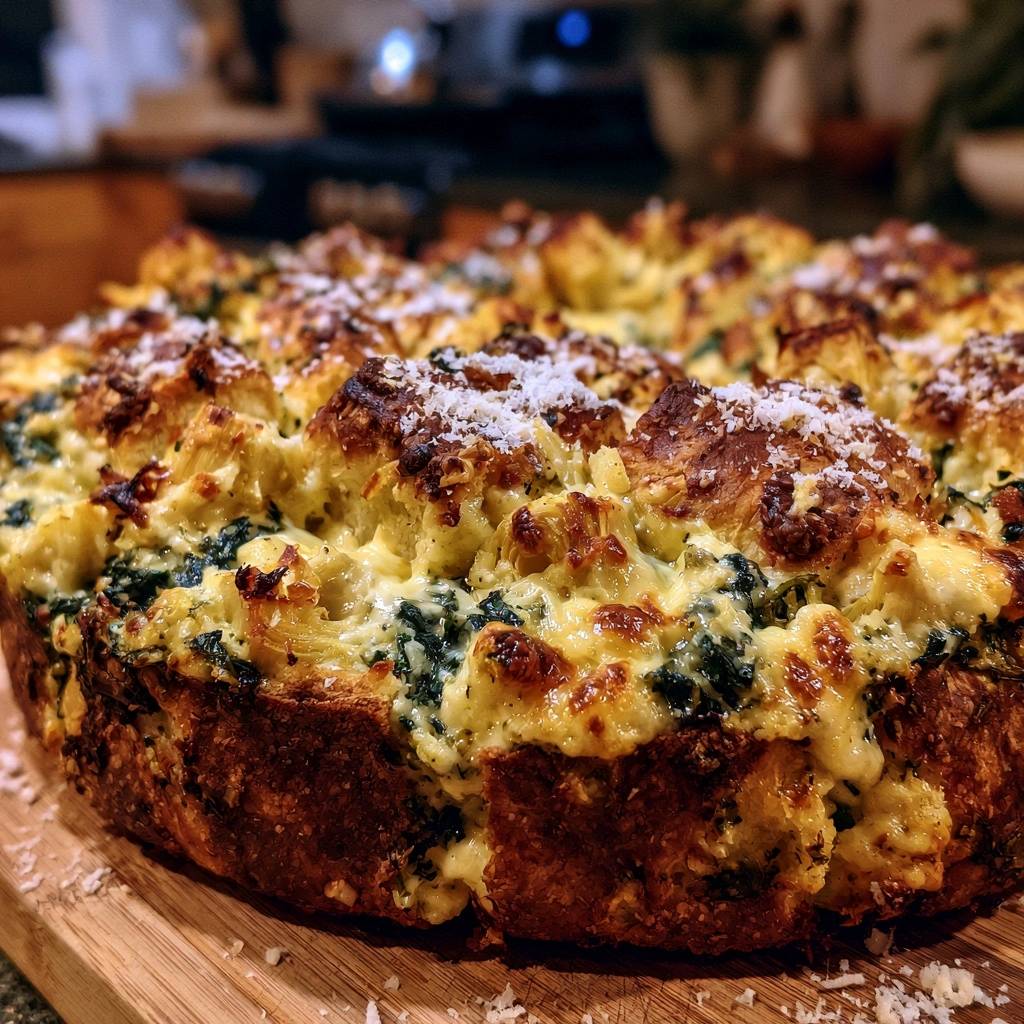
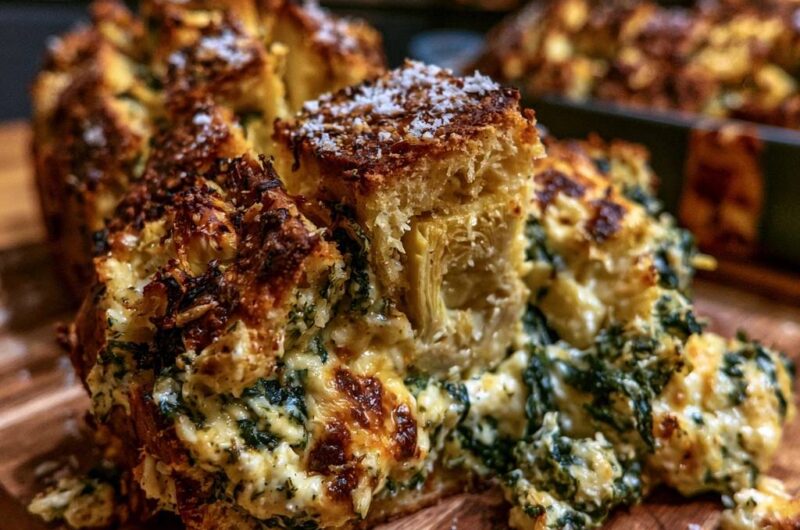
- Remove the foil completely. Increase the oven temperature to 425°F (220°C). Bake for an additional 10 minutes until the cheese is bubbling and the tops of the bread are deeply golden brown and crunchy, as seen in the image.
- Remove from the oven and immediately sprinkle with a pinch of flaky sea salt. Serve hot while the center is molten and the crust is shatteringly crisp.
Notes
- The key to success is wringing the spinach and artichokes until absolutely dry. The butter and parmesan mixture acts as a texture lock to keep the bread fibers crisp.