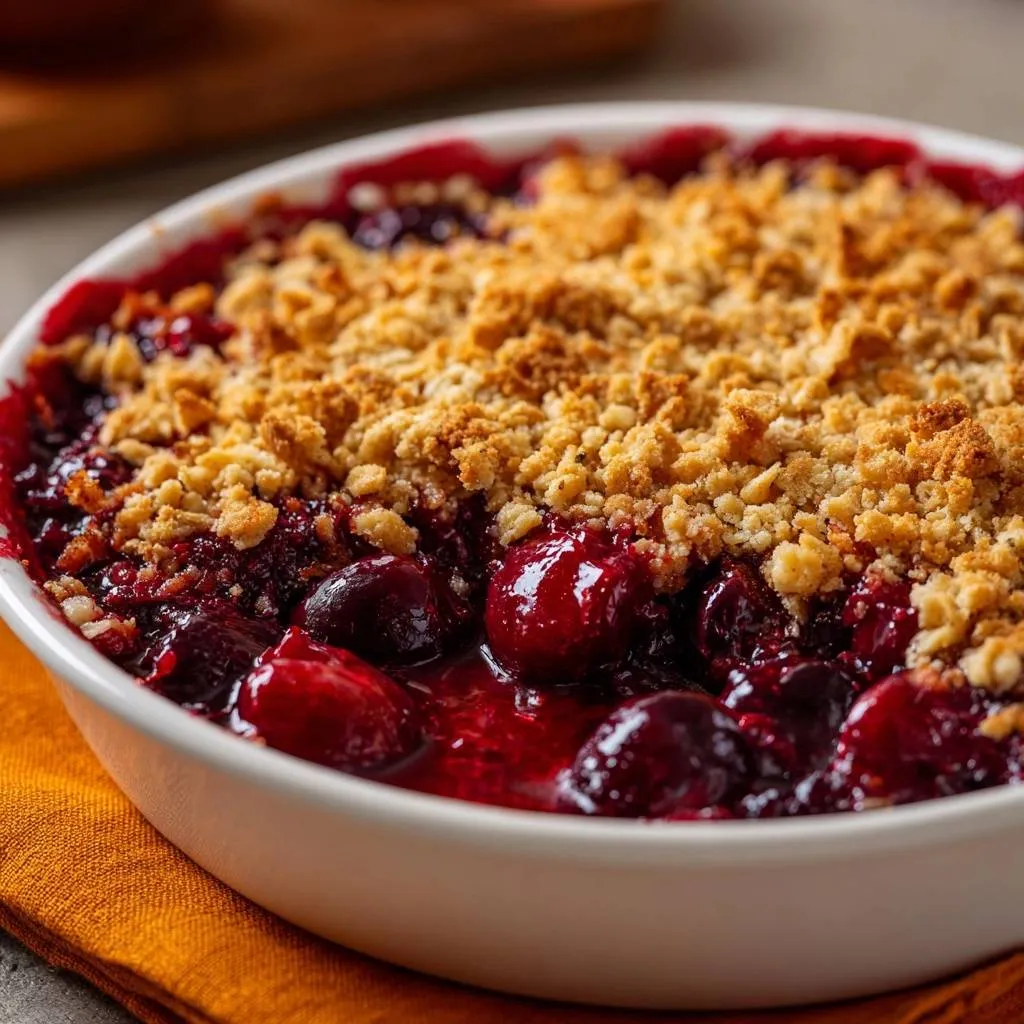
Imagine pulling a deep ceramic dish from the oven, its edges bubbling with a dark, ruby-red syrup that looks more like molten jewels than mere fruit. The topping isn’t a soft, cakey blanket, but a rugged landscape of golden, sandy clusters that shatter with a satisfying crunch under your spoon. This contrast between the jammy, concentrated stone fruit and the crisp, almond-flecked crumble is the hallmark of a perfect summer dessert.
However, most home bakers struggle with the dreaded “soggy bottom,” where the fruit releases a flood of juice that turns the topping into a mushy, grey paste. You want a dessert that holds its shape on the plate, not a fruit soup that requires a straw. By focusing on moisture control and temperature management, we can ensure every bite maintains its structural integrity and vibrant flavor.
The secret to this success lies in the thermal shock of the butter. I’ve found that freezing your crumble topping for just ten minutes before it hits the fruit creates a barrier that prevents the fat from melting too quickly. This small step ensures those distinct, pebbled bits stay perched on top of the cherries rather than sinking into the abyss of the filling.
The Anatomy of a Perfect Fruit Crumble
A “skyscraper” level crumble requires a specific ratio of fruit to topping to achieve the right balance of tartness and sugar. You aren’t just looking for a thin dusting of flour; you want a substantial, craggy layer that provides a textural counterpoint to the soft fruit. The topping should be thick enough to insulate the cherries, allowing them to steam and break down into a thick preserves-like consistency.
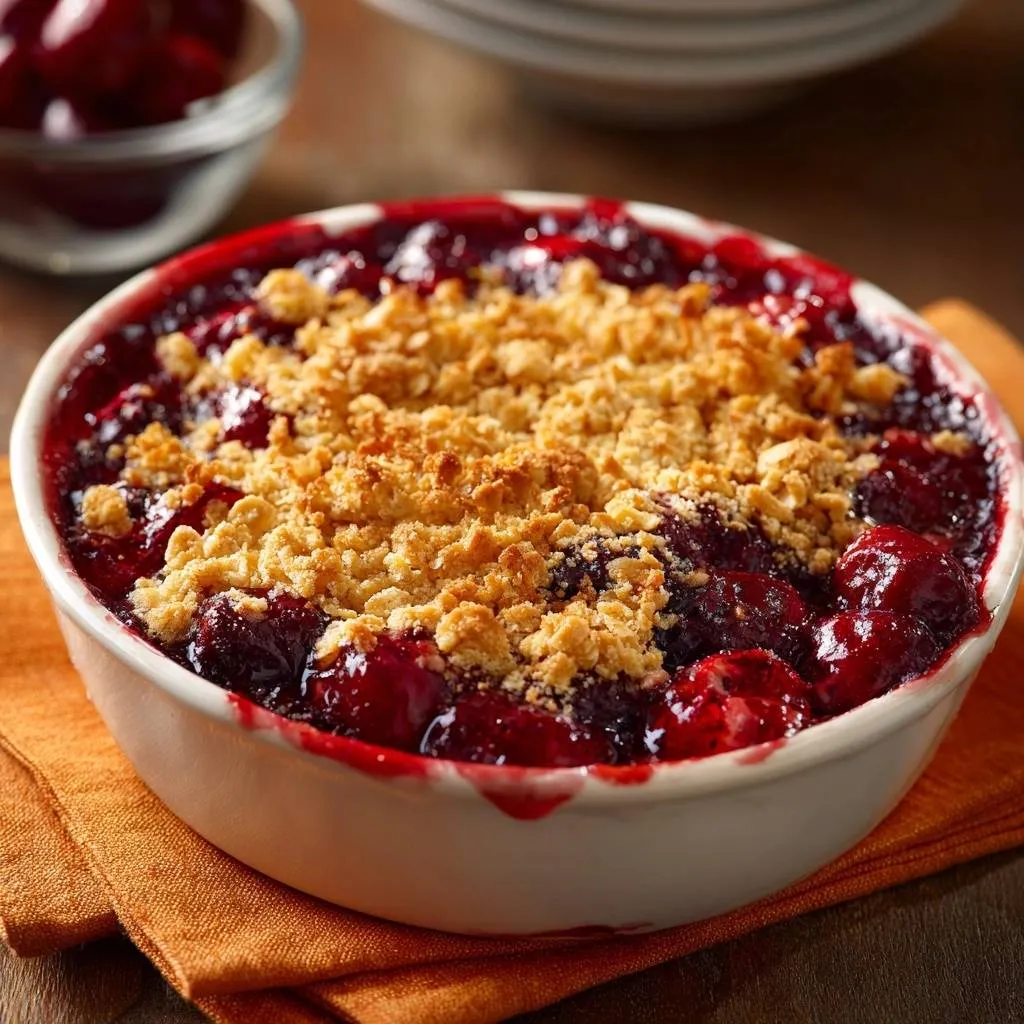
Visually, a successful bake is easy to spot by the “pebbled” texture of the crust. Instead of a flat, uniform surface, you should see varied sizes of crumbs ranging from fine sand to pea-sized nuggets. When the fruit juices start to bubble vigorously around the edges of the dish, staining the golden crust with streaks of deep purple, you know the cornstarch has activated and the filling is properly thickened.
Essential Components for the Warm Cherry Crumble
The heart of this dish is the five cups of pitted dark sweet cherries. If you’re using fresh cherries, look for fruit that is firm, glossy, and deep in color, as these provide the best structural integrity during the long bake. However, frozen cherries are a fantastic year-round option; just ensure you don’t thaw them before tossing with the sugar, as the extra liquid can throw off your thickening ratio.
Granulated sugar is the best choice for the filling because it dissolves cleanly, allowing the natural brightness of the cherries to shine through without the heavy molasses undertones of brown sugar. In the topping, we switch to light brown sugar. The moisture in the brown sugar helps bind the flour and butter together into those coveted clumps, while also providing a hint of caramelization that pairs beautifully with the toasted nuts.
The Role of Almond Flour and Pecans
Using a blend of all-purpose and almond flour is a total game-changer for the texture of your crumble. While all-purpose flour provides the necessary gluten to hold the crumbs together, almond flour adds a delicate, sandy quality that prevents the topping from becoming a solid, tough sheet of dough. It introduces a subtle nuttiness that echoes the natural almond-like flavor found in cherry pits.
Adding chopped pecans is optional, but highly recommended if you enjoy a bit of “snap” in your dessert. The pecans toast beautifully in the 375-degree oven, providing a fatty, earthy contrast to the sweet fruit. If you prefer a smoother texture, you can leave them out, but the almond flour will still provide that sophisticated, professional-bakery mouthfeel.
Why Cornstarch and Lemon Juice are Non-Negotiable
Think of cornstarch as the structural engineer of your cherry filling. Without it, the heat of the oven breaks down the cell walls of the fruit, releasing a “watery soup” that ruins the dish. The cornstarch binds that water into a glossy, thick sauce that coats every cherry. Therefore, ensuring the starch is evenly distributed before baking is the most important step for a clean slice.
Lemon juice might seem like a minor addition, but it performs a vital culinary role by providing acidity. This acid cuts through the intense sweetness of the sugar and the richness of the butter topping. It brightens the entire flavor profile, making the cherries taste more like themselves and less like a cloying candy.
The Science of the Anti-Soggy Bottom
The “Anti-Soggy” philosophy is all about managing the water content of the fruit. As cherries heat up, they lose their physical structure and dump their internal juices into the bottom of the dish. If this liquid stays thin, it migrates upward into the topping, hydrating the flour and turning it into a gummy mess before it has a chance to crisp up.
By creating a cornstarch slurry directly in the bowl with the fruit, you are preparing a trap for that moisture. As the juices reach a simmer, the starch granules swell and gelatinize, turning the liquid into a thick, jammy syrup. This syrup is too heavy to soak into the topping, effectively protecting the crispness of the crust while creating a luxurious mouthfeel in the filling.
Furthermore, the choice of a ceramic baking dish helps regulate this process. Ceramic heats up more slowly than metal, which prevents the bottom of the fruit from scorching before the middle has reached the necessary temperature to activate the thickener. This steady, even heat is essential for a uniform consistency throughout the entire 9-inch dish.
The Thermal Shock: Why We Freeze the Topping
The “Pro Tip” of chilling your crumble topping in the freezer for ten minutes is rooted in pure physics. When cold, solid butter hits a hot 375°F oven, the tiny amount of water trapped inside the butter evaporates instantly. This creates microscopic steam pockets that lift the flour, resulting in a light, crisp, pebbled texture.
If the butter is room temperature or even slightly warm when it enters the oven, it simply melts and soaks into the flour. This leads to a greasy, sunken layer that lacks any structural definition. By keeping the fat frozen until the last possible second, you guarantee that the topping stays on top of the fruit rather than becoming part of it.
Step-by-Step: Preparing the Cherry Base
Start by tossing your pitted cherries with the vanilla, sugar, and lemon juice in a large mixing bowl. Once the fruit is coated, sprinkle the cornstarch over the top and toss again vigorously. You want to see a light, cloudy coating on every single cherry; if you see white clumps of starch, keep mixing until they disappear into the fruit juices.
Transfer the mixture into your ceramic dish, pressing down slightly to ensure there aren’t any massive air pockets. The fruit will shrink as it cooks, so it’s okay if the dish looks quite full. The dark red hue of the raw cherries will eventually transform into a deep, translucent burgundy as the sugar and starch work their magic in the heat.
Technique: Achieving the Sandy Crumble Texture
When preparing the topping, you can use a pastry cutter or your fingertips to work the cold, cubed butter into the dry ingredients. If you use your hands, work quickly so the heat from your skin doesn’t soften the butter too much. You are looking for a mixture that resembles coarse sand but still has several “pea-sized chunks” of visible butter remaining.
For an even more shatteringly crisp topping, check out this perfect cherry crisp.
Be careful not to over-mix the dough into a solid ball. If you overwork the flour, you’ll develop too much gluten, resulting in a tough, cookie-like lid rather than a light, friable crumble. Once the mixture holds together when squeezed but shatters easily when poked, it is ready for its short stint in the freezer.
The Baking Phase: Heat and Timing
Baking at 375°F (190°C) is the “sweet spot” for this recipe. This temperature is high enough to brown the almond flour and pecans quickly, but not so hot that the fruit burns before the center is bubbling. You should place the dish on the middle rack to ensure even heat distribution from both the top and bottom elements.
Keep a close eye on the dish around the 35-minute mark. You are looking for two specific cues: the topping should be a deep, toasted golden brown, and the fruit juices must be bubbling vigorously at the edges. If the juices are still thin and watery, give it another five minutes; that vigorous bubble is the signal that the cornstarch has reached its full thickening power.
The Critical Resting Period
I know it’s tempting to scoop into the crumble the second it leaves the oven, but you must wait at least 20 minutes. This isn’t just about avoiding a burnt tongue; it’s about the science of starch retrogradation. As the filling cools slightly, the cornstarch molecules begin to form a firmer bond, setting the juices into a thick, jammy consistency.
If you cut into it immediately, the hot juices will run to the bottom of the hole you’ve created, leaving the rest of the fruit dry and the bottom of your serving bowl a watery mess. Patience is rewarded with a dessert that holds its shape and has a much more concentrated, intense cherry flavor. The resting period allows the flavors to marry and the topping to fully crisp up as it air-dries.
Troubleshooting Common Crumble Failures
If your topping turns out “floury” or dry, you likely didn’t incorporate the butter well enough or used too much flour. Next time, ensure the butter is distributed until no dry, white patches of flour remain. Conversely, if the topping is greasy and flat, your butter was likely too warm before it hit the oven; don’t skip the freezer step!
For a filling that tastes too tart, you can sprinkle a little extra sugar over the fruit before adding the topping next time. However, if the bake is already done, a side of sweet cream can balance the acidity. If the filling is too runny even after resting, it usually means the cornstarch didn’t reach a high enough temperature to “bloom,” or the fruit was exceptionally juicy and needed an extra tablespoon of starch.
Flavor Variations and Ingredient Swaps
This recipe is quite flexible if you need to make adjustments based on your pantry. If you have a nut allergy, simply replace the almond flour with more all-purpose flour and omit the pecans. For a gluten-free version, a high-quality 1:1 gluten-free flour blend works perfectly in the topping, as the almond flour already does a lot of the heavy lifting for the texture.
You can also play with the spice profile. While cinnamon is a classic, adding a half-teaspoon of ground cardamom or a teaspoon of freshly grated ginger to the cherry base adds a sophisticated, spicy kick. If you don’t have pecans, walnuts or slivered almonds make excellent substitutes for that necessary crunch.
Optimal Pairings for Warm Stone Fruit
The heat of the cherries begs for a cold companion. A scoop of high-quality vanilla bean gelato is the gold standard, as it melts into the nooks and crannies of the crumble topping. For something less sweet, a dollop of unsweetened crème fraîche or a splash of heavy cream provides a silky, tangy contrast that highlights the fruit’s natural sugars.
If you want to try something a bit more adventurous, a small wedge of sharp, aged white cheddar on the side is a traditional pairing in some regions. The saltiness and sharpness of the cheese cut through the jammy cherries in a way that is surprisingly addictive. A cold glass of sparkling apple cider also makes a refreshing accompaniment to the warm, spiced dessert.
Storage and Reheating for Maximum Crispness
Store any leftovers in an airtight container in the refrigerator for up to three days. Be aware that the topping will naturally soften over time as it absorbs moisture from the fruit. To restore that “day one” crunch, avoid the microwave, which will only make the topping soggier and the fruit rubbery.
Instead, reheat individual portions in a 350°F oven or toaster oven for about 10 minutes. This recrisps the butter in the topping and warms the cherries through evenly. You can also freeze the unbaked crumble; simply assemble the dish, wrap it tightly in foil, and freeze for up to three months. Bake it directly from frozen, adding about 15-20 minutes to the total cook time.
Expert Tips for the Best Warm Cherry Crumble
Can I use canned cherry pie filling?
No, I strongly recommend against using canned pie filling for this recipe. Canned fillings are typically loaded with excess corn syrup and artificial thickeners, which lack the structural integrity and bright, tart flavor of whole cherries. They also tend to be much sweeter, which would make the overall dish cloying when combined with the almond crumble topping.
How do I pit cherries quickly without a pitter?
If you don’t own a cherry pitter, you can use a sturdy straw or an empty glass bottle. Place the cherry on the mouth of the bottle and push a straw or a chopstick through the center. The pit will pop out and fall into the bottle, keeping your workspace clean. It takes a little longer than a dedicated tool, but it’s very effective for a single batch.
Why is my crumble topping sinking into the fruit?
This usually happens for two reasons: either the fruit wasn’t packed tightly enough in the dish, or the topping wasn’t chilled properly. If there are large gaps between the cherries, the topping will naturally fall into those holes as the butter melts. Additionally, if the topping is warm, it loses its “pebbled” structure and turns into a liquid state too quickly, causing it to merge with the fruit juices.
Can I reduce the sugar in the filling?
You can reduce the granulated sugar by a few tablespoons if your cherries are exceptionally sweet, but be careful. Sugar doesn’t just provide sweetness; it also interacts with the cornstarch to create the proper viscosity in the sauce. If you cut the sugar too much, the juices may not thicken correctly, and the fruit may taste overly acidic. If you do reduce the sugar, consider adding an extra teaspoon of cornstarch to compensate for the loss of syrupy consistency.
Cherry Crumble
Course: DessertCuisine: AmericanDifficulty: medium6
servings15
minutes40
minutes340
kcal55
MinutesThis recipe solves the common problem of watery fruit crumbles by using a cornstarch slurry and a chilled topping technique. The result is a deep-dish dessert with vibrant dark sweet cherries and a toasted, pebbled crust.
Ingredients
5 cups fresh or frozen pitted dark sweet cherries
1/2 cup granulated sugar
2 tablespoons cornstarch
1 tablespoon lemon juice
1 teaspoon vanilla extract
1 cup all-purpose flour
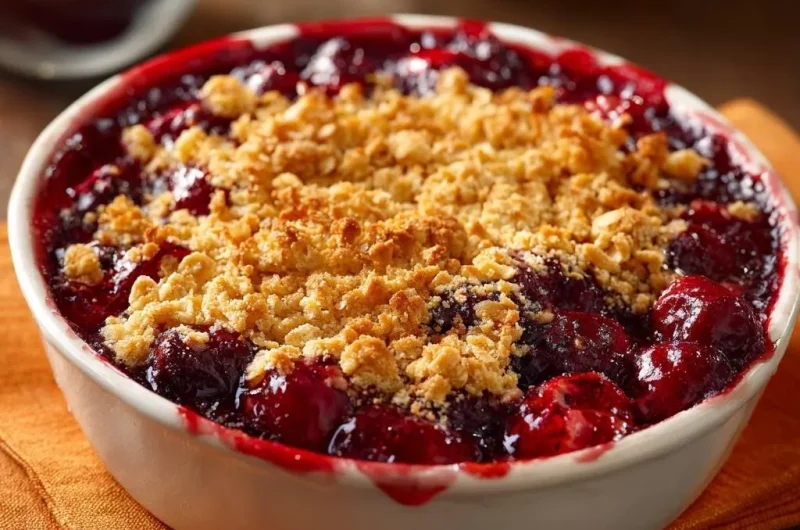
1/2 cup almond flour (for the fine, sandy texture shown in the image)
1/2 cup packed light brown sugar
1/2 cup cold unsalted butter, cubed
1/2 teaspoon ground cinnamon
1/4 teaspoon salt
1/4 cup chopped pecans (optional, for added crunch)
Directions
- Preheat your oven to 375 degrees F (190 degrees C).
- In a large bowl, toss the cherries with the granulated sugar, lemon juice, vanilla, and cornstarch. Ensure the cornstarch is evenly distributed; this is the secret to the anti-soggy bottom as it binds the juices into a thick, glossy sauce rather than a watery soup.
- Transfer the cherry mixture into a 9-inch deep-dish white ceramic baking dish.
- In a separate bowl, combine the flour, almond flour, brown sugar, cinnamon, and salt.
- Use a pastry cutter or your fingers to work the cold butter into the flour mixture until it resembles coarse, sandy crumbs with some pea-sized chunks. If using pecans, stir them in now.
- The Pro Tip: Place the crumble topping in the freezer for 10 minutes before putting it on the fruit. This ensures the butter stays solid until it hits the oven heat, preventing a greasy, sunken topping and maintaining the distinct “pebbled” look seen in the image.
- Sprinkle the chilled crumble evenly over the cherries, leaving some of the dark red fruit visible around the edges.
- Bake for 35 to 40 minutes until the fruit juices are bubbling vigorously and the topping is a deep, toasted golden brown.
- The Critical Step: Let the crumble rest for at least 20 minutes before serving. This resting period allows the cornstarch to fully hydrate and set the fruit juices, guaranteeing a thick, jammy texture rather than a runny mess.
Notes
- For the best results, freeze the crumble topping for 10 minutes before baking to ensure a pebbled texture. Always let the dish rest for 20 minutes after baking to allow the juices to set into a jammy consistency.