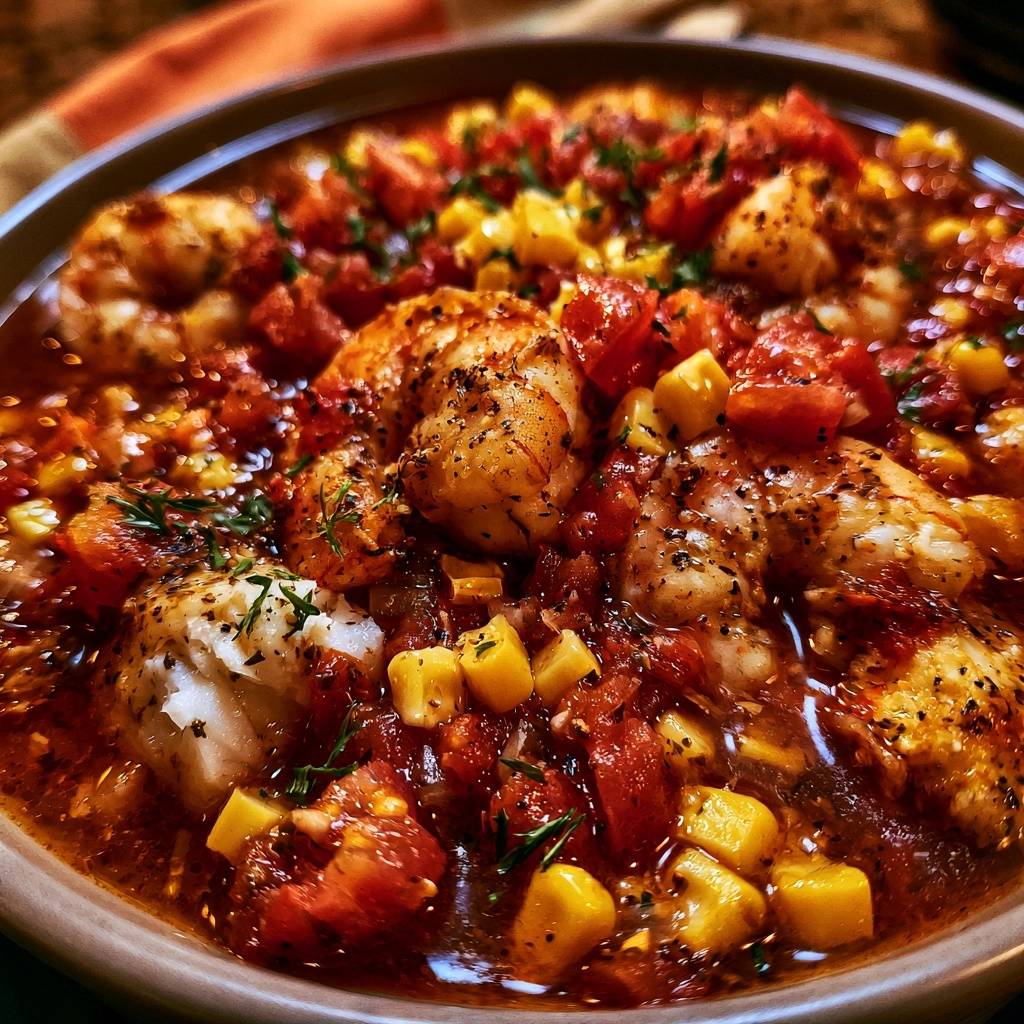
Stop settling for tough, overcooked seafood that feels like chewing on pencil erasers. We’ve all been there, watching beautiful jumbo shrimp shrink into tight, rubbery knots because they spent too much time in the pan. The secret to restaurant-quality results isn’t a fancy culinary degree; it’s all about the timing and the temperature of your sauce.
This Zesty Tomato and Corn Shrimp Skillet relies on a specific layering technique to ensure your shrimp stay plump and tender. By pairing the bright acidity of Roma tomatoes with the natural sweetness of corn, you create a “Skillet Synergy” that tastes like it simmered for hours. In reality, you’ll have this vibrant, savory meal on the table in just 15 minutes.
The real trick to this dish is the two-stage cooking process. Most home cooks make the mistake of boiling their shrimp directly in the sauce, which leads to a mushy texture and bland flavor. Instead, we’re going to sear them first to lock in juices and then finish them gently in the residual heat of the vegetable reduction. It’s a total game-changer for your weeknight rotation.
The Science of Succulent Seafood
Shrimp are almost entirely protein, and those proteins react very quickly to heat. When you cook shrimp, the muscle fibers contract and squeeze out moisture. If you keep the heat high for too long, the shrimp become dry and tough. This is why we use the “Carryover Cooking” principle in this recipe.
By removing the shrimp from the skillet while the centers are still slightly translucent, you prevent them from reaching that dreaded “O” shape. A perfectly cooked shrimp should look like a “C.” The layering technique used here protects the delicate protein by building a rich tomato and corn base separately, then reintroducing the shrimp at the very end.
This method ensures the shrimp are warmed through by the sauce rather than being aggressively cooked by the pan’s surface. It creates a luxurious mouthfeel where the shrimp are snappy on the outside but buttery and soft on the inside. You’re essentially poaching them in a flavor-packed broth at the finish line.
Why Moisture is the Enemy of the Sear
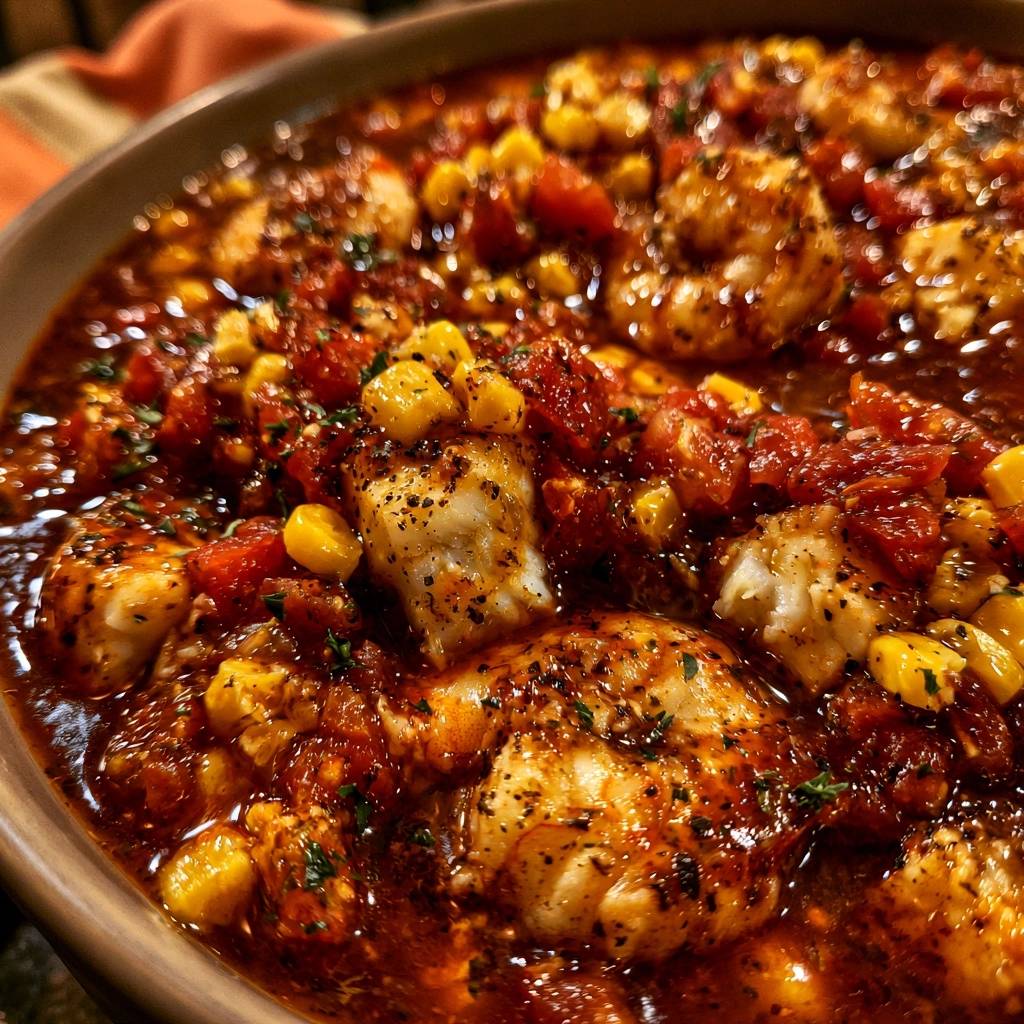
If you want that gorgeous golden-brown crust, you have to start with dry shrimp. When moisture hits a hot pan, it immediately turns into steam. This prevents the Maillard reaction, which is the chemical process that creates deep, savory flavors and that beautiful seared color.
Always pat your shrimp completely dry with paper towels before seasoning. If they’re even slightly damp, they’ll gray and boil in their own juices rather than searing. A dry shrimp in shimmering oil creates a concentrated flavor profile that provides a perfect contrast to the juicy, bursting tomatoes in the sauce.
Essential Components for the Zesty Tomato Base
Quality ingredients make a massive difference when the cook time is this short. I always reach for Roma tomatoes for this skillet. They have a lower water content and higher pectin levels than beefsteak tomatoes, which means they break down into a thick, jammy sauce rather than a watery mess.
The aromatics are just as important. While many recipes call for yellow onions, I prefer finely diced shallots here. Shallots offer a more delicate, garlicky sweetness that doesn’t overpower the seafood. When combined with fresh minced garlic, they create a sophisticated flavor base that feels much more expensive than it actually is.
Don’t skip the smoked paprika. It adds a subtle earthiness that bridges the gap between the sweet corn and the acidic tomatoes. It gives the entire dish a “sun-drenched” Mediterranean vibe that makes the flavors pop without needing a long list of spices.
Fresh vs. Frozen Corn: Texture Profiles
Fresh summer corn sliced right off the cob is the gold standard for this recipe because of its incredible “snap.” However, frozen sweet corn is a fantastic year-round alternative. If you’re using frozen kernels, let them thaw slightly and pat them dry before adding them to the pan.
To get that fresh-off-the-cob flavor with frozen corn, let it sit undisturbed in the hot oil for an extra minute. This allows the sugars to caramelize, giving you those charred, golden edges that mimic a summer cookout. It adds a smoky depth that pairs beautifully with the zesty tomato broth.
The Herb Profile: Why Dill and Parsley?
The combination of dill and parsley might seem unusual if you’re used to basil with tomatoes, but it’s the secret to this dish’s brightness. Dill has a unique, citrusy punch that cuts right through the richness of the olive oil and seafood stock. It highlights the natural sweetness of the shrimp.
Parsley adds a clean, peppery finish that rounds out the herbs. Always add these at the very end, after you’ve pulled the pan off the heat. Fresh herbs are delicate; if they cook too long, they lose their vibrant green color and their essential oils evaporate, leaving you with a dull flavor.
Step-by-Step: Executing the Perfect Skillet Sear
Success with this 15-minute meal depends on having all your ingredients prepped and ready by the stove. Once the oil starts shimmering, things move fast. You’re looking for a sensory experience: the hiss of the shrimp hitting the pan, the aroma of toasted garlic, and the sight of the sauce turning glossy.
Start by heating your skillet over medium-high heat. You want the oil to be shimmering and just on the verge of smoking. This high heat is what gives you that restaurant-style sear in under two minutes. If the pan isn’t hot enough, the shrimp will just sit there and turn rubbery without ever getting that golden crust.
After the shrimp are seared and set aside, the pan will be full of “fond”—those little brown bits stuck to the bottom. Don’t wash the pan! Those bits are concentrated flavor. When you add the tomatoes and stock, you’ll scrape those up, incorporating all that seared shrimp essence back into your sauce.
Phase 1: The High-Heat Initial Sear
Place your seasoned shrimp in the pan in a single layer. If you overcrowd the pan, the temperature will drop, and the shrimp will steam. Give them space! Sear them for only 60 to 90 seconds per side. You’ll see the edges turn pink and opaque while the very center stays a bit translucent.
Remove them immediately to a clean plate. They will continue to cook slightly from their own internal heat while they sit. This “par-cooking” step is the most important part of the recipe. It ensures the exterior is flavorful while the interior stays juicy for the final assembly.
Phase 2: Building the Tomato and Corn Reduction
Add your remaining oil, shallots, and garlic. Sauté them just until they’re fragrant—about a minute. If the garlic turns dark brown, it will taste bitter, so keep things moving. Toss in the tomatoes and corn, letting them sizzle until the tomatoes start to slump and release their juices.
Pour in your seafood stock. Use a wooden spoon to scrape the bottom of the pan. Increase the heat to high and let the liquid bubble away for about two minutes. You’re looking for the sauce to reduce by half. It will transform from a thin liquid into a rich, glossy glaze that coats the back of your spoon.
Phase 3: The Low-Heat Reintegration
Turn the heat down to low before adding the shrimp back in. This is the “Gentle Finish.” Pour the shrimp and any juices that collected on the plate back into the skillet. Toss them gently for just one minute. The sauce is already hot enough to finish the centers of the shrimp without toughening them.
As soon as the shrimp are opaque all the way through, kill the heat. Stir in your fresh lemon juice and herbs. The lemon juice acts as a flavor “magnifier,” making the tomatoes taste fresher and the shrimp taste sweeter. Serve it immediately while the sauce is at its silkiest.
Troubleshooting Common Skillet Errors
If your sauce feels too watery, it’s likely because the tomatoes were extra juicy or the heat wasn’t high enough during the reduction phase. Simply remove the shrimp again and boil the sauce on high for another minute. It should thicken up quickly as the water evaporates and the tomato pectins concentrate.
Burnt garlic is another common pitfall. If your pan is too hot after searing the shrimp, take it off the burner for 30 seconds before adding the garlic and shallots. This slight cool-down prevents the aromatics from scorching. If you do burn the garlic, it’s best to wipe the pan and start the sauce over; that bitter flavor is impossible to hide.
Flavor Variations and Ingredient Swaps
This recipe is incredibly flexible. If you don’t have seafood stock, a splash of clam juice or even a light vegetable broth works well. For a deeper flavor, you can use a bit of tomato paste along with the fresh tomatoes to give the sauce a more concentrated, “sundried” essence.
If you want to change the protein, this same method works beautifully with scallops or even chunks of firm white fish like halibut. Just adjust the initial sear time based on the thickness of the seafood. The goal remains the same: sear for flavor, then finish gently in the sauce.
Adjusting the Heat: From Mild to Spicy
The recipe calls for a quarter teaspoon of red pepper flakes, which provides a very mild, back-of-the-throat warmth. If you love heat, double the red pepper flakes or add a finely diced serrano pepper along with the shallots. The sweetness of the corn acts as a natural balance to the spice.
For a smokier heat, try adding a chopped chipotle pepper in adobo sauce. This creates a completely different flavor profile that leans more toward a Southwestern style, which tastes incredible with the corn and lime juice substituted for the lemon.
Vegetable Additions for Volume
If you want to bulk up the meal without adding more calories, zucchini is your best friend. Use a peeler to create zucchini ribbons and toss them in during the last two minutes of the sauce reduction. They’ll soften just enough to mimic pasta while soaking up that zesty broth.
Bell peppers are another great addition. Dice a red or orange bell pepper and sauté it with the shallots. It adds extra crunch and reinforces the sweetness of the corn. Just be sure not to add too many watery vegetables, or you’ll need to increase your reduction time to keep the sauce glossy.
Optimal Pairings for a Complete Meal
Since this dish has a beautiful, light broth, you want a side dish that can act as a sponge. You don’t want to lose a single drop of that tomato and corn liquid! A neutral base is best so that the delicate flavor of the shrimp remains the star of the show.
Grains and Pastas
Orzo or pearl couscous are my top choices. Their small shape mimics the corn kernels, creating a cohesive texture throughout the bowl. If you prefer bread, a thick slice of toasted sourdough rubbed with a raw garlic clove is perfect for dipping into the bottom of the bowl.
For a lighter option, serve the skillet over a bed of cauliflower rice. The “rice” soaks up the juices beautifully while keeping the meal low-carb. Whatever you choose, make sure it’s ready at the same time as the shrimp, as this dish is best enjoyed piping hot.
Expert Tips for Seafood Prep and Storage
Preparation is the key to professional results. If you’re using frozen shrimp, thaw them overnight in the refrigerator in a colander set over a bowl. This allows the melting ice to drain away so the shrimp don’t sit in a pool of water, which helps maintain their firm texture.
How to Properly Devein Jumbo Shrimp
Most “peeled and deveined” shrimp still need a little bit of cleanup. Use a small paring knife to make a shallow slit down the back of the shrimp. Look for the dark vein and pull it out under cold running water. Keeping the slit shallow helps the shrimp “butterfly” slightly when they hit the hot oil, giving them more surface area for that delicious sear.
Reheating Without Ruining the Texture
Reheating shrimp is tricky because they can turn into “pencil erasers” in the microwave. The best way to enjoy leftovers is to heat them gently on the stovetop. Place the shrimp and sauce in a small pan over low heat. Add a tablespoon of water or stock to loosen the sauce and cover the pan. Heat just until the shrimp are warm to the touch—usually about 2-3 minutes.
Frequently Asked Questions
How long can I store leftovers in the fridge?
You can store this skillet in an airtight container for up to 2 days. Because seafood is delicate, it’s best eaten sooner rather than later. I do not recommend freezing this dish once it’s cooked; the tomatoes will become mushy and the shrimp will lose their snappy texture upon thawing.
Why did my shrimp turn out small and tough?
This usually happens for two reasons: overcrowding the pan or cooking them too long. If the pan is too full, the shrimp steam in their own moisture and shrink significantly. Also, remember that shrimp only need about 3-4 minutes of total heat. If they look like a tight “O,” they are overcooked.
Can I use canned tomatoes instead of fresh Roma tomatoes?
Yes, you can use a 14-ounce can of diced tomatoes if fresh ones aren’t in season. However, make sure to drain them very well first. Canned tomatoes are packed in juice that can make the sauce too thin. You may need to simmer the sauce for an extra 3-4 minutes to achieve the desired glossy consistency.
What can I use if I don’t have seafood stock?
If you don’t have seafood stock, you can use a mix of half chicken broth and half water with a squeeze of extra lemon. Another great trick is to use the shells from the shrimp (if you bought them shell-on) to make a quick 10-minute stock by simmering them in water while you prep your other ingredients.
Is it okay to leave the tails on?
Leaving the tails on is largely a matter of preference. It makes for a beautiful restaurant-style presentation and the tails actually add a bit of extra flavor to the sauce as they simmer. However, if you want a “fork-only” meal where you don’t have to get your hands messy, feel free to remove them before cooking.
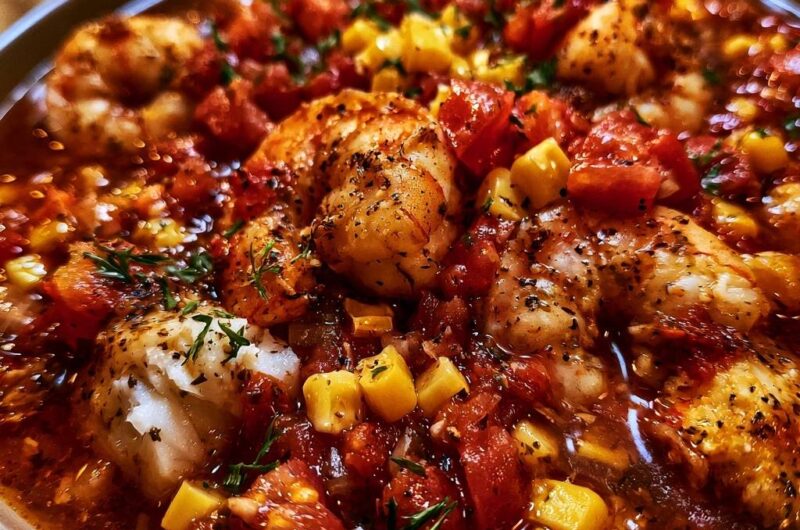
Zesty Tomato and Corn Shrimp Skillet
Course: Main CourseCuisine: AmericanDifficulty: easy4
servings10
minutes15
minutes25
Minutes310
kcalAmerican
Ingredients
1 pound jumbo shrimp, peeled and deveined
2 cups diced Roma tomatoes (fresh, seeded)
1 cup sweet corn kernels (fresh or frozen)
3 tablespoons extra virgin olive oil, divided
3 cloves garlic, minced
1 small shallot, finely diced
1 teaspoon dried oregano
1/2 teaspoon smoked paprika
1/4 teaspoon red pepper flakes
1/2 cup seafood stock (to achieve the glossy broth shown)
Salt and cracked black pepper to taste
2 tablespoons fresh dill and parsley, chopped
1 tablespoon fresh lemon juice
Directions
- Pat the shrimp completely dry with paper towels. This is crucial because excess moisture causes steaming rather than searing. Season the shrimp generously with salt, cracked black pepper, and the smoked paprika.
- Heat 2 tablespoons of olive oil in a large skillet over medium-high heat. Once the oil is shimmering and just starting to smoke, add the shrimp in a single layer. Sear for 60-90 seconds per side until a golden-brown crust forms but the center remains slightly translucent. Remove the shrimp from the pan immediately and set aside on a plate.
- In the same skillet, add the remaining tablespoon of oil. Sauté the shallot and garlic for 1 minute until fragrant. Add the diced tomatoes and corn. Cook for 3 minutes until the tomatoes begin to break down and release their juices.
- Pour in the seafood stock. Increase the heat to high for 2 minutes to reduce the liquid by half, creating the rich, glossy sauce seen in the image. Stir in the oregano and red pepper flakes.
- Here is the fix for rubbery shrimp: Turn the heat to low. Add the par-cooked shrimp and any accumulated juices back into the skillet. Toss gently for only 1 minute. The residual heat of the reduced sauce will finish the cooking process gently, locking in the moisture without toughening the protein.
- Remove from heat immediately. Stir in the lemon juice and the fresh herbs (dill and parsley). Serve in shallow bowls, ensuring the shrimp are nestled into the vibrant tomato-corn broth.
Notes
- To avoid rubbery shrimp, ensure you pat them dry before searing and do not exceed the one-minute mark when reheating them in the sauce.