Imagine biting into a donut that offers a shattering crunch of golden coconut followed by a cloud-like, tender crumb. Most homemade donuts lose that battle within minutes, turning into a weeping, mushy mess as the heavy chocolate and caramel soak into the dough. It’s a common kitchen heartbreak, but it doesn’t have to be your reality.
The secret to a professional-grade donut lies in structural integrity. By using a specific “Reverse-Dip” method, you create a physical barrier that protects the cake from moisture. This isn’t just about flavor; it’s about engineering a better bite that stays fresh and crisp long after the first drizzle of caramel hits the surface.
I’ve found that the real trick to success is the temperature of your “glue.” If you use cold condensed milk, it sits in a thick clump; however, warming it slightly allows it to coat the donut in a thin, even film. This creates the perfect tacky surface for the coconut to grab onto without weighing down the delicate cake.
The Structural Science of the Anti-Soggy Barrier
When you pour warm ganache or caramel over a standard cake donut, the porous surface acts like a sponge. The fats and sugars migrate into the air pockets of the crumb, causing the structure to collapse. This results in that dense, damp texture that makes store-bought donuts so disappointing after an hour in the box.
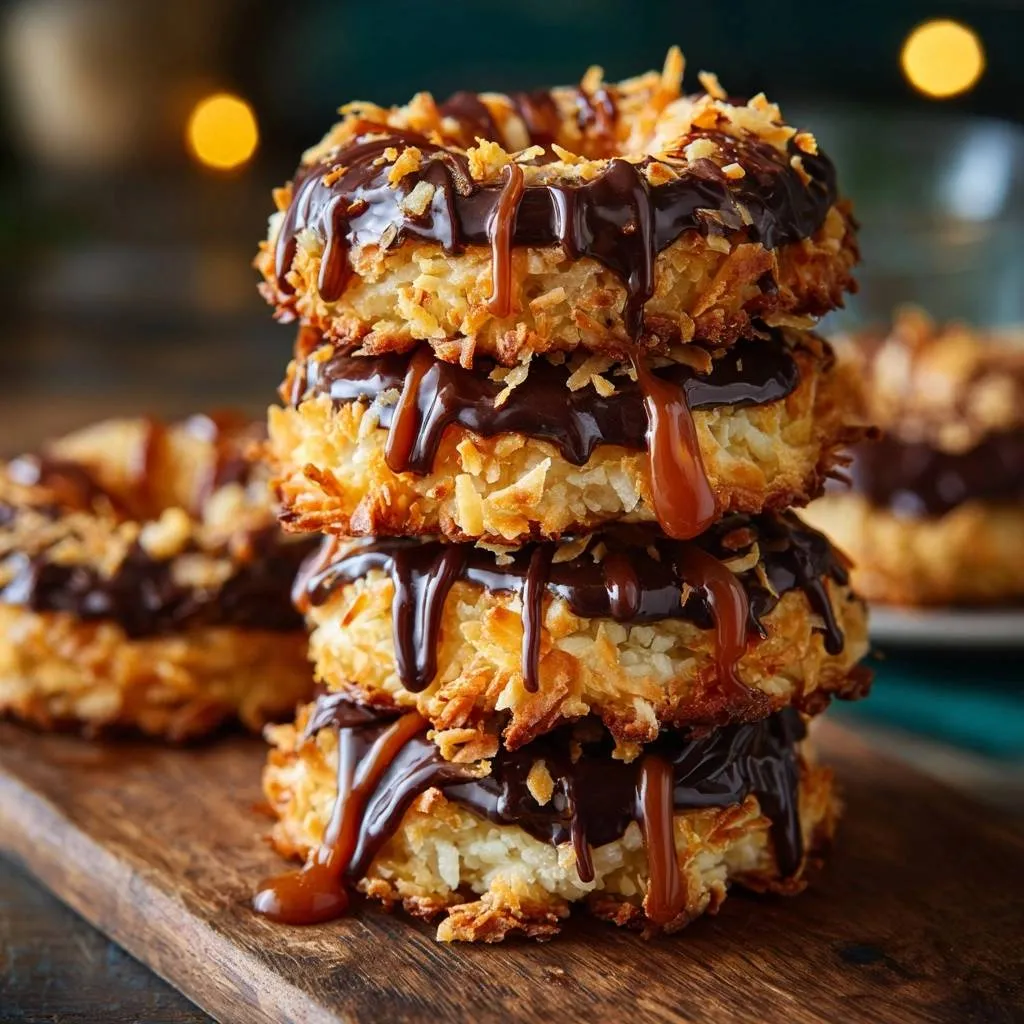
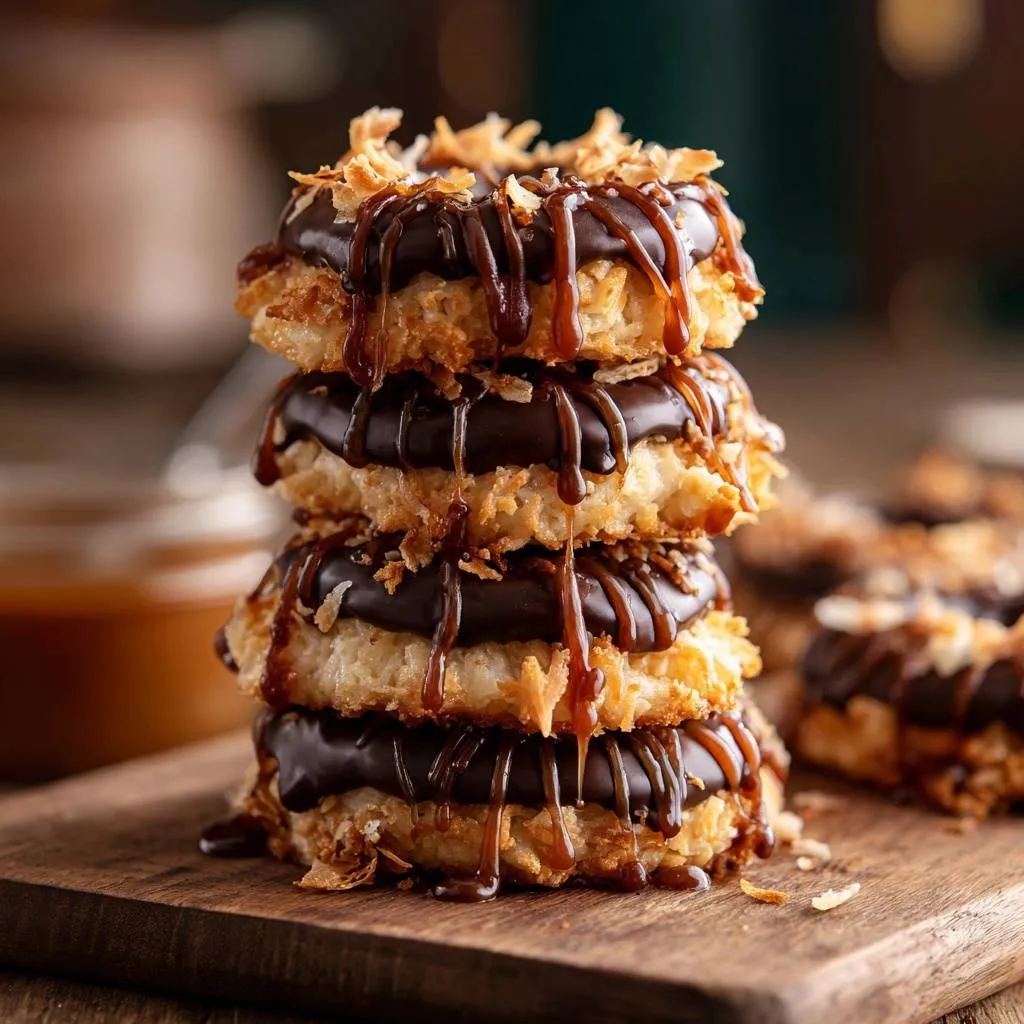
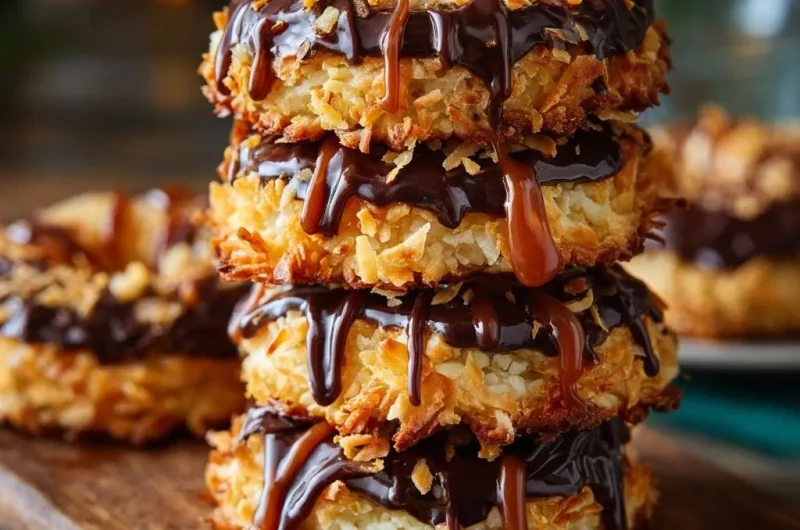
This recipe introduces a “physical shield” approach. By encasing the entire donut in toasted coconut first, you change the surface tension. The chocolate ganache now rests on top of the coconut fibers rather than the cake itself. This simple shift in the order of operations preserves the fluffy interior for up to 48 hours.
Why Traditional Glazing Methods Fail
Standard glazes are humectants, meaning they naturally pull moisture from the surrounding air into the donut. When a warm cake meets a liquid glaze, a chemical reaction occurs where the sugar dissolves into the residual steam of the bread. This creates a sticky, wet interface that quickly turns the donut soggy from the outside in.
The Role of Sweetened Condensed Milk as a Binder
Unlike simple syrup or honey, sweetened condensed milk has a very high solids content and low water activity. Its thick viscosity ensures it stays on the surface of the donut rather than soaking into the pores. It acts as a heavy-duty adhesive that grips the toasted coconut firmly, ensuring your “shield” doesn’t flake off when you take a bite.
Essential Components for Toasted Coconut Caramel Donuts
Success starts with the right flour. While many bakers reach for cake flour for a light texture, all-purpose flour is actually superior here. You need the slightly higher protein content to provide the structural “bones” necessary to support the weight of the coconut, chocolate, and caramel toppings without the donut sagging.
Freshness is your best friend when it comes to the dairy. Use real butter and high-quality heavy cream for the ganache. Since we aren’t using any artificial stabilizers, the natural fats in these ingredients are what will give your chocolate that gorgeous, mirror-like gloss and a melt-in-your-mouth feel.
Selecting the Right Shredded Coconut
Always opt for sweetened shredded coconut for this specific recipe. The added sugar in the coconut is vital for the Maillard reaction, which is the chemical process that creates that deep, nutty flavor and golden color during toasting. Unsweetened coconut often dries out and turns brittle before it ever achieves a true golden hue.
Buttermilk vs. Regular Milk: The Acidity Factor
Don’t swap the buttermilk for regular milk if you can help it. The lactic acid in buttermilk reacts vigorously with the baking powder, creating tiny carbon dioxide bubbles that lift the heavy batter. This results in a tender, tangy crumb that perfectly balances the intense sweetness of the caramel and chocolate toppings.
Precision Equipment for Professional Results
A metal donut pan is generally preferred over silicone for this recipe. Metal conducts heat more efficiently, giving the donuts a slight “crust” that helps them pop out of the pan easily. If you only have silicone, place it on a preheated baking sheet to help the bottom of the donuts brown properly.
You’ll also want a heavy-bottomed saucepan for the ganache. Thin pans have hot spots that can scorch the cream or seize the chocolate. Finally, a wire cooling rack is essential. If you let the donuts cool on a flat plate, steam will trap underneath them, ruining your “anti-soggy” efforts before you even start decorating.
Step-by-Step: Crafting the Perfect Donut Base
When mixing your batter, the golden rule is to stop the moment you see the last streak of flour disappear. Use a wide spatula to fold the wet ingredients into the dry with a gentle “over and under” motion. Over-mixing develops gluten, which will turn your light donuts into tough, rubbery rings.
Spoon the batter into your greased pan, filling each cavity about three-quarters full. As they bake, watch for the visual cues. You’re looking for the edges to pull away slightly from the sides of the pan and the tops to spring back when lightly touched. A toothpick should come out clean, with no wet batter clinging to it.
The Toasting Phase: Achieving Uniform Golden Color
Toasting coconut in the oven is far superior to the stovetop because it provides 360-degree heat. Spread the coconut in a thin, even layer on a large baking sheet. If the coconut is piled too high, the bottom layers will steam while the top layers burn, leaving you with an uneven texture.
Stay close to the oven during the final two minutes. Coconut has a notorious “flashpoint” where it goes from perfectly golden to charred in seconds. Toss the coconut every two minutes to ensure the pieces on the edges of the pan don’t get too dark. Once it smells like toasted marshmallows, pull it out immediately.
For a similar sweet and chewy experience, try these pumpkin chocolate chip blondies.
Executing the Reverse-Dip and Coconut Shield
This is where the magic happens. Once the donuts have cooled for five minutes, they should still be slightly warm to the touch. Brush a thin, translucent layer of the warmed condensed milk over the entire surface. You don’t want it dripping; you just want a tacky, even coating that looks like a light varnish.
Immediately press the donut into the bowl of toasted coconut. Don’t just roll it; use firm pressure to “embed” the coconut into the condensed milk. This creates a tight, interlocking mesh of coconut fibers. This dense layer is what prevents the liquid chocolate from reaching the cake, acting as your primary moisture barrier.
Creating the Chocolate Ganache and Caramel Finish
For the ganache, patience is the most important ingredient. After pouring the hot cream over your chocolate chips, let it sit undisturbed for a full two minutes. This allows the heat to penetrate the center of the chocolate. If you stir too early, the temperature drops too fast, and you’ll end up with grainy, un-melted bits.
When you’re ready to finish, dip the coconut-covered top into the glossy ganache. The coconut provides a rugged surface that the chocolate clings to beautifully. Finally, drizzle the salted caramel while it’s still slightly fluid. If the caramel is too cold, it will pull the coconut off the donut; if it’s too hot, it will melt your ganache.
Troubleshooting Ganache Seizing
If your ganache looks curdled or oily, it has likely “broken.” This usually happens if a drop of water gets into the bowl or if the cream was too hot. Don’t panic! You can usually fix it by whisking in a single teaspoon of warm (not boiling) heavy cream at a time until the emulsion smooths out and becomes glossy again.
Avoiding Common Mistakes with Toasted Coconut Caramel Donuts
The biggest pitfall is decorating the donuts while they are still hot. If the donut is steaming, the condensed milk will thin out and run off, taking the coconut with it. Always wait until the donut is just barely warm. Another mistake is under-toasting the coconut; if it isn’t crunchy, it won’t provide that necessary structural barrier.
Lastly, watch your caramel consistency. If you use a thin, ice-cream style caramel sauce, it will run right off the donut and pool on the plate. Look for a “thick” or “jarred” salted caramel that holds its shape at room temperature. This ensures every bite has the perfect ratio of salt, sugar, and crunch.
Make-Ahead Strategies and Storage Logistics
You can bake the donut bases up to 24 hours in advance. Store the plain, un-dipped donuts in an airtight container at room temperature. However, do not refrigerate them! The cold air in a fridge causes the starch in the flour to crystallize, which makes the donut taste stale and dry almost instantly.
If you need to store fully decorated donuts, keep them in a single layer in a cool, dry place. Because of the “Anti-Soggy” coconut shield, they will stay remarkably crisp for about two days. If you want to freeze them, freeze the plain bases only. Thaw them at room temperature, then proceed with the toasting and dipping steps for the best results.
Flavor Variations and Ingredient Swaps
If you prefer a less sweet profile, swap the semi-sweet chocolate for a 70% dark chocolate ganache. The bitterness of the dark chocolate cuts through the sugar of the caramel beautifully. You can also add a pinch of flaky sea salt directly into the toasted coconut mixture to enhance the nutty notes of the fruit.
For an even more intense coconut flavor, replace the buttermilk with full-fat canned coconut milk. You will need to add a teaspoon of lemon juice to the coconut milk to provide the acidity needed for the rise. This swap creates a tropical, rich crumb that pairs perfectly with the toasted exterior and caramel drizzle.
Frequently Asked Questions
Can I use an air fryer for these donuts?
Yes, you can bake the batter in an air fryer if you have a silicone donut mold that fits your basket. Set the air fryer to 320°F and bake for 8 to 10 minutes. Because air fryers circulate heat rapidly, they can dry out the donuts quickly, so start checking them at the 7-minute mark to ensure they stay moist.
How do I keep the coconut from falling off?
The key is the “firm press” technique. After brushing on the warmed sweetened condensed milk, you must physically press the donut into the coconut flakes. If you just sprinkle the coconut on top, it won’t adhere properly. The condensed milk acts as a heavy-duty glue, but it requires that physical pressure to create a permanent bond.
What is the best way to reheat a decorated donut?
Reheating a fully decorated donut is tricky because the chocolate and caramel will melt. If you must warm it up, use a toaster oven at 300°F for only 2 to 3 minutes. This will crisp the coconut without completely liquifying the toppings. Avoid the microwave, as it will turn the donut rubbery and create a chocolate puddle on your plate.
Can I substitute the buttermilk with a dairy-free alternative?
Absolutely. To mimic the acidity and thickness of buttermilk, mix 3/4 cup of unsweetened soy or oat milk with 1 tablespoon of fresh lemon juice or white vinegar. Let the mixture sit for 5 to 10 minutes until it looks slightly curdled. This “vegan buttermilk” provides the necessary chemical reaction with the baking powder to ensure a good rise.
Why did my donuts stick to the pan?
Donuts usually stick for two reasons: either the pan wasn’t greased well enough or they were removed too quickly. Use a pastry brush to get butter into every nook of the donut pan. After baking, let the donuts rest in the pan for exactly 5 minutes. This allows the structure to firm up so they can be popped out without tearing.
Donuts
Course: DessertCuisine: AmericanDifficulty: medium12
donuts20
minutes20
minutes450
kcal40
MinutesA unique donut recipe featuring a toasted coconut barrier that prevents the dough from absorbing moisture, topped with rich chocolate ganache and salted caramel.
Ingredients
2 cups all-purpose flour
3/4 cup granulated sugar
2 teaspoons baking powder
1/2 teaspoon salt
3/4 cup buttermilk
2 large eggs
2 tablespoons melted butter
1 teaspoon vanilla extract
3 cups sweetened shredded coconut
1/2 cup sweetened condensed milk (for the coconut binder)
1 cup semi-sweet chocolate chips
1/2 cup heavy cream
1/2 cup thick salted caramel sauce
Directions
- Preheat your oven to 350°F (175°C). Grease a donut pan thoroughly.
- In a large bowl, whisk together flour, sugar, baking powder, and salt. In a separate bowl, beat the buttermilk, eggs, vanilla, and melted butter.
- Fold the wet ingredients into the dry until just combined. Spoon the batter into the donut pan and bake for 12 to 15 minutes until a toothpick comes out clean.
- While the donuts bake, spread the shredded coconut on a baking sheet. Toast in the oven for 5 to 8 minutes, tossing frequently, until golden brown. Remove and let cool slightly.
- In a small bowl, slightly warm the 1/2 cup of sweetened condensed milk.
- Remove donuts from the pan and let them cool for 5 minutes. Brush the entire exterior of each donut with a thin layer of the sweetened condensed milk.
- Press the donuts firmly into the toasted coconut, covering the top and sides completely. The condensed milk acts as a “glue” that prevents the donut from absorbing moisture from the toppings.
- Prepare the ganache: Heat the heavy cream until simmering, then pour over the chocolate chips. Let sit for 2 minutes, then whisk until smooth and glossy.
- Dip the top of each coconut-encrusted donut into the chocolate ganache. The toasted coconut layer acts as a physical shield, keeping the chocolate on the surface and preventing it from soaking into the cake.
- Finish with a generous drizzle of salted caramel sauce over the chocolate. Let the donuts sit for 15 minutes to allow the ganache to set before serving.
Notes
- The sweetened condensed milk acts as a glue and moisture barrier. Ensure the coconut is toasted to a golden brown for maximum crunch.