I spent years struggling with flat, tough biscuits until I discovered two simple, game-changing techniques that guarantee extraordinary lift.
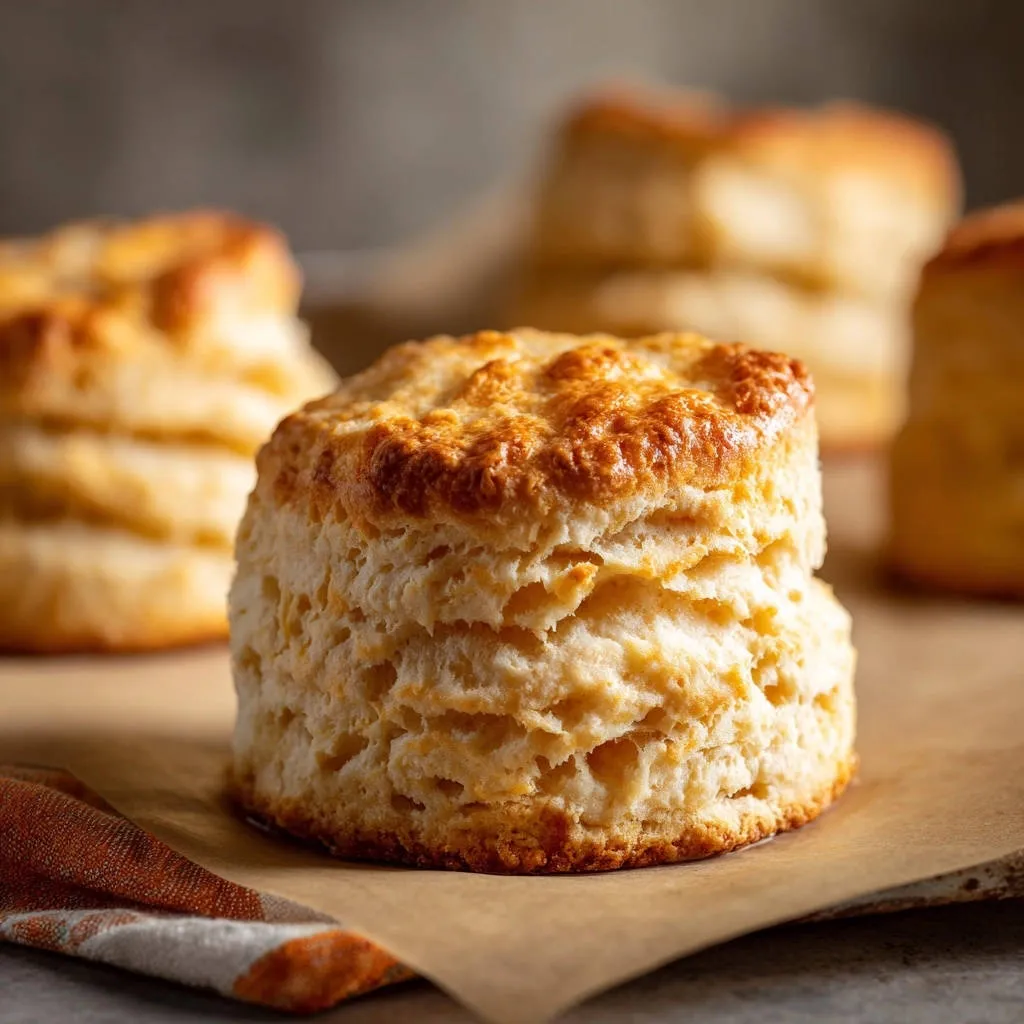
These Mile-High Buttermilk Biscuits are specifically engineered to deliver impressive height and dozens of tender, buttery layers every single time, solving the common problem of dense crumb.
By utilizing frozen grated butter and mastering the letter fold, you unlock the secret to a truly light, satisfyingly flaky texture.
Achieving Altitude: Why These Mile-High Buttermilk Biscuits Rise Above the Rest
The Magic of Grated, Frozen Butter
Cold butter is the foundational engine of a great biscuit; when the high oven heat hits these tiny fat pockets, the trapped water inside instantly converts to steam.
Grating the butter ensures that the fat is quickly incorporated into uniform, rice-sized shreds, maximizing the surface area for steam release while keeping the overall dough temperature critically low.
Layering Success: Mastering the Letter Fold Technique
This simple lamination technique transforms the initially shaggy mix into dozens of organized layers of fat and flour.
Folding the dough over itself like a letter, turning, and repeating simulates professional puff pastry techniques on an accessible level, guaranteeing that impressive vertical stack and a stunningly flaky texture.
The Buttermilk Difference: Acidity for Tenderness
Buttermilk is essential because its acidity reacts powerfully with the baking soda, creating immediate carbon dioxide bubbles for leavening.
The lactic acid also works to tenderize the gluten strands in the flour, which minimizes toughness and results in a uniquely soft, melt-in-your-mouth tender crumb.
The Essential Tools for Your Biscuit Baking Success
The Crucial Role of the Straight-Edged Biscuit Cutter
Always use a sharp, straight-edged biscuit cutter or a glass rim to ensure the dough layers are sliced cleanly through.
A clean, vertical cut allows the layers to separate and rise freely during baking, unlike dull cutters or twisting motions which seal the edges.
Why a Box Grater Replaces the Pastry Blender
Using a box grater to process the frozen butter is significantly faster than using a pastry blender or relying on your hands.
This speed is vital because it prevents the butter from warming up, ensuring that the shredded fat remains rock-solid for maximum steam production.
The Need for a Lightly Floured Surface
When folding and patting the dough, dust your surface with just enough flour to prevent sticking, but no more.
Excessive bench flour will be incorporated into the dough, drying it out and inhibiting the potential for a moist, towering rise.
The Building Blocks of Structure and Flavor
Choosing the Right Flour Base
Standard all-purpose flour provides the perfect balance needed to achieve great structural height without sacrificing necessary tenderness.
For an exceptionally light result, consider sifting the flour before measuring and incorporating the other dry ingredients.
The Perfect Balance of Leavening Agents
We rely on both baking powder and baking soda to ensure maximum lift from both the initial oven heat and the necessary acid reaction.
Baking powder provides rapid volume expansion, while the baking soda is specifically activated by the cold buttermilk.
The Unsung Hero: Cold Buttermilk and Why It Must Be Chilled
The colder the buttermilk, the slower the gluten in the flour develops upon contact with liquid, which is the key to preventing tough biscuits.
Keeping this ingredient ice cold drastically improves the final crumb structure and aids in preserving the temperature of the frozen grated butter.
The Full Ascent: Step-by-Step to Mile-High Buttermilk Biscuits Perfection
-
Prepping the Elements and Oven:
Preheat your oven sharply to 425°F (220°C); this high heat is necessary to create immediate steam lift.
In a large bowl, whisk together the flour, baking powder, baking soda, salt, and sugar. Grate the solid, frozen stick of butter directly into this dry mixture, quickly tossing the shreds to coat them in flour.
-
Phase 1: Mixing the Cold Dough Gently:
Pour the 3/4 cup of chilled buttermilk into the bowl. Use a rubber spatula to gently fold the mixture until the liquid is just absorbed.
The resulting dough will look shaggy and uneven with pockets of flour remaining; stop mixing the moment the dough can roughly hold together, as overmixing is fatal to height.
-
Phase 2: Executing the Lamination Fold (The Key):
Turn the shaggy dough onto a lightly floured surface and pat it gently into a rough rectangle about one inch thick.
Perform the letter fold: fold the left third over the center, then fold the right third over that. Turn the dough 90 degrees and repeat this pat and fold process two more times for a total of three folds.
This quick lamination process organizes the fat and flour into the distinct, defined layers that deliver the ultimate mile-high rise.
-
Phase 3: Cutting and Arranging:
Pat the final folded dough into a square that is precisely 1 inch to 1 1/4 inches thick; this measurement is crucial for maximum altitude.
Press your sharp biscuit cutter straight down through the dough, lifting straight up without twisting. Twisting seals the delicate edges of the laminated dough, preventing separation during the bake.
Arrange the cut biscuits onto a parchment-lined baking sheet, ensuring they are placed close enough that their sides are lightly touching each other.
-
Phase 4: The Final Brush and Bake:
Gently brush the tops of the dough with the reserved tablespoon of cold buttermilk; this promotes a superior, deep golden brown crust and adds moisture.
Bake for 15 to 18 minutes, watching for a rich color and significant vertical expansion before removing them immediately from the oven.
Troubleshooting Your Rise: Why Are My Biscuits Flat or Tough?
Problem: The Biscuits are Dense and Lack Flake
This is almost always caused by warm butter or overmixing the dough past the shaggy stage.
If the butter melts before it hits the oven, you lose the necessary steam lift. Ensure your butter is grating easily and all your ingredients are ice cold.
Problem: The Dough Was Difficult to Handle and Sticky
Sticky dough often means you used too much liquid, or you need more bench flour during the folding steps.
If the dough becomes too warm, chill it immediately for 10-15 minutes before proceeding; cold dough handles beautifully.
The “Sealed Edge” Disaster: Why Twisting the Cutter Is Fatal
Twisting the cutter seals the edges of the dough layers together, essentially fusing the sides closed.
When the internal steam tries to expand, the sealed edges prohibit the necessary separation, resulting in a short, disappointing biscuit.
Maximizing the Rise: The Power of Clustering
Clustering the biscuits so they lightly touch on the pan ensures that they support each other vertically as they bake.
If they are placed too far apart, the dough will spread horizontally instead of channeling its energy upward to achieve the desired mile-high lift.
Beyond Breakfast: Serving and Storing Your Buttermilk Masterpiece
Make-Ahead Tips and Freezing Instructions
The dough can be prepared, cut, and frozen before baking, making these perfect for future quick breakfasts.
Freeze the cut biscuits solid on a tray, then transfer them to an airtight container. Bake straight from frozen, adding about five minutes to the total baking time.
Reheating for Fresh-Baked Results
To best refresh leftovers, wrap them loosely in aluminum foil and reheat them in a 350°F (175°C) oven for about 8 minutes.
This method warms them through gently while preserving their crunchy exterior and desirable flaky texture.
Serving Suggestions: The Best Sweet and Savory Pairings
These tall, sturdy biscuits are robust enough to stand up to rich sauces and hearty spreads, moving them far beyond simple butter and jam.
- Sweet Pairings: Split them horizontally to create a superior base for shortcake, use them for rich peach cobbler toppings, or simply coat them in cinnamon sugar and serve warm.
- Savory Pairings: They are the quintessential vehicle for rich, peppery sausage gravy, fantastic paired with smoked salmon and cream cheese, or used to build mini breakfast sandwiches.
Your Most Asked Questions About Mile-High Buttermilk Biscuits
Can I substitute milk for buttermilk in this recipe?
True buttermilk is essential for the necessary acid reaction with baking soda, ensuring the optimal rise and a true tender crumb.
If you absolutely cannot find buttermilk, combine 1 cup of regular milk with 1 tablespoon of white vinegar or lemon juice, let it sit for five minutes to curdle, then measure and chill before use.
What is the ideal thickness for the dough before cutting?
The optimal thickness for the final dough before cutting is between 1 inch and 1 1/4 inches.
Ensuring this height provides enough mass for the leavening agents to produce maximum vertical expansion in the oven.
Can I use salted butter instead of unsalted?
Yes, you can substitute salted butter, but you must make an adjustment to prevent an overly salty final product.
If using salted butter, reduce the recipe’s added fine salt from one teaspoon down to a scant half-teaspoon.
How do I know when the biscuits are truly done baking?
Look for a deep, rich golden brown color across the entire top surface, not just a light blond hue.
They should also be significantly taller than when they went in, having completed their dramatic ascent, and should sound hollow when tapped.
Ready to Impress? Share Your Mile-High Buttermilk Biscuits Masterpiece!
Mastering these Mile-High Buttermilk Biscuits relies entirely on respecting the cold temperature of your ingredients and executing the simple, high-impact layering technique.
Once you utilize the power of the frozen grated butter and the effective lamination fold, you will never struggle with flat biscuits again.
Bake a batch this weekend and experience the satisfaction of pulling perfectly tall, golden biscuits from the oven. Don’t forget to slather them immediately with honey and butter-they won’t last long!
For a burst of fruity sweetness, consider trying chocolate cherry bread.
Buttermilk Biscuits
Course: BreadCuisine: AmericanDifficulty: medium4
8-10 biscuits20
minutes18
minutes240
kcal38
minutesSay goodbye to flat, tough biscuits. This recipe utilizes a simple folding technique (lamination) using grated frozen butter to lock in incredible height and distinct, defined layers every time. They come out light, airy, and deeply golden.
Ingredients
2 cups all-purpose flour plus more for dusting
1 tablespoon baking powder
1/2 teaspoon baking soda
1 teaspoon fine salt
1 tablespoon granulated sugar
1/2 cup (1 stick) unsalted butter, frozen solid
3/4 cup cold buttermilk plus 1 tablespoon for brushing
Directions
- Prepare the Dry Mix and Butter: Preheat your oven to 425 degrees F. In a large mixing bowl, whisk together the flour, baking powder, baking soda, salt, and sugar. Using a box grater, grate the frozen butter directly into the flour mixture. Quickly toss the butter shreds with the flour until the pieces are coated, ensuring the butter remains very cold.
- Mix the Dough: Pour in the 3/4 cup cold buttermilk. Use a flexible rubber spatula or wooden spoon to gently fold the mixture until just combined. The dough will look shaggy and slightly wet in places, but avoid the urge to overmix.
- The Lamination Secret (This step is key to Flaky and Tall results): Turn the shaggy dough out onto a lightly floured surface. Pat the dough into a rough rectangle about 1 inch thick. Fold the dough over onto itself like a letter (folding the left third to the center, then folding the right third over that). Turn the dough 90 degrees and repeat this fold/pat process two more times (for a total of three folds). This folding creates the distinct layers.
- Cut and Arrange: Pat the final dough into a square about 1 inch to 1 and 1/4 inch thick. Using a 2-inch biscuit cutter (or glass rim), press straight down to cut the biscuits. Crucial Tip: Do not twist the cutter. Twisting seals the edges and prevents the layers from rising. Lift straight up.
- Bake: Place the cut biscuits onto a baking sheet lined with parchment paper. Arrange them so they are lightly touching each other on the pan. This closeness helps them rise taller and stay moist. Brush the tops gently with the extra tablespoon of cold buttermilk.
- Bake for 15 to 18 minutes, or until the tops are deeply golden brown and the biscuits have risen significantly. Serve immediately with plenty of butter and jam.
Notes
- Arrange biscuits lightly touching to help them rise taller. Do not twist the cutter when cutting.