There is nothing more frustrating than biting into a stiff sandie when you were expecting a light, melt-in-your-mouth treat. After extensive testing, I mastered the subtle technique that guarantees perfectly tender Nutty Butter Cookies every time.
This recipe provides the reliable solution to density, utilizing specific sugar ratios and a critical mixing method that inhibits gluten development.
Solving the Sandie Struggle: Why This Recipe Never Turns Out Dense
Many home bakers struggle to achieve that quintessential light, crumbly texture in a butter cookie, often resulting in treats that are heavy and chewy.
The secret lies not just in the ingredients, but in understanding how those ingredients interact to prevent the formation of structural toughness.
The Crucial Difference Between Tough and Tender Cookies
Toughness is caused by overworking the flour, which develops too much gluten-the elastic protein network.
For tender cookie texture, we must minimize mixing once the flour is added. This prevents the dough from becoming stretchy and dense.
For a similar tender texture in your baked goods, explore the no-spread method for glazed raspberry thumbprint cookies.
The Powdered Sugar and Granulated Sugar Harmony
Granulated sugar provides essential structure and aeration during the creaming process, leading to a crisp edge.
Powdered sugar, however, contains a small amount of cornstarch, which softens the overall crumb, resulting in that desirable delicate, melt-in-your-mouth texture.
The Role of the Egg Yolk for Supreme Richness
We use only the large egg yolk because it adds richness and acts as a binder without introducing the extra water and protein found in the egg white.
The high fat content of the yolk also tenderizes the dough by coating flour particles, further inhibiting undesirable gluten development.
The Building Blocks of Bliss: Essential Ingredients for Perfect Nutty Butter Cookies
The Fat Foundation: Butter Quality and Preparation
Always use unsalted butter so you can control the salt content in the finished product.
The butter should be truly “softened,” meaning yielding to a light touch, but not greasy or shiny. This is crucial for successful creaming and aeration.
Flour and Nut Prep: The Pre-Mixing Advantage
By stirring the 3/4 cup of chopped nuts directly into the flour first, we ensure they are evenly distributed throughout the dough.
This pre-mixing step streamlines the crucial “do not overmix” step later on. You incorporate the nuts and the flour simultaneously, reducing overall mixing time.
The Flavor Boosters: Vanilla Extract and Salt
Pure vanilla extract offers superior depth compared to imitation vanilla, enhancing the rich butter notes of these sandies.
Salt is essential for balancing the sweetness and intensifying the overall flavor profile of the buttery cookies.
Essential Tools for Your Nutty Butter Cookies Adventure
Stand Mixer or Hand Mixer: The initial creaming step requires powerful, consistent beating to properly aerate the butter and sugars, which is nearly impossible to achieve by hand.
Parchment Paper and Baking Sheets: Parchment paper prevents sticking and ensures even heat distribution across the cookie bottom. This is necessary for a uniform light golden color.
Wire Cooling Rack: Transferring cookies to a wire rack immediately after the 5-minute cooling period halts the residual baking process. This prevents the bottoms from steaming and becoming soft.
Mastering the Method: A Step-by-Step Guide to Baking Nutty Butter Cookies
-
Prep the Nuts and Oven:
Preheat your oven to 350°F and prepare your baking sheets with parchment paper. This preparation ensures you can move smoothly once the dough is ready.
Crucially, reserve the designated portion of chopped nuts for the exterior topping, mixing the rest directly into the flour now.
-
Achieving the Perfect Creaming Stage:
Cream the softened butter and both sugars (granulated and powdered) on medium speed for the full recommended time (about 3 minutes).
The goal is a mixture that is significantly lighter in color and fluffy; this thorough aeration is key to the final cookie structure.
-
Introducing the Wet Components:
Add the egg yolk and vanilla extract to the creamed mixture.
Mix only until they are just combined, ensuring you stop the mixer immediately to avoid incorporating unnecessary air before the flour stage.
-
The Golden Rule of Flour Integration (Preventing Density):
Add the pre-mixed flour, nuts, and salt to the wet ingredients all at once.
Mix on the absolute lowest speed possible. The critical instruction here is to stop the mixer the very moment the last streak of dry flour disappears. Do not process past this point, even if the dough looks crumbly.
-
Finishing the Dough by Hand:
Gently use your hands to press the resulting clumps into a single cohesive ball.
This minimal handling technique helps bind the dough without activating the gluten, securing that melt-in-your-mouth texture.
For a similar sweet and tangy experience, explore glazed orange creamsicle cookies.
-
Shaping and Coating Techniques:
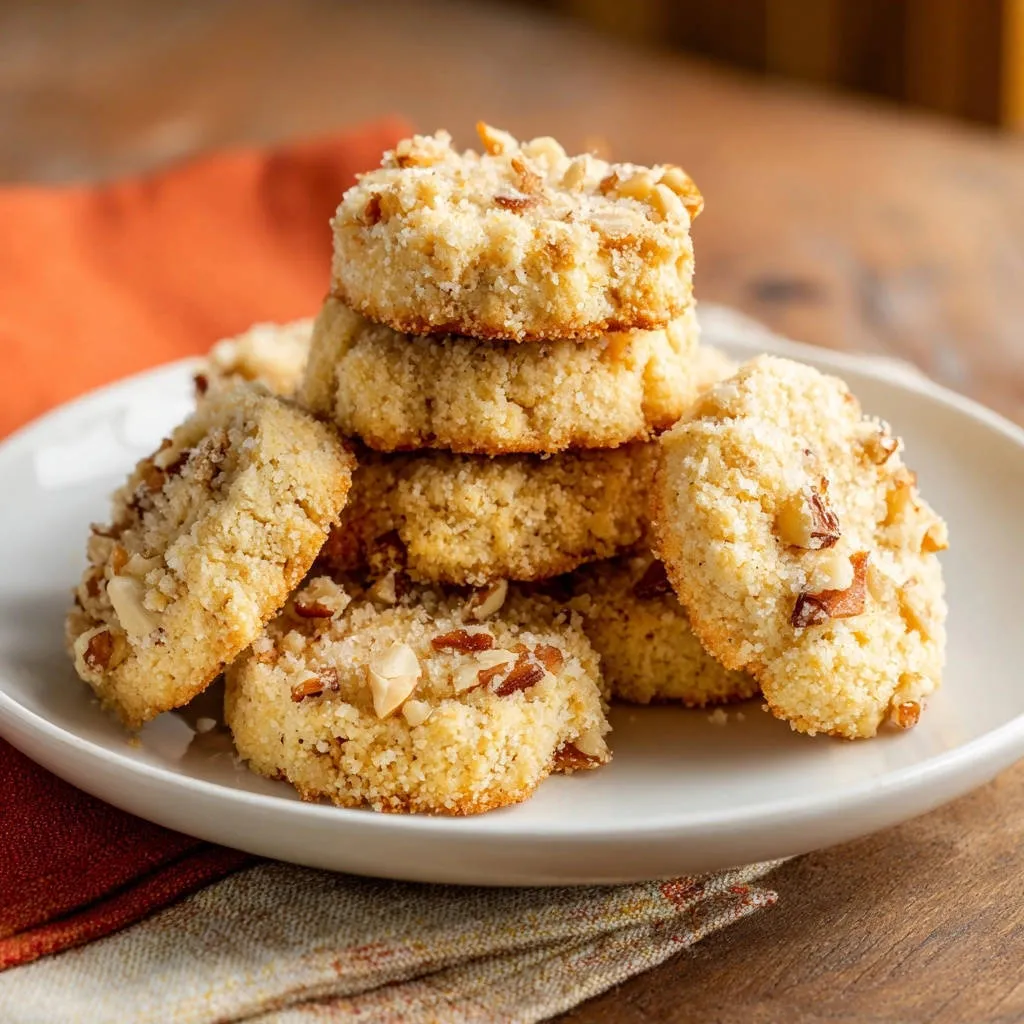
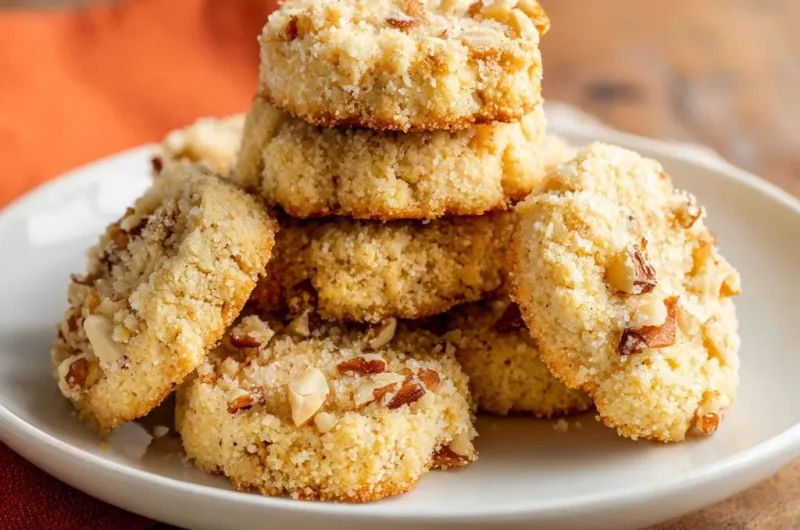
Roll the dough into uniform 1-inch balls.
For the signature crust, roll one side in the extra granulated sugar first, then press that sugared side firmly into the reserved chopped nuts. This dual layer ensures maximum flavor and texture contrast.
-
Baking Cues for Optimal Tenderness:
Bake the cookies for 12 to 15 minutes, or until the edges are just barely golden brown.
The center must still look pale. Overbaking is the fastest way to ruin the delicate texture; the cookies will continue to cook slightly on the tray.
-
The Essential Cooling Process:
Allow the cookies to cool on the hot baking sheet for 5 minutes.
This allows them to firm up safely before transferring them to a wire rack to cool completely, preventing breakage and maintaining crispness.
Chef’s Secrets: Advanced Tips for Next-Level Nutty Butter Cookies
Temperature Control is King: Ensure your butter is truly softened (room temperature, not greasy) for proper creaming. If it’s too cold, the sugars won’t aerate correctly. If it’s too warm, the dough will spread too much.
Weigh Your Flour, Don’t Scoop: Too much flour is the primary cause of dense cookies, even if you follow the mixing steps perfectly. Use a kitchen scale for accurate measurement (2 1/4 cups typically equals 270g).
Perfecting the Toast: If you use raw nuts, gently toasting them before chopping enhances their flavor dramatically, adding depth and a richer aroma to your Nutty Butter Cookies.
The Post-Bake Sugar Dust: For an extra festive touch, dust the fully cooled cookies lightly with powdered sugar before serving.
Troubleshooting Common Nutty Butter Cookie Issues
My Cookies Spread Too Thinly!
This usually indicates the butter was too warm or you did not measure the flour accurately. If the dough feels too soft before shaping, chill it in the refrigerator for 20-30 minutes to firm it up.
The Nuts Fell Off During Baking.
Ensure you press the nuts very firmly into the sugared dough ball. The sugar layer acts as a gentle adhesive.
If your dough is too dry, try dampening the surface slightly with a finger dipped in water before coating to help the nuts adhere.
What If I Accidentally Overmixed the Dough?
If you mixed for too long and the dough feels tough or stretchy, unfortunately, you cannot fully reverse the gluten development.
Try chilling the dough for an hour-the cold can sometimes slightly relax the gluten strands, though the final texture may still be slightly less tender.
Make-Ahead, Storage, and Flavor Variations
How to Prepare the Dough in Advance
The dough can be made and stored in a sealed container in the refrigerator for up to three days. This chilling period can sometimes deepen the flavor profile.
For longer storage, freeze the formed, uncoated dough balls on a baking sheet, then transfer them to a freezer bag for up to two months. Bake from frozen, adding 2-4 minutes to the total baking time.
Optimal Storage for Baked Nutty Butter Cookies
Once completely cooled, store the cookies in an airtight container at room temperature. They will retain their wonderful texture and flavor for 5 to 7 days.
Avoid storing them near anything strong-smelling, as the butter base can absorb odors easily.
Creative Nut and Flavor Substitutions
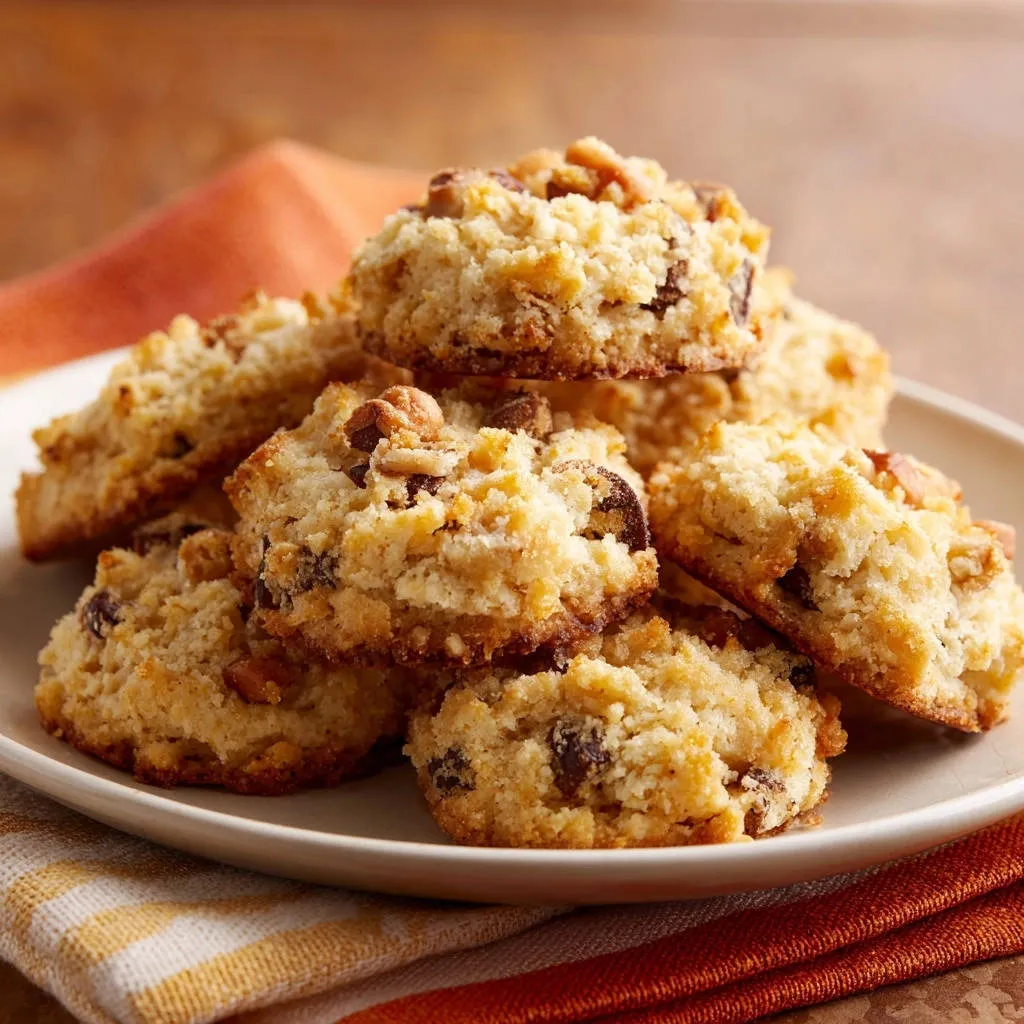
Substitute almonds or macadamia nuts for pecans/walnuts for a different flavor profile.
Add 1/2 teaspoon of almond extract or rum extract to the wet ingredients for deeper complexity.
Mix 1 teaspoon of very finely grated citrus zest (orange or lemon) into the sugar during the creaming stage.
Nutty Butter Cookies FAQ: Answering Your Baking Questions
Can I make these Nutty Butter Cookies gluten-free?
Yes, you can successfully substitute the all-purpose flour with a high-quality 1:1 gluten-free baking blend that contains xanthan gum.
Ensure your flour blend is weighed accurately, as density can be an even larger challenge with GF flours.
What is the difference between a butter cookie and a shortbread cookie?
While similar, shortbread traditionally contains only flour, butter, and sugar (often in a 1:2:3 ratio), making it denser and crumbly.
Butter cookies, like these Nutty Butter Cookies, usually incorporate eggs, leavening agents, or a mix of sugars, resulting in a lighter, softer texture.
Do I have to use an egg yolk? Can I use a whole egg instead?
While you technically could use a whole egg, the yolk is specifically used here for its high-fat content which ensures richness and inhibits gluten development.
The extra liquid and protein from a whole egg white will make the cookies slightly tougher or more cake-like, compromising the signature tenderness.
Ready to Impress? Share Your Nutty Butter Cookies Masterpiece!
With the critical step of minimal flour mixing mastered, you are now equipped to bake the perfect batch of light, nutty, and irresistible butter cookies. Say goodbye to dense sandies forever!
More Sweet Treats to Try
Round out your dessert spread with these delightful cookie recipes.
- For a different take on a classic, consider these Fluffy Diner-Style Pancakes, perfect for a brunch anytime.
- If you’re after another light and airy option, try these Fluffy Golden Pancakes for a sunny breakfast.
We encourage you to try the flavor variations and share your beautiful creations with us online.
Nutty Butter Cookies
Course: DessertCuisine: AmericanDifficulty: easy4
30 cookies20
minutes15
minutes240
kcal40
minutesSay goodbye to tough, dense baked goods. This recipe features a crucial mixing technique that guarantees perfectly tender, melt-in-your-mouth nutty butter cookies. Coated in crunchy nuts and sugar, these classic treats are irresistible.
Ingredients
1 cup unsalted butter, softened
1/2 cup granulated sugar, plus extra for rolling
1/4 cup powdered sugar
1 large egg yolk
1 teaspoon vanilla extract
1/2 teaspoon salt
2 1/4 cups all-purpose flour
1 cup finely chopped nuts (pecans or walnuts, divided)
Directions
- Prep the Nuts: Reserve 1/4 cup of the chopped nuts for topping. Mix the remaining 3/4 cup nuts into the measured flour and set aside. Preheat your oven to 350 degrees F. Line two baking sheets with parchment paper.
- Cream the Wet Ingredients: In a large bowl, use a stand mixer or hand mixer to cream together the softened butter, granulated sugar, and powdered sugar until the mixture is pale and completely smooth (about 3 minutes). Scrape down the bowl.
- Add Wet Components: Beat in the egg yolk and vanilla extract until just combined.
- The Non-Dense Trick: This is the crucial step to prevent density. Add the flour and nut mixture along with the salt to the wet ingredients. Mix on the lowest speed only until the dough just starts to come together into large clumps. Stop the mixer immediately. Do not overmix the dough. The moment the dry flour disappears, stop.
- Finish Mixing: Use your hands to gently press the mixture into a cohesive ball. Minimal handling is key here to keep the texture light.
- Shape and Roll: Roll the dough into 1-inch balls. Gently press one side of each ball into the extra granulated sugar, then press the sugared side into the reserved chopped nuts, ensuring the nuts stick well.
- Bake: Place the cookies sugar/nut-side up on the prepared baking sheets, ensuring they are not touching. Bake for 12 to 15 minutes, or until the edges are just lightly golden brown. The center should still look pale.
- Cool: Let the cookies cool on the baking sheet for 5 minutes before transferring them to a wire rack to cool completely.
Notes
- The key to a non-dense texture is stopping the mixer immediately once the dry flour disappears.