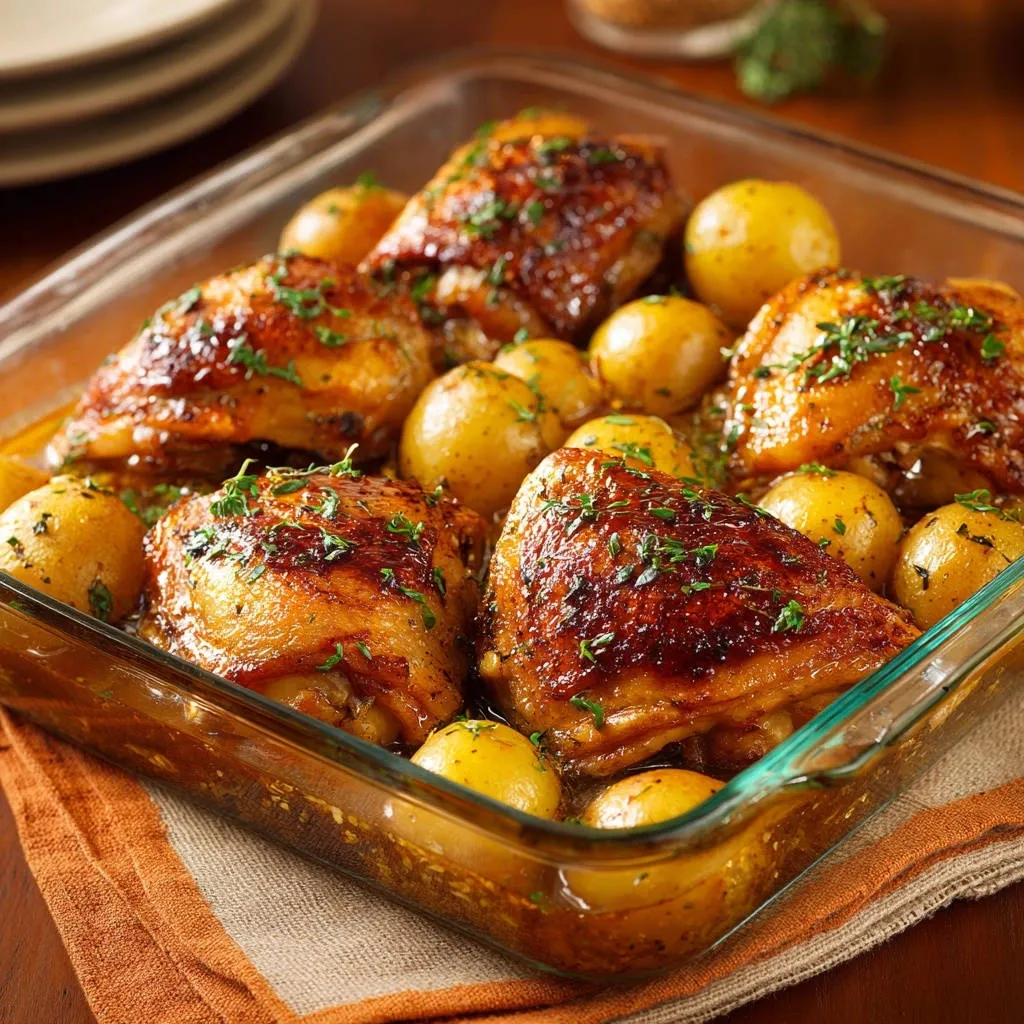
There’s nothing more disheartening than pulling roasted chicken and potatoes from the oven, only to find the chicken skin is far from crisp. I’ve been there, and it truly took the joy out of what should be a simple weeknight meal. This recipe for One-Pan Roasted Chicken & Potatoes solves that problem with a foolproof method, guaranteeing perfectly golden, crispy skin every single time.
Crispy Perfection, Effortless Meals: Why This Recipe Is Your New Favorite
The Crispy Skin Revelation: No More Soggy Surprises!
The hallmark of this One-Pan Roasted Chicken & Potatoes recipe is its utterly crispy chicken skin. Gone are the days of sad, rubbery skin thanks to a key preparation step that makes all the difference.
You’ll enjoy chicken that crackles with flavor, delivering that satisfying crunch in every bite.
For more ways to prepare succulent poultry, explore this herb roasted chicken.
Mastering Juicy Chicken and Tender Potatoes
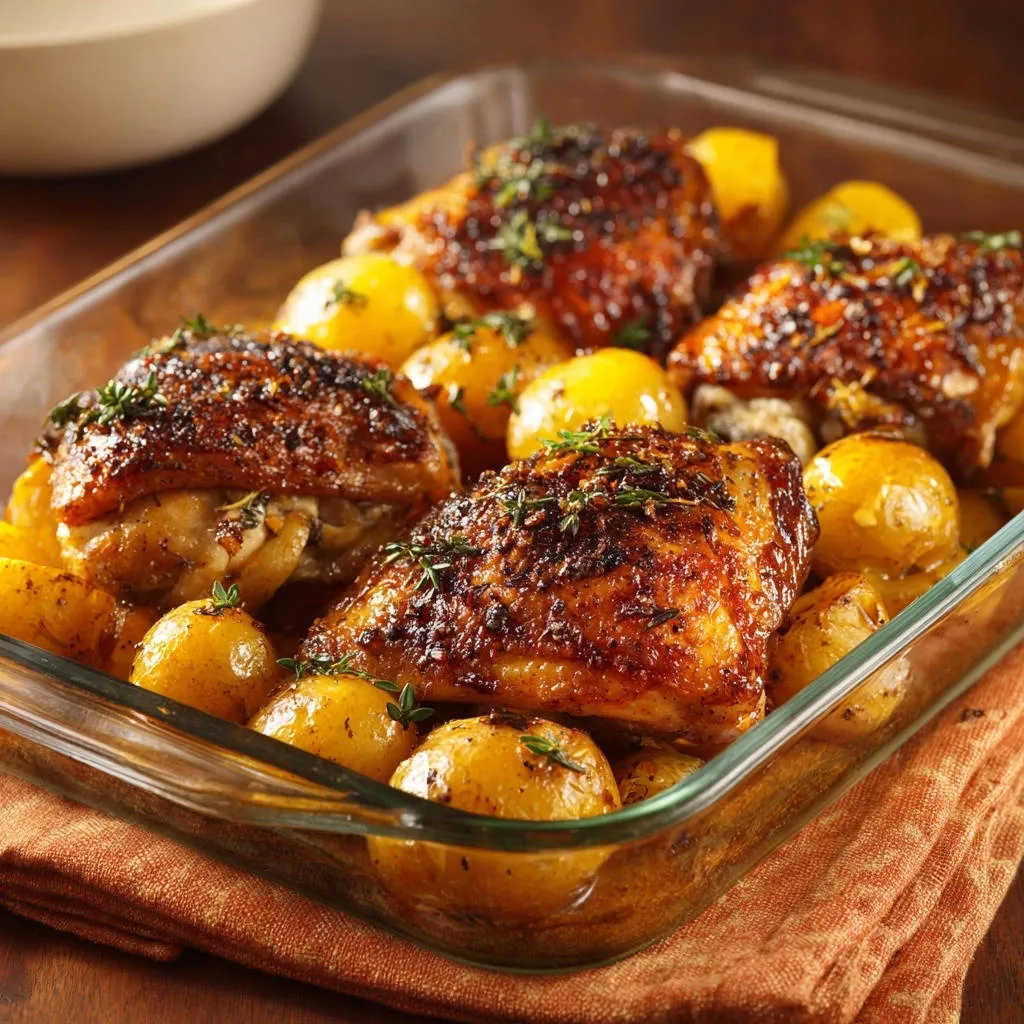
Achieving perfect texture balance is crucial, and this recipe delivers. The chicken stays incredibly juicy on the inside, while the potatoes become beautifully tender and caramelized.
Every element on the pan cooks to its ideal consistency for a harmonious meal.
One Pan, Maximum Flavor, Minimal Cleanup
The beauty of a one-pan meal cannot be overstated. All the ingredients roast together, allowing their flavors to meld and deepen without multiple pots and pans to wash.
This means more time enjoying your dinner and less time scrubbing dishes.
Weeknight Winner: Speed and Simplicity
This One-Pan Roasted Chicken & Potatoes dish is designed for busy schedules. With minimal prep and straightforward steps, it’s a fuss-free solution for delicious weeknight dinners.
You can have a wholesome, impressive meal on the table with surprising ease.
Gather Your Essentials: What You’ll Need for One-Pan Roasted Chicken & Potatoes
The Stars: Chicken and Potatoes
For the chicken, select 4-6 bone-in, skin-on chicken thighs or drumsticks. The bone adds flavor and helps the chicken cook evenly, while the skin is essential for that irresistible crispiness.
Small new potatoes, scrubbed clean, are ideal for roasting alongside the chicken. Their size allows them to cook through at a similar rate, becoming tender and slightly caramelized.
If new potatoes aren’t available, quartered Yukon Gold or red potatoes also work wonderfully.
Flavor Foundation: Oils and Seasonings
Olive oil is your friend for both the chicken and potatoes, helping them achieve a beautiful golden crust and distribute the seasonings evenly. Salt and black pepper form the essential base, enhancing the natural flavors of the ingredients.
Dried thyme adds an earthy, aromatic note that complements chicken beautifully. Garlic powder provides a warm, savory depth without the risk of fresh garlic burning during roasting.
A touch of paprika contributes a subtle sweetness and a gorgeous reddish hue to the roasted skin.
For a similar approach to glazed chicken and potatoes, check out this honey mustard glazed chicken.
The Secret Sauce: Chicken Broth
Just half a cup of low-sodium chicken broth plays a strategic role in this recipe. It’s added to the pan, but importantly, away from the chicken skin.
This broth ensures the potatoes stay tender and cook through, creating a flavorful, steamy environment for them without making the chicken skin soggy.
Your Kitchen Arsenal: Tools for Roasting Success
Having the right tools makes all the difference in achieving a perfectly roasted meal.
The Right Baking Dish Matters
A 9×13 inch baking dish is ideal for this recipe. Its size allows the chicken and potatoes to be spread in a single layer, crucial for proper air circulation and crispy results.
Glass or ceramic dishes work well for even heat distribution, ensuring everything cooks consistently.
Thermometer for Perfect Doneness
An instant-read meat thermometer is your best friend for food safety and perfectly cooked chicken. It eliminates guesswork, ensuring your chicken is juicy and never overcooked.
Aim for 165°F (74°C) in the thickest part of the chicken, avoiding the bone.
Patting Dry: Paper Towels are Your Friend
This simple tool is indispensable for the crispy skin trick. You’ll need plenty of paper towels to thoroughly dry the chicken pieces before seasoning.
The drier the surface, the crispier the skin will become during roasting.
From Pan to Plate: Your Step-by-Step Guide to Crispy Roasted Chicken
- Preheat Your Oven:
Start by preheating your oven to a robust 425°F (220°C). This high temperature is crucial for achieving a beautiful sear on the chicken and ensuring the potatoes roast rather than steam, leading to that coveted crispy exterior and tender interior.
- The Game-Changing Crispy Skin Prep:
This is the single most critical step for crispy skin: pat the chicken pieces extremely dry with paper towels. Remove as much surface moisture as possible.
Any moisture on the skin will turn into steam in the oven, preventing it from crisping up and instead making it rubbery. The drier the chicken, the crispier the skin will be.
- Season and Spread the Potatoes:
In a large bowl, combine your scrubbed small new potatoes with 1 tablespoon of olive oil, 0.5 teaspoon salt, and 0.25 teaspoon black pepper. Toss them well to ensure they are evenly coated.
Spread the seasoned potatoes in a single, even layer in your 9×13 inch baking dish. This ensures all surfaces get direct heat exposure, promoting even browning and tenderness.
- Flavoring the Chicken:
In the same bowl (or a clean one if preferred), drizzle the remaining 1 tablespoon of olive oil over the thoroughly dried chicken pieces. Sprinkle generously with the remaining 0.5 teaspoon salt, 0.25 teaspoon black pepper, dried thyme, garlic powder, and paprika.
Take your time to rub the seasonings all over each chicken piece, ensuring a flavorful crust. If you can, gently loosen the skin a little and rub some seasoning directly onto the meat underneath for maximum flavor penetration.
- Arranging for Success:
Carefully arrange the seasoned chicken pieces on top of the potatoes in the baking dish, making sure the skin side is facing up. Position them so there’s some space between each piece and the edges of the pan.
It’s essential that the chicken skin has direct exposure to the circulating hot air for it to become wonderfully crispy, not tucked away or submerged.
- Adding the Broth Strategically:
Pour the 0.5 cup of chicken broth around the potatoes and chicken in the baking dish, being very careful not to pour it directly over the chicken skin. This is a crucial detail!
The broth provides moisture for the potatoes to cook and steam tenderly, without rehydrating the chicken skin you worked so hard to dry.
- Roast to Golden Perfection:
Place the baking dish in your preheated oven and roast for 35-45 minutes. The precise time will depend on the size of your chicken pieces and oven calibration.
The chicken skin should be deeply golden brown and incredibly crispy, and an instant-read thermometer inserted into the thickest part of the chicken (avoiding bone) should read 165°F (74°C). The potatoes should be fork-tender and lightly browned.
- The Broiler Boost (Optional):
If, after the full roasting time, your chicken skin isn’t quite as crispy as you desire, you can briefly broil it. Move the oven rack closer to the broiler element and broil for 2-3 minutes.
Watch carefully during this step, as broilers can quickly burn food. Just a minute or two is often enough to achieve that extra crispiness.
- Rest and Garnish:
Once roasted, remove the dish from the oven and let it rest for 5 minutes before serving. Resting allows the chicken juices to redistribute throughout the meat, resulting in incredibly moist and flavorful chicken.
Garnish with fresh chopped parsley if desired for a touch of color and fresh flavor.
Unlock the Crispy Code: Advanced Tips for Your One-Pan Roast
Maximizing Dryness: For the ultimate crispy skin, pat the chicken dry and then place it uncovered on a wire rack set over a baking sheet in the refrigerator for at least an hour, or even overnight. Air circulation further dehydrates the skin, leading to unparalleled crispiness.
Choosing the Right Potatoes for Roasting: While new potatoes are great, consider other waxy varieties like red potatoes or Yukon Golds, as they hold their shape well and develop a creamy interior. Starchy potatoes like Russets tend to break down more but can still work if cut larger.
Don’t Crowd the Pan!: This is a common mistake. Overcrowding the baking dish prevents proper air circulation, causing ingredients to steam instead of roast. If you have too many chicken pieces or potatoes for a single layer, use two pans to ensure everything gets crispy and cooks evenly.
Seasoning Under the Skin: Gently work your fingers under the chicken skin to create a pocket. Rub some of the seasoning mixture directly onto the chicken meat. This infuses the chicken with flavor from the inside out and helps prevent the skin from shrinking too much, keeping it nicely draped for crisping.
Monitoring Internal Temperature: Always use an instant-read meat thermometer for safety and best results. Insert it into the thickest part of the chicken thigh or drumstick, being careful to avoid hitting the bone, which can give an inaccurate reading. The target temperature for cooked chicken is 165°F (74°C).
The Broiler Finish: When and How: Only use the broiler if your chicken skin isn’t crisp enough at the end of the main roasting time. Position your oven rack so the chicken skin is 4-6 inches from the broiler element. Broil for short bursts (1-2 minutes), staying vigilant to prevent burning, as broiler heat is intense.
Solving Common Roasting Roadblocks: Troubleshooting Tips
My Chicken Skin Isn’t Crispy Enough!
The most common culprit here is moisture. Revisit step 2 and ensure your chicken is exceptionally dry before seasoning. If it’s still not crisp enough after roasting, utilize the broiler for 2-3 minutes, watching it very closely.
Potatoes Aren’t Tender
If your potatoes are still firm, they might have been cut too large, or the pan was overcrowded. Ensure potatoes are cut into uniform, small pieces. You can also cover the pan with foil for the first 15-20 minutes of roasting to steam them slightly, then uncover to let them brown and crisp.
Chicken is Dry
Dry chicken usually indicates overcooking. Rely on your instant-read meat thermometer to pull the chicken from the oven precisely when it reaches 165°F (74°C). Remember, carryover cooking will raise the temperature a few more degrees as it rests.
Pan is Too Crowded
Crowding leads to steaming instead of roasting. If your ingredients don’t fit in a single layer with a little space around them in a 9×13 inch dish, use two smaller baking dishes or a larger, half-sheet pan. Even distribution is key for crispy results.
Beyond the Basics: Customizing and Enjoying Your Dish
Flavor Twists and Ingredient Swaps
Feel free to get creative with your seasonings! Add a pinch of smoked paprika for a deeper flavor, or a sprinkle of dried rosemary for an aromatic twist. A squeeze of fresh lemon juice over the finished dish brightens all the flavors beautifully.
While bone-in, skin-on chicken is recommended, you can use bone-in, skin-on chicken breasts, adjusting cooking time as needed to reach 165°F (74°C). For a lighter touch, you could swap some potatoes for other hearty, quick-roasting vegetables like crispy roasted Brussels sprouts or bell peppers.
Perfect Pairings: What to Serve Alongside
This One-Pan Roasted Chicken & Potatoes is a complete meal on its own, but it pairs wonderfully with a simple green salad for freshness. A vibrant side like simple summer tomato salad or blanched green beans would also be excellent complements.
Round Out Your Meal
This roasted chicken and potatoes pairs well with cool, creamy salads.
- For a fresh take on a classic, consider this creamy herb and pea potato salad, which uses similar comforting flavors.
- If you enjoy dill, the creamy dill potato pea salad offers a bright herbal note that complements roasted chicken.
For something heartier, consider a rich gravy made from the pan drippings, or serve with a dollop of creamy garlic dip.
Make-Ahead and Storage Solutions
You can prep elements of this dish in advance. Wash and cut your potatoes, and pat your chicken dry and season it, storing both separately in the refrigerator. This cuts down on active cooking time when you’re ready to roast.
Leftovers of One-Pan Roasted Chicken & Potatoes store well in an airtight container in the refrigerator for up to 3-4 days.
Reheating for Best Results
To reheat leftovers and maintain that desirable crispiness, avoid the microwave. The best method is to reheat in an oven or air fryer at 350°F (175°C) until warmed through and the chicken skin crisps up again. This ensures both the chicken and potatoes regain their delicious texture.
Your Questions Answered: One-Pan Roasted Chicken FAQs
Can I Use Boneless, Skinless Chicken?
While you can use boneless, skinless chicken, it won’t achieve the same crispy skin texture, which is a highlight of this recipe. It will also cook much faster, so monitor its internal temperature closely to avoid overcooking and dryness.
What Other Vegetables Can I Add?
Many vegetables roast well alongside chicken and potatoes! Hearty options like carrots, parsnips, or even sweet potatoes, cut to a similar size as your potatoes, work beautifully. Quick-cooking vegetables like broccoli florets or bell peppers can be added during the last 15-20 minutes of roasting so they don’t get overcooked.
Is This Recipe Gluten-Free?
Yes, this One-Pan Roasted Chicken & Potatoes recipe is naturally gluten-free, assuming you use a gluten-free chicken broth. All the ingredients are whole, unprocessed foods.
Can I Prepare This Ahead of Time?
You can certainly do some prep work in advance! You can wash and cut the potatoes, and pat the chicken dry and season it, then store them separately in the refrigerator. Assemble and roast just before you’re ready to eat for the best results.
Your Culinary Triumph Awaits: Share and Savor!
You now possess the secrets to creating the most satisfying, crispy-skinned One-Pan Roasted Chicken & Potatoes. This recipe delivers on flavor, convenience, and that coveted crispy texture that will make it a regular in your meal rotation.
Go ahead, give it a try this week! I’d love to hear how your experience goes and see your delicious results. Happy roasting!
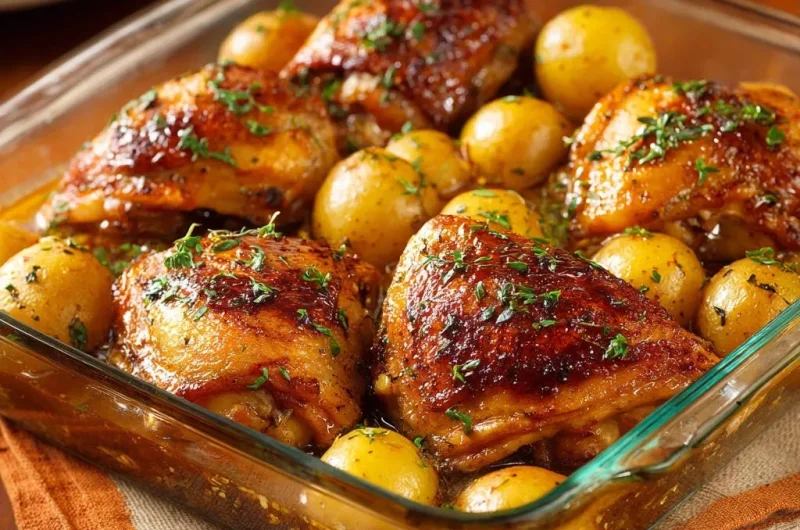
Roasted Chicken Potatoes
Course: Main CourseCuisine: AmericanDifficulty: easy4
servings15
minutes35
minutes450
kcal50
minutesSay goodbye to soggy chicken skin! This easy one-pan recipe reveals the secret to perfectly golden, crispy chicken every time. Enjoy juicy chicken and tender potatoes, all cooked together for a simple and delicious weeknight meal.
Ingredients
4-6 bone-in, skin-on chicken thighs or drumsticks
1.5 pounds small new potatoes, scrubbed
2 tablespoons olive oil, divided
1 teaspoon salt, divided
0.5 teaspoon black pepper, divided
1 teaspoon dried thyme (or fresh, roughly chopped)
0.5 teaspoon garlic powder
0.25 teaspoon paprika
0.5 cup chicken broth (low sodium preferred)
Fresh parsley, chopped, for garnish (optional)
Directions
- Preheat your oven to 425F (220C).
- The Secret to Crispy Skin: Pat the chicken pieces extremely dry with paper towels. This is the single most important step to prevent soggy skin. The drier the skin, the crispier it will get.
- In a large bowl, toss the scrubbed small potatoes with 1 tablespoon of olive oil, 0.5 teaspoon salt, and 0.25 teaspoon black pepper. Spread them in a single layer in a 9×13 inch baking dish.
- In the same bowl (or a clean one), drizzle the remaining 1 tablespoon of olive oil over the dried chicken pieces. Sprinkle with the remaining 0.5 teaspoon salt, 0.25 teaspoon black pepper, dried thyme, garlic powder, and paprika. Rub the seasonings all over the chicken, making sure to get under the skin slightly if possible.
- Arrange the seasoned chicken pieces on top of the potatoes in the baking dish, skin-side up. Ensure the chicken skin is not submerged in too much liquid and has direct exposure to the heat.
- Pour the chicken broth around the potatoes and chicken in the baking dish. Do not pour directly over the chicken skin.
- Roast for 35-45 minutes, or until the chicken skin is deeply golden brown and crispy, and an instant-read thermometer inserted into the thickest part of the chicken (avoiding bone) reads 165F (74C). The potatoes should be tender.
- If the skin isn’t as crispy as desired, you can briefly broil for 2-3 minutes at the end, watching carefully to prevent burning.
- Remove from oven. Let rest for 5 minutes before serving. Garnish with fresh chopped parsley if desired.
Notes
- Features a simple trick for achieving irresistibly crispy chicken skin.