Nothing ruins a beautiful dinner faster than a plate of pasta sitting in a watery puddle. You’ve likely experienced it: you cook the noodles, toss them with your ingredients, and by the time you sit down, the sauce has separated into a thin, flavorless liquid at the bottom of the bowl. This “soggy bottom” syndrome is the hallmark of home-cooked pasta that hasn’t been properly emulsified, but it’s a mistake you’ll never make again once you master the glossy glaze technique.
The secret to restaurant-quality pasta isn’t a complicated ingredient list; it’s the physics of the pan. By using the starchy water from the pasta pot as a bridge between the fats and the noodles, you create a silky, cohesive coating that clings to every curve. Orecchiette, which translates to “little ears,” is the perfect vessel for this method because its concave shape acts like a tiny scoop, capturing the salty capers and the rendered fat from the seared sausage in every single bite.
To ensure success, you must treat your pasta water like liquid gold. Most home cooks dump that cloudy water down the drain, but that starch is exactly what binds the butter and sausage oils into a thick, velvety sauce. One pro tip I always share: use a slightly smaller pot than usual and less water than you think you need. This concentrates the starch, giving you a much more powerful “glue” for your emulsion that results in a professional, high-gloss finish.
The Anatomy of Orecchiette with Seared Sausage
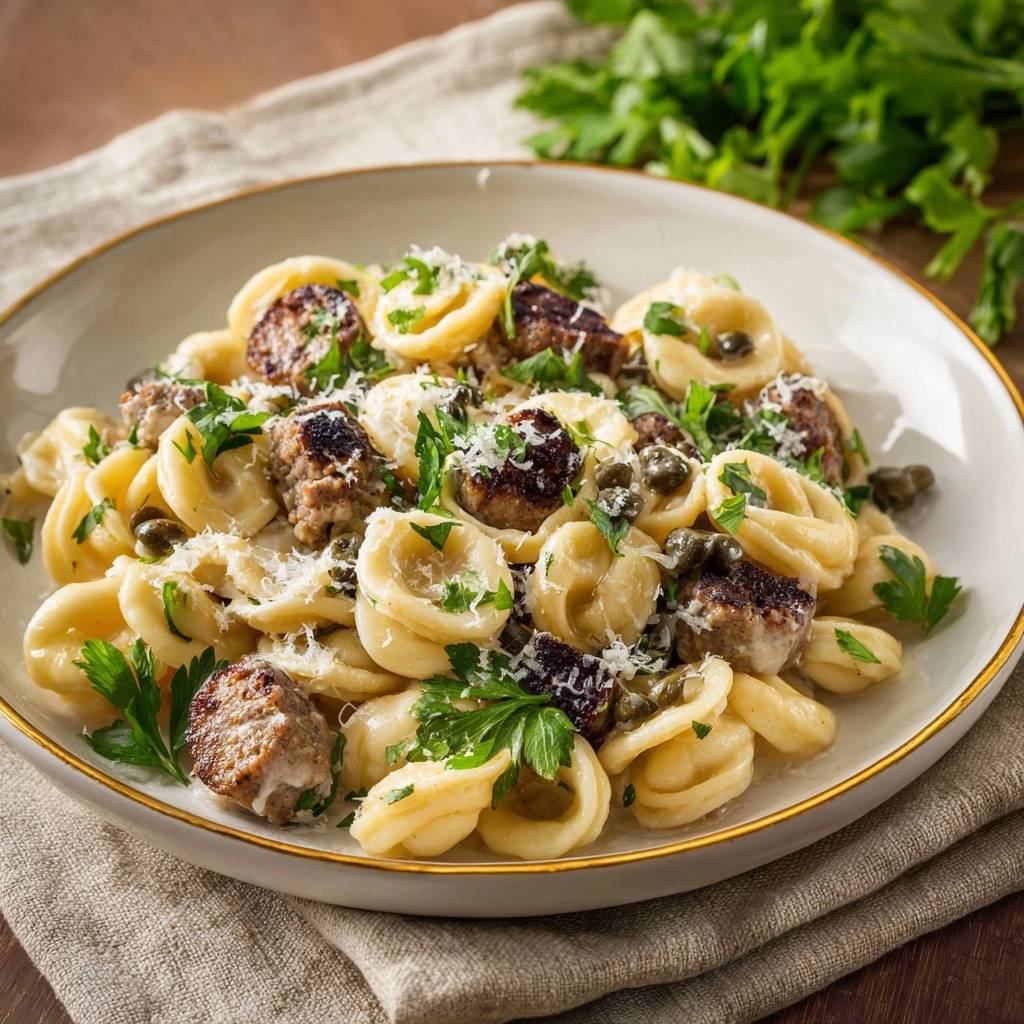
Orecchiette is the undisputed champion for this specific flavor profile. Unlike long, thin strands like spaghetti that let small ingredients fall to the bottom, these sturdy, ear-shaped discs provide a structural home for the chunky sausage rounds and the tiny, briny capers. The texture is slightly chewy, providing a satisfying contrast to the crispy, seared edges of the meat.
The flavor profile here is a masterclass in balance. You have the deep, savory richness of the Italian sausage, the sharp, vinegary pop of the capers, and the earthy brightness of fresh Italian parsley. Because the sauce is built on an emulsion of fat and starch, it carries these flavors across your palate without feeling heavy or greasy. It’s a bright, punchy dish that feels sophisticated yet incredibly comforting.
Selecting Quality Italian Sausage and Capers
When you’re shopping, look for high-quality Italian sausage links rather than the bulk ground meat sold in tubes. The casing is actually your friend here; it helps the sausage maintain its round, coin-like shape during the high-heat searing process. This shape is vital for the “mouthfeel” of the dish, as it mirrors the size and scale of the orecchiette noodles themselves.
For the capers, I recommend looking for “non-pareil” varieties, which are the smallest and most delicate. They offer a concentrated burst of salt and acid without being overwhelming. Always drain your capers thoroughly before adding them to the pan. If you leave them sitting in their brine, you’ll lose control over the sodium levels of the final dish, making it difficult to season accurately at the end.
The Role of Starchy Pasta Water
The science of a perfect pasta sauce relies on starch molecules. As the orecchiette boils, it releases amylose and amylopectin into the water. These molecules act as emulsifiers, which means they have the unique ability to hold oil and water together in a stable mixture. Without this starch, the butter and sausage fat would simply slide off the noodles and pool at the bottom of your plate.
You want your pasta water to look cloudy, not clear. This cloudiness is a visual indicator that the water is saturated with the starch you need. If you find your water is too clear, it usually means you used too much water in the pot. For this recipe, aim for just enough water to cover the pasta by an inch or two, which ensures the starch is concentrated enough to create that signature glossy glaze.
Essential Components for the Glossy Sauce
The ingredient list for this sauce is short, which means the quality of each item is paramount. I always use unsalted butter for the emulsion. Since the sausage, capers, and Parmesan cheese all bring significant amounts of salt to the table, using unsalted butter allows you to manage the seasoning precisely. You can always add a pinch of salt at the end, but you can’t take it away once it’s in the pan.
Temperature and preparation are equally important. Your Parmesan cheese must be freshly grated from a wedge. Pre-shredded cheeses in bags are coated in potato starch or cellulose to prevent clumping in the package, but those same additives will prevent the cheese from melting smoothly into your sauce. For a silky finish, grate the cheese finely so it can dissolve almost instantly when it hits the warm pasta.
Step-by-Step: Achieving the Perfect Sausage Sear
The most common mistake people make is moving the meat too soon. To get a restaurant-quality sear, you need the Maillard reaction, which is the chemical reaction between amino acids and reducing sugars that gives browned food its distinctive flavor. Your skillet needs to be hot—shimmering oil hot—before the sausage rounds ever touch the surface.
Once you place the sausage in the pan, leave it alone. Don’t stir, don’t poke, and don’t flip for at least three minutes. You want to see a deep mahogany crust form on the bottom. If you overcrowd the pan, the moisture released by the meat will turn into steam, and you’ll end up with grey, boiled-looking sausage instead of crispy, flavorful rounds. Work in batches if your skillet isn’t large enough to hold everything in a single layer.
Building the Fond in Your Skillet
As the sausage sears, you’ll notice brown bits starting to stick to the bottom of the pan. This is called “fond,” and it is pure flavor gold. These caramelized bits are the essence of the sausage spices and fats. Do not wash the pan or think you’ve burned it; this is the foundation of your entire sauce.
When you eventually add the starchy pasta water and the butter, you’ll perform a process called deglazing. The liquid will lift those browned bits off the bottom of the skillet and incorporate them directly into the sauce. This ensures that every drop of flavor from the searing process ends up coated onto your orecchiette rather than left behind in the sink.
The Emulsification Process: From Water to Glaze
This is the most critical part of the recipe. Once the pasta and water are in the skillet with the fat, you need to move quickly and vigorously. This isn’t a gentle stir; it’s a high-heat agitation. By tossing the pasta or stirring it rapidly while the liquid boils, you are forcing the fat and the starchy water to bind together into a creamy, unified glaze.
You’ll see the transformation happen right before your eyes. The liquid will go from being thin and watery to thick and opaque, eventually coating the noodles in a shimmering film. If the pan looks dry or the noodles are sticking, don’t be afraid to add another splash of that reserved water. The goal is a sauce that looks like a thin gravy, not a soup, and certainly not a dry pile of noodles.
Timing the Pasta for Al Dente Texture
You must pull your orecchiette out of the boiling water about two minutes before the package says it’s done. This is non-negotiable. The pasta will finish its cooking process inside the skillet, submerged in the sauce. This allows the noodles to actually absorb the flavored liquid into their core, rather than just being coated on the outside.
If you cook the pasta to “perfectly done” in the water, it will become mushy and overcooked by the time the emulsion is finished in the pan. By undercooking it initially, you ensure the final result has that classic al dente “bite.” The pasta should feel slightly too firm when you drain it, knowing it will soften to perfection during those final two minutes of tossing.
For a sauce that gleams, consider the approach behind brown butter mushroom spaghetti.
Integrating Cheese Without Clumping
Adding cheese to a boiling pan is a recipe for disaster. High heat causes the proteins in the Parmesan to tighten and seize, resulting in rubbery clumps of cheese and a greasy, broken sauce. To get that silky, integrated finish, you must take the skillet off the heat entirely before the cheese goes in.
Let the pan sit for about 30 to 60 seconds to let the temperature drop just slightly. Then, sprinkle the cheese over the pasta and stir rapidly. The residual heat of the noodles and the sauce is more than enough to melt the finely grated cheese into the emulsion. This creates a creamy, stable sauce that stays smooth even as it begins to cool on the plate.
Troubleshooting Common Pasta Texture Issues
If you find your sauce is still too thin after a minute of tossing, simply keep the heat high and continue to stir. The evaporation will naturally thicken the sauce. Conversely, if the sauce looks “tight” or greasy, it means you don’t have enough water to hold the emulsion. Add a tablespoon of pasta water at a time until the gloss returns and the sauce moves freely.
Never, under any circumstances, rinse your pasta after draining it. Rinsing washes away the very starch you need to build your sauce. Even if you aren’t ready to toss it in the skillet immediately, the natural starches on the surface of the noodle are what allow the sauce to “grip” the pasta. A rinsed noodle is a slippery noodle that will never hold a sauce properly.
Flavor Variations and Ingredient Swaps
While Italian pork sausage is traditional, you can easily swap it for a spicy lamb sausage or even a high-quality chicken or turkey sausage. Just keep in mind that leaner meats like turkey will produce less fat, so you might need to add an extra tablespoon of olive oil to the pan to ensure you have enough base for your emulsion.
If you want to add some greens, broccoli rabe or chopped kale are fantastic additions. Add them to the boiling pasta water during the last three minutes of cooking. They will soften just enough and can be drained right along with the orecchiette. They bring a nice bitterness that cuts through the richness of the butter and cheese without interfering with the technical emulsion process.
What to Serve with Orecchiette and Sausage
Because this dish is rich and savory, it pairs beautifully with something bright and acidic. A simple arugula salad tossed with fresh lemon juice and a bit of olive oil is the perfect companion. The peppery bite of the arugula cleanses the palate between mouthfuls of the creamy, sausage-laden pasta.
You’ll also want a piece of crusty sourdough or a baguette on the table. In Italy, there is a tradition called “fare la scarpetta,” which means “making the little shoe.” It refers to using a piece of bread to scoop up every last bit of sauce left on your plate. With a sauce this glossy and flavorful, you won’t want to leave a single drop behind.
Expert Tips for Success
Firstly, always salt your pasta water heavily. It should taste like the sea. This is your only chance to season the pasta itself from the inside out. If the water isn’t salty, the entire dish will taste flat, no matter how much salt you add to the sauce later.
Secondly, use a stainless steel or cast iron skillet if you have one. Non-stick pans are great for eggs, but they don’t allow for the same level of fond development. A traditional metal surface will give you a much better sear on the sausage and more flavorful browned bits to deglaze into your sauce.
Thirdly, if you have leftovers, don’t just microwave them dry. The emulsion will break when reheated. Instead, put the pasta in a small pan with a splash of water or broth over medium heat. Stir constantly as it warms up to re-emulsify the sauce and bring back that original glossy texture.
Finally, save the fresh parsley for the very last second. The volatile oils in fresh herbs are delicate and will dissipate if they are cooked for too long. Adding half at the end of the tossing process and the other half as a garnish ensures you get the maximum aromatic impact and a beautiful pop of green color.
Frequently Asked Questions
Can I use dried parsley instead of fresh?
I strongly recommend against using dried parsley for this dish. Dried parsley lacks the bright, grassy aroma and the essential oils that help cut through the richness of the sausage fat. Fresh Italian flat-leaf parsley provides a necessary hit of freshness that balances the heavy flavors. If you can’t find fresh parsley, fresh basil or even a small amount of fresh oregano would be a better substitute than the dried version.
What if I forgot to save the pasta water?
It happens to the best of us! If you accidentally dumped the water, you can create a quick substitute. Whisk half a teaspoon of cornstarch or potato starch into a cup of warm water and microwave it for 30 seconds until it’s slightly cloudy. It won’t have the exact flavor of the pasta water, but it will provide the necessary starch to help emulsify the butter and fat into a sauce.
Can I make this gluten-free?
Yes, you can use gluten-free orecchiette, but be aware that gluten-free pasta often releases a different type of starch that can make the sauce thicker or more “gummy” than usual. You may need to use a bit more water than the recipe calls for to keep the sauce fluid. Also, gluten-free pasta can go from al dente to mushy very quickly, so watch the timer closely during the final tossing stage.
Why are my capers too salty?
Capers are packed in a very heavy brine, and some brands are saltier than others. If you find them overwhelming, try placing the drained capers in a small bowl of fresh water for 5 to 10 minutes before cooking. This will leach out the excess salt while keeping the floral, vinegary flavor intact. Always pat them dry before adding them to the hot oil to prevent splattering.
Can I use a different pasta shape?
While orecchiette is the best choice for its “scoop” shape, you can substitute it with other short, textured pastas. Shells (conchiglie) or campanelle are excellent alternatives because they also have nooks and crannies to catch the sauce and capers. Avoid long, smooth noodles like linguine, as the sausage and capers will simply slide off and settle at the bottom of the bowl.
Orecchiette Sausage
Course: Main CourseCuisine: Italian-AmericanDifficulty: easy4
servings10
minutes15
minutes580
kcal25
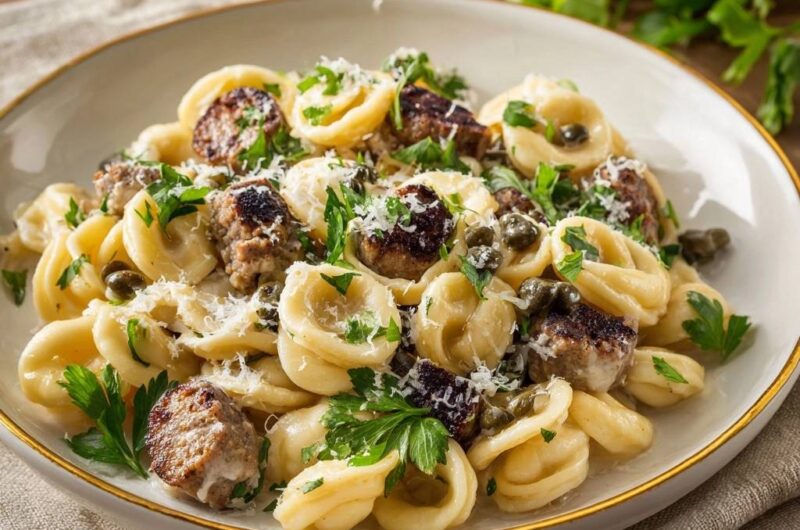
MinutesA flavorful pasta dish featuring crispy seared Italian sausage, briny capers, and orecchiette. The recipe focuses on a specific emulsification technique using starchy pasta water and butter to create a silky sauce that clings to the noodles.
Ingredients
1 pound orecchiette pasta
1 pound Italian sausage links, sliced into 1/2-inch thick rounds
3 tablespoons extra virgin olive oil
2 tablespoons unsalted butter
2 tablespoons capers, drained
1/2 cup fresh Italian parsley, roughly chopped
3/4 cup freshly grated Parmesan cheese
1 cup reserved starchy pasta water
Salt and black pepper to taste
Directions
- Bring a large pot of heavily salted water to a boil. Cook the orecchiette for 2 minutes less than the package directions. The pasta should be slightly firm as it will finish cooking in the sauce.
- While the pasta cooks, heat the olive oil in a large skillet over medium-high heat. Add the sausage rounds in a single layer.
- To solve the soggy pasta problem, sear the sausage undisturbed for 3-4 minutes per side until deeply browned and crispy. This creates a flavorful fond on the pan and prevents the meat from steaming.
- Just before draining the pasta, scoop out 1 cup of the cloudy, starchy pasta water.
- Drain the pasta and add it directly into the skillet with the seared sausage. Add the capers and the butter.
- Pour in 1/2 cup of the reserved pasta water. Increase the heat to high and toss or stir vigorously for 1-2 minutes. This rapid boiling and mechanical action emulsifies the starch, butter, and sausage fat into a creamy glaze. If the pasta looks dry, add the remaining water a splash at a time.
- Remove the skillet from the heat. This is crucial: let the temperature drop slightly before adding 1/2 cup of the Parmesan cheese and half of the parsley. Stir rapidly until the cheese is fully integrated into the glossy sauce.
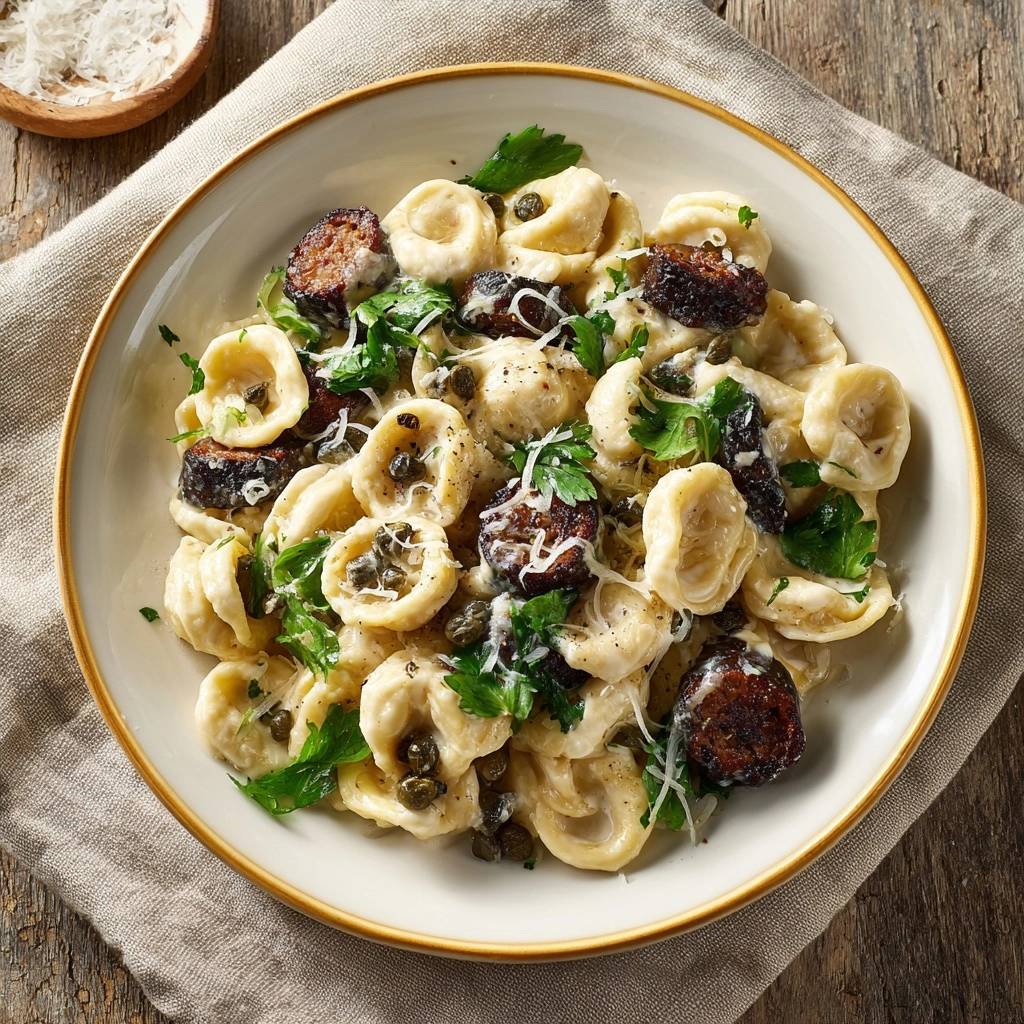
- Serve immediately, garnished with the remaining fresh parsley and a generous dusting of the remaining Parmesan cheese to match the visual texture of the dish.
Notes
- To prevent the sauce from breaking, ensure you remove the skillet from the heat before adding the Parmesan cheese. Always reserve more pasta water than you think you need to adjust the sauce consistency.