I spent years battling dry, rubbery chicken breasts, but mastering one simple technique changed everything and resulted in this incredible Pan-Seared Chicken with Creamy Pepper Sauce.
This recipe uses a strategic sear-oven-rest method to lock in moisture, ensuring every slice is unbelievably juicy, guaranteed.
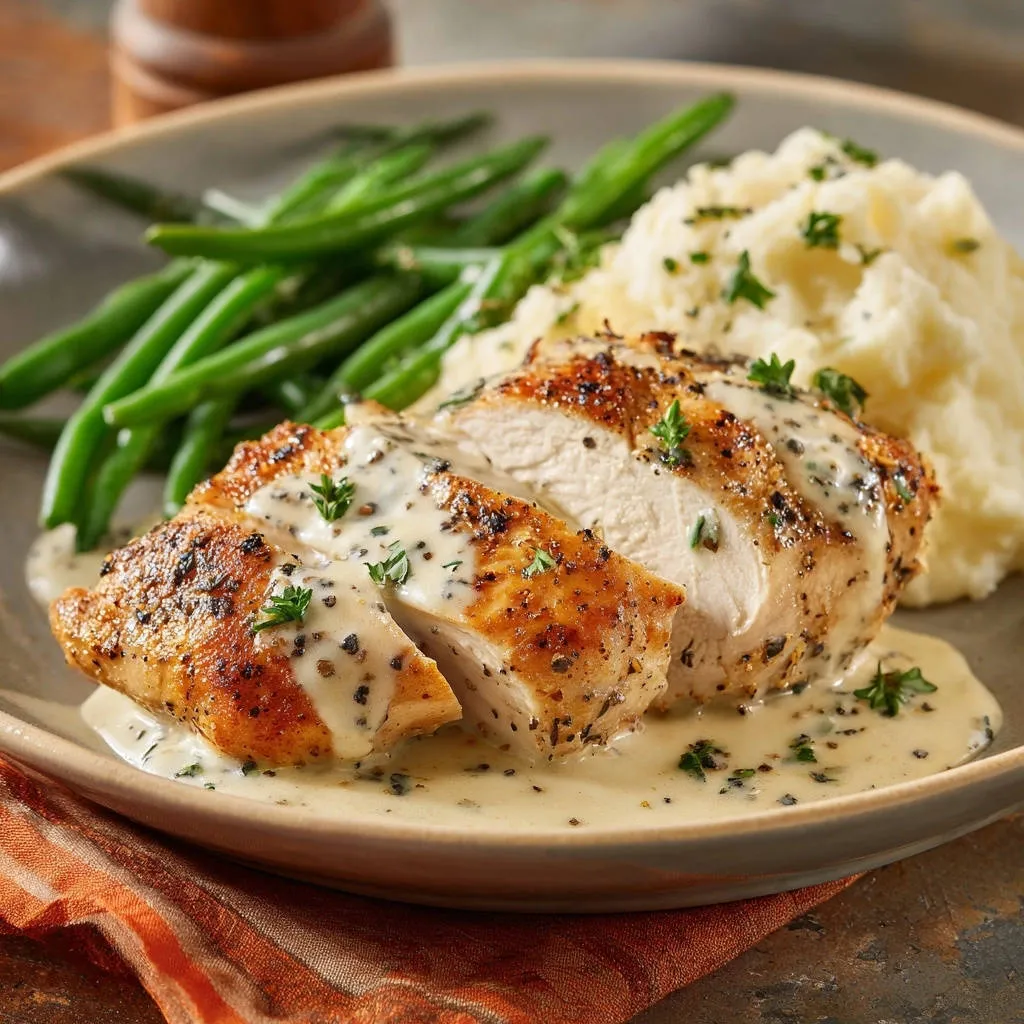
The rich, peppery pan sauce, built directly from the savory fond in the skillet, simply elevates this weeknight meal to restaurant quality.
Why This Pan-Seared Chicken with Creamy Pepper Sauce Never Fails
Achieving perfectly cooked chicken relies less on timing and more on temperature control and technique.
For a similar approach to tender chicken, check out this creamy herb skillet chicken.
We combine high heat searing with a gentle oven finish, a process that ensures intense flavor development on the exterior while cooking the interior evenly.
The Critical Technique: Sear, Bake, and Rest
Searing establishes the crucial Maillard reaction, creating complex, savory flavors and a beautiful golden crust in just a few minutes.
The subsequent brief time in the oven allows the heat to penetrate gently, raising the internal temperature without aggressively drying out the meat’s surface.
This combined approach is the secret weapon, preventing the muscle fibers from seizing up too quickly under prolonged direct heat.
Achieving the Perfect 165°F Internal Temperature Safely
We pull the chicken from the oven precisely at 160°F, not the final serving temperature of 165°F.
Cooking the meat directly to 165°F while it is still in the heat source guarantees overcooked and dry results.
The strategic temperature removal accounts for carryover cooking, ensuring the final, safe temperature is met while maintaining superior tenderness.
Understanding Carryover Cooking: The 10-Minute Moisture Lock
The 10-minute rest is absolutely non-negotiable for a truly juicy result.
During cooking, internal pressure forces the juices toward the center of the meat; the rest allows these high-pressure internal juices to redistribute evenly throughout the muscle fibers.
If you skip the rest and slice immediately, those delicious juices will spill out onto the cutting board, leaving you with inevitably dry chicken.
Building the Perfect Plate: Essential Ingredients for the Creamy Pepper Sauce
Ingredient selection is key to maximizing flavor, especially when creating a depth-rich pan sauce.
For a similar technique, explore this pan-seared chicken with creamy herb sauce.
Focusing on quality aromatics and properly prepared protein guarantees a successful final dish.
The Star Protein: Choosing and Preparing Chicken Breasts
Select large, uniform boneless, skinless chicken breasts for the best results, as they provide an ideal surface area for searing.
The single most important prep step is patting the chicken completely bone dry using paper towels before seasoning.
Residual moisture on the surface will create steam when it hits the hot skillet, inhibiting the Maillard reaction and preventing a beautiful crust from forming.
The Flavor Foundation: Herbs and Seasonings
Freshly cracked black pepper is essential for this creamy pepper sauce, providing the pungent heat and essential textural crunch that pre-ground pepper cannot match.
Thyme, used both dried for the initial seasoning and fresh for garnish, offers a robust, earthy foundation that pairs beautifully with the rich cream base.
The Sauce Essentials: Shallots, Broth, and Cream
We choose minced shallots over pungent garlic for the aromatic base because they offer a sweeter, milder flavor profile.
This prevents the aromatic notes from overpowering the delicate pepper and the savory pan drippings.
Use high-quality, low-sodium chicken broth to control the overall saltiness of the sauce and provide a deep flavor base for the crucial deglazing step.
Finally, heavy cream ensures a stable, luxurious texture that can simmer gently without the risk of breaking or separating.
Essential Gear: Tools for Achieving the Ultimate Pan Sear
Having the right equipment is crucial when moving a dish between the stovetop and the oven.
These three tools are indispensable for mastering juicy Pan-Seared Chicken with Creamy Pepper Sauce.
The Right Skillet Matters: Cast Iron vs. Stainless Steel
An oven-safe skillet is absolutely non-negotiable for this sear-and-bake method.
Cast iron or high-quality stainless steel are ideal choices because they retain heat exceptionally well, ensuring a consistent, even sear across the chicken surface.
The Non-Negotiable Tool: A Reliable Instant-Read Thermometer
An instant-read digital thermometer is the single most important tool for achieving a juicy result every time.
Relying on visual checks risks overcooking; only a precise reading of 160°F before resting guarantees that perfect final temperature.
Pounding and Prep: Mallets and Paper Towels
A meat mallet is useful if your chicken breasts are unusually thick, as it helps lightly pound down the ends for uniform cooking.
Always keep a supply of highly absorbent paper towels handy for the critical drying step before seasoning the chicken.
Step-by-Step Mastery: Cooking Your Pan-Seared Chicken and Crafting the Sauce
Follow these steps exactly, paying close attention to temperature and timing, to achieve flawlessly juicy chicken.
-
Preparation and Even Thickness: The Drying and Pounding Step
Pat the chicken bone-dry, then rub it liberally with the olive oil, salt, pepper, and dried thyme.
If the chicken breasts are very thick, gently pound the thicker ends to create a consistent 1-inch thickness for even cooking throughout the sear and bake.
-
High-Heat Sear: Building the Initial Crust
Heat the skillet over medium-high heat, adding half of the butter; once it foams vigorously and subsides, carefully place the seasoned chicken in the pan.
Sear for 3 to 4 minutes per side until deeply golden brown, ensuring you do not move or peek under the chicken during this time, as this inhibits crust formation.
-
The Moisture-Lock Finish: Transferring to the Oven
Immediately transfer the skillet to the preheated 400°F oven.
Bake for 8 to 12 minutes, depending on thickness, until the internal temperature registered by an instant-read thermometer hits 160°F.
-
The Crucial 10-Minute Rest (Do NOT Skip)
Remove the skillet from the oven and immediately transfer the chicken to a clean cutting board.
Loosely tent the chicken with foil and allow it to rest completely undisturbed for a full 10 minutes to lock in all the reabsorbed juices.
-
Flavor Extraction: Deglazing the Pan Drippings
While the meat rests, place the skillet back on the stovetop over medium heat, add the remaining butter, and sauté the minced shallot until fragrant.
Pour in the chicken broth and use a wooden spoon to vigorously scrape up all the highly concentrated browned bits, or fond, from the bottom of the pan-this is the base of the sauce’s rich flavor.
-
Reducing and Thickening the Pan Sauce
Allow the broth mixture to simmer rapidly until the liquid reduces by roughly half, concentrating the delicious pan drippings.
Stir in the heavy cream and a very generous amount of fresh cracked pepper, simmering gently for 2 to 3 minutes until the sauce has thickened slightly.
-
Slicing and Serving: Maximizing Presentation and Texture
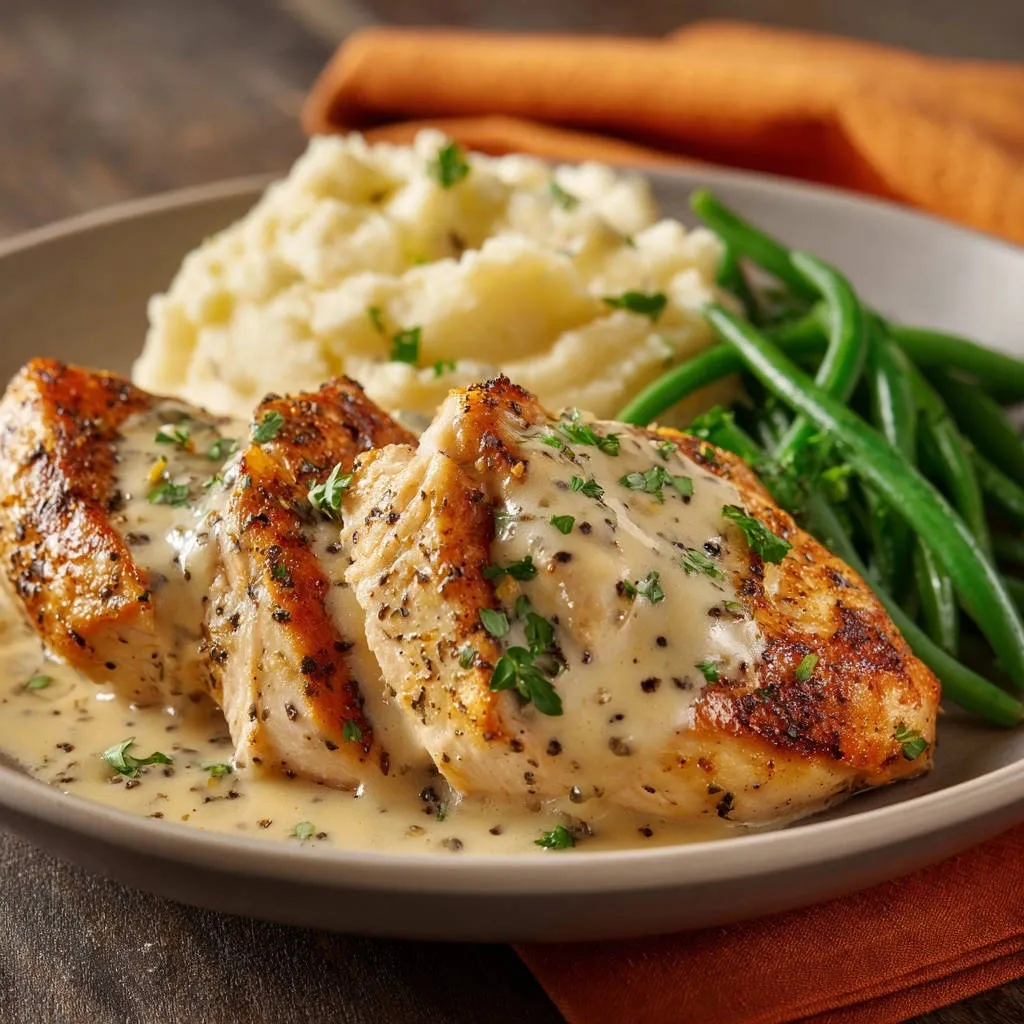
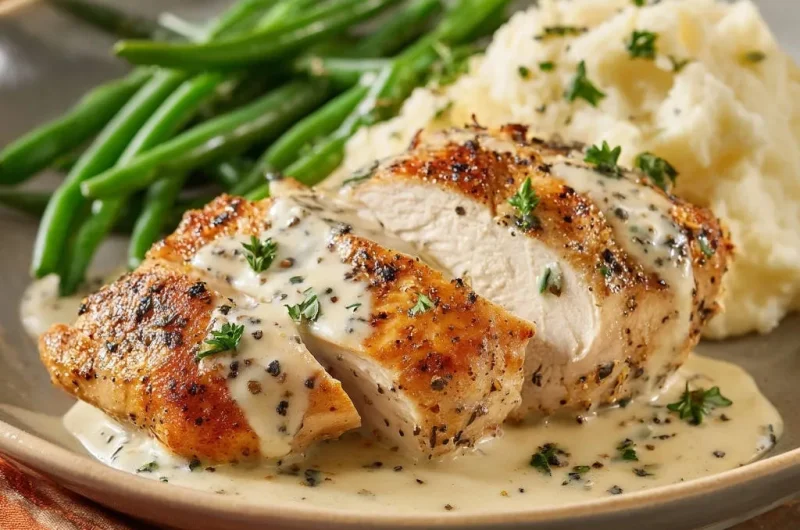
Slice the rested chicken breasts thinly against the grain to maximize tenderness and ensure the most pleasant eating texture.
Arrange the chicken on plates and generously spoon the thick, creamy pepper sauce over top before garnishing with fresh herbs.
Troubleshooting & Pro-Tips: Avoiding the Dry Chicken Disaster
Even expert cooks encounter small hiccups; knowing how to diagnose and fix common mistakes guarantees success.
Common Problem 1: My Sear Is Pale, Not Golden Brown
A pale sear results when the pan is not hot enough, or the chicken surface is still wet.
Ensure the skillet is shimmering hot before adding the butter and that the chicken is completely bone dry before seasoning.
Never overcrowd the skillet, as this dramatically lowers the temperature and causes the chicken to steam instead of sear.
Common Problem 2: My Sauce Broke or Separated
Cream sauces often break if they are allowed to reach a hard boil or if cold cream is added to a very hot liquid.
Ensure the sauce remains at a gentle simmer, never a rolling boil, after incorporating the heavy cream.
If the sauce appears to separate, remove it from the heat and try whisking in a very small amount of cold water or broth to help re-emulsify the fats.
Pro Tip: The Power of Compound Butter
Enhance the initial sear by using clarified butter (ghee) or creating a simple compound butter with minced herbs and garlic.
Clarified butter has a higher smoke point than regular butter, allowing you to use slightly higher heat for better crust development without burning the milk solids.
Pro Tip: Controlling the Pepper Flavor Intensity
For a smoother, mellow pepper background, add a portion of the ground pepper during the sautéing of the shallots.
If you prefer a sharper, more intense bite, reserve a large dose of freshly cracked pepper to stir in only after the heavy cream is fully incorporated into the sauce.
Elevating the Meal: What to Serve Alongside Your Creamy Pepper Chicken
The richness of the creamy sauce requires sides that offer balance in texture and flavor.
Choose pairings that maximize the culinary experience and provide optimal contrast.
What to Serve Alongside
Since you’re making pan-seared chicken with a creamy pepper sauce, consider these complementary dishes to round out your meal.
- For a perfectly creamy starch, try this creamy cheesy garlic rice without the mush.
- Complement the richness of the chicken with these skillet au gratin potatoes, made for a no-watery finish.
Classic Starch Pairings to Complement the Sauce
The richness of the creamy pepper sauce demands a complementary starch that can effectively soak up every drop of the luxurious liquid.
Creamy, garlic-infused mashed potatoes are the time-tested classic, but a buttery Parmesan risotto or a simple rice pilaf also works beautifully.
Bright Green Vegetable Complements
Serving a crisp, slightly acidic green vegetable helps cut through the richness of the heavy cream and provides crucial textural contrast.
Excellent pairings include blanched green beans tossed with lemon zest, roasted asparagus spears, or quickly sautéed broccoli rabe.
Wine and Beverage Pairing Suggestions
A medium-bodied, unoaked Chardonnay or a crisp Sauvignon Blanc stands up well to the richness of the cream and the savory pepper notes.
For non-alcoholic options, try a dry sparkling cider or a refreshing, lemon-infused herbal iced tea to cleanse the palate between bites.
Frequently Asked Questions About Pan-Seared Chicken
Can I Use Chicken Thighs Instead of Breasts?
Yes, chicken thighs are an excellent, moisture-rich substitute, but they require a slightly different approach.
Thighs have more fat and connective tissue, meaning they benefit from being cooked to a higher internal temperature, usually between 175°F and 180°F, to fully render the fat and achieve the best texture.
They often require a longer overall cooking time, typically cooked only on the stovetop or with a longer oven finish.
How Long Does the Creamy Pepper Sauce Keep in the Fridge?
The sauce will keep well in an airtight container for 3 to 4 days in the refrigerator.
To reheat, warm it gently over low heat on the stovetop, stirring constantly; if it seems too thick after chilling, whisk in a tablespoon or two of warm chicken broth or water to restore the consistency.
Is There a Dairy-Free Way to Achieve the Creamy Texture?
Absolutely. Full-fat coconut milk (specifically the thick cream from the top of the can) can mimic the richness, though it will impart a very mild coconut flavor.
For a neutral flavor, blend raw, soaked cashews with vegetable broth and strain; this cashew cream provides remarkable body and thickness without dairy.
Ready to Impress? Share Your Pan-Seared Chicken Masterpiece!
Master this sear-oven-rest technique, and you will never again have to worry about serving dry chicken.
This recipe delivers reliable juiciness paired with a deeply savory, rich pepper sauce that makes dinner truly memorable and highlights your culinary confidence.
Try this Pan-Seared Chicken with Creamy Pepper Sauce tonight, and let us know your favorite side dish pairing in the comments below!
Pan-Seared Chicken
Course: Main CourseCuisine: AmericanDifficulty: easy4
servings10
minutes25
minutes450
kcal35
minutesThis recipe guarantees perfectly juicy chicken breasts by utilizing the crucial residual heat resting technique. The chicken is seared to develop a beautiful crust and then finished with a simple, luxurious creamy pepper pan sauce made right in the skillet.
Ingredients
4 large boneless skinless chicken breasts
1 tablespoon olive oil
1 tablespoon butter, divided
1 teaspoon dried thyme or Italian seasoning
1 teaspoon salt
1 teaspoon freshly cracked black pepper, plus more for garnish
1 large shallot, minced (or 2 cloves garlic, minced)
1/2 cup chicken broth
1/2 cup heavy cream
1 teaspoon fresh thyme sprigs, for garnish
Directions
- Prepare the Chicken for Juiciness. Preheat your oven to 400 degrees F. Pat the chicken breasts completely dry using paper towels. This step is critical for developing a beautiful crust. Rub the chicken on all sides with olive oil, salt, pepper, and dried thyme. If your chicken breasts are extremely thick (over 1 inch at the thickest part), lightly pound the thicker end down to even out the thickness slightly for more consistent cooking.
- Sear the Chicken. Heat a large oven-safe skillet (cast iron works great) over medium-high heat. Add 1/2 tablespoon of butter. Once the butter foams, place the chicken breasts carefully into the pan. Sear for 3 to 4 minutes per side until deeply golden brown. This builds flavor and crust.
- Finish in the Oven (The Moisture Lock). Immediately transfer the skillet to the preheated 400 degree F oven. Bake for 8 to 12 minutes, depending on the thickness, until an internal meat thermometer registers 160 degrees F.
- The Crucial Rest (No More Dry Meat!). Remove the skillet from the oven. This is the key step: Immediately transfer the chicken breasts onto a cutting board and loosely tent them with foil. Let them rest, undisturbed, for a full 10 minutes. The residual heat will carry the temperature up to a safe 165 degrees F while the muscle fibers relax and reabsorb all the delicious juices. Do not skip this step!
- Make the Pan Sauce. While the chicken rests, place the skillet (still containing the pan drippings) back over medium heat on the stovetop. Add the remaining 1/2 tablespoon of butter and the minced shallot (or garlic). Saute for 1 minute until fragrant.
- Build the Sauce. Pour in the chicken broth, scraping up all the browned bits from the bottom of the pan with a wooden spoon; these bits are packed with flavor. Let the liquid reduce by about half, about 2 minutes. Stir in the heavy cream and a generous amount of fresh cracked pepper. Simmer gently until the sauce thickens slightly, about 2 to 3 minutes. Taste and adjust salt if needed.
- Serve. Slice the rested chicken breasts against the grain and arrange them on plates. Spoon the creamy pepper sauce generously over the chicken. Garnish with fresh thyme or parsley and serve immediately alongside mashed potatoes and green beans.
Notes
- Do not skip the 10-minute rest period; this is essential for a moist, juicy chicken breast.