Picture this: you pull a beautiful, golden-brown chicken dish out of the oven, the aroma filling your kitchen, only to slice into it and find… dryness. It’s a culinary heartbreak we’ve all experienced! For years, I wrestled with baking boneless, skinless chicken breasts that were flavorful on the outside but sadly lacking in moisture within.
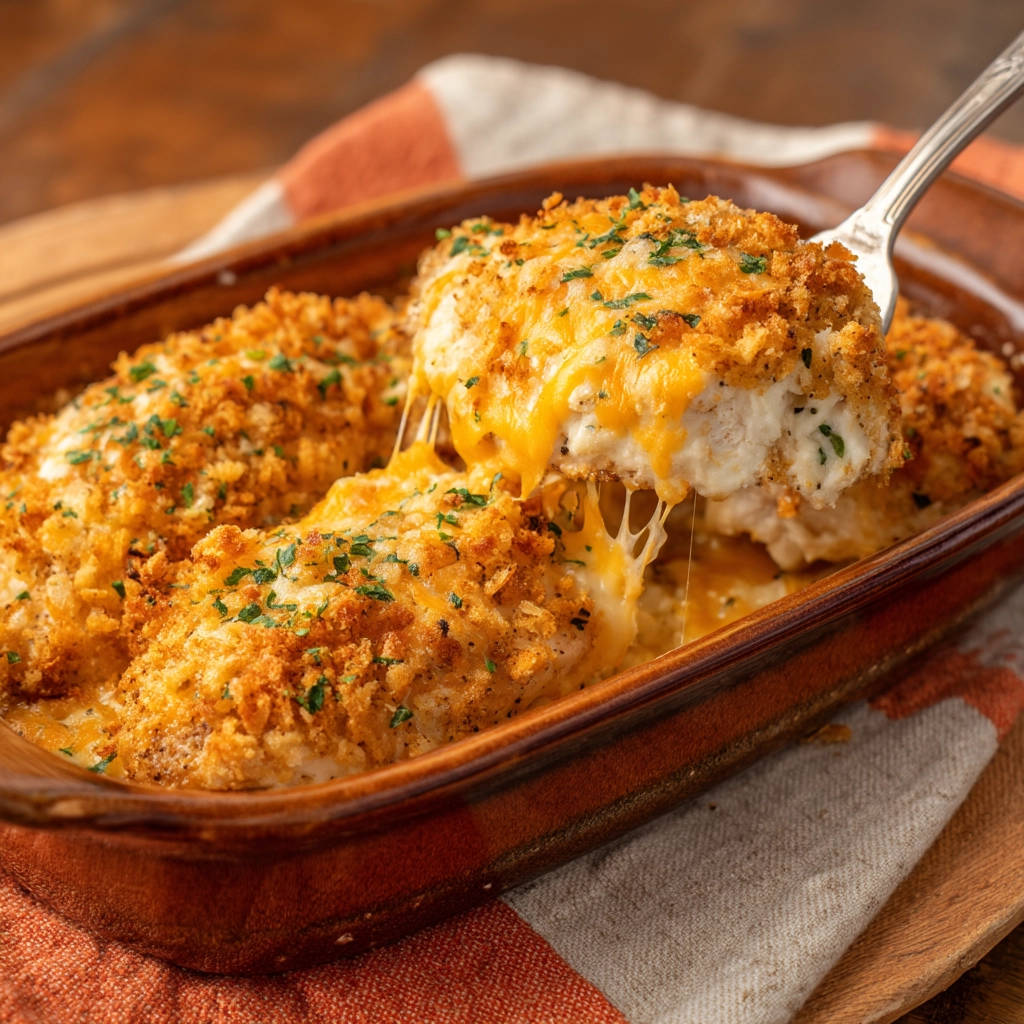
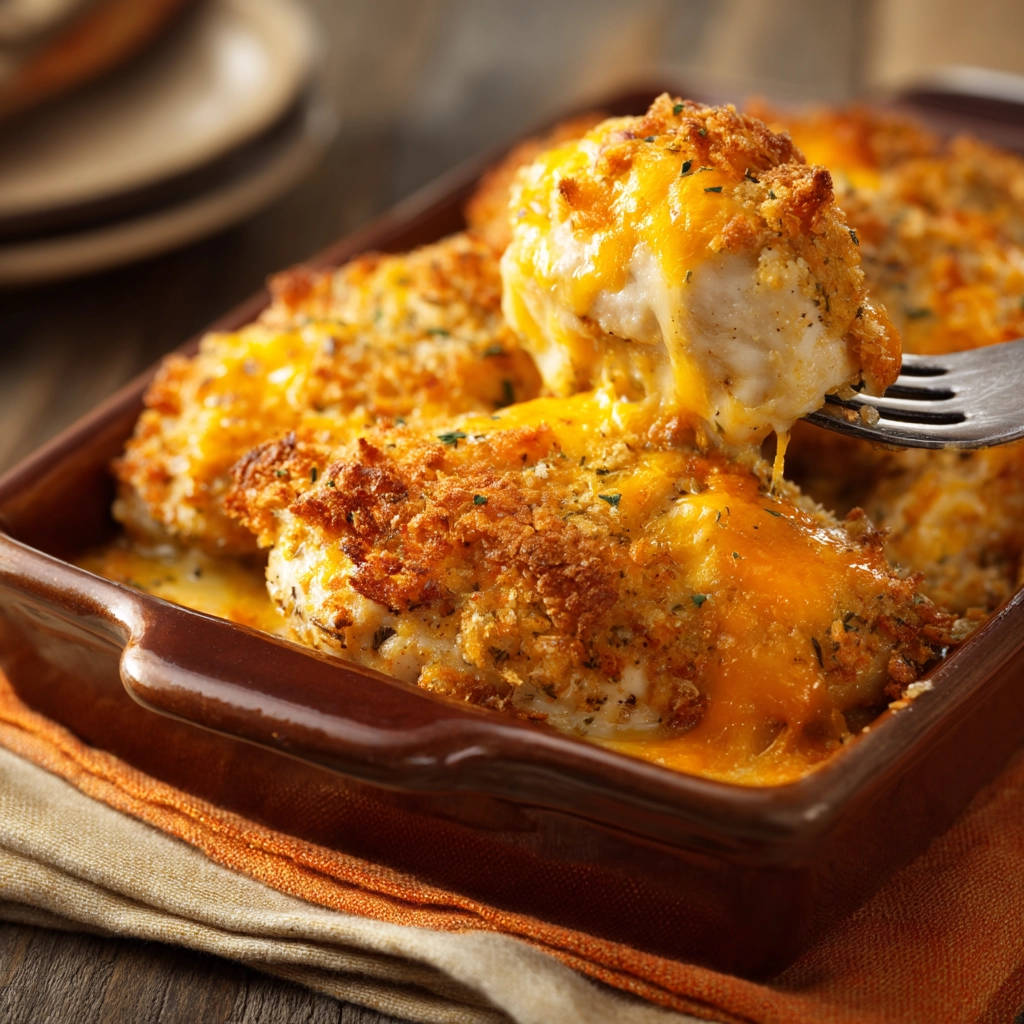
Well, fellow home cooks, I’m here to tell you those days are officially over! I discovered a simple, game-changing trick that guarantees incredibly juicy, tender cheesy baked chicken every single time. This recipe has become a true family favorite, requested regularly, and it delivers a perfect combination of creamy, cheesy goodness, a delightful crispy coating, and that coveted moist interior.
Ready to say goodbye to dry chicken forever and hello to your new favorite dinner? Let’s get started!
Why This Cheesy Baked Chicken is a Keeper
Aside from solving the age-old dry chicken dilemma, this recipe has so much going for it:
- Guaranteed Moisture: The secret ingredient keeps the chicken unbelievably juicy.
- Incredible Flavor: Cream cheese, cheese, and simple seasonings pack a punch.
- Satisfying Texture: You get the creamy chicken inside with a crispy, golden crust outside.
- Weeknight Friendly: It’s quick to prepare and bakes relatively fast.
- Family Approved: It’s a crowd-pleaser, even for picky eaters!
Gathering Your Ingredients for Perfect Cheesy Baked Chicken
This dish relies on a few simple, readily available ingredients that work together to create magic. The beauty is in their combination, transforming plain chicken breasts into something truly special.
Here’s what you’ll need to create this incredibly juicy baked chicken:
- Medium Chicken Breasts: We’ll use four boneless, skinless chicken breasts. Aim for roughly equal sizes so they cook evenly. Patting them completely dry before applying the coating is a critical first step for that crispy exterior!
- Softened Cream Cheese: This is the heart of our moisture-locking strategy! Make sure it’s properly softened to room temperature – this makes it easy to mix and spread smoothly. An 8-ounce block is just right. The fat in the cream cheese melts into the chicken as it bakes, preventing it from drying out.
- Seasonings: We keep it simple but effective with 1 teaspoon of salt, 1/2 teaspoon of black pepper, and 1 teaspoon of garlic powder. These basic pantry staples enhance the chicken’s flavor without overpowering the creamy and cheesy elements.
- Crushed Crackers or Panko Breadcrumbs: This forms our wonderfully crispy coating. You have flexibility here! Crushed buttery crackers (like Ritz) add richness and a distinct savory flavor. Panko breadcrumbs provide a lighter, airier crunch. Choose your favorite or even try a mix! You’ll need about 2 cups.
- Shredded Cheddar Cheese: Because what’s cheesy baked chicken without plenty of cheese on top? About 2 cups of shredded cheddar cheese melts beautifully over the coating, adding another layer of flavor and contributing to the golden finish. Medium or sharp cheddar works wonderfully here.
- Fresh Parsley (Optional): A couple of tablespoons of chopped fresh parsley for garnish adds a pop of color and a touch of freshness right before serving. It’s totally optional but recommended for presentation.
Crafting Your Cheesy Baked Chicken: Step-by-Step Guide
Now that we have our ingredients ready, let’s walk through how to assemble this delightful dish. The process is straightforward, designed for minimal fuss, but paying attention to a few details ensures that perfect juicy result.
Prep the Oven and Dish: Begin by preheating your oven to 375 degrees F (190 degrees C). This ensures the oven is at the correct temperature from the moment the chicken goes in, leading to even cooking. While the oven heats, take a 9×13 inch baking dish and lightly grease the bottom and sides. This prevents sticking and makes cleanup much easier.
Create the Secret Creamy Mixture: Grab a medium-sized bowl. Add the softened cream cheese, salt, black pepper, and garlic powder. Now, mix these ingredients together until they are completely smooth and well combined. This creamy mixture isn’t just for flavor; it’s the essential element that coats the chicken and locks in moisture during baking. Spend a moment ensuring there are no lumps of cream cheese.
Prepare and Coat the Chicken: This step is crucial for both moisture and the coating sticking properly. Pat your chicken breasts thoroughly dry using paper towels. Excess surface moisture can create steam, preventing the crust from crisping. Once dry, take a generous amount of your smooth cream cheese mixture and spread an even layer over the top and sides of each chicken breast. Don’t be shy – cover them well! This is your insurance policy against dry chicken.
Apply the Crispy Coating: Pour your crushed crackers or panko breadcrumbs into a shallow dish or plate. Take each chicken breast that’s been coated in the cream cheese mixture and press it firmly into the crumbs. Make sure all sides, top, and bottom are completely covered. You want a nice, thick layer of crumbs for maximum crunch. Gently shake off any excess.
Arrange for Baking: Carefully arrange the coated chicken breasts in a single layer in the greased 9×13 inch baking dish. Ensure they aren’t touching too much, which helps the heat circulate and the coating crisp up evenly. Giving them a little space is key for that golden texture.
Top with Cheese: Now for the cheesy part! Sprinkle the shredded cheddar cheese evenly over the tops of the chicken breasts. As the chicken bakes, this cheese will melt and get bubbly and golden, creating a delicious cheesy crust that complements the crunchy coating.
Bake to Perfection: Place the dish in your preheated oven and bake for 25 to 35 minutes. The exact time will vary depending on the thickness of your chicken breasts and your oven. You’re looking for the chicken to be cooked through and the coating to be beautifully golden brown and crispy. The most important part of this step is checking for doneness using a meat thermometer. Insert it into the thickest part of the largest chicken breast – it should register 165 degrees F (74 degrees C). As soon as it hits this temperature, take the chicken out! Overcooking is the enemy of juicy chicken.
Garnish and Serve: If you’re using fresh parsley, sprinkle the chopped herbs over the baked chicken just before serving. The vibrant green adds a lovely visual appeal and a hint of fresh flavor. Let the chicken rest for just a couple of minutes before cutting, allowing the juices to redistribute.
Tips for Perfect Cheesy Baked Chicken Every Time
Want to elevate this simple dish even further? Here are a few pro tips:
- Room Temp Cream Cheese is Non-Negotiable: Seriously, this makes mixing and spreading SO much easier and ensures an even coating. Take it out of the fridge at least 30-60 minutes before you plan to mix.
- Don’t Skip Patting Dry: We mentioned it in the steps, but it bears repeating. Dry chicken surface = crispier coating.
- Season the Cream Cheese Well: The cream cheese mixture carries a lot of the flavor. Don’t be afraid to add a pinch more salt or garlic powder if your ingredients feel a bit bland.
- Get a Good Coat: Press firmly into the breadcrumbs or crackers to ensure maximum coverage. This creates the best crust.
- Use a Meat Thermometer: This is your best friend for juicy chicken. Baking time is just a guideline; temperature is key. 165°F (74°C) is the magic number for safe and juicy chicken breast.
- Rest the Chicken: Letting the chicken rest for 5 minutes after baking allows the juices to settle back into the meat, keeping it moist when you slice into it.
Recipe Variations to Try
This basic creamy, cheesy baked chicken recipe is wonderfully adaptable. Once you’ve mastered the classic, try these twists:
- Spice It Up: Add a pinch of cayenne pepper or some red pepper flakes to the cream cheese mixture for a little heat.
- Herb Infusion: Mix dried Italian seasoning, dried chives, or dried dill into the cream cheese for different flavor profiles.
- Cheese Swap: Instead of or in addition to cheddar, try Monterey Jack, Colby Jack, or even a blend of Parmesan and mozzarella for different cheesy dynamics.
- Breadcrumb Boost: Mix in a tablespoon or two of grated Parmesan cheese with the breadcrumbs or crackers for an extra layer of flavor in the crust. You could also add a pinch of dried herbs like parsley or oregano to the coating mixture.
What to Serve With Your Cheesy Baked Chicken
This versatile chicken dish pairs beautifully with a variety of side dishes. For a comforting meal, consider classic pairings like mashed potatoes or roasted vegetables. Our guide to creamy scalloped potatoes or golden roasted potatoes would be perfect complements. If you prefer something lighter, a fresh green salad or our creamy potato salad makes an excellent choice. Simple steamed green beans, broccoli, or asparagus are also fantastic options that let the chicken be the star. And don’t forget some crusty bread like our cheesy garlic bombs to soak up any delicious bits left on your plate!
Your Cheesy Baked Chicken Questions Answered (FAQ)
Can I use chicken thighs instead of breasts?
Yes, absolutely! Chicken thighs are naturally more forgiving and tend to stay juicy more easily due to their higher fat content. If using boneless, skinless thighs, the cooking time might be slightly different. Check for an internal temperature of 175°F (79°C) for thighs, as they are safe and more tender when cooked to a slightly higher temperature than breasts.
Can I prepare this ahead of time?
You can prep the chicken up to the point of arranging it in the baking dish. Cover the dish tightly with plastic wrap and refrigerate for up to 24 hours. When ready to bake, you might need to add a few extra minutes to the baking time since the dish is cold. Ensure it reaches 165°F (74°C).
How do I store and reheat leftovers?
Store any leftover chicken in an airtight container in the refrigerator for 3-4 days. To reheat, the best method for maintaining crispiness is in the oven or an air fryer. Place the chicken on a baking sheet and reheat at 350°F (175°C) until warmed through, typically 10-15 minutes. Reheating in the microwave is okay for speed, but the coating won’t be as crispy.
My coating isn’t getting crispy. What went wrong?
Several factors could cause this. Make sure your oven was fully preheated. Ensure you patted the chicken completely dry before coating. Also, make sure the chicken breasts weren’t overcrowded in the baking dish, which can cause them to steam rather than bake and crisp. Finally, check that you used the right type and amount of crushed crackers or breadcrumbs.
Can I use other types of cheese?
Absolutely! While cheddar is a classic choice that melts and browns nicely, feel free to experiment. Provolone, mozzarella, Monterey Jack, or a blend would all work well, though they might result in a slightly different flavor and melt consistency.
Enjoy Your Homemade Cheesy Baked Chicken!
Say goodbye to dry, disappointing baked chicken! With this recipe and its secret cream cheese trick, you’re ready to create a dish that’s consistently juicy, flavorful, and features that irresistible crispy, cheesy topping. It’s simple enough for a busy weeknight but delicious enough for company.
Give this Cheesy Baked Chicken a try, and let me know how it turns out in the comments below! Did you try a fun variation? What did you serve it with? I love hearing about your kitchen successes!
Cheesy Baked Chicken
Course: Main CourseCuisine: AmericanDifficulty: easy8
servings15
minutes30
minutes650
kcal45
MinutesMake juicy, cheesy baked chicken every time with this easy recipe! Features a creamy secret weapon for guaranteed moisture and a crispy topping.
Ingredients
4 medium chicken breasts
8 ounces softened cream cheese
1 teaspoon salt
1/2 teaspoon black pepper
1 teaspoon garlic powder
2 cups crushed crackers (like Ritz) or panko breadcrumbs
2 cups shredded cheddar cheese
2 tablespoons chopped fresh parsley (optional)
Directions
- Preheat your oven to 375 degrees F. Lightly grease a 9×13 inch baking dish.
- In a medium bowl, combine the softened cream cheese, salt, black pepper, and garlic powder. Mix until smooth. This creamy mixture is the secret weapon that keeps the chicken incredibly moist as it bakes.
- Pat the chicken breasts dry with paper towels. This helps the coating stick better. Spread an even layer of the cream cheese mixture over the top and sides of each chicken breast.
- Place the crushed crackers or breadcrumbs in a shallow dish. Press each cream cheese-coated chicken breast firmly into the crumbs to completely coat all sides.
- Arrange the coated chicken breasts in a single layer in the prepared baking dish.
- Sprinkle the shredded cheddar cheese evenly over the tops of the chicken breasts.
- Bake for 25 to 35 minutes, or until the chicken is cooked through and the coating is golden brown and crispy. To ensure the chicken stays juicy and isn’t overcooked, use a meat thermometer to check that the internal temperature reaches 165 degrees F at the thickest part. Pull it out as soon as it hits this temperature!
- If using, sprinkle with chopped fresh parsley before serving.
Notes
- For an extra crispy coating, ensure your crushed crackers or panko are evenly distributed and pressed firmly onto the cream cheese. If you like a bit of freshness, a sprinkle of fresh parsley over the melted cheese right after baking adds a lovely touch.