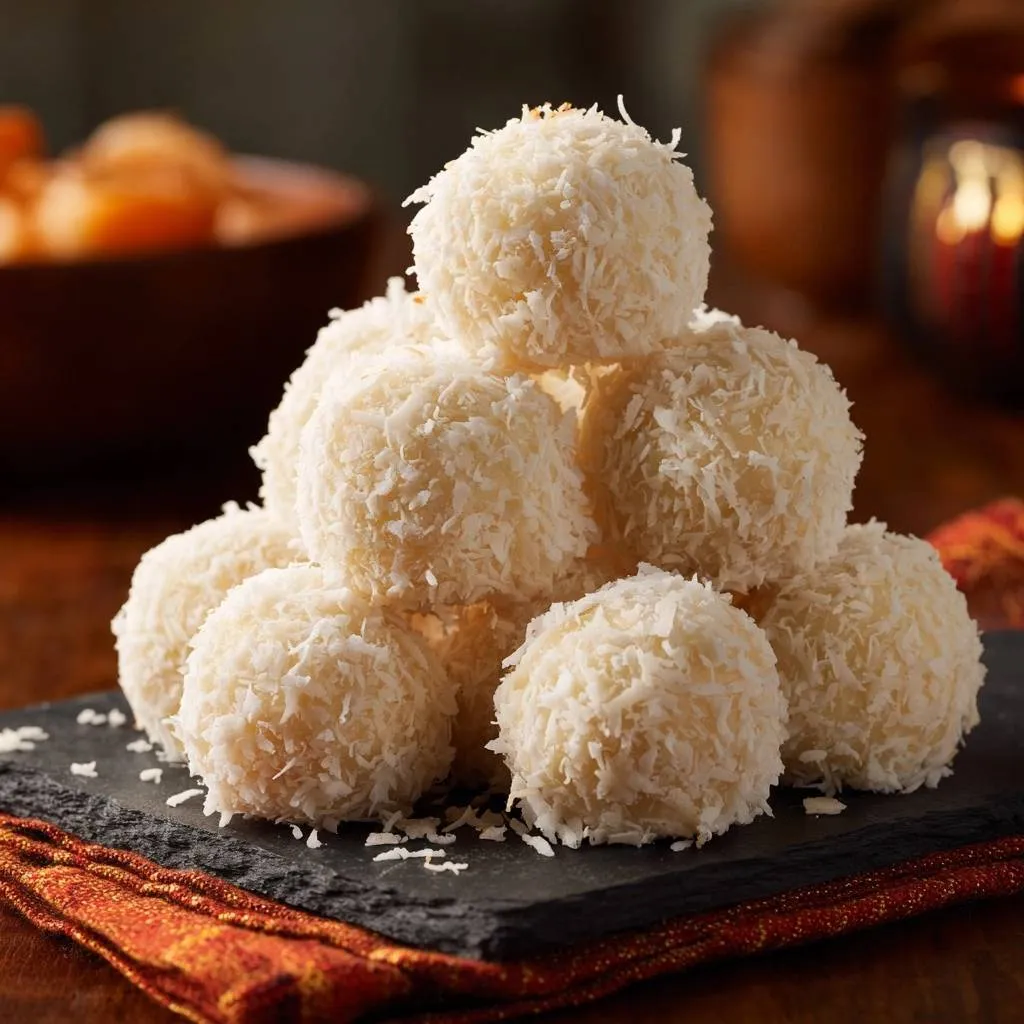
Craving Perfect Coconut Snowballs that don’t crumble into a messy pile? You’ve landed in the right spot. Most recipes fail because they skip the key kneading step, leaving you with dry, falling-apart bites. But this one delivers firm, chewy centers every time with just two ingredients and a simple hand-knead.
These no-bake treats shine for their effortless binding power. Sweetened condensed milk works its magic, creating sticky proteins that hold everything together. You’ll get about 24 snowy orbs ready in under 10 minutes of active work, plus chilling.
For a rich, moist cake experience that stays tender, check out this Classic German Chocolate Cake.
Here’s the game-changer: knead the mix by hand for 2 to 3 minutes. This activates the coconut’s fibers and the milk’s adhesion, turning a crumbly mess into smooth dough. No more disasters, just pure, moist satisfaction.
Why Perfect Coconut Snowballs Transform Treat-Making
Perfect Coconut Snowballs stand out as no-bake gems perfect for holidays, parties, or anytime sweets. Beginners love the simplicity, and they store well without fuss. That tropical vibe draws crowds every time.
Unlike crumbly failures from other recipes, these hold firm thanks to sweetened condensed milk’s binding strength. You’ll skip the oven and still get chewy, moist centers that impress. Plus, they travel great for gifting.
Ideal for Holiday Gifting and Events
Pack Perfect Coconut Snowballs in tins lined with wax paper for stunning gifts. They stay stable at room temp, so no melting worries on party platters. Guests grab them first, every time.
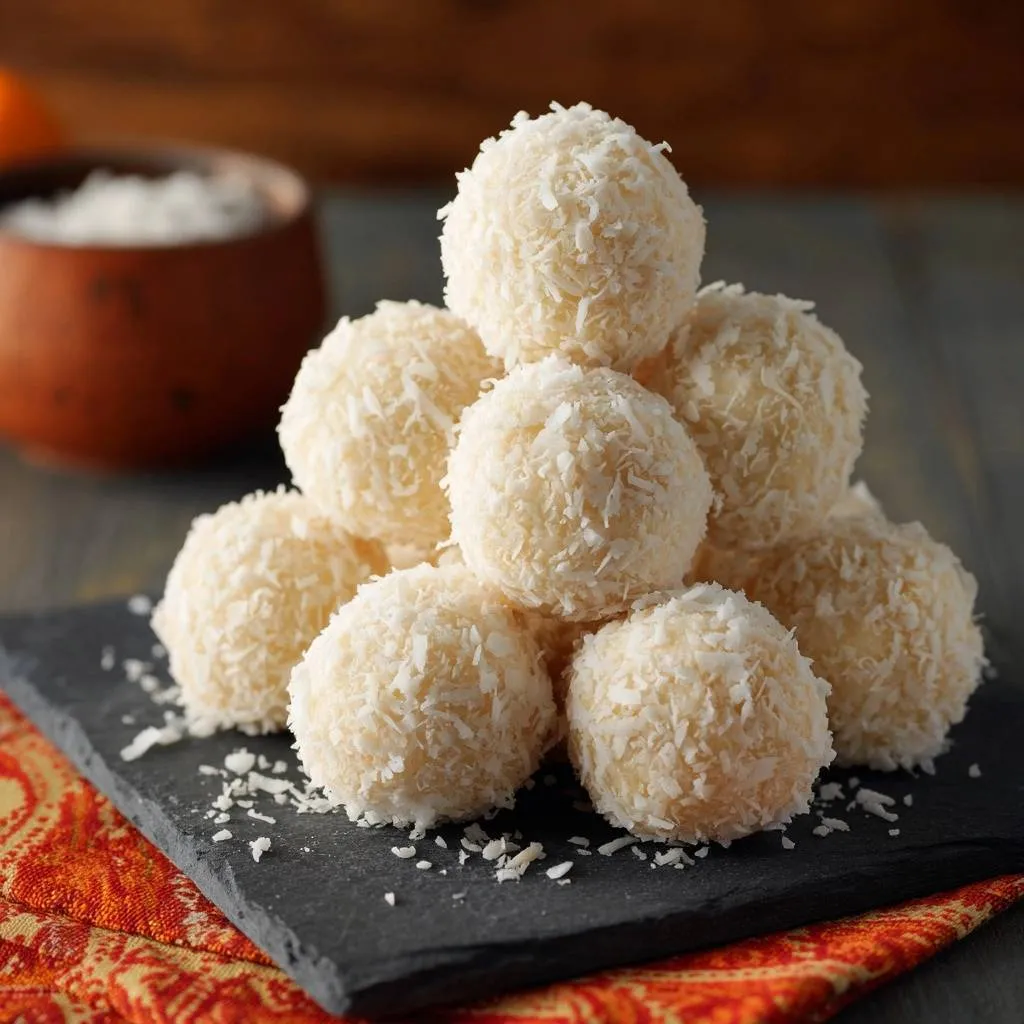
Layer them neatly between parchment sheets to keep coatings pristine. Their snowy look adds festive cheer without extra effort. You’re set for cookie swaps or neighbor treats.
No-Bake Simplicity Meets Chewy Satisfaction
Forget baked cookies that demand hours. Perfect Coconut Snowballs take 10 minutes to prep, yielding firm balls that hold shape beautifully. The chew comes from proper kneading, not heat.
Chill them for an hour, and they’re ready. This method beats fussy doughs hands down. You’ll wonder why you ever bothered with the oven.
Key Ingredients for Flawless Coconut Snowballs
Only two stars make Perfect Coconut Snowballs foolproof: 4 cups sweetened shredded coconut and one 14-ounce can sweetened condensed milk. Divide the coconut, using 3 cups for the base and 1 for coating. This setup ensures moisture inside stays locked in.
Sweetened coconut binds better than unsweetened, thanks to added sugars that boost stickiness. The full can of condensed milk provides essential proteins for adhesion. No extras needed, keeping it simple and shelf-stable.
Shop for fresh coconut without clumps. It shreds evenly and hydrates properly during mixing. These choices guarantee your Perfect Coconut Snowballs won’t dry out.
Sweetened Shredded Coconut Breakdown
Go for medium-shred sweetened coconut in Perfect Coconut Snowballs. It gives the best chew without sogginess. Fine shreds work too, but medium holds shape better.
Reserve that 1 cup for coating to prevent a mushy exterior. Plus, coconut packs fiber for a satisfying bite. Fresh bags ensure top texture.
Sweetened Condensed Milk Magic
The full 14-ounce can is non-negotiable for Perfect Coconut Snowballs. It thickens and binds like nothing else. Evaporated milk lacks the sugars, so it flops.
Store leftovers in the fridge up to two weeks. Shake well before using. This ingredient delivers the moist, firm centers you crave.
Science of Kneading Perfect Coconut Snowballs
Kneading activates proteins in the coconut and milk, forming a gluten-free dough for Perfect Coconut Snowballs. In 2 to 3 minutes, hydration creates elasticity without eggs or flour. It’s food science at work.
Unlike traditional doughs, this relies on coconut fibers swelling with milk. The result? Smooth consistency that rolls without crumbling. Knead until it holds together firmly.
Humidity plays a role too. In dry air, add milk sparingly. This step transforms loose shreds into perfect, chewy balls.
Protein Development in Coconut Mixtures
Hand-kneading hydrates coconut fibers, building elasticity for Perfect Coconut Snowballs. Look for a smooth, dough-like feel with no dry bits. That’s your cue it’s ready.
No gluten means no toughness risk. Just 2 to 3 minutes does it. You’ll feel the mix tighten under your hands.
Humidity’s Role in Binding
Dry climates make mixes crumbly, so knead longer or add milk teaspoon by teaspoon for Perfect Coconut Snowballs. Humid areas might need extra coconut. Test by squeezing; it should hold.
Adjust based on your kitchen. This tweak keeps binding consistent everywhere. Pro tip: work in a warm spot for better flow.
Step-by-Step: Forming Perfect Coconut Snowballs
Start with mixing and kneading for Perfect Coconut Snowballs. Then scoop, roll, coat, and chill. Each phase builds that firm texture. Total active time stays under 10 minutes.
Use lightly oiled hands throughout to avoid sticking. Adjust for crumbly or sticky dough as needed. You’ll yield about 24 uniform balls.
Phase 1: Mixing and Kneading Base
In a large bowl, stir 3 cups sweetened shredded coconut with the full can of sweetened condensed milk. Switch to hand-kneading for 2 to 3 minutes. Spoon-mixing first evens it out before proteins activate.
If crumbly, add 1 teaspoon milk at a time. Too sticky? Sprinkle in 1 tablespoon coconut. The dough smells sweetly tropical and feels smooth when done.
Phase 2: Scooping Tight 1-Inch Balls
Scoop tablespoon-sized portions for uniform Perfect Coconut Snowballs. Roll into tight 1-inch balls with oiled hands. Press firmly for dense centers that won’t crack.
About 24 balls per batch. The oil prevents sticking and ensures smooth shapes. They firm up beautifully later.
Phase 3: Coating and Chilling to Set
Roll each ball in the reserved 1 cup coconut, pressing gently. The flakes adhere right away. Arrange on a plate and chill 1 hour minimum.
Chilling sets them firm without drying. Store airtight up to 1 week. They’ll taste fresh and chewy.
Avoiding Crumbly Perfect Coconut Snowballs
Common pitfalls ruin Perfect Coconut Snowballs: skimping on kneading, using wrong coconut, or over-chilling. Fixes keep yours flawless. Fresh ingredients help too.
Insufficient kneading leaves loose crumbs. Always hit 2 to 3 minutes. Test by pinching; it should mold easily.
Kneading Shortcuts That Ruin Texture
Skipping hand-knead means crumbly Perfect Coconut Snowballs. Under-kneaded looks shaggy; over-kneaded gets tough. Stick to 2 to 3 minutes for that dough sweet spot.
Ingredient Swaps to Skip
Don’t use unsweetened coconut or regular milk in Perfect Coconut Snowballs. They lack binding sugars, leading to dry fails. Stick to sweetened for success.
Flavor Variations for Perfect Coconut Snowballs
Boost Perfect Coconut Snowballs with simple swaps. Add almond extract, chocolate chips, or lime zest to the base. Keep additions under 1/4 cup to maintain firmness.
Test binding after mixing. Dark chocolate dips add gourmet flair post-chill. These twists stay no-bake easy.
Tropical Twists with Citrus Zest
Fold 1 tablespoon lime or lemon zest into the base for zingy Perfect Coconut Snowballs. It cuts sweetness perfectly. Knead well to distribute.
Nutty Additions Without Compromising Firmness
Stir in 1/4 cup chopped almonds or pistachios max. They add crunch without crumbling Perfect Coconut Snowballs. Toast nuts first for deeper flavor.
Chocolate-Dipped Coconut Snowballs
Melt dark chocolate and dip chilled Perfect Coconut Snowballs. Let set on parchment. Irresistible upgrade.
Storage and Make-Ahead for Perfect Coconut Snowballs
Store Perfect Coconut Snowballs airtight in the fridge up to 1 week. They freeze beautifully for 3 months. Layer with parchment to prevent sticking.
Make ahead for holidays by batching double. Thaw in fridge overnight. Always room temp stable for 2 days too.
Freezer Method for Bulk Batches
Flash-freeze coated Perfect Coconut Snowballs on a tray 1 hour, then bag airtight. Thaw in fridge; they’ll firm right up. Perfect for bulk gifting.
Room Temperature Guidelines
Keep Perfect Coconut Snowballs on the counter 2 days max in cool spots. High humidity softens them, so watch it. Airtight containers preserve crunch.
Pairing Perfect Coconut Snowballs with Drinks
Perfect Coconut Snowballs pair great with iced tea or coffee. The sweetness contrasts bitterness beautifully. Serve at events for easy snacking.
Fruit smoothies or herbal infusions balance the tropical notes. Their firmness holds up next to chilled drinks too.
Best Hot Beverage Matches
Chai tea’s spices harmonize with Perfect Coconut Snowballs’ sweetness. Green tea adds earthy contrast. Both warm up the coconut flavors nicely.
Chilled Drink Complements
Lemonade’s tartness cuts through Perfect Coconut Snowballs perfectly. Coconut water enhances the vibe. Refreshing combos for summer parties.
Troubleshooting Perfect Coconut Snowballs Issues
Fixing Loose or Dry Centers
If Perfect Coconut Snowballs feel dry inside, knead longer next time and add milk 1 teaspoon at a time. Proteins need full hydration for firm centers.
Preventing Sticky Rolling Hands
Lightly oil or water your hands for sticky Perfect Coconut Snowballs dough. Wipe between rolls. Keeps shaping smooth and frustration-free.
Ensuring Coating Stays Put
Chill balls 10 minutes before coating Perfect Coconut Snowballs. Press flakes firmly. They’ll stick through storage.
Adjusting for Climate Variations
Dry air? Add more milk during kneading for Perfect Coconut Snowballs. Humid? Extra coconut. Squeeze test ensures perfect bind.
Scaling Recipe Up or Down
Double for 48 Perfect Coconut Snowballs; use two cans milk and 8 cups coconut. Halve for 12. Knead time stays the same.
FAQ
How do I store Perfect Coconut Snowballs and can they be frozen?
Store Perfect Coconut Snowballs in an airtight container in the fridge up to 1 week; they’ll stay firm and chewy. For freezing, flash-freeze on a tray first, then transfer to freezer bags for up to 3 months. Thaw in the fridge overnight, and avoid refreezing to keep texture intact. Layer with parchment to prevent sticking during bulk storage.
Why are my Perfect Coconut Snowballs crumbly and how do I fix it?
Crumbly Perfect Coconut Snowballs usually mean insufficient kneading, which fails to activate the coconut proteins and milk adhesion. Knead by hand 2 to 3 full minutes until smooth and dough-like; if still dry, add sweetened condensed milk 1 teaspoon at a time. Fresh sweetened coconut helps too, as old shreds lose moisture.
Can I substitute ingredients in Perfect Coconut Snowballs, like using unsweetened coconut?
Don’t swap unsweetened coconut; it lacks sugars for binding, leading to crumbly fails in Perfect Coconut Snowballs. Evaporated milk won’t work either, as it misses the thick proteins. Stick to sweetened shredded coconut and full-fat condensed milk for guaranteed firmness. For nut-free, skip add-ins but keep the base intact.
Why are my Perfect Coconut Snowballs too sticky to roll?
Too much humidity or over-mixing causes sticky Perfect Coconut Snowballs. Add 1 tablespoon sweetened coconut at a time while kneading until it firms up. Use lightly oiled hands for rolling; the oil creates a barrier without altering flavor or texture.
How long do Perfect Coconut Snowballs need to chill, and what if I skip it?
Chill Perfect Coconut Snowballs at least 1 hour to set the structure and prevent drying. Skipping leads to soft, fragile balls that crumble when handled. For best results, chill overnight; they slice cleaner and hold shape at room temp after.
Can I make Perfect Coconut Snowballs ahead for parties?
Yes, Perfect Coconut Snowballs are ideal make-ahead treats. Prep up to 1 week ahead and store airtight in the fridge, or freeze for 3 months as noted. Let them come to room temp 30 minutes before serving for peak chewiness. Double the batch for crowds; they don’t melt or wilt on platters.
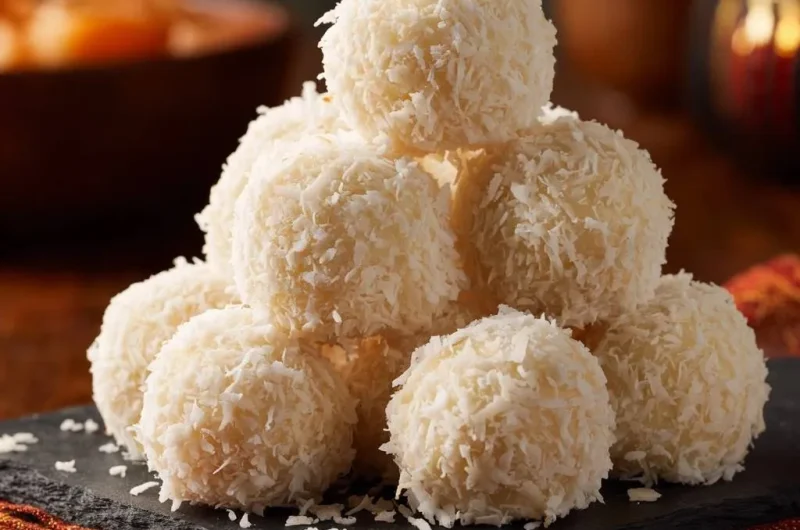
Coconut Snowballs
Course: DessertCuisine: AmericanDifficulty: easy4
24 snowballs15
minutes500
kcal60
MinutesSick of coconut balls that crumble? This dead-simple recipe uses sweetened condensed milk and a kneading trick for perfect binding, ensuring firm, moist centers that hold every time.
Ingredients
4 cups sweetened shredded coconut, divided
1 can (14 ounces) sweetened condensed milk
Directions
- Reserve 1 cup shredded coconut for coating. In a large bowl, combine remaining 3 cups coconut with sweetened condensed milk. Mix with a spoon until combined, then knead by hand for 2 to 3 minutes. This is the crumble-proof secret: kneading develops the sticky proteins in the coconut and milk, creating a smooth, dough-like consistency with zero loose crumbs. If still slightly crumbly, add 1 teaspoon milk at a time; if too sticky, add 1 tablespoon coconut.
- Scoop tablespoon-sized portions and roll into tight 1-inch balls using lightly oiled hands to prevent sticking.
- Roll each ball in reserved coconut, pressing gently so flakes adhere perfectly.
- Arrange on a plate and chill in fridge for 1 hour to set firm without drying out. Store in airtight container up to 1 week. Enjoy the non-crumbling bliss!
Notes
- Kneading for 2-3 minutes is key to developing sticky proteins for crumble-proof texture. Chill for 1 hour to set firm. Store in airtight container up to 1 week.