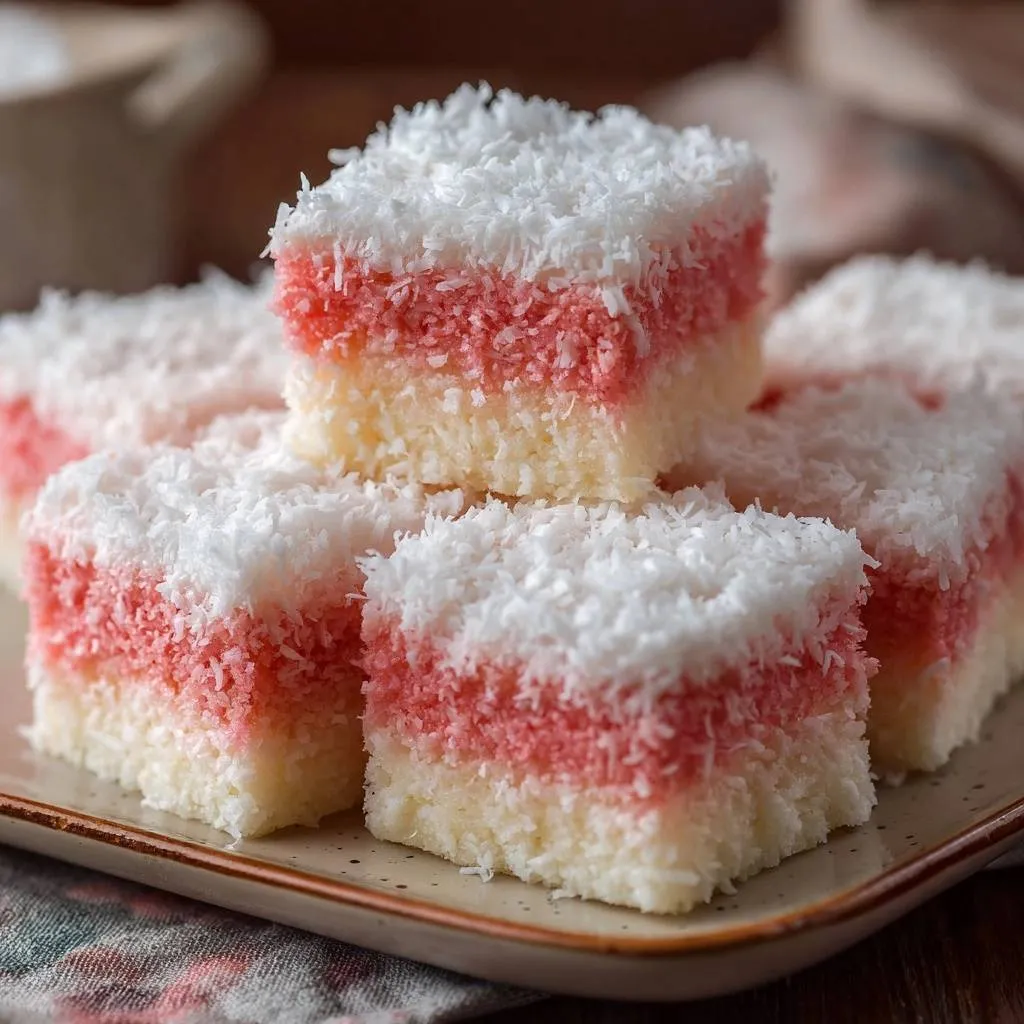
Struggling with crumbly homemade Pink & White Coconut Ice that falls apart the second you slice it? You’re not alone. Most recipes skip the precise ratios and firm press-chill method, leaving you with a mess instead of those stunning, sliceable layers. This foolproof Pink & White Coconut Ice delivers creamy perfection every time.
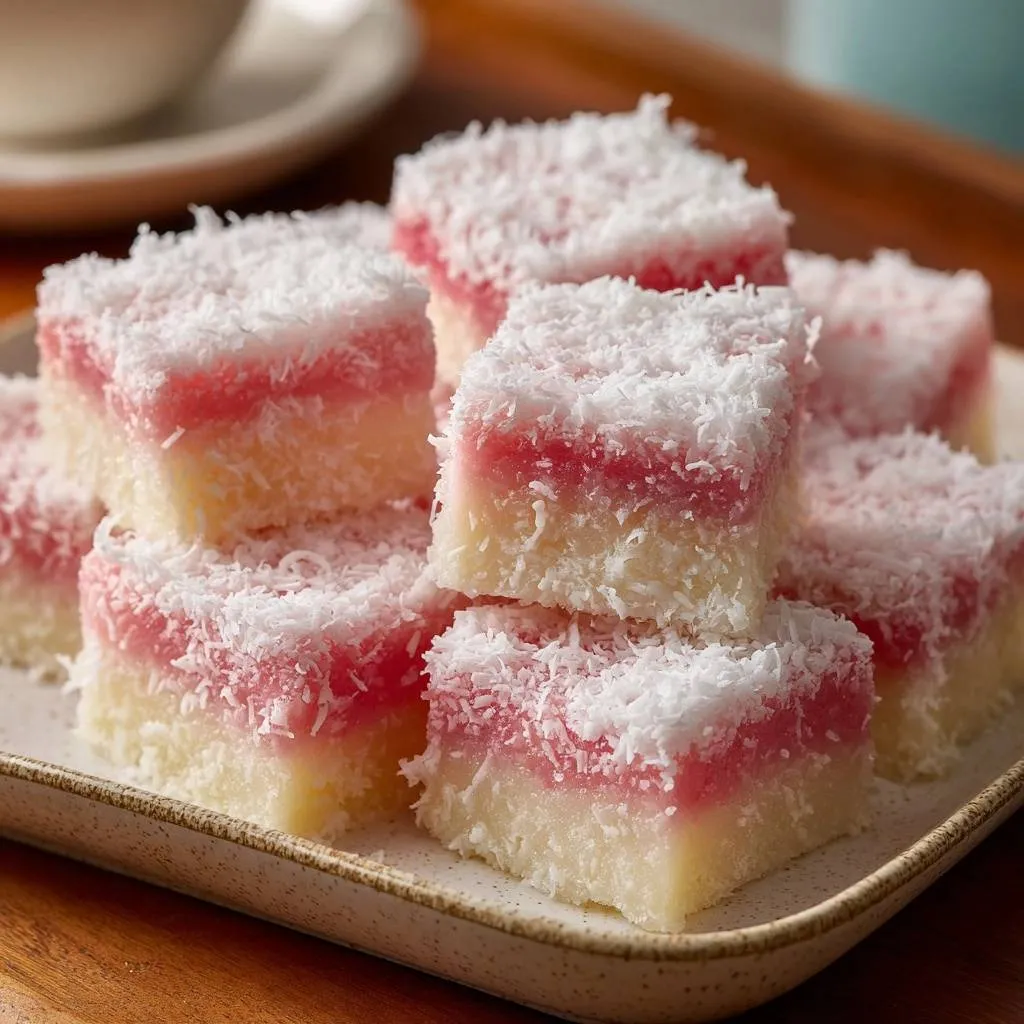
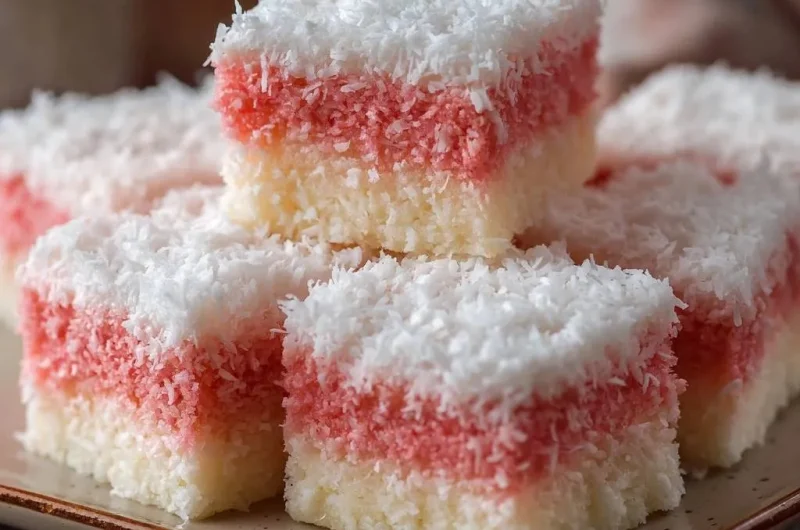
Therefore, it captures that nostalgic charm of pink and white stripes, sweet coconut bite, and a texture that holds firm. You get about 36 squares from this no-bake treat. Prep takes just 20 minutes, plus 4+ hours chilling.
Here’s the expertise booster: divide everything into exact thirds first. That ensures even moisture and sugar binding, so your Pink & White Coconut Ice sets like a dream without sogginess or cracks.
Key Ingredients for Pink & White Coconut Ice
Desiccated Coconut: Fine vs. Coarse Choices
Desiccated coconut forms the backbone of your Pink & White Coconut Ice. Use 4 cups total, divided evenly. It absorbs just enough moisture from the condensed milk to bind everything without turning soggy.
Fine desiccated gives smoother layers that slice cleanly. Medium shred adds a bit more chew, but avoid coarse, which creates uneven texture. In addition, it releases natural oils during chilling for that firm hold.
Sweetened Condensed Milk Ratios Explained
One 14-ounce can of sweetened condensed milk, split into three portions of about 4.5 ounces each, provides the ideal creaminess. Too much liquid softens the mix, so precision matters here.
This ratio sweetens perfectly and evaporates slightly during pressing. No low-fat version? Regular works best, but coconut condensed milk swaps in for vegan Pink & White Coconut Ice seamlessly.
Powdered Sugar and Sifting Essentials
Sift 4 cups powdered sugar, divided into thirds. Lumps ruin the stiff dough-like consistency you need. Granulated sugar won’t dissolve right and leads to grainy results.
Therefore, sifting ensures smooth mixing. It crystallizes during chill time, locking in structure for sliceable Pink & White Coconut Ice.
Vanilla Extract and Pink Gel Coloring
Split 1 teaspoon vanilla between the two white layers for subtle warmth. It enhances coconut without overpowering. For the pink, add gel food coloring drop by drop until vibrant, not pasty.
Gel won’t dilute the mix like liquid colors. Roll edges in extra desiccated coconut at the end for a pretty, non-sticky finish.
Science of Firm Pink & White Coconut Ice Texture
Sugar Crystallization During Chilling
Powdered sugar and condensed milk sugars form a stable matrix when chilled. Coconut oils solidify at fridge temps, creating a firm bond. Without this, your Pink & White Coconut Ice stays too soft.
However, the precise ratios prevent excess moisture. Sugars recrystallize slowly, turning pliable dough into rigid layers that slice without crumbling. It’s simple chemistry you control.
Pro tip: chill immediately after pressing. Room temp lets oils stay liquid, dooming texture.
Pressing Technique Locks in Structure
Firm pressing expels air pockets that cause cracks. Aim for ¼ to ⅓-inch thickness per layer in your 8×8 pan. Even pressure ensures uniform density.
For even more delightful ways to shape these sweet treats, explore old-fashioned coconut ice squares.
This physics creates compact layers that adhere and set evenly. A wet spatula glides smoothly, avoiding tears. Skip it, and you’ll fight uneven surfaces.
Chill Time’s Role in Coconut Ice Stability
Four hours minimum, or overnight, strengthens hydrogen bonds in the sugars. Fridge cold solidifies everything into a sliceable block. Rush it, and layers separate.
Room temp chilling fails because oils don’t harden. Therefore, patience guarantees perfect Pink & White Coconut Ice.
Preparing Your Pink & White Coconut Ice Pan
Parchment Lining for Clean Release
Line an 8×8-inch pan with parchment, leaving overhang on two sides. Press it into corners smoothly. This blocks sticking from sugary oils.
No parchment? Lightly grease foil, but parchment lifts cleaner. It makes unmolding effortless for neat squares.
Layering Steps for Stunning Pink & White Coconut Ice
Mixing Bottom White Layer Precisely
Divide into three portions: 1⅓ cups coconut, 4.5 ounces milk, 1⅓ cups sifted sugar, ½ teaspoon vanilla per white layer. Mix vigorously until stiff like dough. It smells sweetly tropical right away.
Press firmly into pan bottom with a spatula dipped in cold water. Even out to ¼-inch, feeling for no air gaps. This base sets strong.
Creating Vibrant Pink Middle Layer
Mix the second portion, kneading in pink gel coloring evenly. Avoid streaks by blending thoroughly first. Press over white layer with wet spatula for adhesion.
The pink hue pops against white. Firm pressure compacts it smoothly, preventing lift during chill.
Top White Layer and Final Press
Mix final white portion and press over pink. Keep each layer ¼ to ⅓-inch thick. Wet spatula ensures a glass-smooth top.
You’ll feel resistance as it densifies. Perfect stacking creates those iconic Pink & White Coconut Ice stripes.
Chilling and Cutting Pink & White Coconut Ice
Optimal Chill for Sliceable Results
Cover loosely and chill 4 hours or overnight. Sugars fully set, oils harden. Rushed cuts crumble instantly.
Coating Edges and Sharp Cuts
Lift slab with parchment overhang. Roll sides in extra coconut for grip and looks. Wipe a sharp knife clean between cuts for 36 perfect 1.5-inch squares.
Store airtight at room temp up to 2 weeks. Reheating isn’t needed; it stays fudgy.
Avoiding Crumbly Pink & White Coconut Ice Mistakes
Common Ratio and Pressing Errors
Too much milk makes it soft and sticky. Uneven pressing traps air, causing cracks on slice. Always measure precisely and press hard.
Fix soft batches by chilling longer next time. For cracks, repack and repress before full chill.
Humidity and Temperature Pitfalls
High humidity softens sugars; make in dry conditions or use AC. Warm fridge won’t solidify oils properly.
Therefore, chill below 40°F. In humid spots, add ¼ cup extra sugar per portion.
Flavor Variations for Pink & White Coconut Ice
Chocolate-Drizzled or Nutty Twists
Mix 2 tablespoons cocoa into pink layer for chocolate coconut vibe. Or stir ¼ cup chopped almonds into white for crunch. Keep pressing firm.
Drizzle melted dark chocolate post-chill. These stay no-bake easy, just more addictive.
Citrus Zest or Extract Swaps
Add 1 teaspoon lemon zest to bottom white, lime to top. For pink, swap vanilla with ½ teaspoon rose water. Zest brightens without changing ratios.
Fresh scent elevates classic Pink & White Coconut Ice beautifully.
Make-Ahead Guide for Pink & White Coconut Ice
Freezing and Thawing Instructions
Freeze whole slab in parchment, airtight up to 2 months. Thaw overnight in fridge; don’t microwave or it sweats. Slices firm up perfectly.
Portion first for grab-and-go. Great for holiday prep.
Batch Scaling for Gifts or Events
Double for 9×13 pan, same ratios. Prep day ahead for parties. Wrap squares in wax paper, box for gifts.
Timeline: mix morning, chill by noon, cut evening. Scales effortlessly.
Pairing Ideas with Pink & White Coconut Ice
Tea Time and Dessert Board Matches
Pair with chamomile tea; coconut sweetness balances herbal notes. Add to boards with fresh strawberries, dark chocolate squares.
Plate squares upright for visual pop at parties. Guests love the creamy bite.
Frequently Asked Questions About Pink & White Coconut Ice
Why Does Homemade Coconut Ice Crumble?
Air pockets from poor pressing, short chill, or off ratios cause crumbling. Firm press expels air, 4+ hour fridge time sets sugars, exact thirds prevent moisture imbalance. Follow this, and it slices clean every time.
Can I Use Fresh Coconut Instead?
No, fresh coconut’s high moisture turns Pink & White Coconut Ice soggy and unstable. Desiccated is dry and perfect for binding. Stick to it for reliable texture.
How Long Does Pink & White Coconut Ice Last?
Airtight at room temp, 1 week. Fridge, 2 weeks. Freezer, 2 months. Keeps fudgy without drying out.
Gluten-Free or Vegan Options?
Naturally gluten-free. For vegan, swap regular condensed milk for coconut condensed milk. Ratios stay the same; flavor intensifies coconut deliciously.
Scaling Recipe for Smaller Batches?
Halve everything for 4×4 pan or loaf, yields 9-12 squares. Chill time same, 4+ hours. Perfect for solo treats.
Why Is My Coconut Ice Too Soft?
Excess milk, insufficient pressing, or warm storage softens it. Measure precisely, press hard, chill fully, store airtight cool. Add extra powdered sugar next batch if humid.
Can I Skip the Parchment Paper?
You can grease foil heavily, but parchment with overhang lifts cleaner without sticking. Sugary mix grabs pans otherwise, ruining edges.
Coconut Ice
Course: DessertCuisine: BritishDifficulty: easy4
36 squares20
minutes150
kcal240
MinutesHomemade coconut ice that always crumbles or stays too soft? This foolproof method uses precise ratios and a firm press-chill technique to lock in perfect, sliceable texture with stunning layers that hold every time.
Ingredients
4 cups desiccated coconut, divided
1 can (14 ounces) sweetened condensed milk, divided
4 cups powdered sugar, sifted and divided
1 teaspoon vanilla extract, divided
Pink gel food coloring
Extra desiccated coconut for coating sides
Directions
- Line an 8×8-inch pan with parchment paper, leaving overhang for easy removal. This prevents sticking and ensures clean release.
- Divide ingredients evenly into three portions: about 1⅓ cups coconut, ⅓ can condensed milk (about 4½ ounces or scant ½ cup), and 1⅓ cups sifted powdered sugar per portion. Divide vanilla evenly between the two white portions (½ teaspoon each).
- For the bottom white layer: In a bowl, mix one white portion until it forms a stiff dough-like consistency. Press firmly into the pan bottom using a spatula dipped in cold water. Press evenly to ¼–⅓-inch thickness, eliminating air pockets that cause crumbling.
- For the pink layer: Mix one portion, adding pink gel food coloring until vibrant pink. Press firmly over the white layer using the wet spatula for a smooth, compact surface.
- For the top white layer: Mix the remaining white portion and press firmly over the pink layer, again using the wet spatula.
- Cover and chill 4 hours or overnight. The extended chill sets the sugars and coconut oils into a firm matrix, preventing crumble.
- Lift out using parchment. Coat sides generously with extra coconut by rolling edges. Cut into squares with a sharp knife wiped clean between cuts for perfect edges. Store in airtight container.
Notes
- Use pink gel food coloring for vibrant color. Chill overnight for best results. Coat sides with extra coconut and use a sharp knife wiped clean between cuts for perfect edges.