Ever made coconut ice that clings to your teeth and refuses to slice? Most recipes leave you with a gooey mess because they skip the key kneading step. This pink & white coconut ice fixes that with a simple, vigorous mix that creates firm, clean-cut squares every time.
Therefore, you get that nostalgic treat without the frustration. No baking required, just pantry staples and 10 minutes of active work. Plus, it chills into perfect layers that wow at parties or afternoon tea.
The secret lies in kneading for 3-4 minutes until the mixture forms a dough ball that pulls away from the bowl. This releases coconut oils, binding everything for sliceable firmness. You’ll never go back to sticky disasters.
Key Ingredients for Pink & White Coconut Ice
Desiccated coconut forms the base, absorbing moisture for structure. Powdered sugar binds it all with its fine texture, while sweetened condensed milk adds creaminess and sweetness. Vanilla and pink food coloring create those classic layers.
In addition, use fine desiccated coconut for smoother results. It shreds evenly, unlike coarse types that add chew. Divide the 4 cups precisely for balanced pink & white coconut ice layers.
Desiccated Coconut: Fine vs Coarse Choices
Fine desiccated coconut melts into a smooth texture, perfect for firm pink & white coconut ice. Coarse versions give more bite but can make slices uneven. Store it airtight to keep fresh; it lasts months in a cool pantry.
Why Powdered Sugar Powers Firm Texture
Powdered sugar’s cornstarch absorbs coconut oils, preventing stickiness. Granulated sugar fails here because it doesn’t dissolve fully. Sift it first for lump-free mixing that kneads easily.
Condensed Milk’s Role in Binding Pink & White Coconut Ice
Sweetened condensed milk’s high sugar content draws out moisture for a dense set. Evaporated milk lacks that sweetness and stays gooey. Use half a can per layer for even binding; dairy-free swaps work with adjustments.
The Kneading Science Behind Non-Sticky Coconut Ice
Kneading vigorously for 3-4 minutes releases coconut oils, which emulsify with sugar and milk. This creates cohesion over adhesion, so your pink & white coconut ice holds shape instead of sticking. Skip it, and you’ll face a soft mess.
However, the physics involve fats coating starches for a dough-like ball. Room temperature ingredients knead best; cold ones resist. This confectionery trick guarantees sliceable results every time.
Pro tip: Your hands warm the mix naturally, speeding oil release. Test by squeezing; it should hold without crumbling or sticking.
How Kneading Locks in Sliceable Firmness
Start mixing, then knead hard for 3-4 minutes. The mixture transforms from crumbly to a smooth ball that pulls from the bowl. Squeeze it; if firm, you’re set. Hands apply better force than spoons for even work.
Coconut Oil Emulsification Explained
Coconut oils bind starches during kneading, forming a stable emulsion. Keep everything at room temp for fluidity. Over-knead risks toughness, so stop at the dough stage.
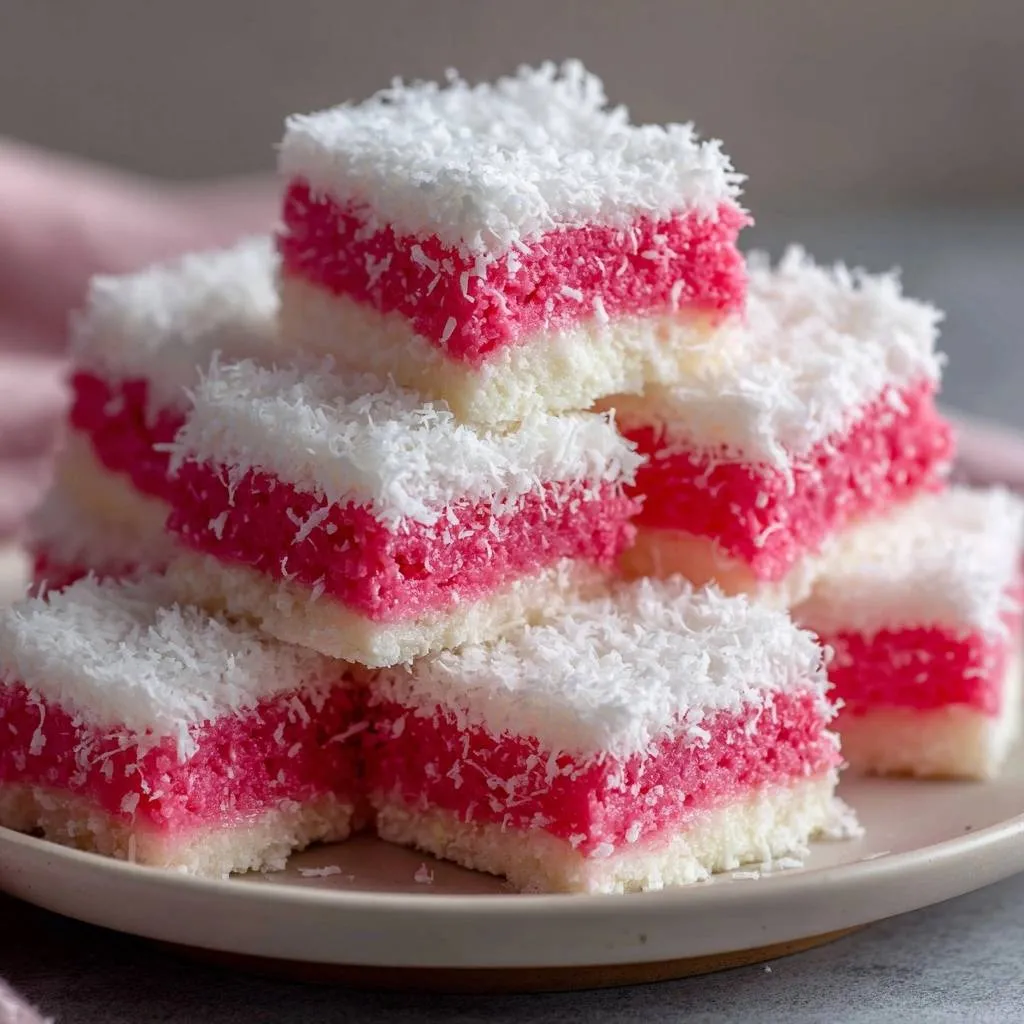
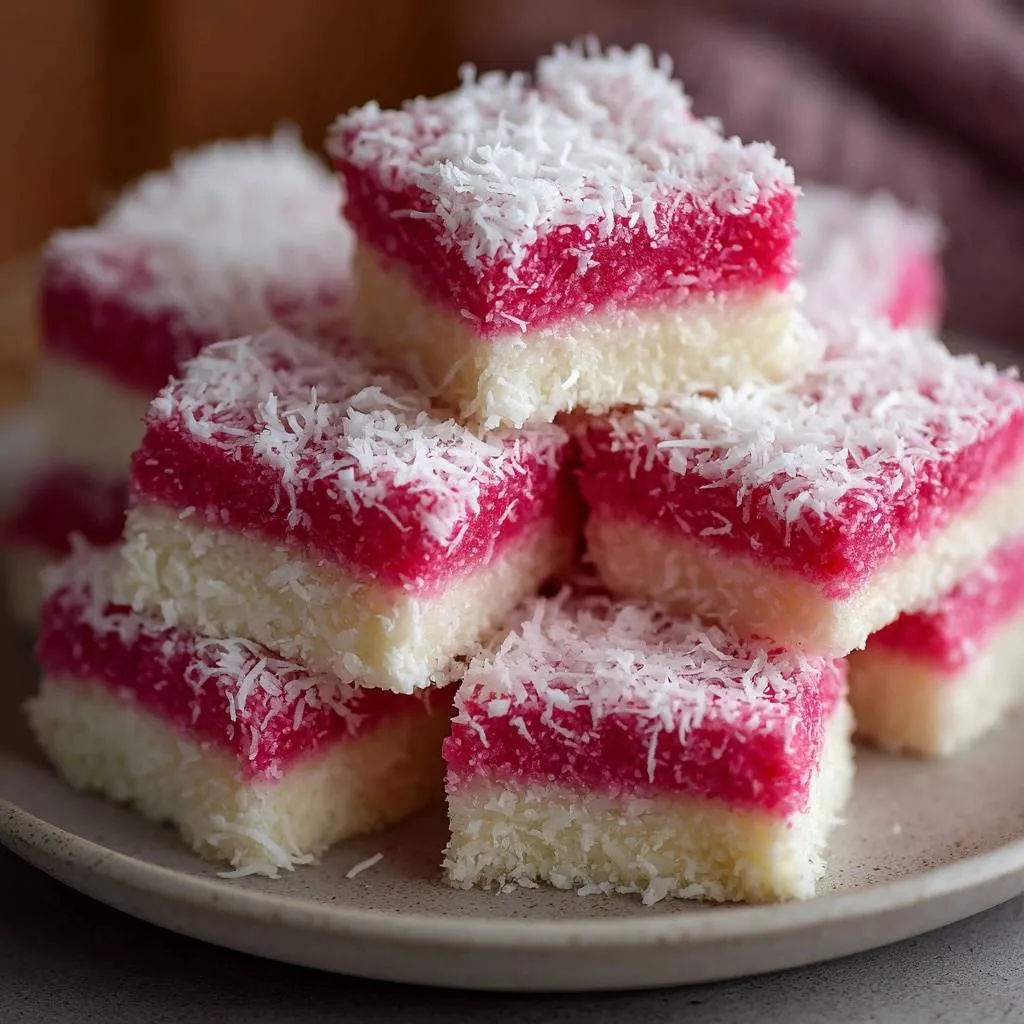
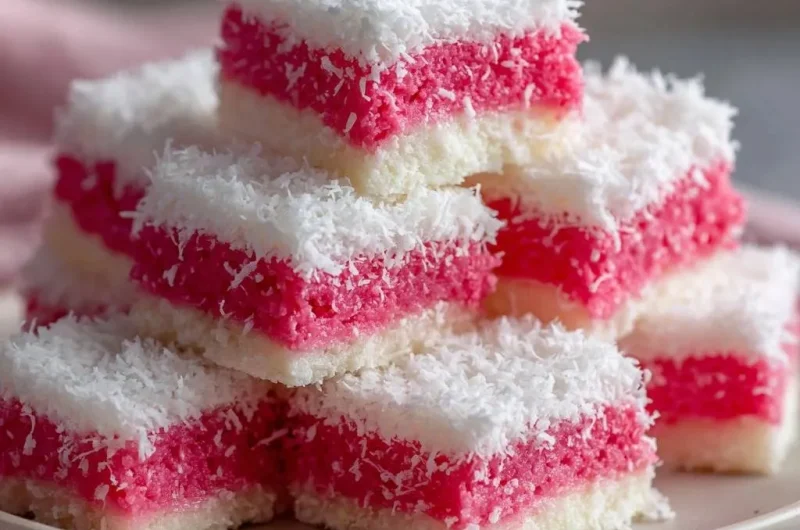
Assembling Firm Pink & White Coconut Ice Layers
Line your pan first, then mix and knead the pink layer with coloring. Press it dense, add the white layer with vanilla, top with coconut, and chill. Sharp knife cuts yield perfect pink & white coconut ice squares.
Therefore, chilling for 4 hours solidifies the oils into rock-hard firmness. You’ll lift out a stunning two-tone slab ready to slice.
Prepping Pan for Easy Pink & White Coconut Ice Removal
Plastic wrap with overhang lets you lift cleanly. Parchment works too; skip oil spray unless sticky. Press edges smooth for neat sides.
Pink Layer: Mixing and Pressing Techniques
Add pink food coloring drop by drop for control. Knead to dough, then press with wet hands or spoon back for density. Aim for even 1/2-inch thickness.
White Layer: Vanilla Infusion and Topping
Stir in 1 tsp vanilla extract; it’s potent for full flavor. Knead firm, press over pink, then sprinkle extra coconut and pat gently.
For more chocolatey fun, you might enjoy these festive chocolate coconut delights.
For more coconut delights, try these lemon coconut balls for a delightful treat.
Avoiding Sticky Pink & White Coconut Ice Pitfalls
Under-kneading tops the list, leaving gooey results. Warm ingredients soften too much, loose pressing creates air pockets, rushed chilling prevents setting, and dull knives smash squares. High humidity worsens stickiness by adding moisture.
Fix with timers, cool tools, firm packs, full chill time, and a hot knife wipe. Dry climates help, but anyone can succeed.
Under-Kneading: The Gooey Disaster Fix
If sticky, knead 1 more minute; it firms up. Set a timer for 3-4 minutes initially to prevent this.
Chilling Time: Why 4 Hours Minimum
Fridge sets slowly for even firmness; freezer risks ice crystals. Overnight delivers perfection without cracks.
Humidity’s Impact on Coconut Ice Texture
Humid air softens the set. Use a dehumidifier or AC, and store away from steam.
Flavor Twists on Classic Pink & White Coconut Ice
Add lemon zest to white for citrus pop, drizzle chocolate on pink, mix in almonds for crunch, infuse coffee, or swap essences. Dairy-free uses coconut cream. Test small batches on your pink & white coconut ice base.
What to Make Next
After enjoying this coconut ice, consider pairing it with or trying these sweet treats.
- For a rich chocolate dessert, try this moist chocolate bundt cake, offering a different kind of sweet indulgence.
- If you’re in the mood for another delightful confection, explore the glazed New Orleans style beignets for a fluffy, fried treat.
These keep the firm texture while boosting taste. Scale flavors gradually during kneading.
Citrus Zest Boost for White Layer
Grate 1 tsp lemon or lime zest into white mix. Knead well to distribute oils without clumps.
Chocolate Accents for Pink Coconut Ice
Melt dark chips post-chill, drizzle, and let set. No tempering needed for simple lines.
For an even richer experience, try these no-bake chocolate coconut truffles.
Dairy-Free Swaps for Vegan Coconut Ice
Use full-fat coconut cream; thicken with extra powdered sugar. Knead longer for binding.
Storage and Make-Ahead for Pink & White Coconut Ice
Keep airtight at room temp for 1 week, or freeze slabs up to 1 month. Thaw overnight in fridge for fresh texture. Double batches fit 9×13 pans; re-knead trimmings into new ice.
Gift in tins with wax paper layers. It holds shape perfectly.
Freezing Whole Slabs vs Squares
Wrap slabs tightly twice, freeze flat. Thaw 4-6 hours; texture stays firm unlike loose squares that absorb odors.
Reusing Trimmings into New Batches
Soften scraps, re-knead with extra sugar. Refresh with vanilla for new firm ice.
Pairing Pink & White Coconut Ice with Beverages
Iced tea cuts the sweetness, coffee balances richness, herbal infusions add earthiness, smoothies contrast creaminess, and hot chocolate makes a dip. Serve at events in small bites for easy pairing.
Texture logic: Crisp drinks refresh the dense chew.
Best Iced Teas to Complement Coconut Ice
Jasmine’s floral notes lift coconut; green tea’s grassiness tempers sugar. Brew strong, chill fully.
Coffee Pairings for Balanced Bites
Espresso’s boldness offsets creaminess. Medium roast brews pair best without overpowering.
Pink & White Coconut Ice FAQ
Why Does Coconut Ice Turn Sticky?
Insufficient kneading fails to release and bind coconut oils, leaving excess moisture. Knead vigorously 3-4 minutes until it forms a firm ball that pulls from the bowl. This fixes most sticky pink & white coconut ice issues instantly.
Exact Kneading Duration Needed?
Aim for 3-4 minutes, or until the mix pulls clean from the bowl and holds shape when squeezed. Hands knead faster than spoons; watch for a smooth, non-sticky dough ball as your cue.
Dairy-Free Option for Pink & White Coconut Ice?
Swap sweetened condensed milk for full-fat coconut cream thickened with 1/4 cup extra powdered sugar per layer. Knead longer to emulsify; it sets just as firm for vegan pink & white coconut ice.
Safe Food Coloring for Children?
Natural beet juice gives soft pink; use 1-2 tsp for color without intensity. Gel colors are concentrated and kid-safe in small drops, avoiding synthetic dyes if preferred.
Scaling Up for Parties?
Double ingredients for a 9×13 pan, yielding 64 small squares. Knead in bigger bowls; chill 6 hours. Perfect for crowds with the same firm pink & white coconut ice texture.
Coconut Ice
Course: DessertCuisine: AmericanDifficulty: easy16
squares20
minutes8
minutes200
kcal240
MinutesTired of coconut ice that stays gooey and sticks to everything? This foolproof recipe delivers firm, sliceable squares every time with one simple mixing trick that locks in perfect texture.
Ingredients
4 cups desiccated coconut, divided
2 cups powdered sugar
1 can (14 oz) sweetened condensed milk
1 tsp vanilla extract
Pink food coloring
Extra desiccated coconut for topping
Directions
- Line an 8×8-inch pan with plastic wrap, leaving overhang for easy removal.
- For pink layer: In a large bowl, mix 2 cups desiccated coconut, 1 cup powdered sugar, and half the condensed milk, adding a few drops pink food coloring until smooth.
- The no-sticky-mess secret: Knead vigorously with a sturdy spoon or hands for 3-4 minutes until the mixture pulls completely away from the bowl sides, forming a firm, non-sticky dough ball that holds shape when squeezed. This releases coconut oils and fully binds the sugar for guaranteed firmness.
- Press pink mixture evenly into prepared pan, packing tightly with the back of a spoon or wet hands for a dense base.
- For white layer: Repeat step 2 with remaining coconut, sugar, and condensed milk, adding vanilla. Knead 3-4 minutes using the same firm-dough trick.
- Press white layer firmly over pink layer. Sprinkle extra coconut on top and press gently to adhere.
- Cover and chill 4 hours or overnight until rock-solid firm.
- Lift out using wrap, cut into squares with a sharp knife. Stores airtight for 1 week. Perfect clean slices, no gooey disaster!
Notes
- The key to no-sticky mess is kneading each layer vigorously for 3-4 minutes until it forms a firm dough ball that pulls away from the bowl. Chill overnight for best results. Stores airtight for 1 week.