I remember when making Perfectly Glazed Chicken Thighs felt like a gamble-either the glaze would burn or stay stubbornly watery, and the chicken would often end up dry. After much experimenting, I’ve finally cracked the code to achieve that deeply flavorful, sticky-sweet coating that’s perfectly caramelized and never bitter, all while keeping the chicken incredibly juicy. This recipe isn’t just about a meal; it’s about mastering a technique that elevates a simple chicken dinner into a truly memorable experience.
Why This Glazed Chicken Recipe Will Be Your Go-To
Achieving the Perfect Caramelized Glaze (No Burn!)
Many struggle with glazes that scorch or remain thin. This recipe’s carefully timed simmering and oven finish ensure the glaze reduces beautifully to a rich, syrupy consistency, caramelizing without any bitterness.
The method allows the sugars to deepen in flavor and color, creating that irresistible glossy exterior that adheres perfectly to the chicken.
Unbelievably Juicy Chicken, Every Time
The secret to succulent chicken lies in two key steps: an initial high-heat sear to lock in juices and careful temperature monitoring in the oven. Using bone-in, skin-on thighs also contributes significantly to their inherent moistness.
This approach prevents overcooking, ensuring every bite of these juicy chicken thighs is tender and full of flavor.
Effortless Elegance: Weeknight Ready & Guest Approved
Despite its gourmet appearance, this recipe for Perfectly Glazed Chicken Thighs is surprisingly straightforward. It transforms everyday ingredients into a dish that’s impressive enough for entertaining.
It’s quick enough for a busy weeknight yet sophisticated enough to earn compliments when serving guests.
Flavor Foundations: What You’ll Need
The Star of the Show: Chicken Thighs
Bone-in, skin-on chicken thighs are truly ideal for this dish. The bone helps conduct heat evenly, contributing to juicy meat, while the skin crisps up wonderfully, adding a layer of flavor and protection.
Choose thighs that are plump and have an even skin tone for the best results.
Crafting the Signature Glaze: Essential Liquids
Low sodium soy sauce provides a foundational umami and savory depth to the glaze. Using low sodium allows you to control the overall saltiness.
Packed light brown sugar is crucial for sweetness and to achieve that beautiful caramelization. Its molasses content adds a subtle richness that granulated sugar can’t.
Apple cider vinegar cuts through the sweetness and richness, providing a necessary tangy balance. It also contributes to the glaze’s glossy finish.
Water or chicken broth helps to thin the sauce initially and allows for a gradual reduction, concentrating flavors without becoming too thick too quickly.
Aromatic Boosters: Garlic & Ginger
Freshly minced garlic and grated fresh ginger are non-negotiable for this recipe. They provide a vibrant, pungent, and aromatic base that truly defines the homemade glaze’s character.
These aromatics are gently sautéed, releasing their fragrant oils and infusing the entire dish with depth.
The Perfect Finish: Seasoning & Garnish
Simple salt and black pepper are used to season the chicken, enhancing its natural flavors before the glaze is even applied. Don’t underestimate their importance.
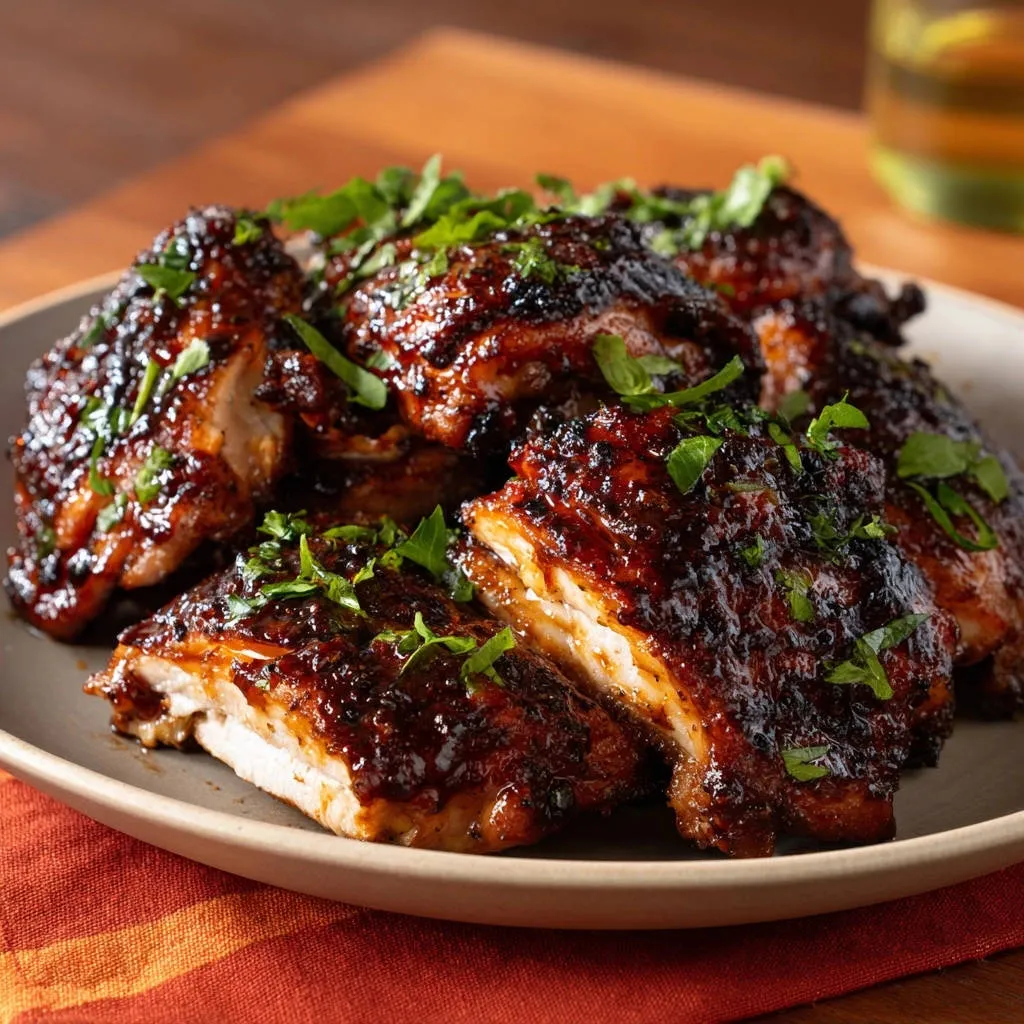
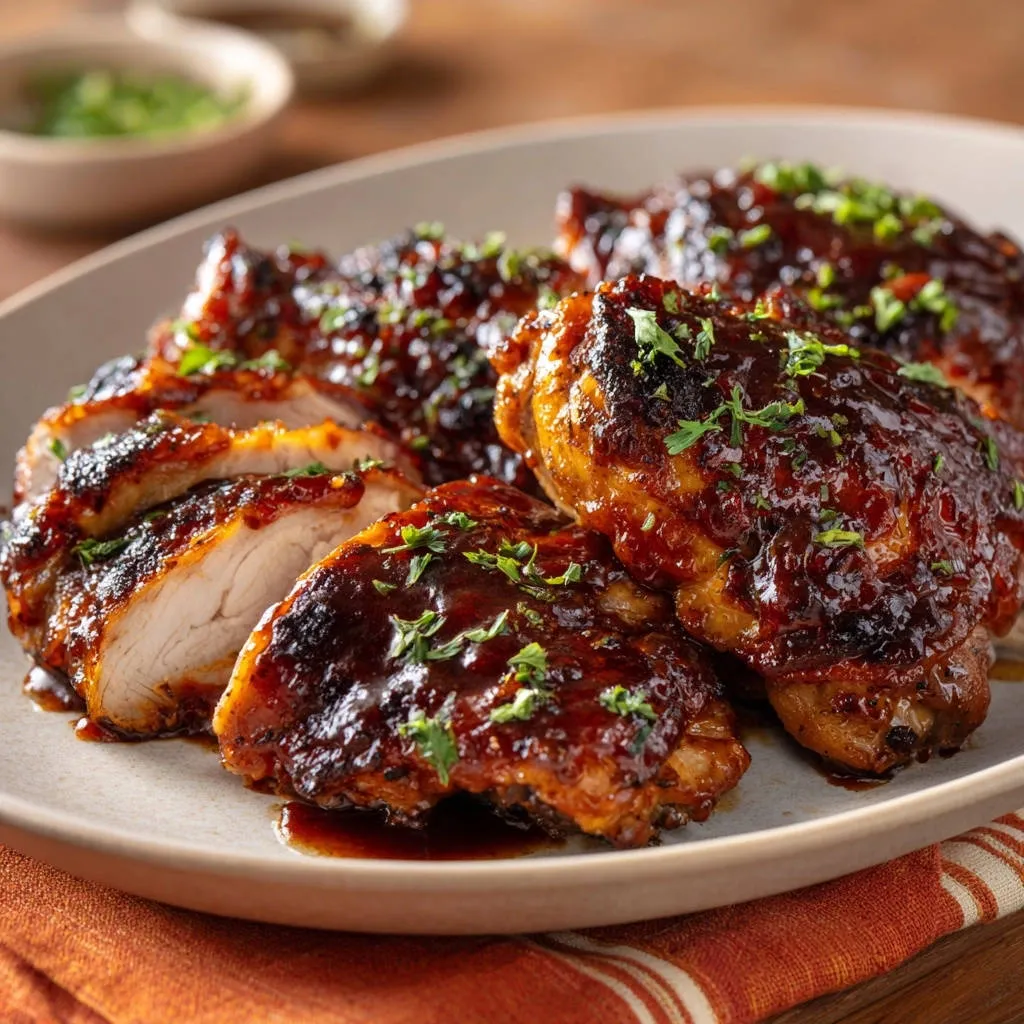
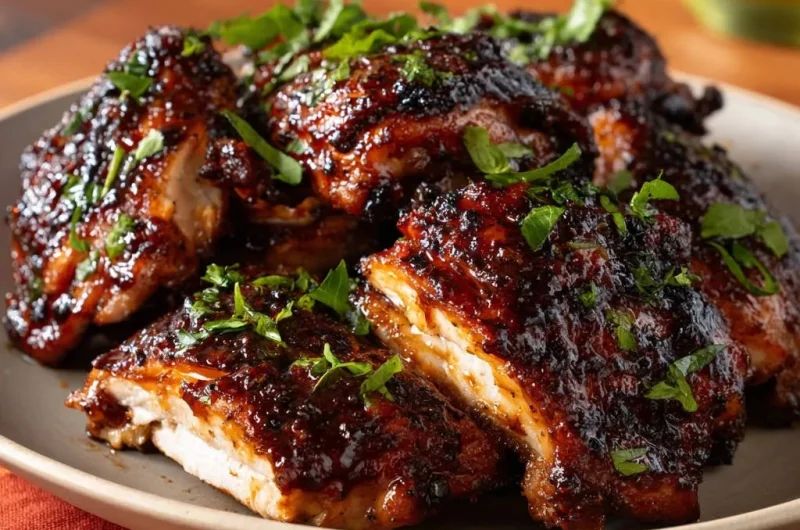
A generous sprinkle of fresh chopped parsley at the end adds a burst of freshness and a touch of vibrant color, making the dish visually appealing.
Essential Gear for Glazed Chicken Perfection
The Right Skillet Matters
A large, oven-safe skillet is absolutely crucial for this recipe. It allows you to sear the chicken on the stovetop and then transfer it directly to the oven without switching pans, preserving all those delicious pan drippings.
Cast iron or a heavy-bottomed stainless steel skillet are excellent choices that retain heat well for a perfect sear.
Precision for Juiciness: A Meat Thermometer
To guarantee your chicken is perfectly cooked and incredibly juicy, a reliable meat thermometer is indispensable. It eliminates guesswork, ensuring the chicken reaches the safe internal temperature of 165°F (74°C) without overcooking.
This simple tool is your best friend for consistently tender results.
Your Step-by-Step Guide to Perfectly Glazed Chicken
Prep & Sear for Crispy Skin
Begin by thoroughly patting your chicken thighs dry with paper towels. This crucial step ensures a crispy skin and prevents steaming, which is essential for that perfect sear.
Season both sides generously with salt and black pepper. Heat olive oil in a large oven-safe skillet over medium-high heat until shimmering. Carefully place the chicken thighs skin-side down in the hot skillet.
Sear for 6-8 minutes, undisturbed, until the skin is deep golden brown and delightfully crispy. This initial sear builds incredible flavor and forms the foundation for our perfect caramelized chicken.
Flipping for Initial Color
Flip the chicken and sear for another 2-3 minutes on the flesh side. This step isn’t about cooking through, but rather about developing a bit of color and additional flavor on the underside.
Once lightly browned, remove the chicken from the skillet and set it aside on a clean plate. This makes space for building the glaze.
Building the Syrupy Glaze
Reduce the heat to medium-low. Carefully pour off any excess rendered fat from the skillet, leaving about a tablespoon behind for flavor. Add the minced garlic and grated ginger to the pan and sauté for just 30 seconds until fragrant, being vigilant not to burn them.
Immediately whisk in the soy sauce, brown sugar, apple cider vinegar, and water or chicken broth. Bring the mixture to a gentle simmer, making sure to scrape up any browned bits (fond) from the bottom of the pan-these bits are packed with flavor!
Continue to simmer the glaze for 5-7 minutes, stirring occasionally, until it has slightly thickened and reduced to a beautiful, syrupy consistency. This slow reduction is key to developing a deep, rich homemade glaze.
The Oven Finish: Caramelizing & Cooking Through
Return the seared chicken thighs to the skillet, placing them skin-side up into the simmering glaze. Spoon some of the luscious glaze over each piece of chicken, ensuring it’s coated.
Transfer the skillet to the preheated oven. Bake for 20-25 minutes, or until the chicken reaches an internal temperature of 165°F (74°C) at its thickest part and the glaze is deeply caramelized and wonderfully sticky.
Baste the chicken once or twice during baking with the pan juices. This ensures an even, non-burnt coating and infuses the chicken with more of that incredible sticky-sweet chicken flavor.
Rest & Serve for Optimal Flavor
Once baked, remove the skillet from the oven. Let the chicken rest in the pan for 5 minutes before serving. Resting allows the juices to redistribute throughout the meat, ensuring every bite is as juicy as possible.
Garnish generously with fresh chopped parsley for a pop of color and fresh flavor. Serve your perfectly glazed chicken thighs immediately.
Chef’s Secrets for Ultimate Glazed Chicken Thighs
The Importance of Patting Dry
Thoroughly drying the chicken skin before searing is paramount. Any moisture on the skin will cause it to steam rather than crisp, preventing that coveted deep golden-brown crust and juicy chicken thighs.
Mastering the Sear for Flavor & Texture
Don’t rush the initial sear. High heat and leaving the chicken undisturbed for the recommended time allow the skin to render fat and develop a truly crispy, flavorful crust. This foundational step significantly impacts the final taste and texture of your pan-seared chicken.
Don’t Skip the Basting
Basting the chicken with the glaze during the oven baking phase is critical. It helps to build multiple layers of the sticky-sweet coating, prevents the glaze from drying out or burning in spots, and keeps the chicken moist by adding moisture back to the surface.
The Power of Resting Meat
Allowing the cooked chicken to rest for a few minutes after it comes out of the oven is a simple step that makes a huge difference. It lets the internal juices, which collect at the center during cooking, redistribute throughout the meat, resulting in a more tender and juicy chicken dinner.
Flavor Boost: Deglazing the Pan
When you add the liquids for the glaze to the skillet, be sure to vigorously scrape up all the browned bits (the “fond”) from the bottom of the pan. These caramelized fragments are pure flavor gold and will add immense depth to your homemade glaze.
Troubleshooting Your Glazed Chicken: Common Questions Answered
Why is My Glaze Too Thin/Watery?
If your glaze is too thin, it likely hasn’t simmered long enough. Increase the heat slightly to a more active simmer and continue cooking, stirring occasionally, until it visibly thickens and coats the back of a spoon. You can also add a tiny pinch of cornstarch mixed with cold water to help it along, if needed.
Why is My Glaze Burning?
Glaze burning typically happens if the heat is too high, or if it reduces too much before the chicken is added. Ensure you reduce the heat to medium-low when making the glaze, and don’t over-simmer it before the chicken returns. Regular basting during baking also prevents localized burning and keeps the Perfectly Glazed Chicken Thighs evenly coated.
My Chicken Isn’t Juicy – What Went Wrong?
The most common culprit for dry chicken is overcooking. Always use a meat thermometer to ensure the chicken reaches exactly 165°F (74°C) at its thickest part, then remove it immediately. Not letting the chicken rest after baking can also lead to drier results, as juices escape when cut too soon.
Beyond the Plate: Serving, Storing & Reheating
Perfect Pairings: What to Serve With Glazed Chicken Thighs
These Perfectly Glazed Chicken Thighs are incredibly versatile. They pair beautifully with steamed rice to soak up the extra glaze, roasted vegetables like crispy roasted cauliflower, or a simple green salad to balance the richness.
For a heartier side, consider perfectly crispy skillet potatoes and onions, which complement the savory-sweet notes wonderfully.
Storing Leftovers Safely
To store leftover Glazed Chicken Thighs, allow them to cool completely, then transfer them to an airtight container. Refrigerate promptly within two hours of cooking. They will keep fresh in the refrigerator for up to 3-4 days.
Reheating for Best Results
For best results, reheat the chicken thighs in a preheated oven at 300°F (150°C) until warmed through, about 10-15 minutes. This method helps maintain the crispiness of the skin and prevents the chicken from drying out.
You can also reheat gently in a microwave, but the skin may not remain as crispy.
Your Top Questions About Glazed Chicken Answered
Can I Use Boneless, Skinless Thighs?
Yes, you can use boneless, skinless thighs, but the cooking time will be shorter (around 15-20 minutes in the oven). Be extra careful not to overcook them, as they can dry out more easily without the bone and skin. A meat thermometer is especially important here.
Can I Make This Recipe Ahead of Time?
You can prepare the glaze ahead of time and store it in an airtight container in the refrigerator for up to 3 days. When ready to cook, simply sear the chicken and then add the prepared glaze to finish in the oven. This speeds up meal prep significantly.
Is There a Gluten-Free Option?
Absolutely! To make this recipe gluten-free, simply substitute the regular low sodium soy sauce with a certified gluten-free tamari. The flavor profile will remain largely the same, ensuring a delicious and safe meal for those with gluten sensitivities.
How Do I Adjust for Different Cuts of Chicken?
While chicken thighs are ideal for their juiciness, you can adapt this recipe for other cuts. For drumsticks, cooking times are similar to thighs. For chicken breasts (bone-in or boneless), reduce oven cooking time significantly and rely on your meat thermometer to ensure they reach 165°F without drying out. The juicy pan-seared chicken breast recipe offers great tips for those specific cuts.
Ready to Create Your Glazed Chicken Masterpiece?
Now that you have all the secrets to achieving Perfectly Glazed Chicken Thighs, it’s time to bring this culinary magic to your own kitchen. This recipe is designed for success, transforming simple ingredients into a dish that’s sure to impress everyone at your table.
I encourage you to give it a try tonight and discover just how easy it is to create a truly unforgettable sticky-sweet chicken dinner. Share your creations and let me know how it turns out!
Chicken Thighs
Course: Main CourseCuisine: AsianDifficulty: easy4
servings15
minutes45
minutes350
kcal60
minutesDiscover the secret to perfectly glazed chicken thighs with this foolproof recipe. Say goodbye to burnt or watery glazes and hello to deeply flavorful, sticky-sweet coating and incredibly juicy chicken. Get ready to master this classic!
Ingredients
4 bone-in, skin-on chicken thighs
1 tablespoon olive oil
1/2 cup low sodium soy sauce
1/2 cup packed light brown sugar
1/4 cup apple cider vinegar
2 cloves garlic, minced
1 teaspoon grated fresh ginger
1/4 cup water or chicken broth
1/2 teaspoon salt
1/4 teaspoon black pepper
2 tablespoons chopped fresh parsley, for garnish
Directions
- Preheat oven to 375°F (190°C). Pat chicken thighs dry thoroughly with paper towels. Season both sides of the chicken with salt and black pepper.
- Heat the olive oil in a large oven-safe skillet over medium-high heat. Once shimmering, add the chicken thighs, skin-side down. Sear for 6-8 minutes, undisturbed, until the skin is deep golden brown and crispy. This step creates a flavorful base for your sauce and prevents the sauce from burning later.
- Flip the chicken and sear for another 2-3 minutes on the flesh side, just to get some color. Remove chicken from the skillet and set aside.
- Reduce the heat to medium-low. Carefully pour off any excess rendered fat, leaving about a tablespoon in the pan. Add the minced garlic and grated ginger to the skillet and sauté for 30 seconds until fragrant, being careful not to burn them.
- Immediately whisk in the soy sauce, brown sugar, apple cider vinegar, and water or chicken broth. Bring the mixture to a gentle simmer, scraping up any browned bits from the bottom of the pan. Continue to simmer for 5-7 minutes, stirring occasionally, until the sauce has slightly thickened and reduced to a beautiful syrupy consistency. This slow reduction builds deep flavor without scorching.
- Return the seared chicken thighs to the skillet, skin-side up. Spoon some of the glaze over each piece of chicken.
- Transfer the skillet to the preheated oven. Bake for 20-25 minutes, or until the chicken reaches an internal temperature of 165°F (74°C) at its thickest part and the glaze is deeply caramelized and sticky. Baste the chicken once or twice during baking with the pan juices to ensure an even, non-burnt coating.
- Remove the skillet from the oven. Let the chicken rest in the pan for 5 minutes before serving. Garnish generously with fresh chopped parsley.
Notes
- Basting the chicken once or twice during baking ensures an even, non-burnt coating.