I spent years perfecting large apple pies, only to be constantly disappointed by the dreaded soggy bottom, especially when transitioning to beautiful, portion-controlled Personal Mini Apple Pies.
This recipe changes everything; it introduces a simple, brilliant technique that creates a waterproof barrier, ensuring every crust remains golden, flaky, and structurally perfect, making these treats ideal for any gathering.
The Soggy Bottom Solution: Why These Mini Pies Win Every Time
Traditional pies often fail because the wet filling seeps directly into the dough during the long bake time, turning the bottom layer into a gummy mess.
Our method focuses on blind baking and sealing the shell before the filling is added, guaranteeing superior texture and consistency every single time.
Perfect Portability and Portion Control
Making Personal Mini Apple Pies means you completely eliminate the need for slicing and serving utensils, simplifying cleanup and presentation.
They are perfectly sized for individual enjoyment, parties, or packing into lunchboxes, and the small format allows for easy, consistent freezing and storage.

Foolproof Texture: Crisp Crust, Thick Filling
The anti-soggy barrier technique-a quick brush of egg wash and a flash bake-seals the dough, preventing moisture migration from the syrupy apple mixture.
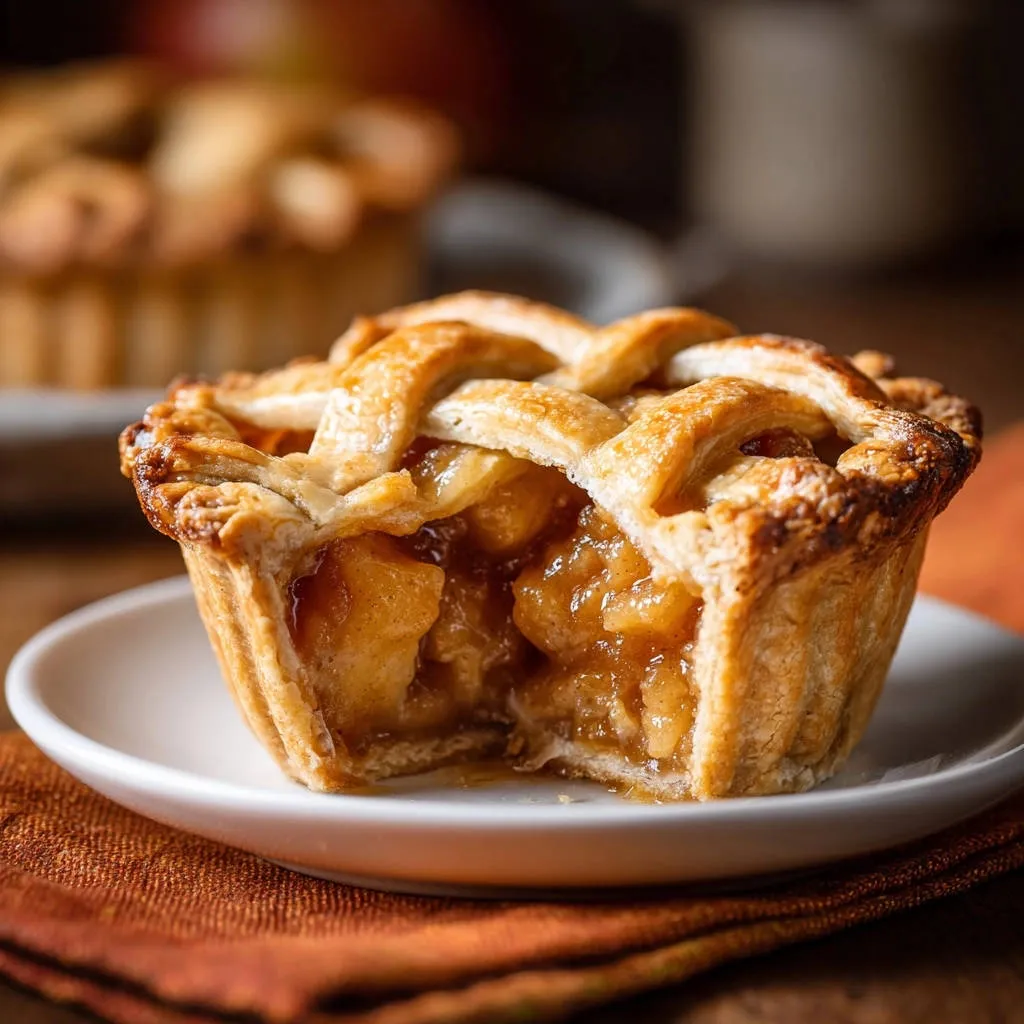
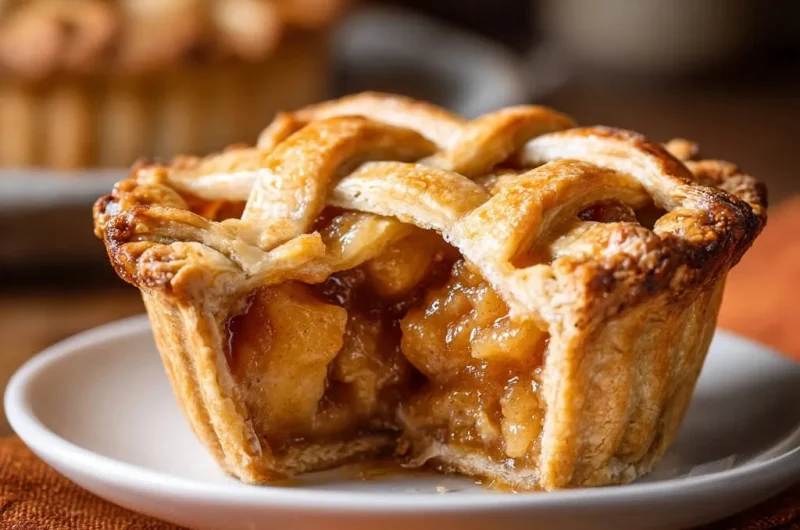
The result is a delicate, buttery crust that gives a satisfying crunch, complementing the thick, warmly spiced filling.
Simplified Assembly (Using Muffin Tins)
Baking these treats in standard muffin tins or small ramekins simplifies the assembly process significantly.
There is no need for complex fluting or transferring large, fragile pastry discs, making this a much faster and more forgiving process than baking a full-sized pie.
The Core Components: What You Need for Perfect Personal Mini Apple Pies
Success starts with sourcing and prepping ingredients specifically for texture and flavor balance.
Mastering the Crust: Cold Butter and Proper Ratios
The primary key to a flaky crust is maintaining the integrity of the fat before it hits the oven.
Using cold, cubed butter cut into the flour ensures that distinct pockets of fat remain intact, which steam and separate the flour layers during baking, creating flakiness.
The ice water must be added gradually and maintained at a frigid temperature to prevent the butter from softening and the gluten from developing too much, keeping the dough tender.
Selecting the Star: Choosing the Right Apple Varieties
The best apples for baking are those that are firm and hold their shape well under heat, preventing a mushy filling.
Varieties like Granny Smith (for necessary tartness and structure) or Honeycrisp (for balanced sweetness and excellent structure) are ideal for Personal Mini Apple Pies.
Ensure the apples are peeled and diced into uniform 1/2-inch pieces so they cook evenly throughout the short bake time.
The Thickening Agent Dilemma: Flour Versus Cornstarch
Both flour and cornstarch work effectively to thicken the filling, but they yield slightly different final results.
Using flour is more traditional; it provides an opaque, slightly cloudier filling, and you need about twice as much flour as cornstarch to achieve the same thickening power.
Cornstarch, conversely, provides a stronger thickening action and results in a glossy, clearer, and more vibrant filling, often preferred for its clean texture.
For a similar glossy finish in fruity baked goods, check out this recipe for creamy lemon crumble bars.
Essential Tools for Personal Mini Apple Pies Production
Having the right equipment ensures uniformity and makes the crucial blind baking step much easier.
For a similar shine on your baked goods, try these glazed orange creamsicle cookies.
Standard Muffin Tins or Small Ramekins
A standard 12-cup muffin tin is perfect for achieving uniform portions, yielding six mini pies (using every other cup for better airflow, or six large ramekins).
The Importance of Pie Weights (or Alternatives)
Weights are critical for the blind bake step; they anchor the dough to the tin and prevent the sides from collapsing or puffing up, maintaining the perfect shell shape needed for the filling.
A Step-by-Step Guide to Crafting Your Mini Pies
Follow these steps closely, especially the blind bake and sealing technique, for guaranteed success.
Preparing the Dough and Filling
Start by combining the flour and salt, then quickly cut in the cold butter until the mixture resembles coarse, pea-sized crumbs-do not overmix, as large pieces of butter are key to flakiness.
Add the ice water spoon by spoon, mixing only until the dough just holds together when pinched; excess handling develops gluten, leading to a tough crust.
Combine the diced apples, sugars, thickener, spices, and lemon juice quickly in a separate bowl; mixing swiftly prevents the sugar from drawing moisture out of the apples prematurely (known as weeping).
Rolling, Shaping, and Prepping the Shells
Divide the chilled dough into 12 small, uniform portions. Roll six of these portions into small discs large enough to fit your muffin tin or ramekin wells.
Gently press the dough into the tins, ensuring it conforms tightly to the bottom and sides without stretching, which can cause the crust to shrink excessively during baking.
Crucial Technique: Implementing the Anti-Soggy Barrier
The Blind Bake Foundation
Preheat your oven to 400°F (200°C). After shaping the dough, use a fork to pierce the bottom of each shell multiple times-this is essential to allow steam to escape and prevent large air bubbles from forming.
Line the shells with small squares of foil or parchment paper, fill them with dried beans or pie weights, and bake for 15 minutes to set the structure.
The Egg Wash Seal: A Waterproof Secret
Remove the partially baked crusts from the oven and carefully lift out the weights and foil. The crust should be dry, but not yet golden.
Brush the entire interior bottom and sides of the hot crusts generously with a thin, even layer of beaten egg wash (made from 1 egg beaten with 1 teaspoon of water).
Immediately return the empty, sealed shells to the oven for 5 minutes until the egg wash is set, shiny, and dry, forming a protective, waterproof protein layer against the wet apple filling.
Assembling and Lattice Perfection
Reduce the oven temperature to 375°F (190°C). Fill the sealed crusts with the apple mixture, mounding the filling slightly above the tin edge, as the apples will compact slightly during baking.
Roll out the remaining six dough portions and cut them into uniform strips using a sharp knife or pastry cutter; weaving these strips over the top creates a classic lattice design.
Finish by brushing the entire lattice top with the remaining egg wash, which promotes that deep, desirable golden brown color.
The Final Bake and Setting Time
Bake the mini pies for 25 to 30 minutes. Look for visual cues: the filling should be vigorously bubbling in the center, and the crust should be a rich golden brown.
If the lattice edges start browning too quickly, loosely tent the entire muffin tin with a piece of aluminum foil to shield the crust.
It is absolutely critical to allow the pies to cool in the pan for at least 30 minutes; this cooling period allows the starches in the filling to gel and set properly, ensuring it remains thick and doesn’t run out when served.
Chef’s Pro Tips and Troubleshooting Common Pie Mistakes
Take your mini pies from excellent to extraordinary with these expert insights.
Achieving the Golden Glow: Mastering the Egg Wash
A simple egg wash is essential for professional-looking shine and deep color.
For the best results, mix one whole beaten egg with one tablespoon of water or milk; the water/milk thins the egg, allowing it to coat the dough evenly without becoming thick or patchy.
The Problem: Runny Apple Filling
The most common cause of runny filling is insufficient thickener or, more often, inadequate cooling time.
If your filling seems too liquid after cooling, you can usually thicken it slightly by placing the pie (after removing it from the tin) briefly back into a 350°F oven for 5-10 minutes, allowing the starches to reach their final gelling point.
Preventing the Edges from Burning
Mini pies have delicate edges that can burn easily due to their exposed position.
As soon as you notice the edges are adequately golden (about halfway through the final bake), quickly create small aluminum foil tents or rings to cover just the exposed crust edges, reflecting heat away.
Make-Ahead Marvel: Freezing Personal Mini Apple Pies
These individual pies are perfect for making ahead and freezing.
For freezing pre-bake, assemble the pies completely, place the entire muffin tin into the freezer until solid, then pop the frozen pies out and store them in an airtight container for up to 3 months. Bake directly from frozen, adding 10-15 minutes to the total bake time.
Make Ahead, Store, and Serve: Practical Pie Logistics
Maximize the lifespan and enjoyment of your baked goods.
How Long Do Personal Mini Apple Pies Keep? (Storage Guide)
Proper storage ensures the crust remains crisp and the filling fresh.
If stored in an airtight container in the refrigerator, these pies will maintain their quality and flavor for up to 4 to 5 days.
At room temperature, the pies should only be kept for 1 to 2 days, especially if your kitchen is warm, due to the fruit filling content.
The Perfect Companions: Serving Suggestions
While delicious on their own, a few additions elevate the serving experience.
Pairing these warm treats with a dollop of sharp, mature cheddar cheese is a classic combination that beautifully balances the sweetness and acidity of the apples.
For an indulgent touch, try serving them alongside homemade salted caramel sauce or a generous swirl of fresh, lightly sweetened whipped cream.
Frequently Asked Questions About Baking Mini Pies
Can I use store-bought refrigerated pie crust for this recipe?
Yes, you can substitute store-bought dough for convenience, but be aware that homemade crust often handles the blind bake and subsequent egg wash sealing much better due to its higher butter content and specific structure.
What if I don’t have pie weights for the blind bake?
Standard dried beans (navy or black beans) are an excellent, reusable alternative to ceramic pie weights.
Dry rice or granulated sugar can also be used, but ensure they are lined with parchment paper, as sugar can melt or caramelize slightly at high temperatures.
Can I make these pies gluten-free?
Absolutely. You can substitute a high-quality gluten-free all-purpose flour blend (containing xanthan gum) cup-for-cup in the crust recipe.
In the filling, ensure you use cornstarch, which is naturally gluten-free, instead of wheat flour for thickening.
What to Make Next
Enjoy more comforting baked goods inspired by apple season.
- For a sweet start to your day, consider these fluffy pumpkin spice pancakes, perfect for using up any leftover applesauce or spices.
- If you love warm, spiced doughs, try these homemade cinnamon rolls, offering a similar cozy sweetness.
Ready to Impress? Share Your Personal Mini Apple Pies Masterpiece!
You now possess the expert technique required to eliminate soggy crusts forever and bake truly flawless, portable Personal Mini Apple Pies.
Embrace the blind bake and the sealing egg wash; it’s the professional secret that ensures you achieve perfect textural contrast every time. We can’t wait to see your golden-crusted creations!
Bake a batch, share your success, and let us know how this anti-soggy method transformed your dessert game!
Mini Apple Pies
Course: DessertCuisine: AmericanDifficulty: medium4
6 mini pies1
hour50
minutes350
kcal120
minutesNever suffer from a soggy crust again! This recipe features a foolproof blind-baking and egg wash barrier technique, ensuring a perfectly crisp, buttery bottom for every personal mini apple pie. Filled with sweet, spiced apples and topped with a classic lattice.
Ingredients
For the Crust (Makes 6 mini pies):
2 1/2 cups all-purpose flour
1 teaspoon salt
1 cup (2 sticks) unsalted cold butter, cut into cubes
1/2 cup ice water
1 egg, beaten (for egg wash)
For the Filling:
4 medium firm apples (like Granny Smith or Honeycrisp), peeled and diced
1/2 cup brown sugar
1/4 cup granulated sugar
1/4 cup all-purpose flour OR cornstarch (the thickener)
1 teaspoon ground cinnamon
1/4 teaspoon ground nutmeg
1 tablespoon fresh lemon juice
Directions
- Prepare the Dough and Filling: Combine flour and salt. Cut in the cold butter until the mixture resembles coarse crumbs. Gradually add the ice water, mixing until the dough just comes together. Divide into 12 small portions (6 bottoms, 6 lattice tops). Chill for 30 minutes. While dough chills, combine the diced apples, both sugars, flour or cornstarch, cinnamon, nutmeg, and lemon juice in a large bowl. Mix well.
- Blind Bake the Bottom Shells: Preheat oven to 400 degrees F. Roll out the 6 bottom dough portions and gently press them into standard muffin tins or small ramekins, trimming the edges. Pierce the bottom of each shell multiple times with a fork. Place foil or parchment paper inside each shell and fill with dried beans or pie weights. Bake for 15 minutes. This is crucial for structure.
- Implement the Anti-Soggy Barrier Technique: Remove the baked crusts from the oven and carefully remove the weights and foil. This is the step that locks in crispness. Brush the bottom and sides of the partially baked crusts generously with a thin layer of the beaten egg wash. Immediately return the empty shells to the oven for 5 more minutes until the egg wash is set and shiny, creating a waterproof seal.
- Assemble the Pies: Reduce the oven temperature to 375 degrees F. Fill the sealed, partially baked crusts with the apple filling mixture, ensuring they are mounded slightly. Cut the remaining 6 dough portions into strips and weave them over the top of the filling to create a lattice design. Brush the entire lattice top with the remaining egg wash.
- Bake and Cool: Bake the mini pies for 25 to 30 minutes, or until the filling is bubbling thickly and the crust is golden brown. If the edges begin to brown too quickly, lightly tent the tops with a small piece of foil.
- Final Serve: Allow the pies to cool in the pan for at least 30 minutes before gently removing them. The residual heat helps set the thick filling. Serve warm with vanilla ice cream, if desired.
Notes
- The egg wash barrier technique (Step 3) is essential for creating a waterproof seal that guarantees a crisp bottom crust.