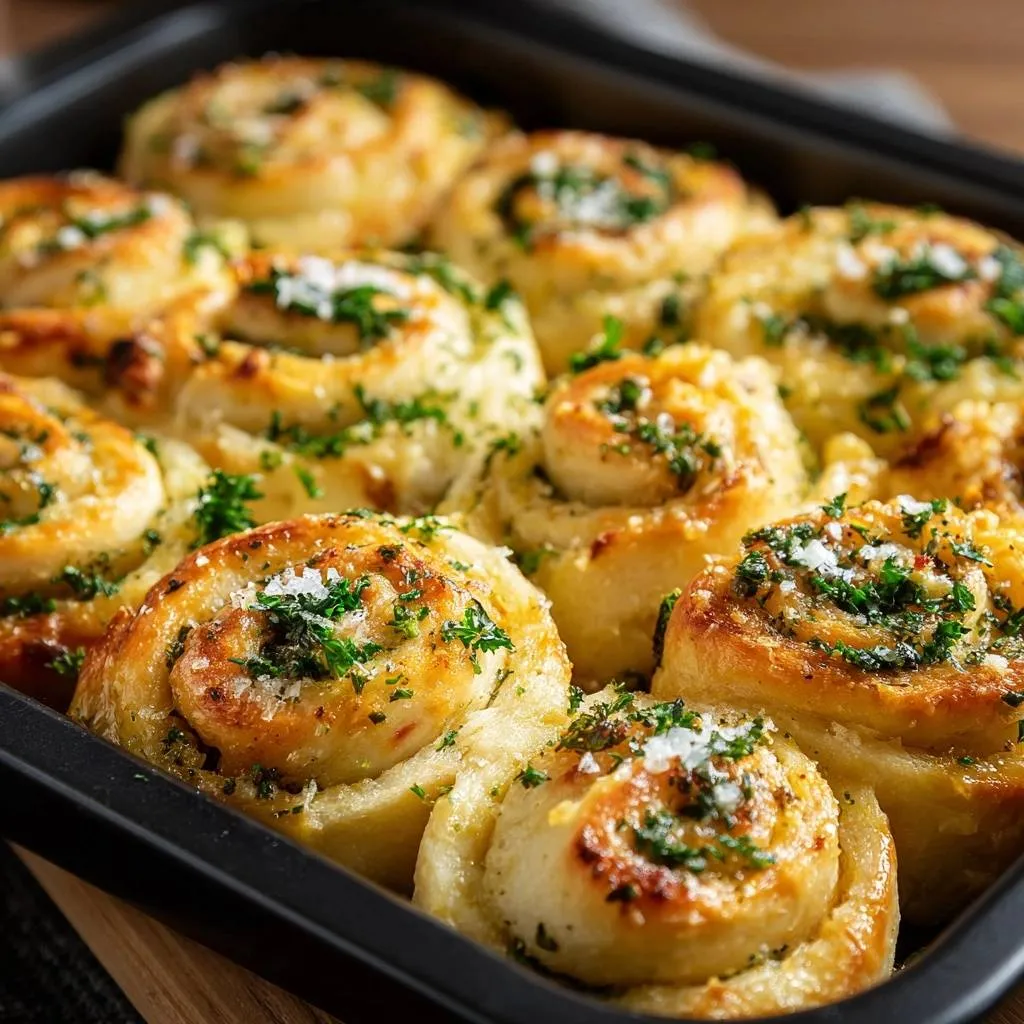
Ever pulled apart those gorgeous-looking rolls only to find a doughy, dense mess in the middle? You don’t have to anymore. This pull-apart garlic butter rolls recipe fixes that with a simple covered baking trick that steams the centers first for fluffy texture from edge to edge. You’ll get 12 perfect rolls ready in about 3 hours total, with 20 minutes prep, 2 hours rising, and 25 minutes baking.
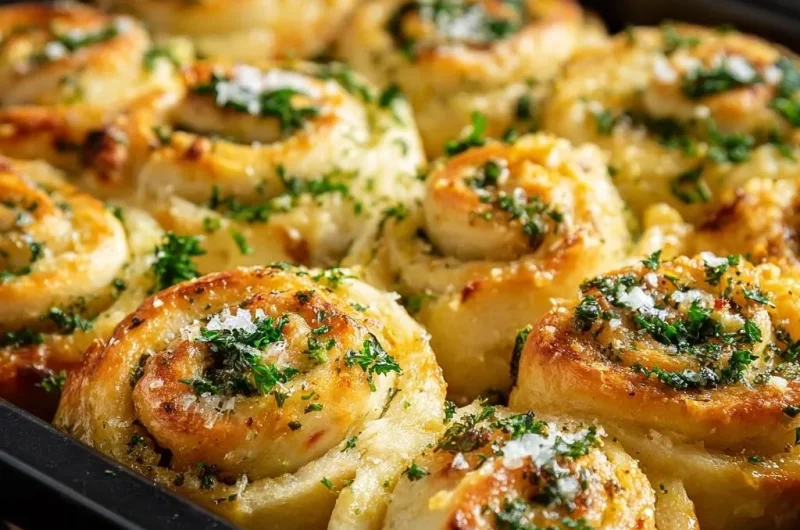
Therefore, these rolls stand out for holidays or weeknight dinners because they deliver bakery-quality results without fancy equipment. The steaming method ensures no raw spots, while garlic butter infuses every layer with savory punch. In addition, they’re ideal for sharing, pulling apart warm and buttery right at the table.
For a similar light texture, explore the cheddar parsley biscuits secrets.
Here’s the expertise booster: preheat to exactly 375F before covering tightly with foil for 15 minutes. That precise steam pocket cooks the interiors evenly, then the uncovered bake triggers golden browning. Trust me, it’s the difference between good rolls and pull-apart garlic butter rolls that disappear fast.
Essential Ingredients for Pull-Apart Garlic Butter Rolls
Flour and Yeast Foundation
All-purpose flour gives your garlic rolls dough the perfect structure, holding up to the buttery filling without getting gummy. You need 3 cups total, starting with 2.5 in the mix for easy handling. Therefore, it develops just enough gluten during kneading for that soft, pillowy bite.
Active dry yeast thrives in milk at 110F, so grab your thermometer. The 2 teaspoons activate with sugar’s help, which feeds them for rise and aids browning later. However, if you swap bread flour, expect a chewier texture, but stick to all-purpose for classic fluffiness.
Butter Layers for Richness
Softened unsalted butter splits duties: 1/4 cup in the dough keeps it tender and flavorful. Then, 1/2 cup more forms the garlic butter rolls filling, spreading easily without tearing the dough. Unsalted lets you control saltiness perfectly.
Therefore, always soften, don’t melt it, for a lamination-like swirl that releases buttery goodness as rolls bake. You’ll smell that rich aroma building during the second rise. In addition, it creates flaky layers when you pull them apart.
Garlic, Parsley, and Salt Accents
Fresh garlic shines here, so mince 4 cloves finely for bold, punchy flavor that powder can’t match. It mellows beautifully in the butter paste. Meanwhile, 1/4 cup chopped parsley adds bright green flecks and fresh herbal lift.
Flaky sea salt sprinkled at the end delivers crunchy pops against the soft rolls. For subs, try chives for oniony zing or herbs de Provence for a Mediterranean twist. However, parsley’s classic pairing with garlic keeps these pull-apart garlic butter rolls irresistible.
Science of Fluffy Pull-Apart Garlic Butter Rolls
Yeast Activation and Dough Rise Dynamics
Hit 110F milk with sugar and yeast, then watch for foam in 5 minutes, proving it’s alive and pumping CO2. That kickstarts gluten networks as you knead 5-7 minutes on a floured surface. Therefore, your pull-apart garlic butter rolls dough turns smooth and elastic, ready to double in an hour.
A warm spot, like near a sunny window, speeds things up by keeping yeast happy. In addition, adding flour gradually prevents a sticky mess. Skip this, and rises drag, leaving dense results.
Steaming Method for No-Doughy Centers
The foil cover at 375F traps steam for 15 minutes, gently cooking interiors like a pro oven. This ensures fluffy centers in pull-apart garlic butter rolls without drying tops. Uncovered from the start? You get raw middles and tough outsides every time.
Then, remove foil for 10 more minutes, firing up the Maillard reaction for golden, flavorful crusts. Therefore, every bite pulls apart evenly tender. It’s simple science that transforms basic dough into wow-worthy rolls.
Garlic Butter Emulsion and Flavor Release
Softened butter binds minced garlic and parsley into a stable paste that seeps into layers during proofing. Heat then activates garlic’s savory compounds, releasing aroma as it bakes. You’ll taste that fresh punch in every pull-apart piece.
In addition, the emulsion melts evenly, preventing greasy pools. Pro tip: let it sit 10 minutes before spreading for max spreadability.
Step-by-Step: Building Pull-Apart Garlic Butter Rolls
Activate Yeast and Mix Initial Dough
Combine warm milk, sugar, and yeast in a big bowl. Wait 5 minutes for foamy proof it’s working. Then stir in 2.5 cups flour, 1/4 cup softened butter, and salt until shaggy.
Knead on floured surface 5-7 minutes, adding last 0.5 cup flour for smooth, soft dough that springs back. Therefore, it won’t stick to your hands. Feel that silky texture, and you’re golden for pull-apart garlic butter rolls.
First Rise and Garlic Butter Prep
Pop dough in a greased bowl, cover with plastic wrap to block drying skins, and let rise 1 hour until doubled. Meanwhile, mash 1/2 cup softened butter with garlic and parsley into spreadable paste. Oh man, that smell hits hard.
Plastic keeps humidity in, so rises stay even. In addition, prep filling ahead saves time later.
Shaping the Garlic Butter Log
Punch down risen dough, roll into 12×16-inch rectangle on floured board. Spread garlic butter evenly, leaving a 1-inch border to seal. Roll tightly from the long side into a log, pinching seams.
Cut into 12 equal slices with a sharp knife for clean edges. Therefore, tight rolling prevents leaks and ensures swirly layers in your pull-apart garlic butter rolls.
Arrange, Proof, and Dual-Phase Bake
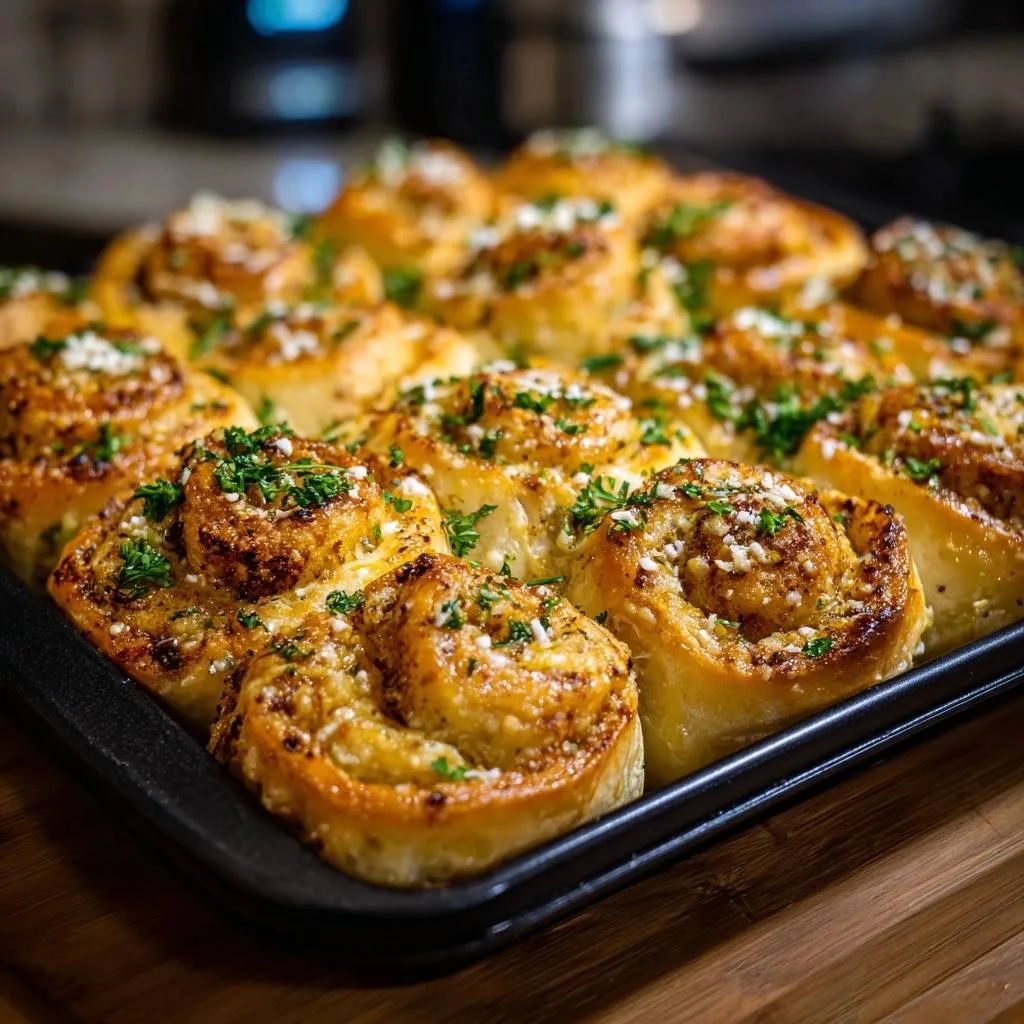
Place slices cut-side up in greased 8×8 dish, sides touching for pull-apart fun. Cover loosely, rise 45-60 minutes until puffy. Preheat to 375F, cover tight with foil, bake 15 minutes to steam fluffy centers.
Uncover, bake 10 more minutes till golden. Touching sides create shared crusts that tear satisfyingly. These pull-apart garlic butter rolls come out perfect every time.
Final Brushing and Serving
Brush with warm pan butter, sprinkle extra parsley and flaky salt. Serve right away while steaming hot. Each pull reveals garlicky bliss.
Pro tip: reheat leftovers the same way to revive that fresh-baked joy.
Equipment Choices for Perfect Garlic Butter Rolls
Best Baking Dish and Covers
Greased 8×8 metal dish conducts heat fast for even baking in pull-apart garlic butter rolls. Glass works too but takes longer to warm. Tight foil seals steam perfectly.
Plastic wrap for proofing won’t stick if oiled lightly. Alternatively, a Dutch oven lid mimics the cover for small batches. Therefore, no fancy gear needed.
Kneading Surfaces and Tools
A floured wooden board gives traction for rolling that 12×16 rectangle smooth. Sharp knife or unflavored floss slices cleanly without squishing. Digital thermometer nails milk temp every time.
Stand mixer with dough hook speeds kneading if hands tire. In addition, silicone mat prevents sticking on counters.
Avoiding Pitfalls in Pull-Apart Garlic Butter Rolls
Fixing Dense or Doughy Textures
Over-knead and gluten toughens, making chewy rolls. Under-proof with a cold kitchen leaves doughy centers, so use the finger poke test: dough springs back slowly when ready. Warm it near the oven light if needed.
Therefore, watch rise times closely for fluffy pull-apart garlic butter rolls. Patience pays off big.
Preventing Butter Leaks and Uneven Browning
Leave that 1-inch border and roll tight to trap butter inside. Don’t cram the dish full. Rotate halfway through uncovered bake if your oven has hot spots.
Burning garlic? Lower temp slightly next time. In addition, foil prevents early crisping issues.
Troubleshooting Yeast and Rise Issues
No foam after 5 minutes means dead yeast, so check dates and use fresh. Slow rise? Move to a warmer spot or oven with light on. Never add salt before activation, it kills yeast.
Therefore, nail this for reliable pull-apart garlic butter rolls every bake.
Flavor Twists on Pull-Apart Garlic Butter Rolls
Herb and Cheese Enhancements
Mix shredded cheddar or parmesan into the filling for gooey cheesiness. Swap parsley for rosemary or thyme for woodsy depth. Vegan? Use plant butter and nutritional yeast for nutty savoriness.
Keep the steaming method for fluffy centers. Therefore, these twists make pull-apart garlic butter rolls endlessly adaptable for any meal.
Spicy or Sweet Garlic Roll Variations
Stir chili flakes into butter for heat that builds with each pull. Or try honey-sriracha for sweet-spicy kick. For dessert vibes, cinnamon-honey swirl skips savory but uses same fluffy bake.
In addition, steaming ensures even layers no matter the filling.
Make-Ahead Strategies for Garlic Butter Rolls
Freezing Dough Logs or Shaped Rolls
Freeze sliced log on a sheet, then bag for up to a month. Thaw overnight in fridge, proof as usual. Or par-bake foil-covered, freeze, then finish baking straight from frozen at 375F.
Reheat wrapped in foil at 350F for crisp tops. Therefore, perfect for surprise guests.
Batch Prep for Holidays
Double everything for 24 rolls, but rise in two dishes. Fridge-proof shaped rolls overnight for deeper flavor. Shape assembly-line style to save time.
Store assembled up to 2 days covered. In addition, slow cold rise improves texture.
Pairing Ideas for Pull-Apart Garlic Butter Rolls
Soup and Stew Companions
These pull-apart garlic butter rolls sop up tomato basil soup perfectly, balancing acidity with buttery richness. Creamy mushroom or veggie chowder loves the garlicky pull. Dip extras in reserved pan butter.
Main Dish Matches
Roast chicken gets elevated by parsley-garlic notes. Pasta primavera or grilled veggies pair seamlessly. The brightness cuts through proteins beautifully.
Frequently Asked Questions on Pull-Apart Garlic Butter Rolls
Can I Use Instant Yeast?
Yes, swap 1.5 teaspoons instant yeast directly into the flour, skipping activation. Mix with warm milk right away. Rises might finish 10 minutes faster, so check with the poke test for puffy pull-apart garlic butter rolls.
How to Store Leftovers?
Keep in airtight container at room temp up to 2 days, or fridge for 4 days. Freeze baked rolls up to 1 month in bags. Reheat foil-covered at 350F for 10-15 minutes to restore steam and fluffiness without drying.
Gluten-Free Pull-Apart Rolls Possible?
Absolutely, use a 1:1 gluten-free flour blend with xanthan gum added. Boost butter by 1 tablespoon for moisture. Proof 20 minutes longer, as GF doughs rise slower, but steaming ensures fluffy centers.
Why Foil Cover Essential?
Foil traps steam during the first 15 minutes, cooking interiors evenly like commercial ovens for no-doughy pull-apart garlic butter rolls. Without it, edges dry while centers stay raw. It’s the key to pro texture at home.
Vegan Substitutions Work?
Swap milk for warm oat or almond, and use vegan butter. The method stays identical, with same rises and bake. Garlic parsley shines through, delivering fluffy, buttery vegan pull-apart garlic butter rolls everyone loves.
Garlic Butter Rolls
Course: Side DishCuisine: AmericanDifficulty: medium12
rolls30
minutes25
minutes240
kcal120
MinutesTired of pull-apart rolls that look perfect on top but stay doughy inside? This recipe delivers fluffy texture throughout with a covered baking method that steams the centers first for foolproof results.
Ingredients
3 cups all-purpose flour
1 cup warm milk (about 110F)
2 tablespoons sugar
2 teaspoons active dry yeast
1/4 cup softened unsalted butter (plus 1/2 cup for filling)
1 teaspoon salt
4 garlic cloves, minced
1/4 cup finely chopped fresh parsley (plus extra for topping)
Flaky sea salt for sprinkling
Directions
- Activate yeast: In a large bowl, combine warm milk, sugar, and yeast. Let sit 5 minutes until foamy.
- Make dough: Add 2 1/2 cups flour, 1/4 cup softened butter, and salt. Mix until dough forms. Knead on floured surface 5-7 minutes, adding remaining 1/2 cup flour as needed for soft, smooth dough.
- First rise: Place dough in greased bowl, cover with plastic wrap, and let rise in warm spot 1 hour until doubled.
- Prepare filling: Mix 1/2 cup softened butter, minced garlic, and 1/4 cup parsley into a spreadable paste.
- Shape rolls: Punch down dough, roll into 12×16-inch rectangle on floured surface. Spread garlic butter evenly over dough, leaving 1-inch border. Roll tightly from long side into log. Cut into 12 equal slices.
- Arrange: Place rolls cut-side up in greased 8×8-inch baking dish, touching each other. Cover loosely with plastic wrap.
- Second rise: Let rise 45-60 minutes until puffy and nearly doubled.
- Bake for no doughy centers: Preheat oven to 375F. Cover dish tightly with foil and bake 15 minutes. This steams the interiors for fluffy, fully cooked centers without drying out. Remove foil, bake uncovered 10 minutes more until golden brown.
- Finish: Brush with any pan butter, sprinkle extra parsley and flaky salt. Serve warm. Pull apart and enjoy perfect texture!
Notes
- Use warm milk around 110°F to activate yeast properly. The foil-covered baking step is key to steaming the centers for even cooking without dryness.