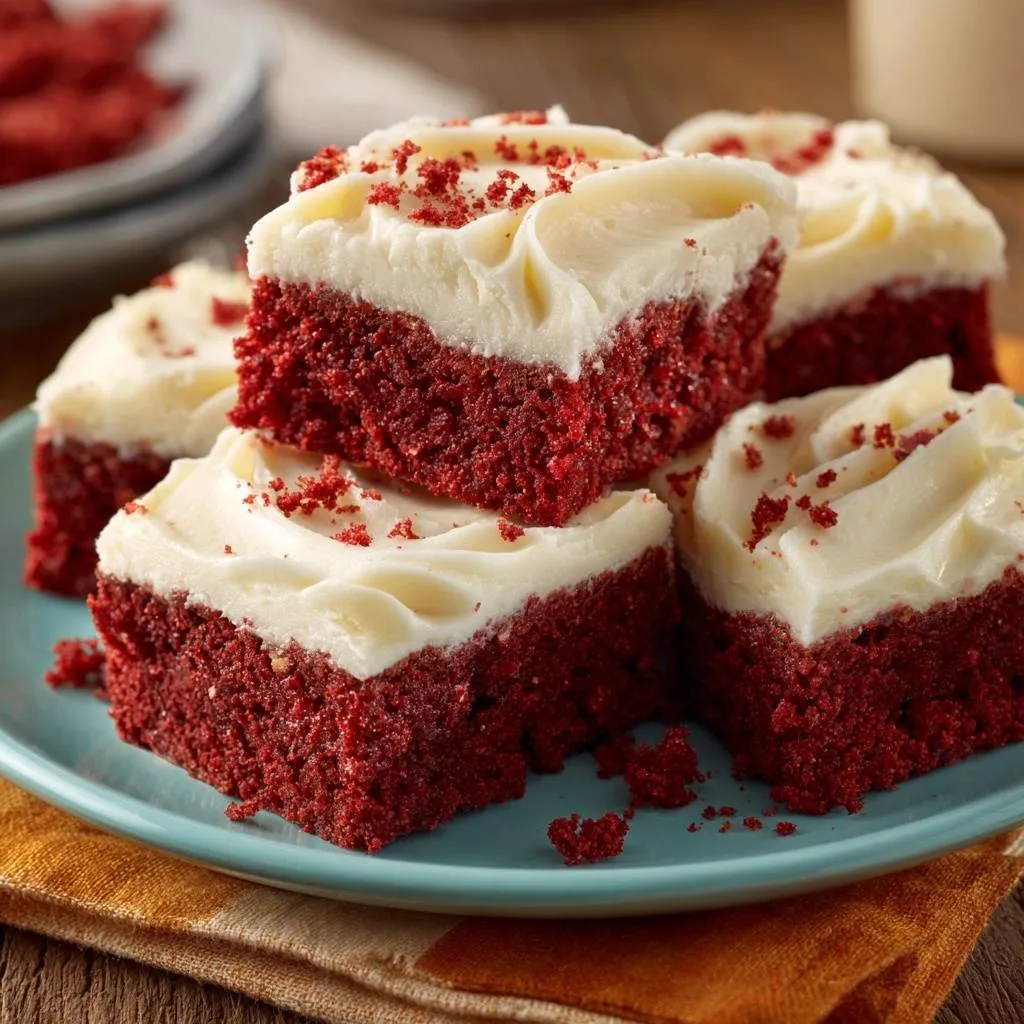
Nothing ruins red velvet cake faster than a dry, crumbly bite. You’ve been there, right? This recipe changes everything with vegetable oil that locks in moisture way better than butter ever could. You’ll get 16 perfect squares ready in just 10 minutes prep and 25 minutes bake, beating any boxed mix hands down.
So why does this work so well? The oil stays liquid even after baking, keeping every crumb tender. Buttermilk adds that signature tang and softness, while vinegar teams up with baking soda for a light lift. Plus, those buttery cake crumb tops make them irresistible party bites.
Here’s the real secret: whisk the wet ingredients until they’re silky smooth before combining. That emulsion traps air and moisture, so your squares come out velvety, not dense. Oh man, the vibrant red hue and subtle cocoa tang will have you craving seconds.
If you enjoy this red velvet flavor, you’ll also want to try red velvet cheesecake cookies.
Core Ingredients for Moist Red Velvet Cake Squares
Flour, Sugar, and Cocoa Foundation
All-purpose flour gives your 2 1/2 cups of structure without gumminess, unlike cake flour that can make it too fragile. In addition, the 1 1/2 cups granulated sugar doesn’t just sweeten; it boosts tenderness by interfering with gluten formation. Meanwhile, 2 tablespoons unsweetened cocoa powder delivers that authentic red hue and faint chocolate whisper without overpowering the cake.
What to Try Next
If you enjoyed the rich flavors of red velvet, you might like these other sweet treats.
- For a delightful breakfast or brunch option, consider these fluffy cranberry maple pancakes, balancing sweet and tart notes.
- If you’re in the mood for more chocolate, this moist chocolate bundt cake offers a similar deep cocoa experience.
Therefore, stick to white granulated sugar for even browning. It melts predictably, helping the crumb stay soft. Freshly measured ingredients ensure your base holds up perfectly.
Wet Blend: Oil, Buttermilk, and Vinegar Magic
Vegetable oil, at 1 1/2 cups, is your anti-dry hero because it remains liquid at room temperature, unlike butter that solidifies and lets moisture escape. Buttermilk brings tangy tenderness that tenderizes the batter, while 2 teaspoons white vinegar activates the baking soda for rise. You get lift without density.
However, choose gel food coloring over liquid for bolder red without watering down the mix. Two large eggs emulsify everything smoothly. This combo creates that classic velvety texture everyone loves.
Cream Cheese Frosting and Crumb Components
Start with 8 ounces softened cream cheese and 1/2 cup unsalted butter to avoid any salty clash with the tang. Then, beat in 4 cups powdered sugar gradually, plus 1 teaspoon vanilla, for fluffy peaks. Sift the sugar first; it prevents lumps and yields silkiness.
Reserve those baked cake scraps for buttery crumbs on top. They add crunch and tie the whole thing together. Pro tip: unsalted butter keeps the frosting balanced and spreadable.
Science of Moist Red Velvet Cake Squares
Oil vs. Butter for Lasting Moisture
Vegetable oil traps moisture because its liquid state doesn’t evaporate like butter’s 20% water content during baking. Eggs help emulsify it, creating a stable batter that stays tender for days. Studies show oil-based cakes retain 15-20% more moisture post-bake.
Therefore, your squares won’t dry out overnight. The result? A crumb that’s soft and moist every time you bite in. Switch to oil, and you’ll never go back.
For a similar crumb structure in another bake, check out the ultimate three-layer carrot cake.
Buttermilk Bloom and Vinegar Activation
Buttermilk’s acidity tenderizes gluten strands, preventing toughness, while vinegar lowers the pH to trigger baking soda’s CO2 bubbles for rise. This reaction stabilizes the red color against cocoa’s natural blue tones. You’ll see the batter puff gently in the oven.
In addition, the tangy bloom enhances that signature flavor. Without it, you’d get flat, dense cake. It’s simple science for perfect lift.
Essential Tools for Red Velvet Cake Squares
Baking Pan and Parchment Setup
A 9×13-inch metal pan heats evenly, avoiding the overbake risk of glass. Grease it lightly, then add a parchment sling for easy lifting. No sticking, no mess.
If parchment’s scarce, foil works fine. However, always cool on a wire rack to prevent soggy bottoms. These steps make cleanup a breeze.
Mixing Bowls and Electric Mixer Precision
Grab two large bowls: one for dry whisking, one for wet emulsion. A stand mixer fluffs the frosting without tiring your arms. Handheld mixers work too; just beat on medium speed.
Therefore, precise tools ensure smooth batter. You’ll notice the difference in texture right away.
Step-by-Step: Baking Moist Red Velvet Cake Squares
Preheat and Pan Prep Phase
Preheat your oven to 350°F for steady heat. Grease the 9×13 pan, line with parchment overhanging the sides. This sling lets you lift the cake out cleanly later.
Place on a wire rack to cool fully after baking. Soggy bottoms ruin the texture, so don’t skip this. You’ll smell that cocoa aroma filling your kitchen soon.
Dry Ingredients Whisk and Wet Emulsion
Whisk 2 1/2 cups flour, 1 1/2 cups sugar, 2 tablespoons cocoa, 1 teaspoon baking soda, and 1 teaspoon salt in a large bowl. In another, whisk 2 eggs, 1 1/2 cups oil, 1 cup buttermilk, 2 teaspoons vanilla, 2 teaspoons vinegar, and 1 ounce red food coloring until smooth and vibrant.
The wet mix should look silky, not separated. This prevents lumps later. Pro tip: vinegar might fizz a bit; that’s the activation starting.
Batter Combine, Bake, and Cool
Pour wet into dry and stir gently until just combined; streaks are okay. Overmixing toughens the gluten. Pour into the pan and bake 22-25 minutes until a toothpick pulls clean.
Cool completely in the pan. The cake sets up firm but stays moist inside. Patience here ensures perfect frosting adhesion.
Frosting Whip and Square Assembly
Beat softened 8 ounces cream cheese and 1/2 cup butter until creamy. Gradually add 4 cups powdered sugar and 1 teaspoon vanilla; whip to fluffy clouds. Lift cake out, trim edges straight, and crumble trimmings.
Frost the tops generously, sprinkle crumbs, then cut into 16 squares. Store covered at room temp up to 3 days. Each bite delivers that creamy-tangy bliss.
Avoiding Dry Red Velvet Cake Squares Pitfalls
Overmixing and Dense Texture Fixes
Stop stirring at the first streaks to keep air pockets intact. Overmixing develops gluten, leading to chewiness. Check internal temp at 195-200°F for doneness over toothpick alone.
Underbaking leaves a gummy center, so watch closely. These fixes guarantee tender crumb every time.
Frosting Separation and Color Fading
Always use room-temp cream cheese and butter for stable emulsion; cold ones cause curdling. For vibrant red, stick to 1 ounce gel coloring and store away from humidity.
Therefore, your squares stay bright and frosting smooth. Cover loosely to avoid condensation.
Flavor Twists on Red Velvet Cake Squares
Chocolate Chip or Nut Additions
Fold in 1 cup chocolate chips or chopped pecans right after combining wet and dry. They add crunch against the velvet softness and amplify the cocoa tang. Toast nuts first for deeper flavor.
For allergies, swap seeds like sunflower. However, don’t overload; too much weighs it down. Kids love the chips version.
Spice or Citrus Frosting Variations
Add 1/2 teaspoon cinnamon to the dry ingredients for warm spice notes. Zest an orange into the frosting for bright citrus lift. These tweaks keep it fresh.
Vegan? Use plant-based buttermilk and cream cheese. In addition, scale spices to taste during mixing.
Perfect Pairings for Red Velvet Cake Squares
Beverage Matches and Side Bites
Coffee cuts through the richness with its bitterness, while tea balances the tang. Cold milk softens the cream cheese edge perfectly. Pair with fresh berries or a fruit salad for contrast.
At events, plate on stands with mint leaves. Therefore, your squares shine as the star dessert.
Make-Ahead Guide for Red Velvet Cake Squares
Freezing Unfrosted Layers and Frosting
Cool the cake fully, wrap tightly in plastic and foil, then freeze up to 2 months. Thaw overnight in the fridge before frosting. The unfrosted layer stays moist.
Frosting keeps in the fridge for a week; bring to room temp before using. Double the recipe for parties. This makes hosting easy.
Red Velvet Cake Squares Questions Answered
Can I Use Butter Instead of Oil?
Yes, swap 1 1/2 cups softened butter for oil, but expect slightly drier results since butter solidifies post-bake. Add 1/4 cup applesauce to rescue moisture. The texture shifts to more cake-like, less velvet, but still tasty.
How to Get Brighter Red Color?
Use gel food coloring; it’s more potent than liquid and won’t thin the batter. Reduce cocoa to 1 tablespoon if needed, and mix coloring thoroughly into wets first. Bake immediately to lock in vibrancy.
Gluten-Free Red Velvet Cake Squares Adaptation?
Replace flour with a 1:1 gluten-free blend plus 1/2 teaspoon xanthan gum for structure. Use dairy-free buttermilk. Test bake 2-3 minutes longer; the rise holds well with these tweaks.
Why Vinegar in Red Velvet Cake Squares?
Vinegar activates baking soda for CO2 rise, preventing dense cake, and stabilizes the red pH against cocoa. Apple cider vinegar subs fine with similar acidity. Skip it, and you’ll get flat results.
Storage Beyond 3 Days for Squares?
Refrigerate in an airtight container up to 5 days; the frosting firms but softens at room temp. Freeze frosted squares wrapped individually for 1 month; thaw in fridge and microwave 10 seconds for revival. Avoid refreezing to prevent dryness.
Red Velvet Cake
Course: DessertCuisine: AmericanDifficulty: medium16
squares20
minutes25
minutes450
kcal45
MinutesDry red velvet cake is the worst. This recipe fixes it forever with one simple swap: vegetable oil instead of butter for locked-in moisture, plus a buttermilk bloom that keeps every crumb tender and velvety. Perfect squares topped with buttery frosting and homemade crumbs.
Ingredients
Cake:
2 1/2 cups all-purpose flour
1 1/2 cups granulated sugar
2 tablespoons unsweetened cocoa powder
1 teaspoon baking soda
1 teaspoon salt
2 large eggs
1 1/2 cups vegetable oil
1 cup buttermilk
2 teaspoons vanilla extract
2 teaspoons white vinegar
1 ounce red food coloring (gel or liquid)
For the Cream Cheese Frosting:
8 ounces cream cheese, softened
1/2 cup unsalted butter, softened
4 cups powdered sugar
1 teaspoon vanilla extract
For the Crumbs:
Reserved baked cake scraps
Directions
- Preheat oven to 350 degrees F. Grease a 9×13-inch baking pan and line with parchment paper for easy release.
- In a large bowl, whisk flour, sugar, cocoa, baking soda, and salt.
- In another bowl, whisk eggs, vegetable oil (the no-dry secret: oil stays liquid for superior moisture retention unlike butter), buttermilk, vanilla, vinegar, and food coloring until smooth. The vinegar activates baking soda for perfect lift, preventing dense dryness.
- Pour wet into dry. Stir gently just until combined, no overmixing to keep it tender.
- Pour batter into pan. Bake 22 to 25 minutes until toothpick comes out clean. Cool completely in pan on wire rack.
- For frosting: Beat cream cheese and butter until creamy. Add powdered sugar and vanilla; beat until fluffy.
- Lift cake out, trim edges for neat squares, and crumble trimmings for topping. Frost tops generously, sprinkle with cake crumbs. Cut into 16 squares. Store covered at room temp up to 3 days.
Notes
- Store covered at room temperature up to 3 days. Use gel or liquid red food coloring. Vegetable oil ensures superior moisture retention compared to butter.