Imagine biting into a cookie that offers a crisp, sugary snap before giving way to a dense, velvety center. Most red velvet sandwich cookies are a heartbreak waiting to happen because they turn into a mushy, structural mess within hours of assembly. The moisture from the cream cheese filling migrates into the cookie, leaving you with a soggy bottom that lacks any satisfying texture.
These cookies solve that engineering flaw by utilizing a dual-layer moisture barrier. We aren’t just making a cookie; we’re building a structural masterpiece that maintains its integrity even after a day in the fridge. By focusing on the science of the crumb, you get that iconic tangy flavor paired with a professional, bakery-style bite that doesn’t fall apart in your hands.
The secret to this success lies in the “sugar crust” technique. Rolling the dough in granulated sugar before baking creates a sacrificial barrier that shields the inner cookie from the frosting’s hydration. This simple step ensures your dessert stays chewy and firm, providing the perfect contrast to the silky, decadent filling inside. Oh man, the first time you hear that subtle crunch followed by the creamy center, you’ll never go back to basic recipes.
The Chemistry of Red Velvet and Cocoa Ratios
Red velvet is often misunderstood as just a chocolate cookie with a bottle of dye thrown in, but the chemistry is much more specific. We use a relatively small amount of cocoa powder because too much would overpower the delicate balance of vanilla and tang. This specific ratio ensures the cocoa provides a hint of earthiness without turning the dough into a standard chocolate base.
Unsweetened cocoa powder is essential here because it interacts with the leavening agents to create a specific “velvet” crumb. The acidity in the cocoa helps tenderize the flour proteins, resulting in a texture that is tighter and smoother than a chocolate chip cookie. This fine-tuned pH balance is what gives the cookies their signature tight crumb, which is necessary for holding up a heavy layer of frosting.
Why Brown Sugar Dictates Cookie Chewiness
While granulated sugar provides the structure and that essential outer crunch, light brown sugar is the secret weapon for moisture control. Brown sugar is hygroscopic, meaning it holds onto moisture, which keeps the interior of the cookie pliable. This ensures that when you take a bite, the cookie yields easily rather than snapping and sending the filling flying out the sides.
The molasses content in the light brown sugar also adds a subtle depth of flavor that mimics the traditional buttermilk tang found in red velvet cakes. Therefore, using a packed 1/4 cup of brown sugar creates a chewy center that acts as a soft cushion for the cream cheese. It’s all about finding that sweet spot where the cookie is sturdy enough to hold but soft enough to enjoy.
Essential Components for the Red Velvet Base
To get the perfect dough, you need 1/2 cup of unsalted butter, granulated and brown sugars, a large egg, vanilla, red food coloring, flour, cocoa, baking soda, and salt. Using room temperature butter is absolutely non-negotiable for proper aeration. If the butter is too cold, it won’t trap the air bubbles needed to make the cookies light; if it’s melted, the cookies will spread into flat puddles.
In addition to the butter, high-quality vanilla extract plays a massive role in the flavor profile. Vanilla acts as a bridge, pulling together the slight bitterness of the cocoa and the richness of the cream cheese. Since red velvet has a relatively mild flavor, using a cheap imitation vanilla will leave the cookies tasting flat and one-dimensional.
Selecting the Right Red Food Coloring
When it comes to achieving that deep crimson hue, not all dyes are created equal. Liquid food coloring is often too weak and can thin out your dough, leading to a loss of structure. Gel food coloring is the preferred choice for bakers because it provides an intense, vibrant color without adding unnecessary liquid to the recipe.
Heat can often dull the brightness of the red during the baking process, especially if the pH of the dough is too alkaline. However, by using the specific amount of cocoa and baking soda listed, we maintain an acidic environment that keeps the red looking sharp. If you try to use natural beet-based colorants, be aware that they often turn brown or earthy orange when exposed to the high heat of the oven.
The Sugar Crust: Engineering a Moisture Barrier
The “sugar crust” is the skyscraper value-add of this recipe. By rolling the dough balls in a separate bowl of granulated sugar, you are creating a physical wall between the cookie and the frosting. During baking, this sugar dehydrates the surface of the dough, forming a micro-thin, crispy shell that is highly resistant to moisture absorption.
This sacrificial layer is what prevents the “soggy bottom” syndrome. When the cream cheese filling sits against the cookie, the sugar crust absorbs the initial moisture migration, protecting the inner crumb. This engineering trick allows the cookies to stay fresh and structural for days, whereas an uncoated cookie would become mushy within four hours.
Step-by-Step: Mixing and Shaping the Dough
Start by creaming the butter and sugars together for at least three minutes. You are looking for a visual cue where the mixture becomes pale yellow and nearly doubles in volume. This step builds the foundation of the cookie’s texture, so don’t rush it; the sugar crystals need time to carve air pockets into the butter.
Once you add the dry ingredients, switch to a low speed or use a spatula to mix until “just combined.” You want to stop the moment you no longer see streaks of white flour. Over-mixing at this stage develops gluten, which will turn your velvety cookies into tough, bread-like discs that are difficult to bite through.
The Cold-Start Method: Why Freezer Chilling is Vital
After shaping the dough into balls and rolling them in sugar, you must chill the discs in the freezer for 10 minutes. This cold-start method is vital because it solidifies the fats before they hit the heat of the oven. When the butter starts cold, the edges of the cookie set before the center has a chance to spread too thin.
This technique creates a tighter, more resilient crumb structure that can support the weight of the filling. Furthermore, the temperature shock helps the sugar crust crystallize more effectively, enhancing that protective barrier. Skipping this 10-minute chill is the most common reason for cookies that look like flat pancakes rather than thick, bakery-style sandwiches.
Precision Baking for Structural Integrity
Bake the cookies for exactly 9 to 11 minutes at 350 degrees F. You are looking for the edges to be set and matte, while the centers should still look slightly soft and underdone. It is tempting to leave them in longer, but over-baking will destroy the “velvet” texture and make the cookies too brittle to sandwich.
Carry-over cooking is a major factor here. As the cookies sit on the hot baking sheet after leaving the oven, they continue to firm up from the residual heat. Let them cool completely on the pan to ensure they reach their full structural strength. If you try to move them too early, they might crack or lose their shape.
Crafting the Stiff Cream Cheese Filling
A standard runny frosting will not work for a sandwich cookie; you need a stiff, pipeable filling that stays put. By beating 8 ounces of cold cream cheese with 1/4 cup of butter, you create a base that is rich but stable. Gradually adding the powdered sugar and a tiny splash of heavy cream results in a filling that holds its height even under the weight of the top cookie.
For a truly secure filling, consider the no-leak method for red velvet cheesecake cookies.
The heavy cream is the secret to achieving a silky mouthfeel without making the frosting too soft. It adds a luxurious fat content that smooths out the graininess of the powdered sugar. However, be careful not to over-beat the frosting once the sugar is in, as the friction can cause the cream cheese to break down and become watery.
The White Chocolate Drizzle as a Secondary Seal
The white chocolate drizzle isn’t just for looks; it serves as a secondary moisture lock. When the chocolate hardens, it creates a seal on the top cookie that prevents humidity from entering the crumb. This helps maintain that perfect contrast between the crispy exterior and the soft interior for a longer period.
To melt the chocolate, use a microwave in 20-second bursts, stirring well between each interval. Be very careful not to get even a drop of water in the bowl, or the chocolate will seize into a gritty clump. Once it’s smooth, a quick zig-zag drizzle over the assembled sandwiches adds a professional finish and a boost of creamy sweetness.
Assembly: Building the Perfect Sandwich
Before you even think about frosting, the cookies must be “stone cold.” If there is even a hint of warmth left in the cookie, it will melt the butter in the frosting, causing the top cookie to slide right off. Patience is your best friend here; give them at least an hour on a wire rack to reach room temperature.
To assemble, pipe a generous mound of frosting onto the flat side of one cookie, leaving a small margin at the edge. Place the second cookie on top and use a gentle “twist and press” motion. This distributes the frosting evenly to the edges without putting too much downward pressure on the center, which prevents the cookies from cracking.
For similar results with jam-filled treats, explore the techniques for glazed raspberry thumbprint cookies.
Troubleshooting Common Red Velvet Issues
If your cookies spread too thin, your butter was likely too soft or you skipped the freezer chill. Ensure the dough is cold when it enters the oven to maintain that thick, chewy profile. If the filling is sliding out, your frosting might be too warm; pop it in the fridge for 20 minutes to firm up the butter and cream cheese before piping.
Loss of red color usually happens if you use too much cocoa powder or if your baking soda is expired. Stick to the measurements to keep the pH in the right range. Finally, if you experience the dreaded “soggy bottom,” it means the cookies weren’t fully cooled before assembly or the sugar crust was too thin. Always ensure a heavy coating of granulated sugar for the best results.
Make-Ahead Strategies and Storage Physics
These cookies actually improve after a short rest in the refrigerator. A 30-minute “set” time in the fridge allows the moisture in the frosting to bond slightly with the sugar crust, creating a unified structure that is easier to eat. For the best experience, store them in an airtight container in the fridge for up to five days.
If you want to make them further in advance, you can freeze the baked (unfilled) cookies for up to three months. Just thaw them at room temperature before adding the fresh frosting. I don’t recommend freezing the fully assembled sandwiches, as the cream cheese can sometimes change texture and become slightly grainy upon thawing.
Expert Tips for Bakery-Style Results
For perfectly uniform cookies, use a kitchen scale to weigh each dough ball to exactly 30 grams. This ensures they all bake at the same rate and fit together perfectly when you go to sandwich them. If some cookies come out slightly wonky, use a large round cookie cutter to “scoot” them into perfect circles immediately after they come out of the oven while they are still soft.
Another pro tip is to sift your cocoa powder and powdered sugar. Both of these ingredients are notorious for having small, stubborn lumps that can ruin the texture of your dough and frosting. Sifting takes an extra minute but results in a much more professional, smooth finish that feels like it came from a high-end pastry shop.
Flavor Variations: Beyond the Classic
If you want to experiment, try adding a half-teaspoon of espresso powder to the dry ingredients. It won’t make the cookies taste like coffee, but it will significantly deepen the flavor of the cocoa. Alternatively, you can fold some orange or lemon zest into the cream cheese filling to add a bright, citrusy note that cuts through the heavy richness of the sugar.
For a different texture, you could even roll the dough balls in sparkling sanding sugar instead of regular granulated sugar. This provides a much larger “crunch” and a beautiful glittery finish that looks stunning for holiday parties. Just remember that the goal is always to maintain that moisture barrier, so whatever sugar you use, make sure the coating is thorough.
Frequently Asked Questions
How should I store these cookies and do they freeze well?
Store the assembled sandwich cookies in an airtight container in the refrigerator for up to 5 days. Because of the cream cheese filling, they must stay chilled to remain food-safe and to keep the frosting stable. You can freeze the baked cookie shells for up to 3 months in a freezer-safe bag. However, I do not recommend freezing the fully assembled sandwiches, as the cream cheese filling can become watery or grainy once thawed.
Why did my cookies turn out flat and thin?
Flat cookies are usually the result of butter that was too warm during the creaming process or skipping the mandatory 10-minute freezer chill. If the fat is already near its melting point when it enters the oven, the cookies will spread before the flour has time to set. Always ensure your butter is “cool room temperature” (it should dent with pressure but not be greasy) and never skip the cold-start freezer step.
Can I use natural cocoa powder instead of Dutch-processed?
This recipe is designed for standard unsweetened cocoa powder. Natural cocoa is more acidic, which actually works well with the baking soda to create the “velvet” texture and maintain the red color. Dutch-processed cocoa is neutralized and darker, which can sometimes turn the cookies a muddy purple or brown color rather than a bright red. For the most vibrant results, stick with a basic natural unsweetened cocoa.
How do I prevent the cream cheese filling from squishing out?
The key is the “stiff, pipeable” consistency and the “twist and press” assembly method. Ensure your cream cheese and butter are beaten until smooth but not over-processed, which can make them runny. If your kitchen is warm, chill the frosting for 30 minutes before piping. Additionally, the 30-minute post-assembly chill in the fridge is mandatory; it firms up the filling so it stays in place when you take a bite.
Can I make these cookies gluten-free?
Yes, you can substitute the all-purpose flour with a high-quality 1:1 gluten-free flour blend that contains xanthan gum. Because these cookies rely on a tight crumb rather than long gluten strands, they transition to gluten-free quite well. Be sure to let the dough rest for an extra 10 minutes before shaping to allow the alternative flours to hydrate, which prevents a gritty texture.
Why did my cookies turn brown instead of red?
Brownish cookies usually happen for two reasons: too much cocoa powder or too much heat. Cocoa powder is naturally brown, so if you exceed the 3 tablespoons, it will overpower the red dye. Secondly, if your oven runs hot, the sugars can caramelize too quickly, browning the exterior. Use an oven thermometer to ensure you are at exactly 350 degrees F and use gel food coloring for the most concentrated pigment.
More Sweet Treats to Try
After enjoying these red velvet cookies, consider these other delightful baked recipes.
- For a breakfast or brunch option that offers a different kind of comforting sweetness, explore the loaded sausage gravy tater tot bowl, which provides a savory contrast to your dessert.
- If you’re in the mood for more warm, baked goodness with a satisfying crust, try the cinnamon French toast stacks, featuring a delightful texture.
Red Velvet Sandwich Cookies
Course: DessertCuisine: AmericanDifficulty: medium12
sandwiches20
minutes10
minutes310
kcal30
MinutesThese bakery-style red velvet sandwich cookies feature a chewy texture and a rich cream cheese filling. By using a specific sugar-rolling and chilling method, these cookies maintain their structural integrity and resist moisture absorption from the frosting.
Ingredients
1/2 cup unsalted butter, softened
3/4 cup granulated sugar
1/4 cup light brown sugar, packed (for chewiness)
1 large egg
1 teaspoon vanilla extract
1 tablespoon red food coloring
1 1/2 cups all-purpose flour
3 tablespoons unsweetened cocoa powder
1/2 teaspoon baking soda
1/4 teaspoon salt
1/2 cup granulated sugar (in a separate bowl for rolling)
8 ounces cream cheese, softened
1/4 cup unsalted butter, softened
2 cups powdered sugar
1 tablespoon heavy cream
1/2 cup white chocolate chips, melted (for drizzle)
Directions
- Preheat your oven to 350 degrees F and line two baking sheets with parchment paper.
- In a large bowl, cream together 1/2 cup butter, 3/4 cup granulated sugar, and brown sugar until light and fluffy. Beat in the egg, vanilla, and red food coloring until the color is vibrant and uniform.
- Whisk together the flour, cocoa powder, baking soda, and salt. Gradually add the dry ingredients to the wet ingredients, mixing until just combined.
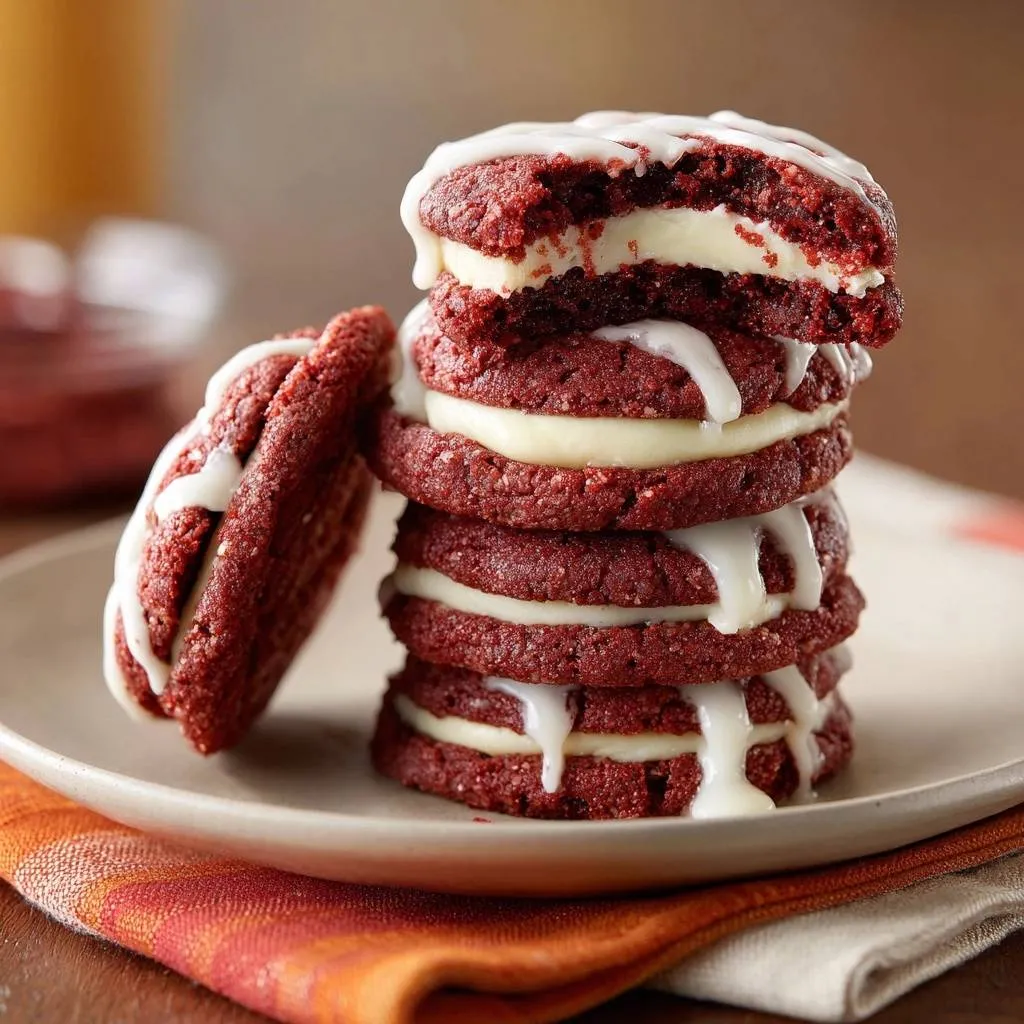
- To solve the soggy bottom issue and achieve the visual texture shown in the image, scoop rounded tablespoons of dough and roll them into balls. Roll each ball in the extra 1/2 cup of granulated sugar until fully coated. This creates a “sugar crust” barrier that prevents the frosting from soaking into the cookie.
- Place the balls on the baking sheets and press down slightly to flatten. Chill the dough discs in the freezer for 10 minutes before baking. This cold-start method creates a tighter, more resilient crumb structure.
- Bake for 9 to 11 minutes. The edges should be set but the centers still slightly soft. Let them cool completely on the pan. This is vital: a warm cookie will melt the frosting, leading to immediate sogginess.
- While cookies cool, beat the cream cheese and 1/4 cup butter until smooth. Gradually add powdered sugar and heavy cream until you have a stiff, pipeable frosting.
- Once cookies are stone cold, pipe a thick layer of frosting onto the flat side of one cookie and top with another.
- For the final seal and visual finish, drizzle the melted white chocolate over the tops of the sandwiches. The chocolate acts as a secondary moisture lock. Refrigerate the sandwiches for 30 minutes before serving to set the crumb and ensure the perfect structural integrity.
Notes
- The sugar coating and freezer chill step are essential to create a moisture barrier. Ensure cookies are completely cold before assembly to prevent the frosting from melting and making the cookies soggy.