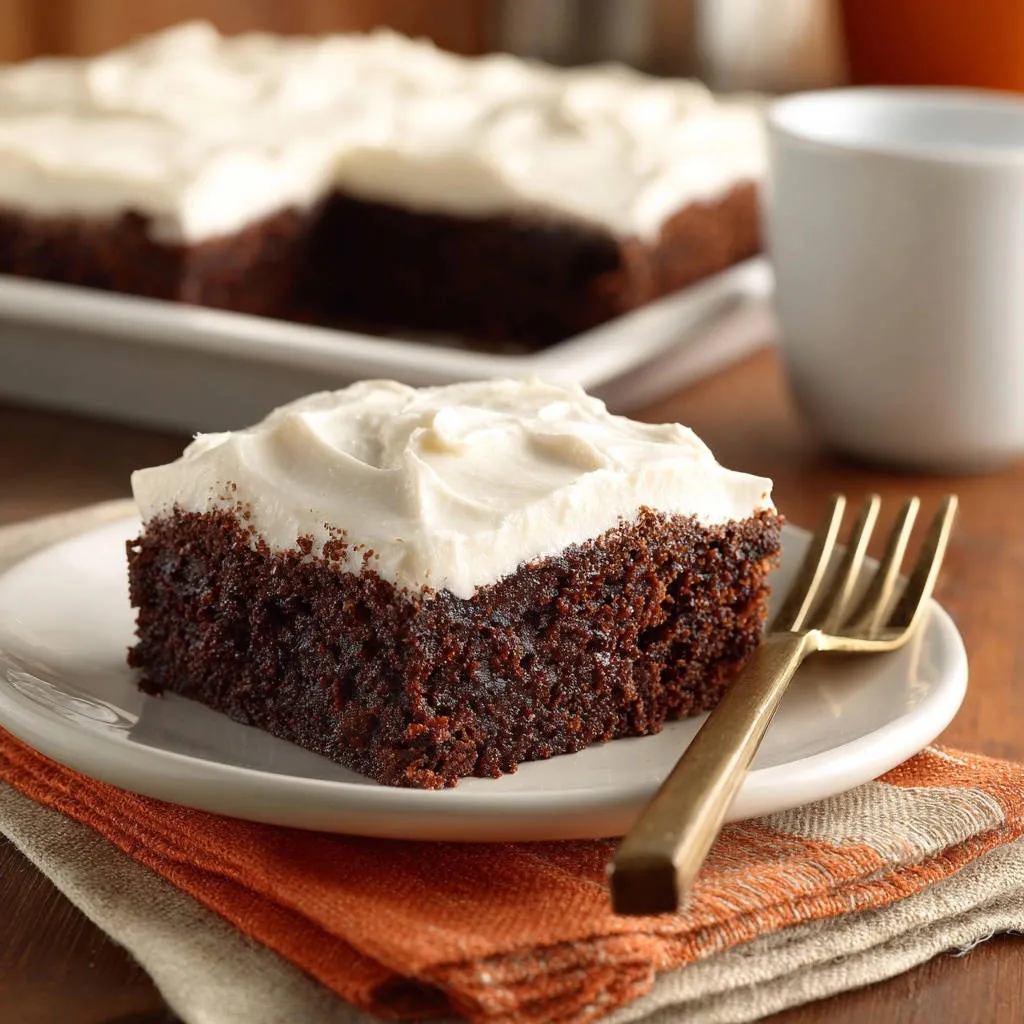
There is nothing worse than investing time in a chocolate cake only to cut into a dry, crumbly mess. We’ve all faced that challenge-chasing the elusive, rich, fudgey perfection in a simple pan.
I perfected this recipe for the ultimate Rich Chocolate Sheet Cake by utilizing a simple hot liquid technique that instantly locks in moisture, ensuring a deep chocolate flavor and a stunningly tender crumb that stays fresh for days. Trust me, this is the guaranteed method for a never-dry cake.
For more ideas on keeping fillings contained, see this method for Red Velvet Cheesecake Stuffed Cookies.
Why This Rich Chocolate Sheet Cake Recipe Gets Rave Reviews (The Never-Dry Guarantee)
This cake is celebrated for its incredible texture-it’s dense yet incredibly light, mimicking a brownie on the edges and pure fudge in the center.
Unlike standard layer cakes that dry out quickly, this sheet cake retains its fresh-baked moisture for up to five days, making it ideal for preparation ahead of time.
The “Never Dry” Promise: Understanding the Crumb Structure
The secret lies in boiling water or coffee being poured directly into the batter. This process fully gelatinizes the starches in the flour while simultaneously blooming the cocoa powder.
The result is a fully hydrated structure that resists drying out during the baking process, yielding a consistently moist and luxurious crumb every single time.
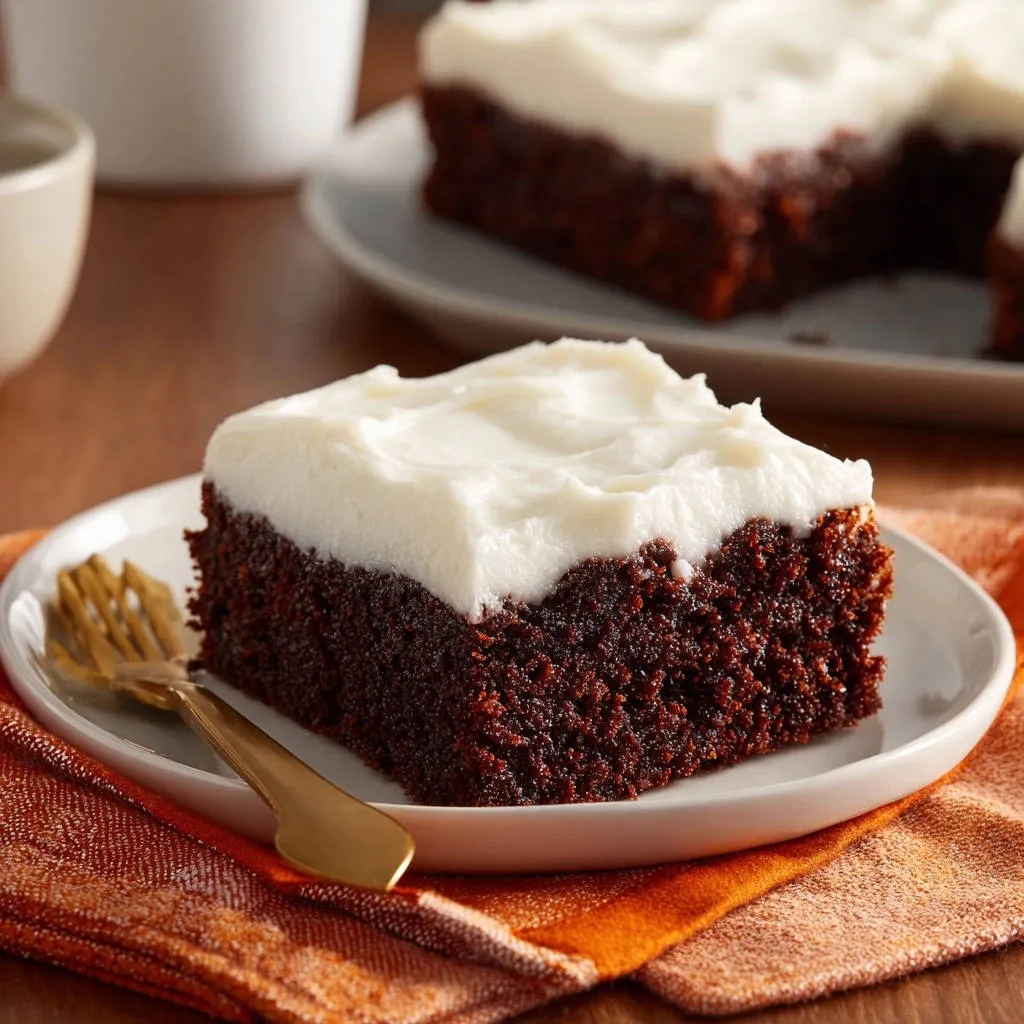
Perfect Portions: Why the Sheet Cake Format Wins
The 9×13 sheet cake format is inherently practical for gatherings, offering generous servings without the hassle of stacking or elaborate decorating.
It’s exceptionally easy to transport and simplifies the process of cutting uniform slices, making it the perfect choice for potlucks or casual entertaining.
Simple Prep, Incredible Flavor Depth
This recipe uses a simple dump-and-go method, requiring minimal fuss compared to multi-bowl cakes, yet it achieves an intense, dark chocolate flavor.
The strategic use of hot liquid elevates the depth of the cocoa, balancing the simplicity of the sheet pan preparation with a truly gourmet taste.
The Building Blocks: Sourcing Ingredients for Optimal Texture
The Chocolate Core: Choosing High-Quality Cocoa Powder
For this recipe, quality cocoa powder is essential. Standard unsweetened natural cocoa powder works best as it reacts perfectly with the baking soda and buttermilk.
Using a high-quality brand means the chocolate flavor will be deep and impactful once it has been fully bloomed by the hot liquid.
Achieving the Perfect Rise and Acidity (Buttermilk and Baking Soda)
Buttermilk provides essential acidity that, when combined with baking soda, ensures the cake achieves a light, airy rise and a supremely tender crumb.
If you don’t have buttermilk, the DIY version using milk and vinegar works just as effectively to provide the necessary acid activation.
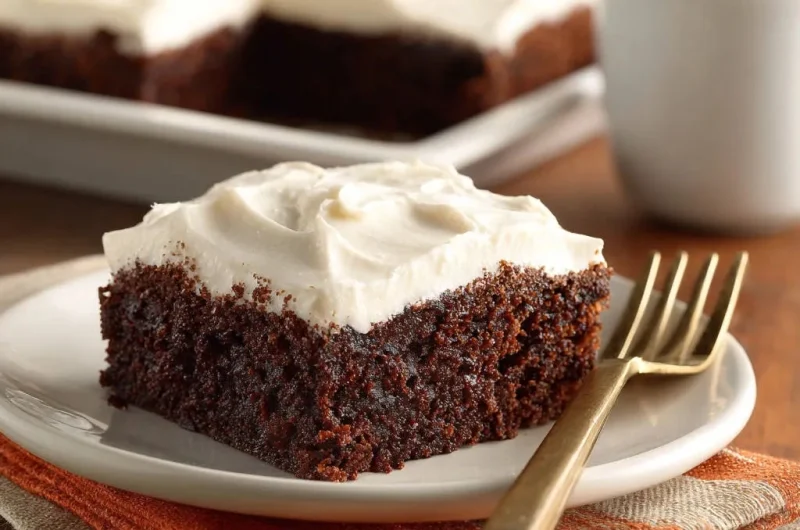
Foundation of the Creamy Frosting: Cream Cheese vs. Butter Balance
Using full-fat, softened cream cheese and unsalted butter is critical for creating a stable, luxurious cream cheese frosting.
Ensuring both fats are properly softened allows them to emulsify completely with the powdered sugar, preventing lumps and ensuring a light, spreadable texture.
The Secret Method: How to Execute the Cocoa Blooming Technique
Prepping the Workspace and Pan
Preheat your oven immediately to 350°F (175°C). Proper preheating is non-negotiable for an even bake.
Thoroughly grease and lightly flour your 9×13 inch baking pan, ensuring the flour coating is thin and even to prevent sticking without creating a thick crust.
Combining Dry and Wet Components (Before the Bloom)
- Whisk the Dry Ingredients:
Ensure the flour, sugar, cocoa, baking soda, and salt are thoroughly combined. This prevents pockets of leavening agent or cocoa lumps.
- Mix the Standard Wet Ingredients:
In a separate bowl, whisk the buttermilk, oil, eggs, and vanilla. Introduce these gently into the dry ingredients until barely mixed.
The Critical Step: The Blooming Power of Hot Liquid
Step 4: The Hot Liquid Addition.
Bring 1 cup of liquid (water or non-alcoholic coffee substitute) to a rolling boil. While the batter is mixing on low speed, slowly and carefully pour the hot liquid directly into the batter.
The resulting batter will look dramatically thin and runny; this is 100% correct. The heat instantly blooms the cocoa, releasing maximum flavor intensity, and fully hydrates the flour, which is the key mechanism for preventing a dry, dense final crumb.
From Prep to Plate: Detailed Directions for Baking and Frosting
Baking the Rich Chocolate Sheet Cake to Perfection
- Pour and Bake:
Pour the thin batter immediately into the prepared pan. Bake for 30-35 minutes at 350°F (175°C).
- Testing for Doneness:
Look for a toothpick inserted near the center to come out clean or with a few moist, not wet, crumbs attached. Avoid overbaking at all costs, as the cake continues to set as it cools.
- Cooling Strategy:
Let the cake cool completely in the pan on a wire rack. Attempting to frost a warm cake will result in melted, sliding frosting.
Crafting the Fluffy Cream Cheese Frosting
- Cream the Fats:
Beat the softened cream cheese and butter until the mixture is exceptionally smooth and light, taking 2-3 minutes. This step is crucial for lump-free frosting.
- Sweetening and Whipping:
Gradually incorporate the powdered sugar, mixing first on low to prevent a cloud, then increasing speed. Add the vanilla and milk.
- Adjusting Consistency:
Beat until the frosting is light and spreadable. If it’s too thick, add milk 1 teaspoon at a time; if too thin, incorporate a tablespoon of powdered sugar.
- The Final Assembly:
Only frost the cake once it is completely cool. Spread the frosting generously and evenly across the sheet cake surface.
Chef’s Secrets: Elevate Your Chocolate Sheet Cake Game
The Temperature is Key: Ensure your eggs, buttermilk, butter, and cream cheese are all at room temperature (except the hot liquid, of course). This helps them emulsify properly, creating a smoother batter and fluffier frosting.
Do Not Overmix the Batter: Once the flour is added, mix only until the streaks disappear. Overmixing develops gluten, which directly works against the moist, tender crumb structure we are aiming for.
Use Coffee, Not Water (If Possible): Using hot brewed coffee substitute instead of hot water significantly intensifies the chocolate flavor without making the cake taste like coffee. The notes of dark roast deepen the richness of the cocoa.
For a different take on rich chocolate, explore chocolate glazed pistachio cake.
The Perfect Slice: For clean slices, chill the frosted cake for 30 minutes before cutting. Use a large, sharp knife dipped in hot water and wiped dry between cuts.
Troubleshooting Sheet Cake Failures: Common Problems and Quick Fixes
Problem: The Cake Tastes Dry or Crumbly
This usually occurs due to overbaking or insufficient hydration. Always check the cake 5 minutes before the time suggested. If you suspect your cake is already slightly dry, brush the cooled surface lightly with simple syrup or milk before frosting to lock in residual moisture.
Problem: The Center Sank Down After Baking
A sunken center is often caused by underbaking (which leaves the structure too weak) or opening the oven door too early. Ensure your oven temperature is accurate and resist the urge to peek during the first 25 minutes of baking.
Problem: The Frosting is Granular
Granular frosting means the powdered sugar wasn’t fully dissolved or incorporated. Always sift your powdered sugar, especially if it has been stored for a while, and ensure you beat the mixture long enough until it is light and truly smooth.
Serving, Storage, and Flavor Variations
Making It Ahead: Storage Strategies for Cake and Frosting
The unfrosted cake can be wrapped tightly and stored at room temperature for up to 3 days, or frozen for up to 3 months. The cream cheese frosting can be prepared 1-2 days in advance and stored in the fridge, but allow it to come to room temperature and re-whip before spreading.
Flavor Boosts and Customization
For an elevated taste, add a dash of cayenne pepper (Chili Chocolate Sheet Cake) or 1/4 teaspoon of instant espresso powder to the dry ingredients. You can also swap the vanilla extract for almond extract in the frosting for a slight shift in flavor profile.
Complementary Bites
To round out your chocolate cake experience, consider these sweet treats.
- For a breakfast-inspired indulgence with a touch of cinnamon, try these Cinnamon French Toast Stacks.
- If you’re craving campfire flavors in pancake form, these S’mores Pancakes offer a fun, chocolatey twist.
Best Ways to Store Leftover Rich Chocolate Sheet Cake
Because this recipe uses cream cheese frosting, the finished cake must be stored in an airtight container in the refrigerator. Thanks to the ‘Moisture Lock’ technique, the cake will remain tender and delicious for 4-5 days.
Essential Questions About Rich Chocolate Sheet Cake (FAQ)
Can I Substitute Buttermilk with Regular Milk?
Yes, you can easily create a substitute by measuring 1 cup of regular milk and stirring in 1 tablespoon of white vinegar or lemon juice. Let it stand for 5-10 minutes until it curdles slightly. This acidity is necessary to react with the baking soda and tenderize the cake.
Why Do I Need to Use Hot Liquid Instead of Room Temperature?
The heat is essential for two reasons: it fully dissolves the cocoa powder (blooming it) which releases maximum flavor, and it helps immediately hydrate the starch in the flour, preventing gluten from seizing up and leading to a softer, moister crumb.
Is a Sheet Cake the Same as a Texas Sheet Cake?
While often confused, a true Texas Sheet Cake usually uses a thin, fudge-like poured icing made on the stovetop and is baked in a very large half-sheet pan. This recipe uses a thicker, creamier cream cheese frosting and is baked in a standard 9×13 pan.
Ready to Impress? Share Your Rich Chocolate Sheet Cake Masterpiece!
This Rich Chocolate Sheet Cake is guaranteed to be your new go-to recipe when you need a reliable, deeply satisfying dessert that avoids the common pitfall of dryness. Once you experience the tender crumb achieved through the simple but effective moisture lock technique, you won’t go back.
Bake this indulgent cake for your next gathering and watch it disappear. Don’t forget to tag us in your creations and let us know how long your sheet cake stayed irresistibly moist!
Chocolate Sheet Cake
Course: DessertCuisine: AmericanDifficulty: medium15
servings20
minutes35
minutes450
kcal60
minutesDiscover the key ingredient that transforms the crumb structure, ensuring a dark, fudgey, and perfectly moist cake that stays tender for days. This sheet cake is simple to prepare and finished with a classic, tangy cream cheese frosting.
Ingredients
For the Cake:
2 cups all-purpose flour
2 cups granulated sugar
3/4 cup unsweetened cocoa powder (high quality)
1 teaspoon baking soda
1 teaspoon salt
1 cup buttermilk (or milk mixed with 1 tablespoon vinegar)
1/2 cup vegetable oil
2 large eggs
1 teaspoon vanilla extract
1 cup hot water or hot non-alcoholic coffee substitute
For the Creamy Frosting:
8 ounces full-fat cream cheese, softened
1/2 cup unsalted butter, softened
4 cups powdered sugar
1 teaspoon vanilla extract
2 tablespoons milk
Directions
- Preheat the oven to 350 degrees F. Grease and lightly flour a 9×13 inch baking pan.
- In a very large bowl, whisk together the flour, sugar, cocoa powder, baking soda, and salt until everything is evenly combined and there are no lumps of cocoa.
- In a separate medium bowl, whisk together the buttermilk, oil, eggs, and vanilla extract until smooth. Add the wet ingredients to the dry ingredients and beat with a hand mixer or stand mixer on low speed until just combined. Scrape down the sides of the bowl.
- The Moisture Lock Technique: This is the key step to achieving the fudgey, moist texture. Bring 1 cup of water or non-alcoholic coffee substitute to a rolling boil. While the batter is mixing on low, slowly pour the hot liquid into the batter until fully incorporated. The batter will be very thin and runny, but this is exactly right. This process blooms the cocoa, intensifying the flavor and hydrating the flour properly to prevent dryness.
- Pour the thin batter into the prepared 9×13 inch pan.
- Bake for 30 to 35 minutes, or until a toothpick inserted into the center comes out clean or with a few moist crumbs attached.
- Let the cake cool completely in the pan on a wire rack before frosting.
- For the Creamy Frosting:
- In a large bowl, beat the softened cream cheese and butter together until smooth and fluffy. This usually takes about 2 to 3 minutes.
- Gradually add the powdered sugar, one cup at a time, mixing on low speed until combined, then increase to medium speed. Add the vanilla and milk.
- Beat the frosting until it is light, fluffy, and spreadable. If it is too thick, add a little more milk (1 teaspoon at a time).
- Once the cake is completely cool, spread the frosting generously over the surface. Slice and serve.
Notes
- The hot liquid step is crucial for the moisture lock technique; it hydrates the flour and intensifies the cocoa flavor.